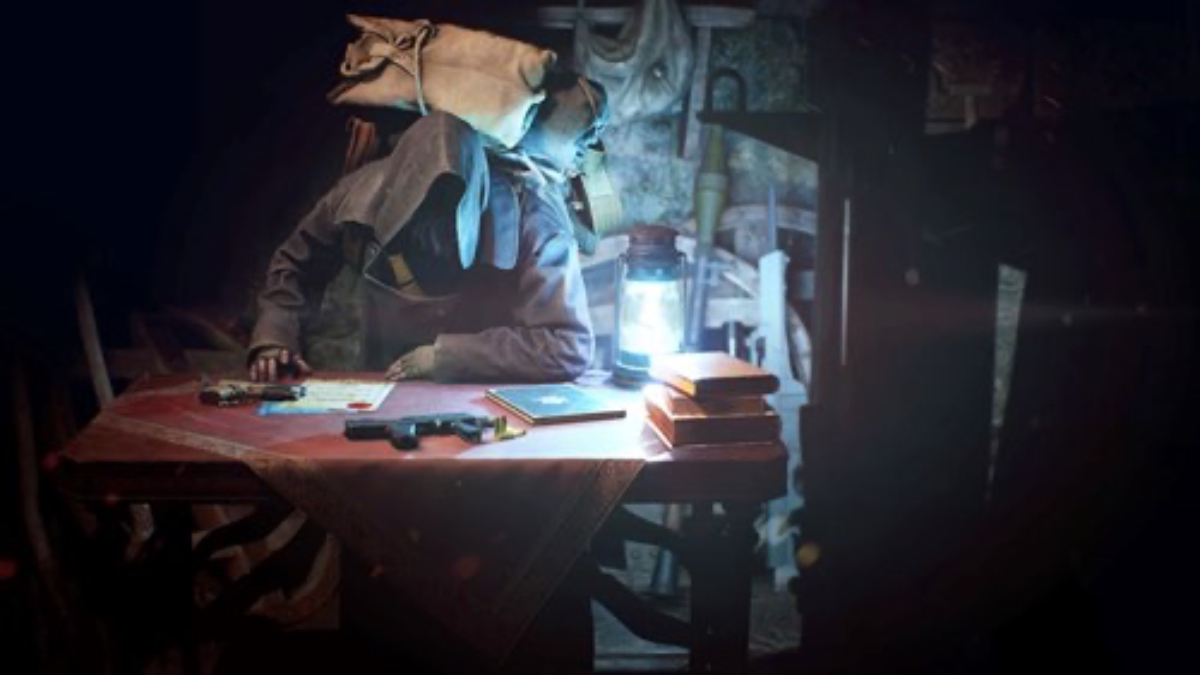
Among the many new changes added to the Resident Evil 4 Remake, one of the coolest has to be the inclusion of Merchant Requests. These are various tasks offered to Leon by the Merchant in the form of blue request forms that are found either along the main path of the story or near any Merchant location. Collecting and completing them all will get you the Jack of All Trades trophy/achievement and plenty of spinels to use on rare items. To make sure you don’t miss any of these, here is our guide for all merchant requests in Resident Evil 4 Remake and how to complete them.
What is a Merchant Request?
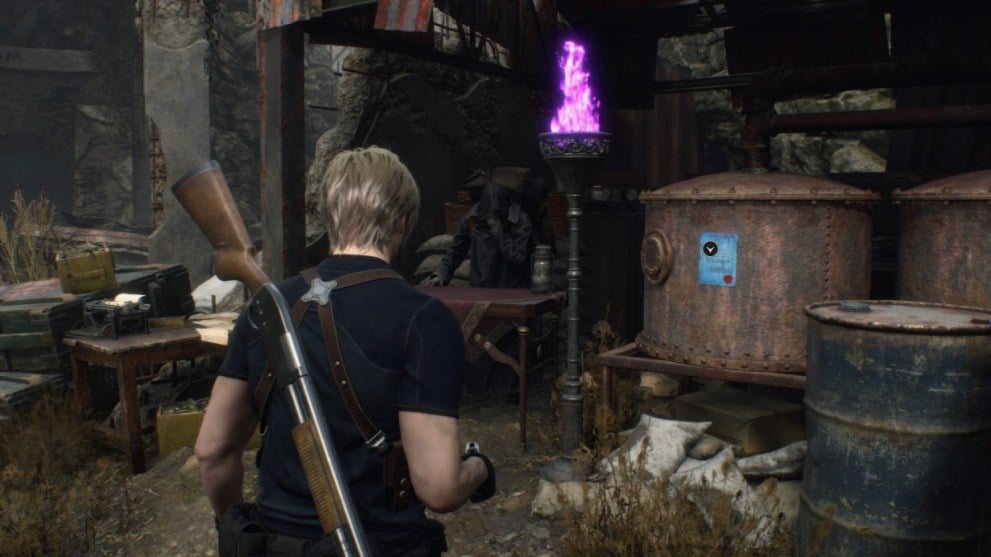
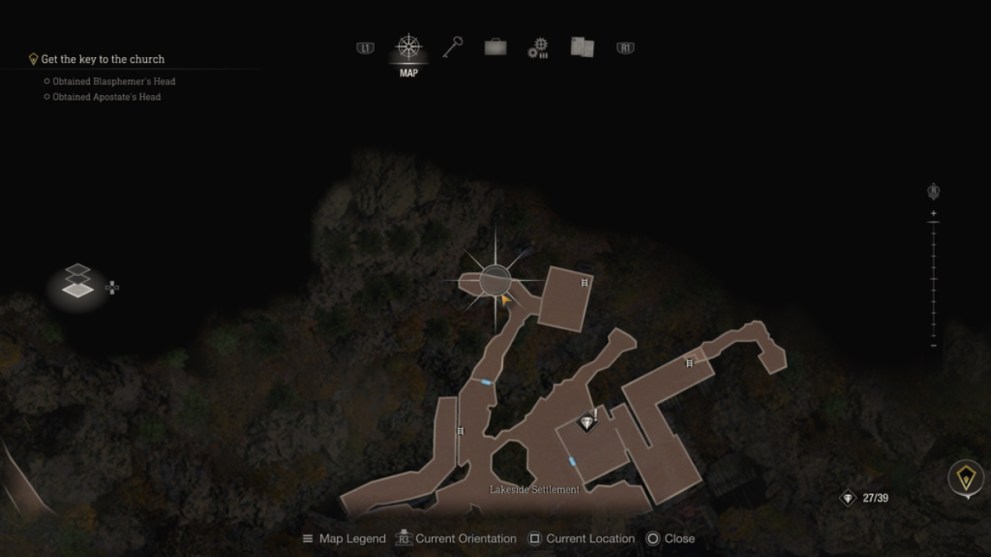
As noted before, a Merchant Quest is a special task given by the Merchant himself via the blue request forms you find throughout the game. There are 19 requests in all, and these tasks vary from shooting blue medallions to killing critters. They are ALL missable, so you need to be attentive when it comes to exploring every corner of each area to find them.
On top of earning a trophy/achievement, turning these tasks in will net you a tidy sum of Spinels to put towards special weapons, items, and upgrades, so there’s plenty of benefit to completing all of them.
Make note that you won’t be able to return to most areas upon finishing a chapter of the game, so it’s best to focus on completing a challenge as soon as you obtain it.
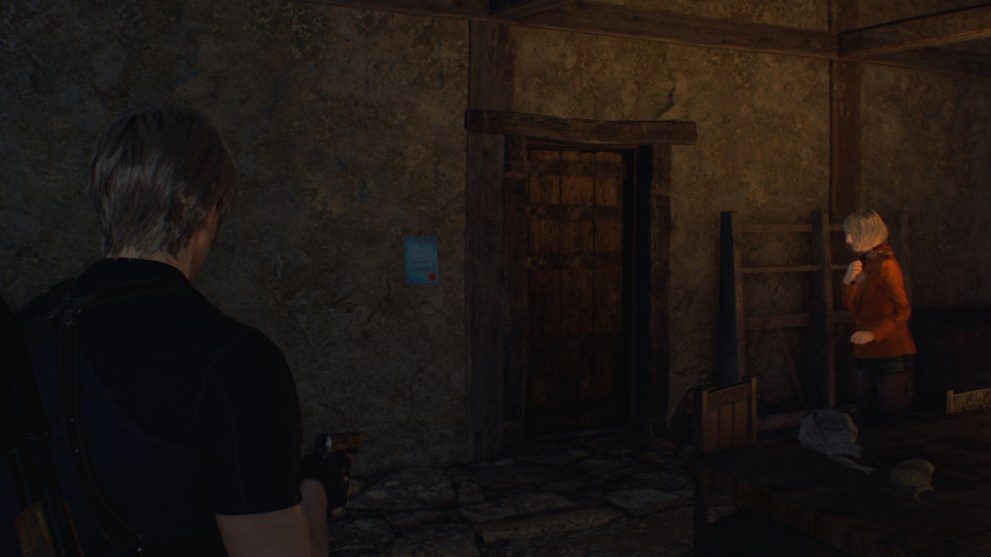
Also, picking up the request forms is actually NOT required to complete and turn in the tasks themselves, but they can help with providing vital information about them.
We will break down all of these requests in order by chapter.
Chapter 1 (One Request Total)
Merchant Request 1 – Destroy Blue Medallions (3 x Spinel Reward)
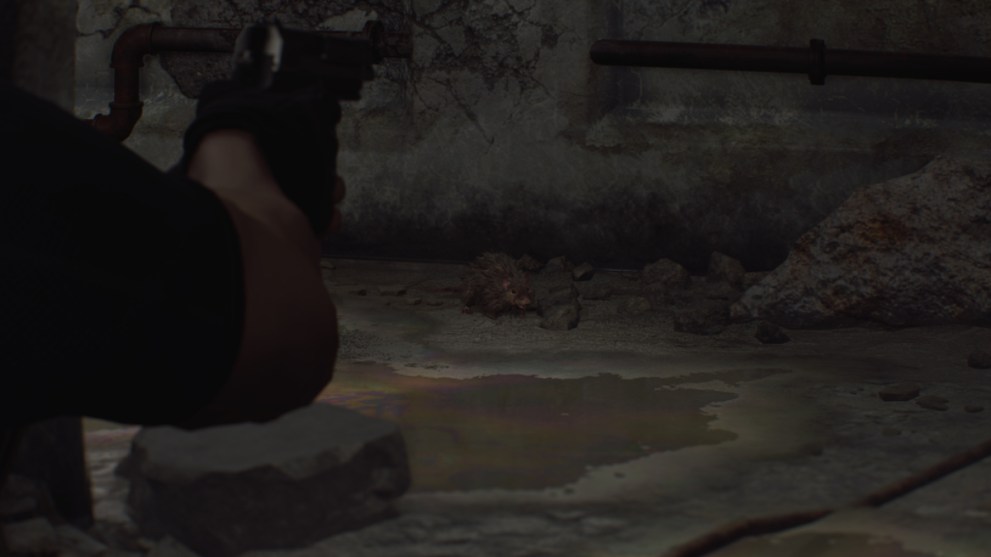
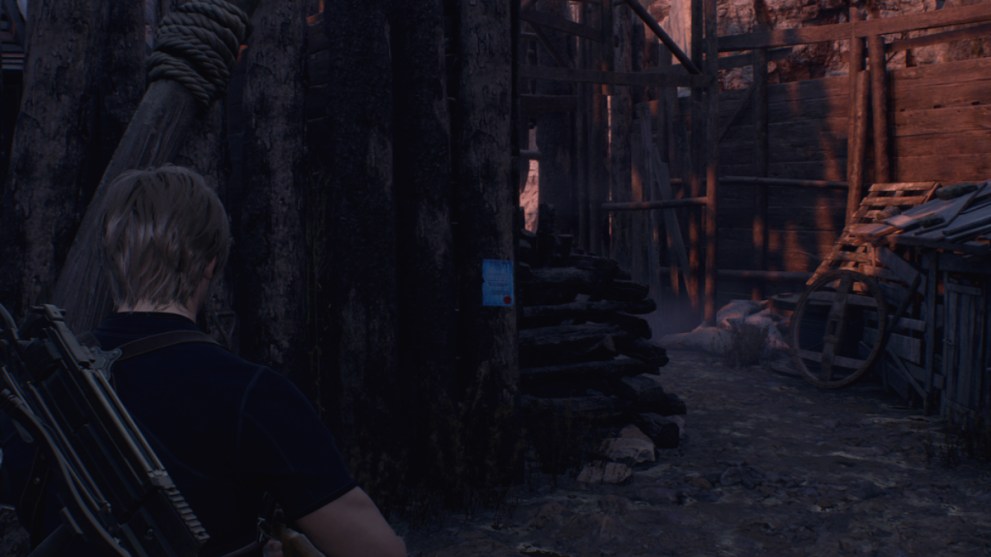
The very first request form you can obtain is found hanging on the right side of a stone wall just before the giant metal gate that blocks your path in the Windmill area. The form requests that someone destroy the 5 blue medallions hanging in various places in the area. This should primarily be done with your handgun (or your knife if it is low enough), but if one is hanging somewhere out of range then use your rifle.
- The first medallion is hanging on the side of a small building in the area that houses a typewriter save point. You likely encounter this one first by accident.
- The second medallion is inside the barn you can cut through where the cows are standing. It’ll be on the back side of a wood pole on the left side, so just strafe with your gun aimed until you see it. Alternatively, you can shoot it through a small window also on that same side.
- The third medallion is inside a small hut on the left side of the farm area, hanging from the ceiling.
- The fourth medallion is found hanging in the open second floor window of the big barn that’s initially locked from both sides.
- The fifth and final medallion can be found on the far right side of the area, near the small shrine. Go to the immediate right of the shrine and you’ll see it hanging just on the other side of the fence.
Chapter 2 (One Request Total)
Merchant Request 2 – Pest Control (3 x Spinel Reward)

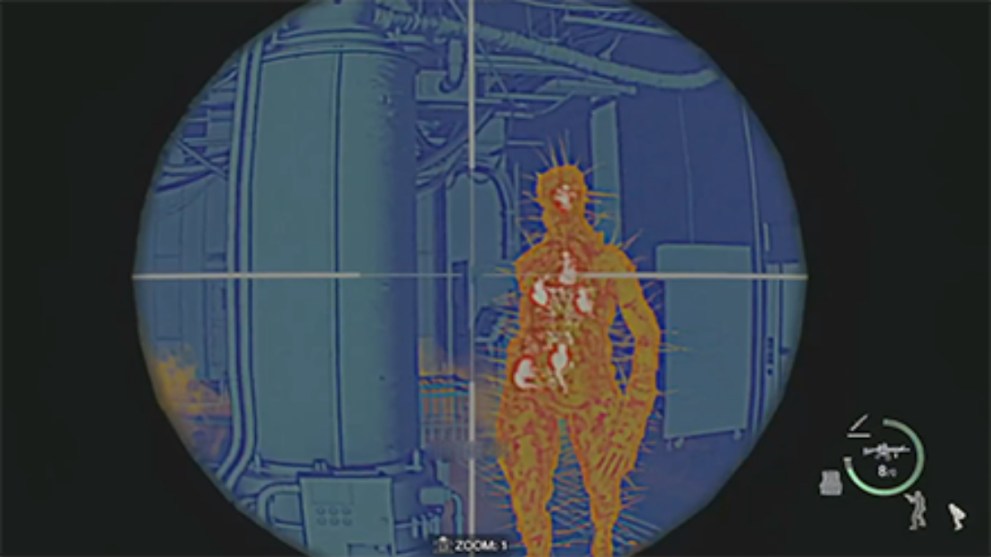
This request form is found hanging on the side of a rusted boiler tank right next to the first spot the Merchant appears at in the Abandoned Factory area. This task requires you to get rid of a rat infestation inside the factory you escaped from. Don’t worry though, because you only need to actually kill 3 rats to complete it.
We recommend shooting these dead from a distance with the handgun, as getting too close will cause them to flee.
Side Note: Make sure you finish this task BEFORE taking the boat to the lake which kicks off Chapter 3.
- The first rat is found at the end of the long hallway of the factory where you first encountered the rake-wielding Ganado.
- The second rat is found in the main room of the factory near the broken windows you climb through to reach the long hallway.
- The third rat is running in circles directly in front of the furnace in the main room where you find the Sapphire Gemstone treasure.
Chapter 3 (Three Requests Total)
Merchant Request 3 – Viper Hunter (4 x Spinel & 3,000 Pesetas Reward)
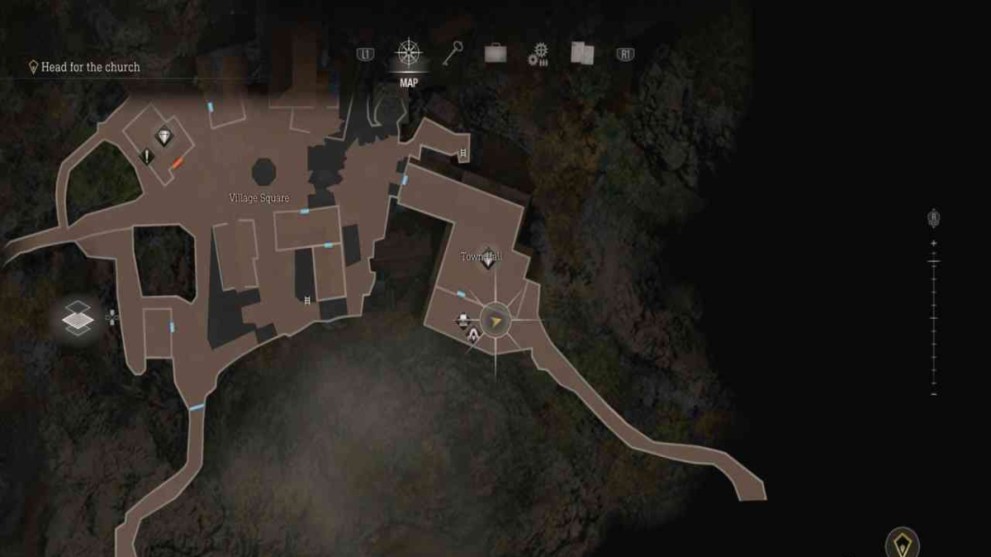
This request form is found on the side of the Town Hall building again right next to the Merchant. The task at hand requires you to kill and sell 3 Vipers to him, and luckily these are found in several places. They’re small striped snakes that are usually hiding in or near boxes. They can be hard to see, so try to listen for the hissing noise they make when you’re near.
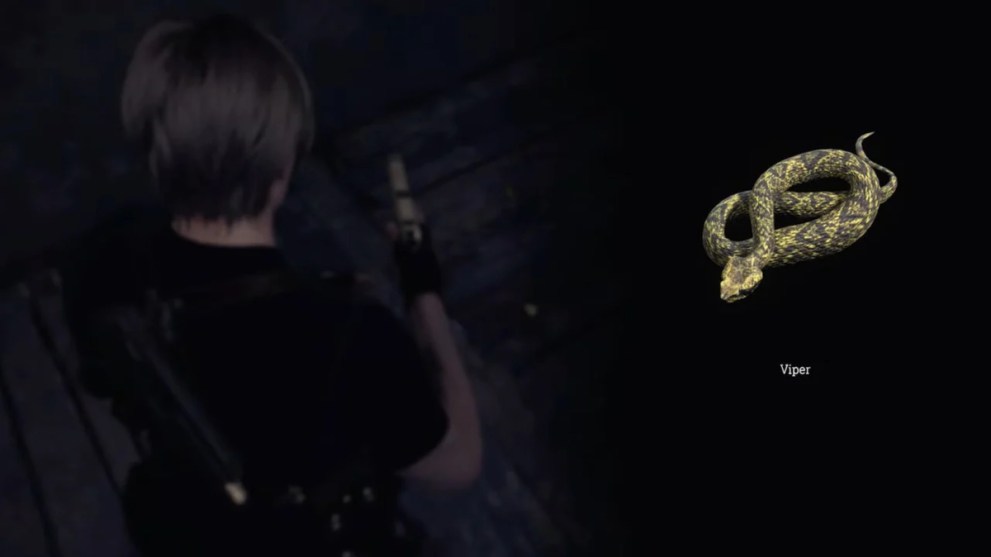
Side Note: A neat trick is to turn on Closed Captions in the Language Settings, which will indicate with text when there is hissing close by.
Here are the easiest locations to find the Vipers you need:
- Town Hall Building – This viper is inside a breakable box on a shelf to your immediate left when you first enter the Town Hall Building with the Insignia Key. Stab the snake with your knife as quick as possible before you take damage.
- Cliffside Shack Near Church – After discovering that the church is locked, you’ll head down a cliffside path in search of the key. Ganados will be scattered along the way, and you’ll need to eliminate them to reach the shack on the other side. Inside there will be another breakable crate that the viper is hiding inside. Take it down the same way as the first.
- Fish Farm Life Preserver Shack – This viper will be scurrying around the front of shack you find after walking up the first ramp in the Fish Farm area. A life preserver is hanging on the side of it.
- Fish Farm Walkway – Another viper can be found wandering the central walkway area.
- Fish Farm North Corner – This viper is swimming in the water around the northern area.
- Fish Farm Boat Fuel Shack – The last one in this area is found near the wooden shack on the far west side that’s filled with boat fuel.
Merchant Request 4 – Grave Robber (2 x Spinel Reward)
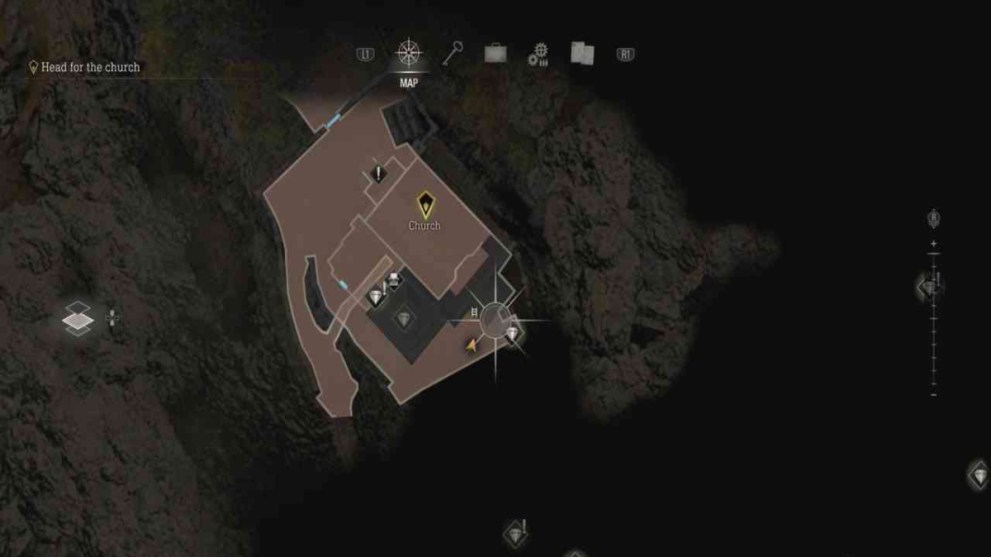
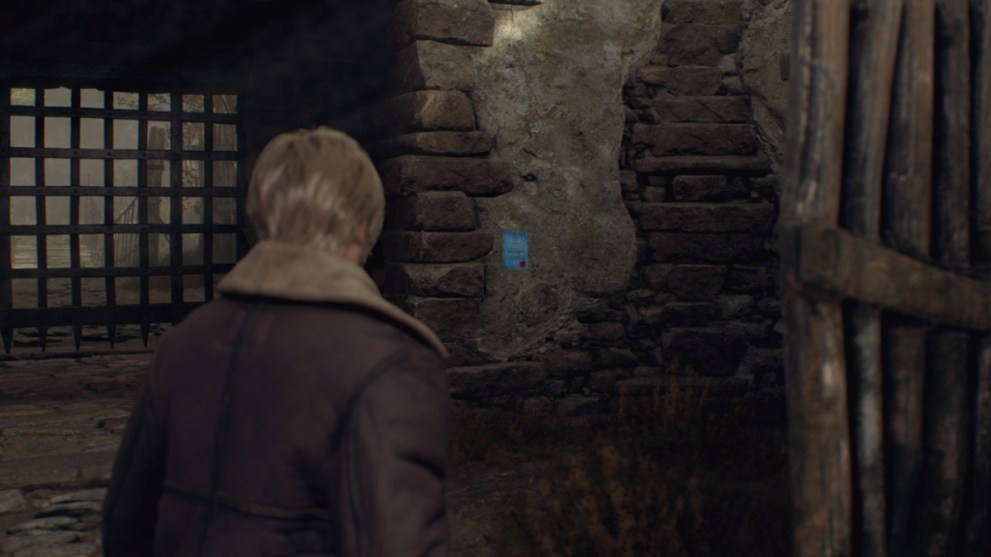
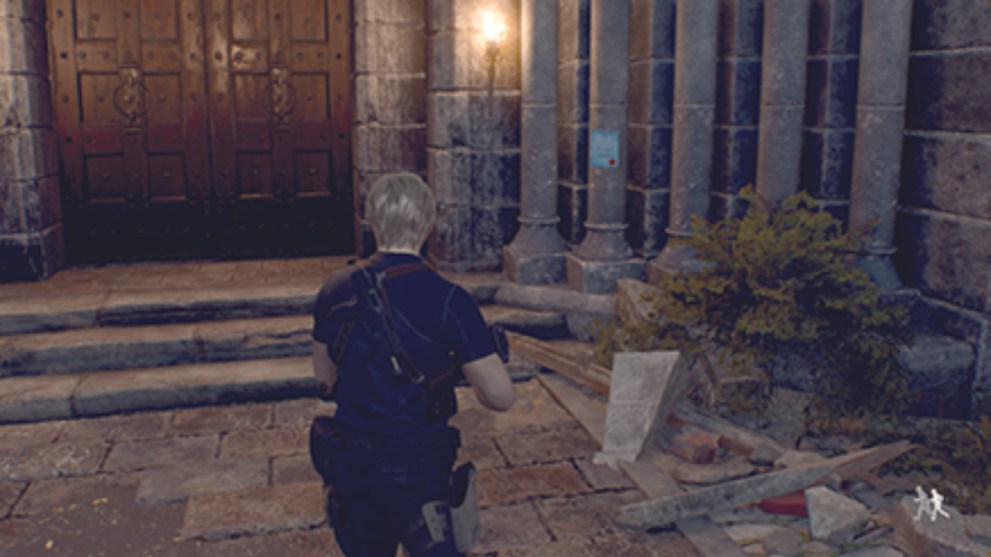
This request form can be found by circling all the way around the church to a small alley behind it, and the blue sheet is posted on the wall. The task is fairly and simple and just involves shooting Plagas emblems off two tombstones in the nearby graveyard.
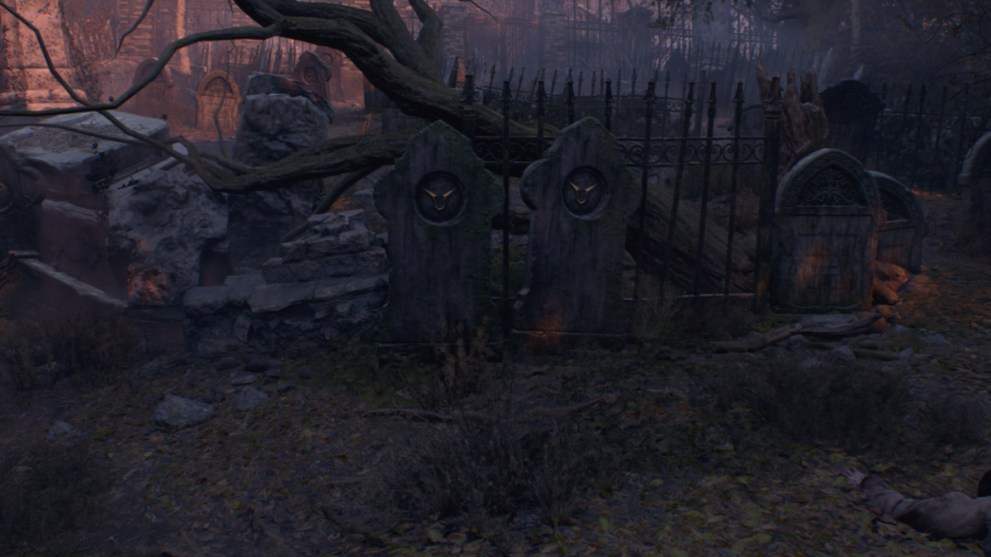
Run back to the graveyard in front of the church and look for a dead tree that’s fallen down. The twin tombstones will be right in front of it. Shoot the emblems to complete the task, or slash them with your knife. This can be done before or right after you rescue Ashley Graham from the church, but be sure to do it before you depart the area altogether.
Merchant Request 5 – Destroy Blue Medallions (4 x Spinel Reward)
This next request is found hanging on a pillar near the entrance to the Quarry area. The task involves shooting down more blue medallions in both the Quarry and Fish Farm areas, so have your handgun loaded and ready.
- The first medallion is found hanging high up on a scaffolding before exiting the Quarry area.
- The second medallion is underneath the dock at the coast near where you find the boat and the stone pedestal puzzle. Walk towards the boat and then turn around until you spot it hanging underneath the platform.
- The third medallion is found in the Fish Farm area, hanging inside the first wood shack which has a red and white life preserver hanging on the side of it.
- The fourth medallion can be found by making your way to the northwestern area of the Fish Farm. Follow the wooden walkways as best you can to the north, and disarm the tripwire blocking your path. Upon reaching the end of the walkway, drop off the left side of it into the water and then crouch your way underneath it to the other side and the medallion will be hanging just over the water to the right.
- The last medallion for this task is hanging on the southern wall, which can be reached from the center area of the Fish Farm.
Chapter 4 (Two Requests Total)
Merchant Request 6 – Egg Hunt (3 x Spinel & 9,000 Pesetas Reward)
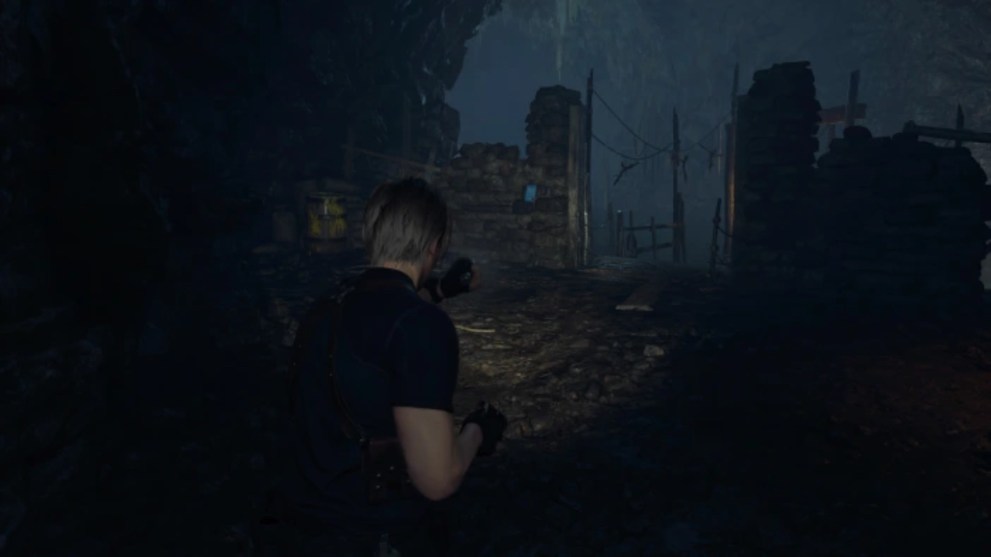
The Egg Hunt request is found inside the winding cave in the southeast region of Lake area map, posted on a stone wall nearby a boat at the entrance leading to the lake. The task requires you to find a unique golden chicken egg and sell it to the Merchant. The request doesn’t give any hints on where to actually find one, which can make this otherwise simple task rather tricky. We’ve got that covered, though.
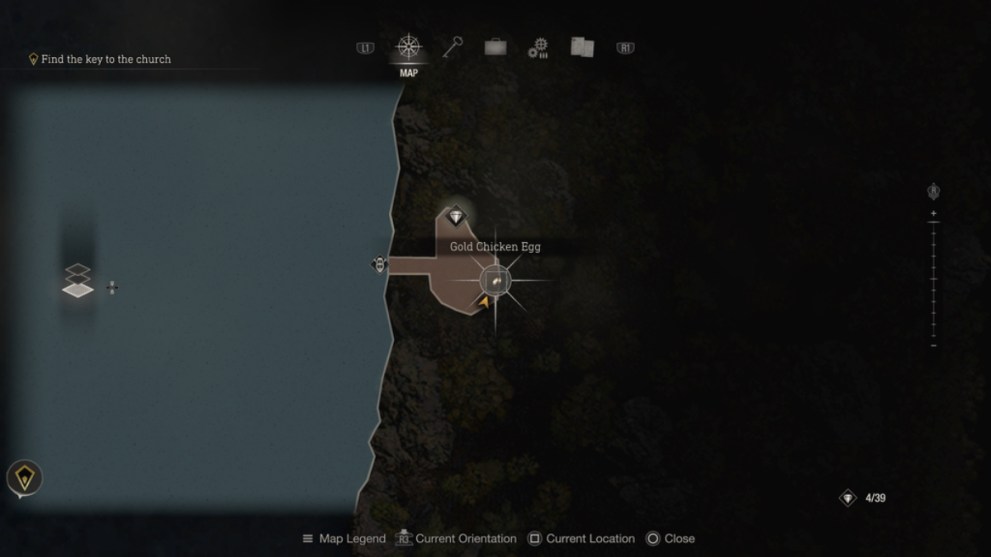
There are two gold eggs that can be found in the game, and the first is thankfully nearby. Take the boat out to the lake. Consult the map in the menu and travel all the way to the far right side to this small farm outcrop, where you’ll find a bunch of chickens running loose. They’ll lay an assortment of white and brown eggs, which are of course handy for healing purposes.
The real prize, however, lies nestled in the mud towards the very back. Search the ground along the back wall until you find a gold glimmer and the prompt to pick the egg up. Take it back to the Merchant to sell for your reward.
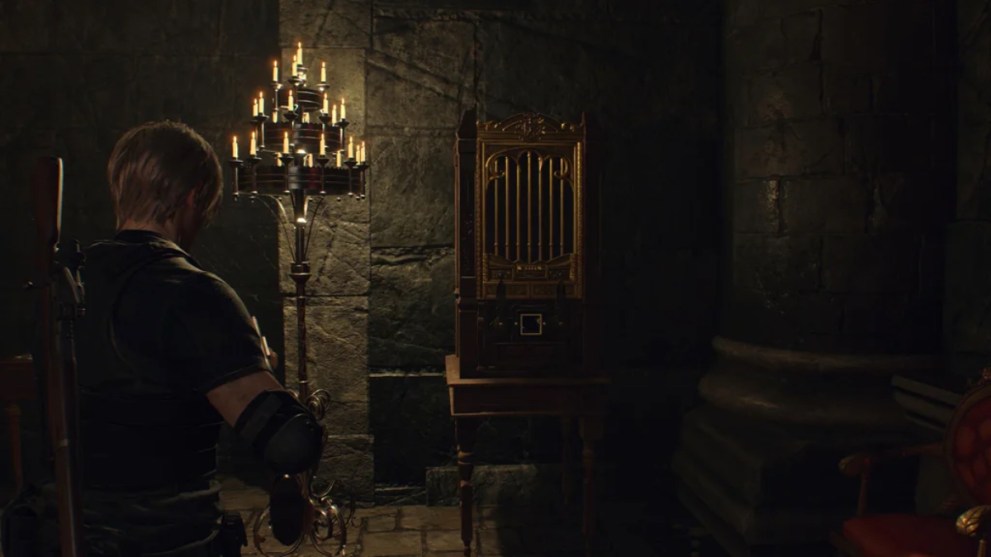
The second gold egg, in case you missed the first one, can be found much further in the game during Chapter 12, inside the Throne Room of the Castle. The Throne Room can be accessed via the Antechamber. Once in there, go up to the altar and on the right you’ll find a treasure box with a square hole at the bottom. Insert the Cubic Device to open it and the egg will be inside.
Side Note: The portrait of Ramon Salazar is directly across from this box, and you need to defile said portrait with an egg to also complete the “Disgrace of the Salazar Family” Merchant Request. Just be sure to use a normal egg and not your gold one.
Merchant Request 7 – Catch Me a Big Fish (4 x Spinel & 5,000 Pesetas Reward)
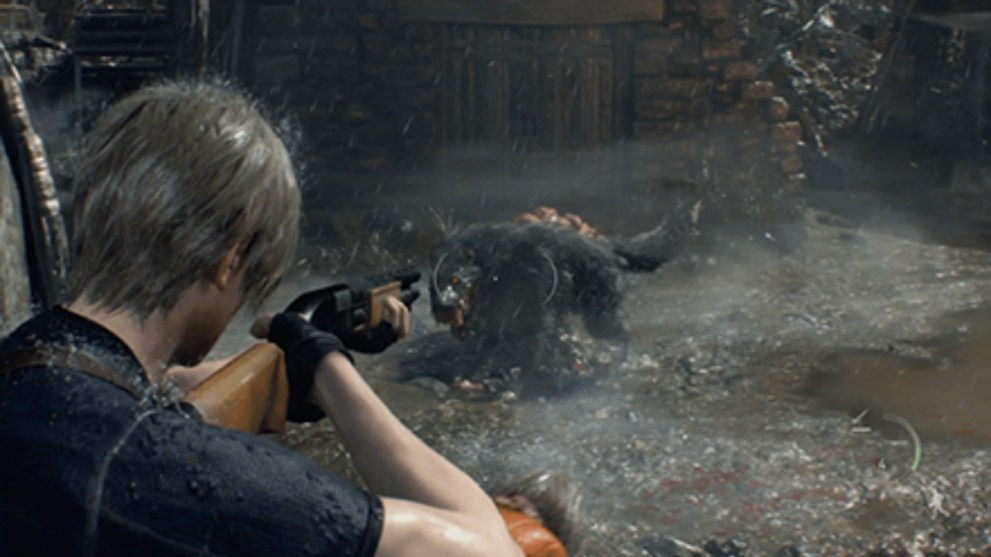
This merchant request is found in the Lakeside Settlement area on the north side of the lake. It’ll be posted on a wooden pole in the far end of a cavern that you access with the Insignia Key. As the name of the request alludes, you’re tasked with catching an unusually big fish living in the lake called a Lunker Bass, and then selling it to the Merchant.

To find this fish, take the boat out and head toward the Boat House on the south side of the lake. The Lunker Bass will be wandering around the front of the building and is fairly easy to spot; quite large and green in color. Use the same harpoons from the Del Lago boss fight to kill the fish and collect it to sell to the Merchant.
Chapter 5 (One Request Total)
Merchant Request 8 – A Savage Mutt (8 x Spinel Reward)
This request is located directly across from the Merchant Shop on the south side of the Town Hall building in the Village. The task involves killing a particularly strong wolf monster called the Colmillo that’s prowling around the area. To get him to spawn you’ll need to fulfill a sub-task first.
After rescuing Ashley from the Church, instead of heading for the extraction point you’ll instead make your way along the narrow path down south to the Village Chief’s Manor. With Ashley in tow, you’ll be able to explore the Manor top to bottom, including the attic. Clear it of all the treasure and the Clockwork Castellan and then head back out.
At the gate you’ll see Colmillo in all his menacing glory. He’ll run off before you can engage him, so travel back to the Village Square where he’ll be waiting.
Be sure to have a good stock of ammo and some healing resources, as Colmillo has significantly more health than the regular wolves. We recommend making use of Flash Grenades to stun him and get close with your Shotgun. Either way, watch for his charges and swipe attacks from the Plagas inside him. His tail is apparently a weak spot, so aim for that if you have the chance.
Chapter 6 (None)
There are no new Merchant Requests in this chapter.
Chapter 7 (One Request Total)
Merchant Request 9 – Destroy the Blue Medallions (5 x Spinel Reward)
Yet another blue medallion request awaits. You can find this one just beyond the giant Castle gate you blow up with the cannon. Again, you’ll be destroying several more blue insignia medallions, six in total, that are scattered across the battlements you just traversed through.
If you haven’t yet killed the trebuchet enemies, tread carefully and ideally take care of them first, so both you and Ashley don’t get blown away while looking around.
- The first medallion is in the small pavillion directly behind the cannon. This is also a safe spot where you can eliminate all the trebuchet enemies from with your rifle.
- The second medallion can also be found from the vantage point of the cannon. Look to the north and spot it hanging inside a small window in the ruins.
- The third medallion is hanging on a wall very close by the second one.
- The fourth medallion is directly below the cannon, down in the room where you destroyed the counterweight to raise it. Drop down there to find the medallion dangling on the rafters.
- The fifth medallion is hanging off a stone wall near the spiral staircase where you first entered the area.
- The sixth and final medallion is found in the small room atop the north side of the battlements, where the brown treasure chest also is.
Chapter 8 (None)
There are no new Merchant Requests in this chapter.
Chapter 9 (Two Requests Total)
Merchant Request 10 – Destroy Blue Medallions (5 x Spinel Reward)
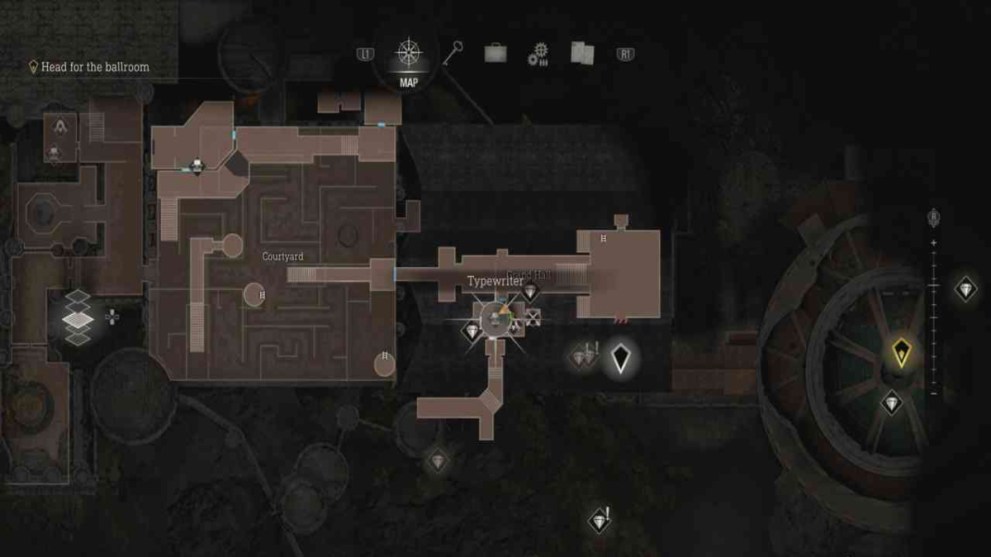
The next blue medallion request is found in the Save Room just off the Grand Hall area of the Castle. It’ll be sitting on a table directly across from the Merchant and next to the Typewriter, so be sure not to overlook it.
Again you’ll be tasked with destroying six medallions scattered around the nearby areas of the Grand Hall. Remember that upon accepting the request all six of the medallions will appear on your map, saving you the time of tediously searching them out.
- To find the first medallion backtrack toward the hallway leading to the outdoor labyrinth. It’ll be hanging in an archway on the left side.
- The second medallion is hanging behind a pillar at the back of the Grand Hall behind the three-headed statue you repair to progress the story.
- The third medallion is found in the Dining Hall, almost hidden behind curtains in front of the last window near the back of the room.
- The fourth medallion can be a bit hard to spot but it’s back in the Grand Hall, hanging literally inside the massive chandelier.
- The fifth medallion is over in the Armory area. Enter it via the second floor door and head to the circular pavillion. The medallion is hanging behind some dark curtains above a throne-like chair.
- The last medallion is found in the Gallery area, at the far end of the long room hanging on a marble pillar.
Merchant Request 11 – More Pest Control (3 x Spinel Reward)
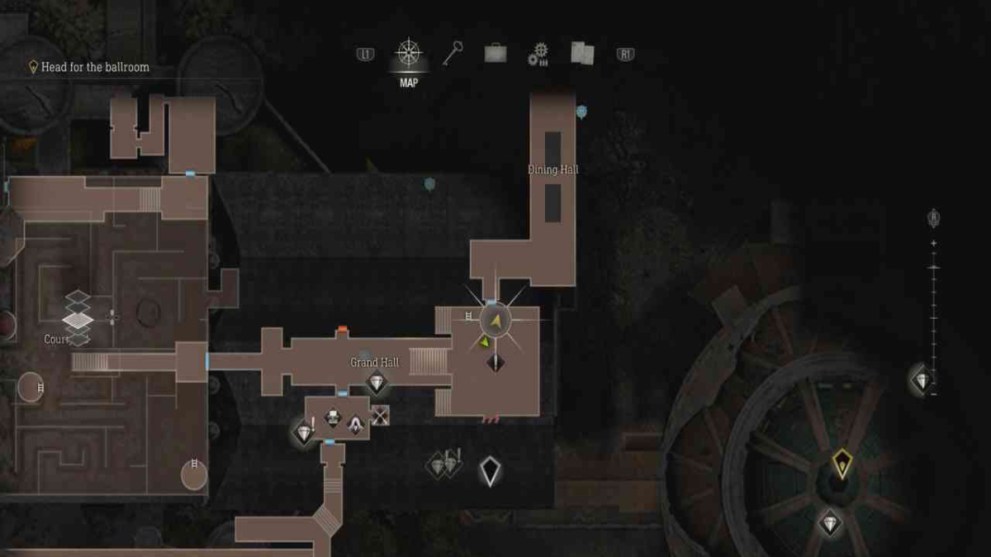
In a castle full of zombies and bugs there are of course bound to be rats. This request is found posted on the wall to the left of the three-headed statue in the Grand Hall. Once again you’ll be tasked with killing three rats scurrying around the area. Either your handgun or a knife is recommended for this.
- The first rat is found running around the Dining Hall area.
- The second rat is in the hallway leading to and from the Armory area.
- The third rat is technically only reachable in the beginning of Chapter 10. Once Leon has access to the Library to the right of the three-headed statue, head in there to find the rat running around the shelves.
Chapter 10 (One Request Total)
Merchant Request 12 – Merciless Knight (8 x Spinel Reward)
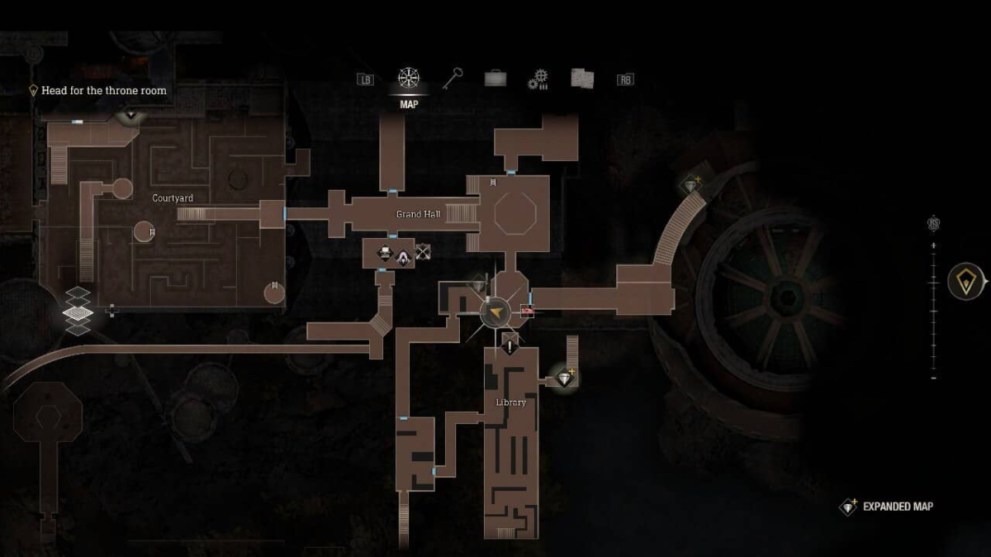
This request is another mini-boss fight found in the depths of the Mausoleum, in the same area where Ashley ventured not long before. The blue request form is located in the room between the Grand Hall and the Library, sitting on top of a dresser. You’re tasked with killing a unique and far stronger Armadura Knight enemy.
Make your way down to the Mausoleum via the same path Ashley did, taking the door nearby and following the winding hallway to an old library area. Go down the staircase that was hidden behind the grandfather clock until you reach an elevator. Take it all the way down to the area where the giant, gold-plated Armadura and his two henchmen are waiting.
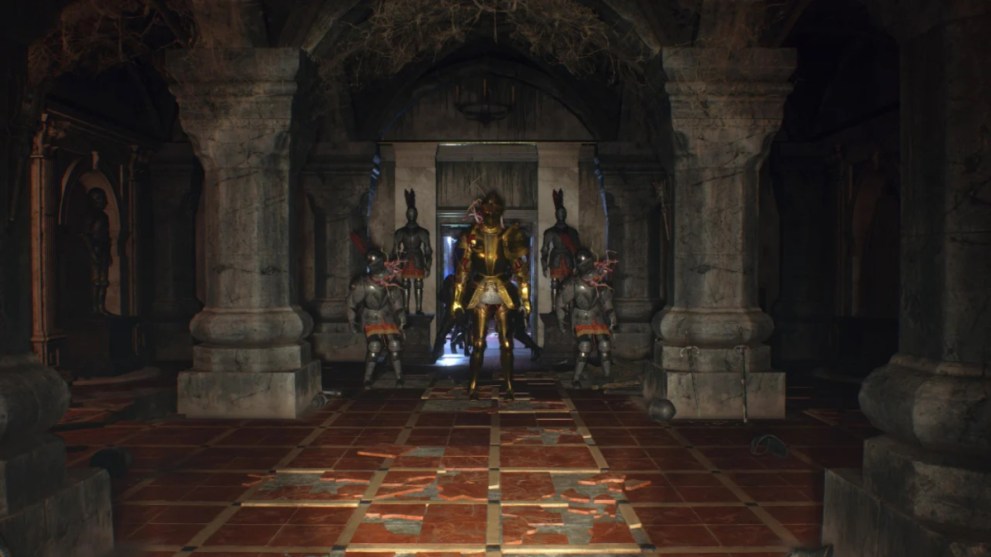
Approach them to start the fight, and they’ll chase you relentlessly around the room swinging their swords. Just like in the Armory, you have to target the Plagas peeking out from within their armor to damage them and ultimately draw them out. A powerful handgun like a fully upgraded Red9 with precise aiming is a great way to go. A flash grenade will immediately kill them, leaving only the big guy left.
The gold Armadura has a lot of health and it takes patience to land your shots, so be mindful with your ammo. We recommend a high-powered weapon like the Black Butterfly Magnum to finish him off in 2-3 shots.
Chapter 11 (One Request Total)
Merchant Request 13 – Insect Hive (4 x Spinel Reward)

This request is arguably the grossest of the bunch, but it must be done. The form is found hanging on a wood pallet on the east side of the Hive area. This task requires you to destroy all four entrances to the Hive, which are noticeable by the yellow rings with tendrils dangling from them. Shoot the glowing sacs hanging upon each one to bring them down.
- The first entrance can be found by literally just looking up and to your left from the location of the request form.
- The second entrance is at the intersection on the east side, before you enter the tunnel. Look up again to spot the glowing sac and destroy it.
- The third entrance is close by the second one, noticeable at the same intersection.
- The fourth and final entrance is found in the vicinity of the southwest area of the Hive. Head over there until you see the mine carts full of coal. Exit the cavern and look up to find the last entrance.
Chapter 12 (Two Requests Total)
Merchant Request 14 – The Disgrace of the Salazar Family (4 x Spinel Reward)
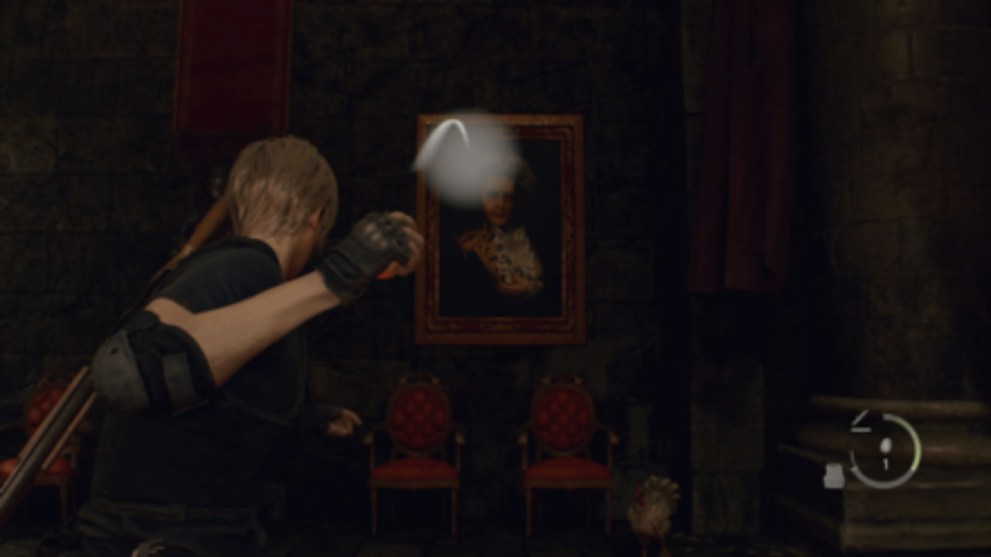
This request is likely the easiest and the most comical. You’ll find the blue form hanging on a wall near the Merchant’s Shop by the Ballroom. It’ll be right next to the other request of this chapter. The task in question involves literally defacing the portrait of Ramon Salazar himself, and you’ll need an egg to do it.
The portrait is found back in the Throne Room on the left side. Equip either a white or brown egg, make sure you don’t eat it. Then aim your throw at the portrait and voila, Ramon ends up with egg on his face, so to speak.
Merchant Request 15 – Jewel Thief (3 x Spinel Reward)
This request is again found right next to the previous one near the Ballroom. This time you’re tasked with tracking down a stolen emerald jewel, and the thief is question is a crow. The goal is simply to retrieve the jewel and sell it to the Merchant.
To find it, you’ll have to backtrack all the way back to the hedge maze area. Head through the west side of the Ballroom and follow the hallway until you’re able to make a right into the Grand Hall. From there, go down the stairs and all the way out until you reach the Maze Courtyard.
The crow’s nest is found on the side of the Courtyard nearest the Merchant (not actually in the Courtyard), perched atop a balcony covered in vines. Shoot it down and the emerald will tumble to the ground. Pick it up and return it to the Merchant.
Chapter 13 (None)
There are no new Merchant Requests in this chapter.
Chapter 14 (Three Requests Total)
Merchant Request 16 – Destroy Blue Medallions (5 x Spinel Reward)

Time for yet another medallion request. This request can be found near the Cargo Depot, right by the Merchant. Pull out your map and get ready to shoot down all five medallions in the area.
- The first medallion is not far from the request pickup. Head north from the Merchant and look east towards a giant rusted tank. It’ll be hanging off the side.
- The second medallion is found right above you after walking back through the door from the Merchant shop. It’s hanging off the stairwell leading up the metal tower.
- Head up the stairs and then down the ladder to find the third medallion hanging on a red storage container.
- The fourth medallion is in the southwest corner of the Cargo Depot, hanging off the top of a nearby water tower.
- The last medallion is found on the other side of the staircase in the northwest corner, hanging by some square metal crates.
Merchant Request 17 – Even More Pest Control (3 x Spinel Reward)
Time to kill the last of the rats. This request will be found on top of a crate near the Merchant east of the Waste Disposal. You’re required to eradicate one final rat infestation, this time scattered around the Waste Disposal area. Killing all four of them will get you the reward.
- The first rat will be scurrying around the entrance to Waste Disposal.
- The second rat is found on the other side of the control bridge. Have Ashley raise it for you so you can get across.
- After crossing the bridge, head down the dark hallway and across the catwalk. The third rat will be scampering around there.
- The last rat will be right near the third one, nearby a pile of trash bags.
Merchant Request 18 – The Wandering Dead (8 x Spinel Reward)

This is the final, and likely the toughest mini-boss request of the game. You’ll find the blue form sitting on top of some crates in the north part of the Crate Depot area. This time you’re asked to kill a unique version of the Regenerador monster known as the Iron Maiden, an even stronger form of these menacing foes.
We highly recommend you stock up on everything you can at the nearby Merchant, and get those final weapon upgrades if you haven’t already as this fight is quite difficult. Alternatively, if you have enough pesetas, a Rocket Launcher is also an option that will cheese this fight instantly.
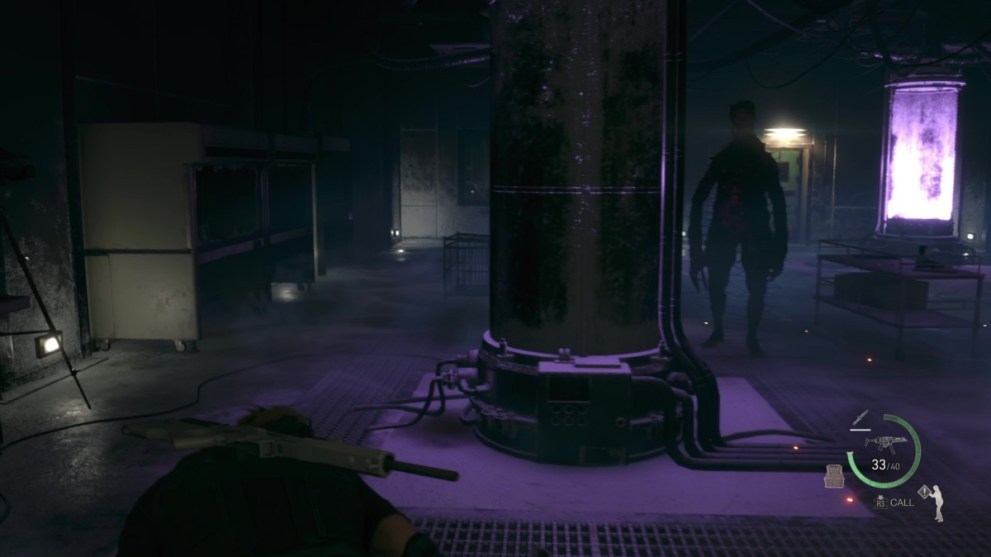
To find the Iron Maiden, you’ll need to head southward past the generator room to the Incubation Lab, where you last visited in Chapter 13. You’ll find it wandering the room in its default form, so make sure you have your chosen weapons at the ready. You can go about this one of two ways. You can use a Rocket Launcher to one-shot kill the monster. Otherwise, we recommend the highest powered weapons in your arsenal like the assault rifle or the magnum.
You will also need the Biosensor Scope acquired earlier to detect the several Plagas in its body and focus on targeting them. Killing all of the Plagas will successfully kill the Iron Maiden. As it dies, it will shoot spikes out everywhere so be sure to hide somewhere to avoid accidental damage. Also make sure to pick up the Alexandrite gem it drops afterward.
Chapter 15 (One Request Total)
Merchant Request 19 – Destroy Blue Medallions (5 x Spinel Reward)
Time for the last request of the game, which involves destroying the last of those pesky medallions. The blue form for this one is found near the exit of the Cliffside Ruins.
- The first medallion is hanging in the belltower of the nearby church.
- The second medallion is hanging inside some scaffolding on the side of the same building.
- Look over and down off the side of the cliff to see the third medallion hanging on a stone wall.
- In the ruins, go towards the ladder and peek into the archway to the side of it, the fourth medallion will be there.
- Climb down that same ladder and look through the rightmost door to see the last medallion hanging among a pile of rocks.
Chapter 16 (None)
There are no new Merchant Requests in the final chapter. It’s all strictly business from here on!
This concludes our guide to all Merchant Requests in Resident Evil 4 Remake and How to Complete Them. We hope that you found this helpful and let us know if we missed any extra details.
Be sure to check out all of our other guides for everything Resident Evil 4 Remake.


Updated: Apr 4, 2023 06:06 pm