
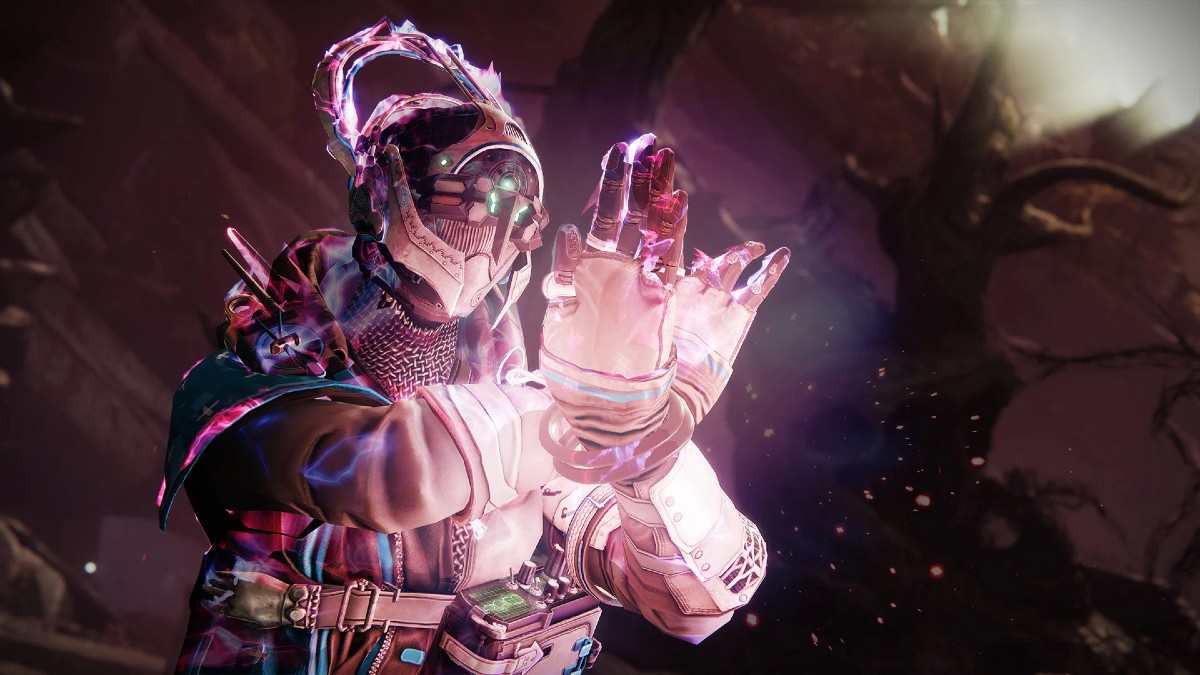
Looking to run the new Destiny 2 Dual Destiny exotic mission? The exotic class item mission has finally dropped in game, and it’s among the most complex and involved missions of its kind to date. Requiring exactly two players to complete, and filled with an array of puzzles, it’s an enthralling time with great rewards, and well worth the effort to do. We’ll give you a full walkthrough of the Destiny 2 Dual Destiny exotic mission, how you can unlock it, and how to claim your exotic class items.
How Do You Unlock the Dual Destiny Exotic Mission in Destiny 2?
First things first – you need to actually unlock the mission. This is easier said than done, as there’s no straightforward quest to pick up and track. Blame Savathun’s involvement for that one. Here are the steps you’ll need to follow to unlock the mission.
- Complete Alone In The Dark for Micha-10, at least enough times to unlock all 6 Cysts. This is worth doing anyway, as it’s a necessary step for picking up the Khvostov exotic auto rifle.
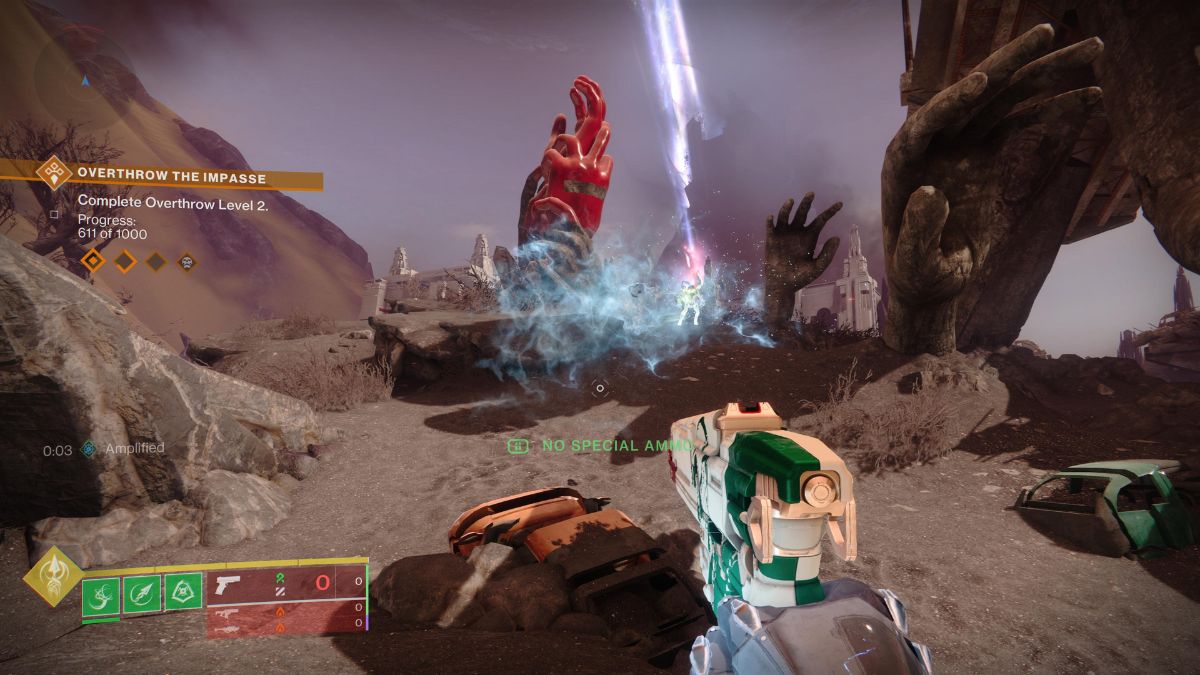
- Once that’s done, head to The Landing and fully complete an Overthrow. A few moments after it ends, a message should appear in the bottom left above your super bar reading “A Secret-Keeper of The Witch Queen is near.” Head to the open caverns at the bottom right of the area and defeat the Secret-Keeper there.
- Next go to The Blooming and repeat the process from The Landing. The Secret-Keeper this time should spawn in the walled-off area to the left, where the Ghost-Scanning activity for Overthrow usually spawns.
- Finally, head to The Impasse and do this process one more time. The last Secret-Keeper can be found inside a Taken energy dome nearby to the path leading towards The Divide in the south of the area.
- Once you’ve defeated all the Secret-Keepers, a pale green beam of light will appear in the sky, visible southbound from The Impasse. This beam originates from The Refraction, the area between The Landing and The Bloom where you find Ikora’s crashed jumpship in the campaign.
- Head here, and follow the beam directly into a crystalline cavern. This will trigger some dialogue of Savathun laughing, after which two locations outside the cave will become marked.
- Return outside, and you’ll encounter a couple of extremely tanky Subjugators in turn at each marked location. Do enough damage to them and they’ll teleport away, dropping an Orb of Darkness and an Orb of Light respectively after they fall.
- Take each orb and head back to the cave. You’ll find a Darkness and a Light platform both active in this chamber now – just deposit the orbs into their respective platforms by walking up to them.
This will then at last unlock the flag for the exotic mission. Once it’s done, you can also launch the mission from the Pale Heart map. Keep in mind that you need two players exactly to complete this mission, no more and no less. However, you can still unlock the mission with a full fireteam.
Now it’s time to launch the mission. It’s a pretty long and involved affair, but well worth the effort. Next, we’ll go through each encounter step-by-step, explaining what you need to do to complete them.

How to Complete the Dual Destiny Exotic Quest
Here are the general steps you need to complete the Dual Destiny mission.
- Complete Encounter 1: The Escape
- Complete Traversal 1: Explore The Anomaly
- Complete Encounter 2: Find Balance
- Complete Traversal 2: Explore The Anomaly (2)
- Complete Encounter 3: Find Balance (2)
- Complete Traversal 3: Explore The Anomaly (3)
- Complete Encounter 4: Mastery Of Balance
- Complete the Revelation.
Of course, we’ll go over each of these steps in more detail below, explaining exactly how their mechanics work and what you’ll need to do to progress.
Once you launch into the mission, you’ll likely notice you’ve got a timer counting down on the left. This is going to remain a constant throughout the mission, so you’ll want to try and be quick. Note though that each time you complete a segment of the mission, the timer will refresh, and it’ll add on any remaining time from the last section as a bonus.
Dual Destiny Encounter 1: The Escape
The first encounter is also the easiest. It asks you to simply escape the room you spawn into. To do this, one person needs to climb up onto the Light plate and another onto the Darkness plate. This done, the shield blocking the exit will drop, and you’ll be able to continue.
Note that stepping on the Light plate will give you the Light Aligned buff, and stepping on the Darkness plate will give Darkness Aligned. This is a key buff that’ll be relevant throughout the mission, and necessitates cooperation.
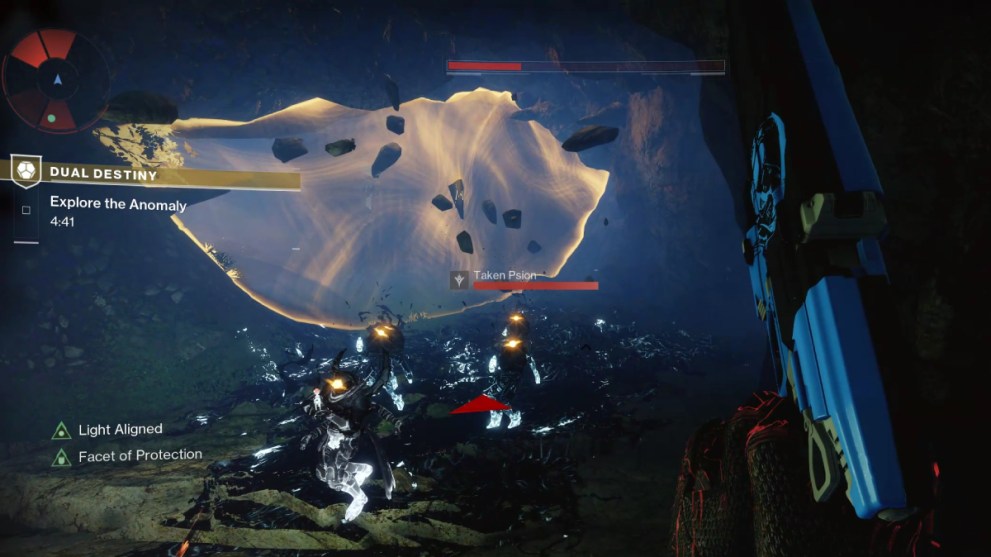
Dual Destiny Traversal 1: Explore The Anomaly
Leaving the cave, you might expect something a bit more complex, but the solution to this next section is deceptively simple: it’s just traversal. Head across The Refraction to the far side and into the wide open cave. Here you’ll find another two entranceways, each blocked off by another barrier. Hidden to the right of the rightmost barred entrance is another Light plate, and found nearby the leftmost entrance is another Dark plate. All you need to do is have each player stand on the plate that aligns with your respective buffs. This will open the way forward.
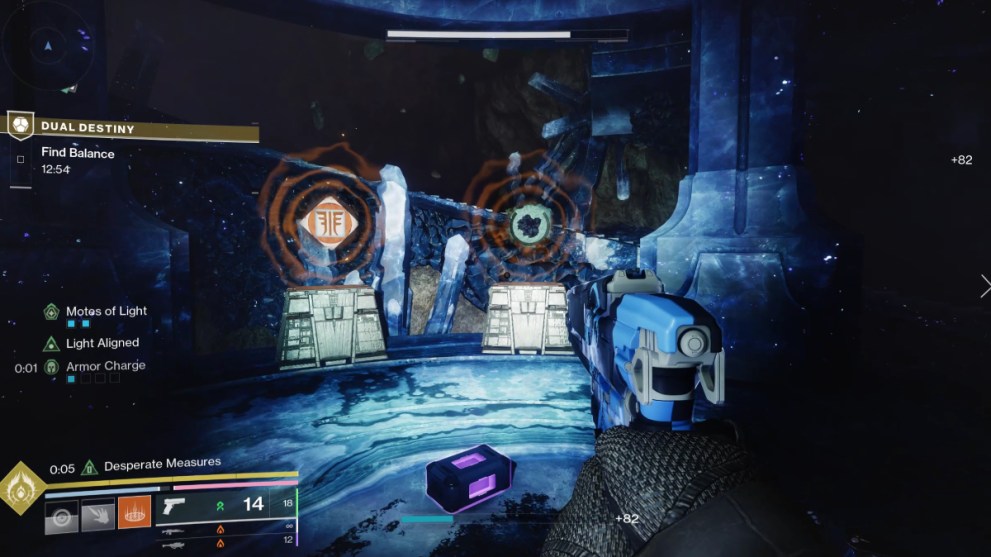
Dual Destiny Encounter 2: Find Balance
The second encounter is where you’ll begin coming to grips with some more involved mechanics. This one is a symbols-based puzzle, split into four parts.
There are two roles in this encounter, a scribe role and an input role, which will swap back and forth between you based on your buffs. In encounter 1, the Light Aligned player will be the scribe, and the Darkness Aligned player will be the input. To begin the encounter, stand on your respective glowing plates. Light plate is found on the lower level directly under Darkness plate.
Next, some adds are going to spawn in. Clear them out and after a moment, two special combatants will appear. On top a Servile Knight will appear with a Darkness aura – it can only be damaged by the Darkness Aligned player. On the bottom a Servile Centurion with a Light aura will appear – likewise, only the Light Aligned player can damage it. Each player must kill their respective yellow-bar enemy. Doing so will cause them to both drop a Mote. Pick it up and you’ll see that the Mote of Light and Mote of Darkness buffs respectively on the left of your UI each fill in a box, acknowledging the pickup.
Once this happens, symbols will begin to appear. Note that with two boxes to fill in on that buff, you both need to defeat another yellow bar each and collect another mote. Doing so will allow all the remaining symbols to appear. Once you’ve got your symbols, your roles come into full play. The Light Aligned player needs to look over at their plinths – there should be two at this stage – and call out what the symbols are. If you’ve done the Vow of The Disciple raid you’ll recognise these symbols and may already have your own callouts for them. On the upper level meanwhile, the Darkness Aligned player will see a number of different symbols up in the air, with spinning Pyramid nodes underneath them. When the Light Aligned player calls out the two symbols on their plinths, the Darkness Aligned player needs to locate those symbols up above and shoot the nodes underneath them. This will complete the first instance of the puzzle.
You’ll then both be teleported to another chamber, where your roles will switch. Now the Darkness Aligned player will call out the correct symbols, and the Light Aligned player will shoot them. As before you’ll still need to defeat your respective yellow-bar enemies, though note that there are now three plinths, three mote slots, and thus three symbols total you need to destroy. Do so successfully and you’ll teleport to the final instance of the encounter.
In this chamber, the roles switch again, returning to their setup in the first chamber. The Darkness Aligned player can find the symbols and nodes they need to shoot right up at the top of the room near the ceiling, while the Light Aligned player can find their now four plinths in the front and center of the room. Note that this time, there’s an extra wrinkle. As well as having four symbols total, you need to shoot them in order. The Darkness Aligned player should wait until the Light Aligned player has unlocked all four plinths, and then follow their instructions, shooting in the order that the symbols appeared.
This done, you’ll complete the encounter, and be able to progress onwards.
Dual Destiny Traversal 2: Explore The Anomaly (Some More)
Once you’ve finished the symbols encounter, you’ll need to do some more traversing. Most of this traversal isn’t all that bad, requiring a bit of careful jumping and timing to get through – but do note you’re still on a timer here. About halfway through, you’ll find a pair of Light and Darkness plates together. Stand on them as usual, and the path ahead will open up. From here, you’ll need to alternate back and forth.
The Darkness Aligned player needs to head to their plate first. Once they stand on it, new platforms will shift into place, allowing the Light Aligned player to reach their next plate. When they step on their Light plate, it’ll open up the next section of path for the Darkness Aligned player. You both simply need to continue this back-and-forth, opening up the next sections for one another until you complete the traversal section.
Dual Destiny Encounter 3: Find Balance (A Different Way This Time)
Up next is Encounter 3, with a brand-new mechanic. Once you get going, a large clock face of Pyramid nodes will spawn in the front-centre of the room. We’d recommend sorting out some callouts for this off the bat, as it’s central to the puzzle. We favored L1 to L4 for the left-most nodes, Mid for the middle node, and R4 to R1 for the rightmost nodes, with L1 and R1 respectively at the top of each side. You could also simply number the nodes if that’s easier for you.
The first thing you’ll want to do once you’ve agreed on callouts is clear out the ads in the room. There will be a lot in this encounter, so we’d recommend some good ad-clearing weapons like Forbearance, Lost Signal, or Sunshot. After you’ve wiped away the first wave, a large Tormentor will spawn in the center of the room. You need to focus fire and kill it as quickly as possible, but take note of whoever lands the final blow. This is because whoever actually scores the kill will pick up a temporary buff called Harmonic Sundering. With this active, they’ll be able to damage and thus interact with the nodes.
The aim here is actually pretty simple. Either player will have a number of nodes that are lit up and attached to the center by a ribbon of Darkness energy. But each player will also have a number of nodes that are disconnected. These will be different for each of you, and what you’re aiming to do is to find and interact with the three nodes which are lit up and tethered on both of your screens. The easiest way to do this is to have the person with the Harmonic Sundering buff start at L1 and go node-by-node, calling out their positions. The second player can then confirm or deny whether or not that node is lit for them. When the player with Harmonic Sundering finds a node both of them have lit up, they need to shoot it. Once all three are done, you’ve passed the puzzle, and will need to complete the exact same process twice more to finish the encounter.
Dual Destiny Traversal 3: Explore The Anomaly (Even More)
The third and final Traversal is reasonably simple. As you exit the third encounter, you’ll come up to some more Light and Darkness plates. Stand on them, and you’ll each be catapulted to separate platforms by gravity lift rings. Once you arrive on your separate islands, you’ll both need to clear out the enemies. This done, the next pair of plates will light up. Stand on them again to activate the next lifts, then continue onwards and repeat the process until the traversal section is done.
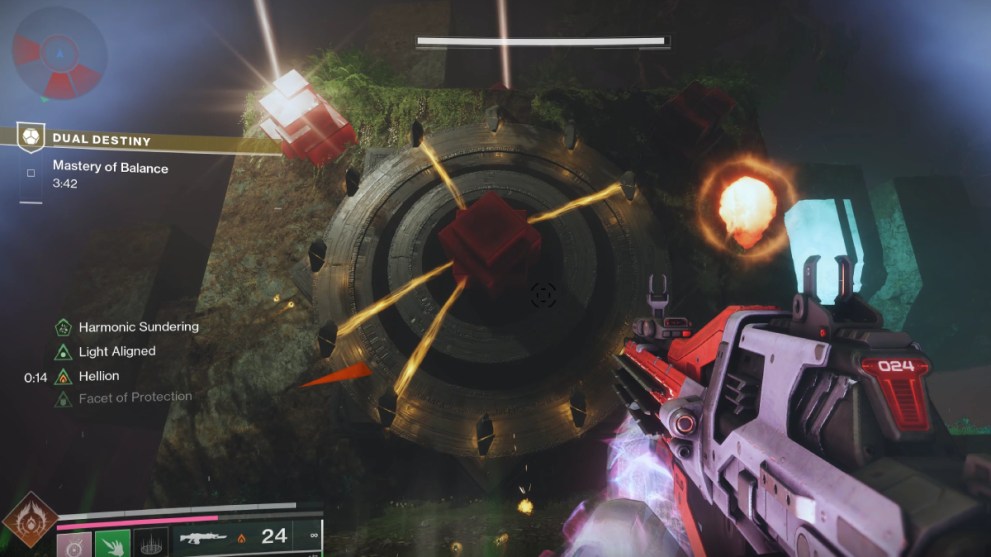
Dual Destiny Encounter 4: Mastery Of Balance
At long last, we’re at the final encounter. As one might expect, this is the most complex of them all, requiring you to utilize all the previous encounter mechanics together.
Step onto your respective plates, and the encounter will begin, spawning in one of those two Subjugators you fought off when first unlocking the mission: Inspector Selin. Carry out normal DPS, remaining mindful of the large numbers of ads. Machine guns, linear fusion rifles, and grenade launchers are all decent damage choices. Once you hit the end of his first healthgate, the immunity shield will raise, and the symbols encounter will come into play.
Look around and you’ll quickly both find yellow bars that only the respectively aligned players can kill. When the Light Aligned player kills theirs and picks up a mote, they’ll see three symbols appear near to where the Subjugator is standing. When the Darkness Aligned player gets their mote, they’ll see a number of symbols with nodes underneath appear around the back of the room. The Light Aligned player needs to call out the symbols from top to bottom, and the Darkness Aligned player needs to shoot the corresponding nodes in order. That done, another two yellow bars will spawn, and the roles will flip, with Darkness Aligned scribing and Light Aligned inputting. This will progress the next step of the encounter – not bringing down the immunity barrier, but spawning in Expector Yemiq, the other Subjugator.
Do enough damage to Yemiq and like Selin, they’ll retreat behind an immunity barrier. Next up is the third encounter’s mechanic. This is probably the most challenging part of the mission, as it requires extremely tight coordination and speed.
On either side of the arena, two node collections will have spawned. They’ll have as many points as a clock face, so we’d suggest using the numbers on a clock as your callouts to make things simple. This time two Tormentors will spawn in, and you’ll both be able to secure a permanent version of the Harmonic Sundering buff. Head over to a clockface each. The first thing you’ll notice is that the tethered nodes are changing rapidly. The key here is simple in principle but difficult to execute. When a set of nodes comes up for each of you, you need to quickly find the matching node that you both have lit, and both shoot it. You only need to do this a few times, but given the speed at which they change, it’s pretty difficult to do. A few solutions you can try is to set up a stream if one player has two monitors so that one person can look at both faces and call out the matching node. Alternatively, you can get one person to quickly call out their lit nodes, with the second interjecting when they reach a matching node.
Once you’ve managed to match and both shoot three nodes, the immunity barriers for both Subjugators will come down. You now just need to kill them.
If you’re running out of time, a Lightbearer Wizard should spawn in right around now. Killing it will add an extra three minutes to your timer, and could save your run.
Dual Destiny: Completing The Revelation
Once the Subjugators are dead, the final part of the mission becomes available. Head over to the marker to claim your rewards by standing on the plates, and you’ll instead find that you’re both teleported into immunity boxes. Here, you’ll have a control node each with an interact caption reading “Prepare For Battle”. This part’s simple – you’re now in a duel against your partner.
Once the shields come down, PvP will be enabled, and you’ll need to kill your partner or die trying. Whoever gets the first kill will then be offered a choice by Savathun: spare your opponent or crush their Ghost. This is of course not a real choice, but taking one or the other will earn some unique dialogue from Savathun. After this, she’ll finally relinquish your prizes, and you’ll both be able to claim your exotic class items.
And that, at last, brings us to the end of the Destiny 2 Dual Destiny exotic missions. It’s easily one of the most involved missions of its type out there, but a lot of fun, and well worth the effort. If you’re wondering what to pair your shiny new exotic class item with though, there’s no shortage of fresh exotic weapons in The Final Shape. Whether you’re after a Golden Gun ammo sniper like Still Hunt, or a heavy trace rifle like Microcosm we’ve got you covered with extensive guides.
If you’re wondering which rolls you should be on the hunt for though, be sure to check out our breakdown of the best exotic class item rolls, and maybe have a think about incorporating them into the best Prismatic Hunter builds, best Prismatic Titan builds, and best Prismatic Warlock builds.


Updated: Jun 12, 2024 11:53 am