Hundreds of thousands of players are eagerly embarking on their first adventures into Palworld, and when you first wash onto the shores of Palpagos, it can feel a bit overwhelming about where to start.
The game does provide a very handy guide of how many things work, but it can still be a challenge to know what to prioritize, and what will really help your character gain momentum with leveling, Pal collecting, and more.
If you’re finding yourself wondering the best way to start your own Pal-venture, we’ve got you covered. Here is our list of the top 10 things to do first in Palworld.
Beginner’s Guide to Palworld – 10 Things You Must Do First
Read the Survival Guide
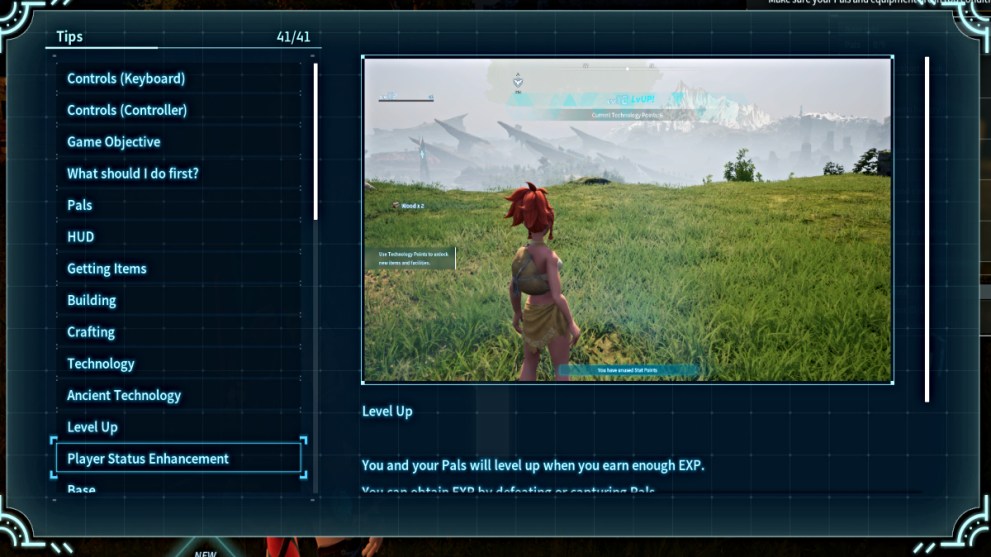
When booting up Palworld for the first time, one of the very first things you’ll want to do is open the Survival Guide that Pocketpair intently placed in the game’s Main Menu. You can also view it later at anytime during your playthrough via the character menu, so no need to worry about having to awkwardly duck out to check it.
This is an impressively thorough but very easy-to-read source of helpful tips for anyone, but especially if you’re just stepping foot onto Palpagos with no idea what to expect. Whether it’s learning about the game’s main objective, or how to capture Pals, your HUD, building and crafting, or what various unique objects do, you have roughly 40 topics to choose from. There’s even a section aptly called “What should I do first?”, which gives you a brief overview of what to do at the very start of the game.
While it’s of course easiest to learn by action, having a well-referenced head start with certain aspects of the gameplay is a tool you definitely shouldn’t take for granted.
Establish Your Base & Build Certain Items First
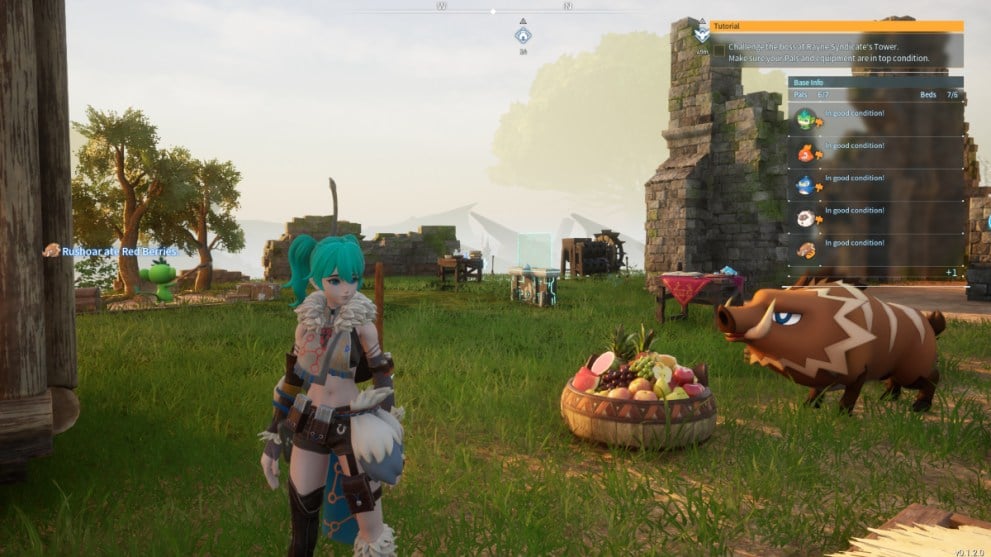
As you venture into the wilds of Palpagos, it’s important to remember that this is a craft-based survival game, so the first thing you’ll want to do before going too far is establish your base. Pick a reliable spot that you feel will suit your needs for awhile, even relatively close to where you first spawn into the game if you want.
You’ll then want to quickly go gather wood and stone that’s lying on the ground (you’ll need tools to get it from trees/boulders) in the vicinity of your chosen spot. Collect as much as you can, as you’ll need it to then construct a Palbox. This machine officially establishes your base and its boundaries, and also serves as its own fast travel point when you need to get back in a jiffy. On top of that, it’s the main collection and management source for all Pals that you capture.
Right after building that, you’ll want to immediately craft a Primitive Workbench (only requires Wood), which will allow you to subsequently craft other crucial items such as Pal Spheres, tools, armor, and more. If you have the means, you can also put a Repair Bench (only requires Stone and Wood) right next to it, which will allow you to repair all of your equipment as it gets wear and tear.
Finally, the other two items you want to immediately craft as soon as you’re able, once you’ve unlocked them with Technology Points, are the Stone Pit and Logging Site. These will greatly help bolster your stores of Wood and Stone resources, which are the most essentially ones early on, and will help offset you having to chop trees and grind boulders everywhere all the time.
Capture Several of Each Starter Pal (Don’t Kill!)
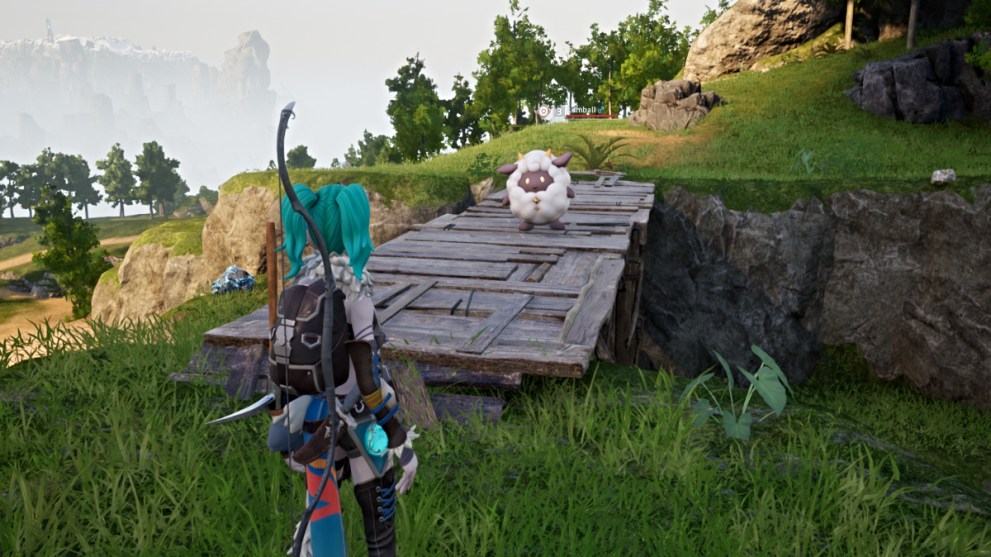
As soon as you have at least a handful of Pal Spheres (hit up those blue Paldium ores to make more, they’re everywhere!) in your inventory, you’ll want to start exploring and collecting Pals. Thankfully, the starting area is richly abundant in the easiest Pals you can capture, such as Lamballs (seen above), Cattivas, and Chikipis.
When it comes to capturing a Pal, the key is to either sneak up on it from behind (called a ‘Back Bonus’), or weaken it enough via base damage and/or a status ailment. Once you’ve achieved that, your chances of capturing the Pal are pretty much guaranteed. However, you do want to be careful to not do too much damage, or you’ll end up killing the Pal before you can collect it.
The main reason you want to capture as many of these starter Pals as possible in the beginning, is because when you make a successful capture, you gain really good EXP as well as various materials/resources (leather, wool, etc) that will be invaluable for all your crafting needs. So the more Pals you capture, you’ll be swimming in EXP and items and boosting your levels quicker early on.
Technically, you can obtain both as well with killing Pals, but again, you lose out on having the Pal itself, and while you do get the items it’s less EXP for a kill versus a capture.
Use Technology Points Wisely
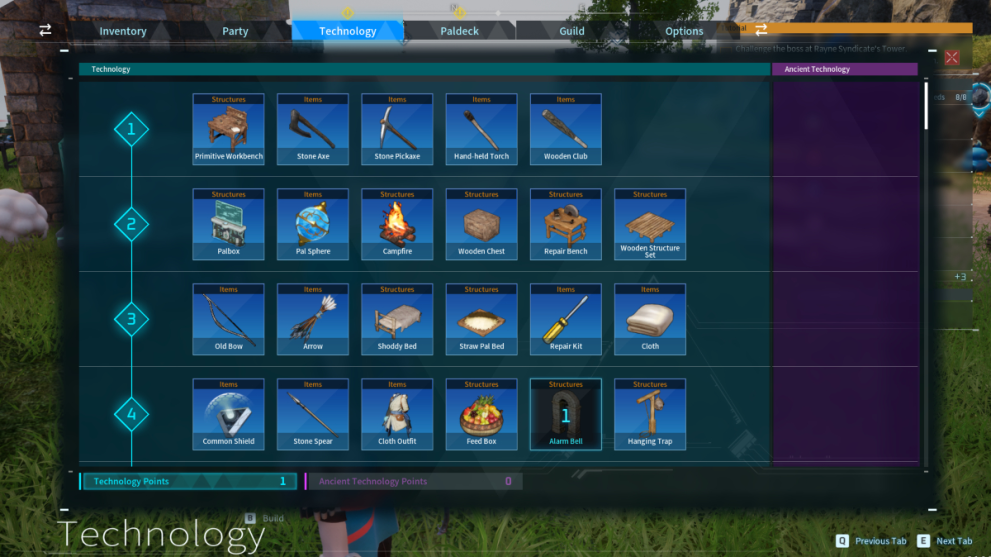
When it comes to being able to craft various items that help expand your base and make both exploration and battle easier, you need to unlock the recipes for all of them first. To do that, you need to accrue Technology Points. These are primarily obtained one of two ways: leveling up and finding new Fast Travel statues.
When your character levels up, you’ll earn a generous amount of Technology points, particularly early on. You’ll usually get 10-12 points per level, and these can then be used to unlock new crafting recipes, which can be found under the ‘Technology’ tab on the character menu. There are 50 tiers of unlockable recipes in all, and you want to make sure to prioritize the most important ones first.
This means those you need to upgrade your base’s level (done by completing certain crafts), and ones that help provide critical resources and take care of your Pals while they work and protect it.
The most important thing to note, however, is that Technology Points CANNOT be respec’d. So if you unlock something by accident that you may not need at that time, sadly you cannot undo it. So think ahead about what you need before you pull the trigger on those points.
Always Have Food In Your Inventory
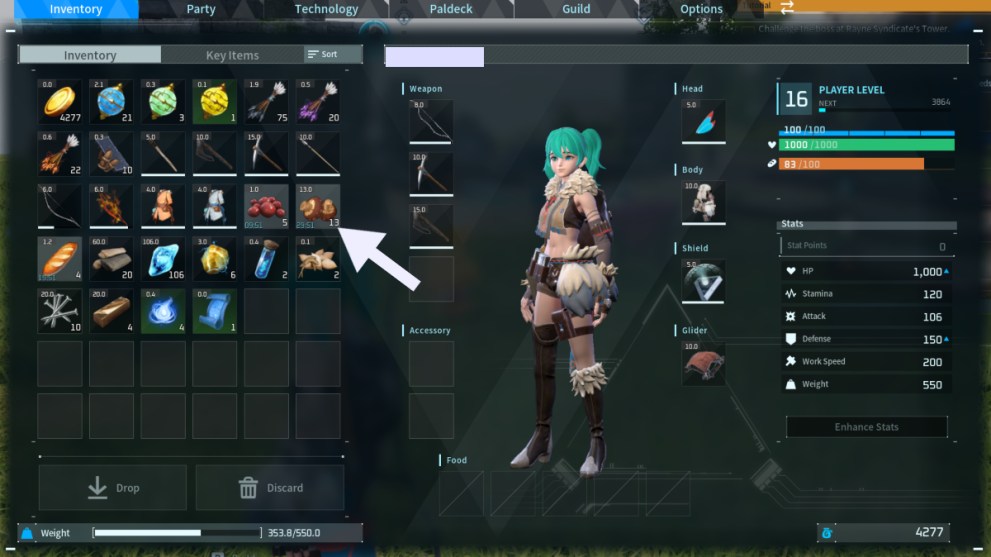
A major factor of survival in Palworld, as in many other survival games, is hunger. The more activity you engage in and the further you explore, you’ll notice the orange-colored Hunger meter (right below your HP bar) begin to dwindle. The lower it gets, your character will become ‘Hungry’, and a red prompt for it will pop up and linger on your screen. If the meter goes all the way down, you’ll reach ‘Starving’ status, and your HP will also start to fall as a result.
Obviously you want to avoid that situation at all costs, so having some amount of food in your inventory at all times is crucial. As you explore around and gather resources such as wood, stone, and Paldium, you’ll also notice bushes of red berries. You’ll want to pick as many of these as you can, as they’re essentially the starter food source for you and your Pals to rely on.
The other main method of getting food starting out is from Pals that you capture and/or kill. Different ones will often drop different kinds of food, and you can consume it raw or cooked. In order to cook food items, you’ll need to build a Campfire at your base. Cooked food will yield a higher Nutrition rate and thus replenish more of your hunger meter.
However, remember also that all food carries an Item Rot timer, and you have to consume it within that amount of time, or it will vanish from your inventory permanently. Eventually, once you unlock the Refrigerator recipe you’ll be able to properly store and keep food fresh longer.
Find As Many Fast Travel Points As You Can, Safely
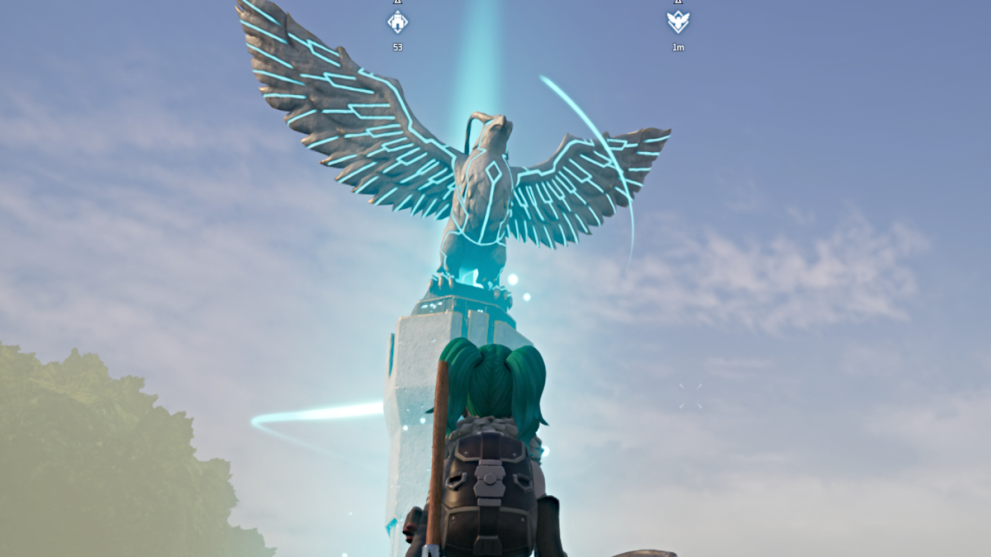
Upon first starting the game, one of the first key landmarks you’ll come across is a Fast Travel statue (has an eagle on top) with an NPC sitting beside it. Interacting with it will unlock it as an accessible point to fast travel to when needed.
More of these statues are scattered everywhere across the entire map of Palpagos, and it makes getting back and around to certain areas much easier and quicker versus hoofing it, or even on a mount. Given that the map itself is very, very big, unlocking as many Fast Travel points as you can early on will make exploring, gathering items, and building up your Pal collection far more efficient.
As you look out across the vast island-scape, it turns out you can see impressively far away, and you’ll likely notice Fast Travel statues off in the distance. If they’re orange in color, that means they haven’t been unlocked yet. If they’re blue, they’ve been unlocked and ready for use.
Your compass at the top of your screen can also act as an additional guide to new Fast Travel statues, as the eagle symbol will appear when one is nearby.
However, we advise being careful just how far you venture out at any given time to unlock these. The farther you go, you’ll inevitably find Pals and human enemies at higher levels, and if you stumble across aggressive ones while pursuing a Fast Travel statue, you may end up getting overpowered and killed in the process. So plan these endeavors carefully.
As an added bonus, each Fast Travel point you unlock will also give you 1 Technology Point.
Don’t Be Afraid to Explore at Night
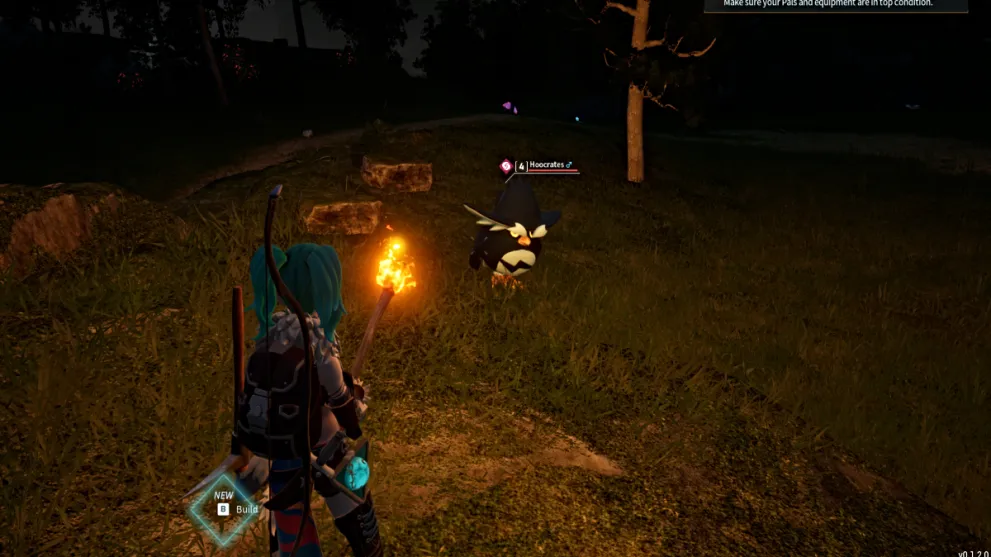
Many craft-based survival games and even other open-world genre games have often touted not venturing out at night, unless you absolutely want to meet your demise. Thus it’s ingrained in many of our brains to avoid it at all costs, or only if you’re exceptionally geared for it. Even Palworld’s Survival Guide suggests caution about nighttime travel in Palpagos, but actually they’re pulling our leg a bit. It’s one of the things you absolutely want to do (even at lower levels), and frequently.
Going out into the wilds at night doesn’t dramatically boost threats, or cause any debuffs like fatigue. Your character is just as fine running around in the darkness as they are during the day. Have your usual equipment (including a Torch) and Pal Spheres ready, and feel free to wander out around the vicinity of your base, as far as you feel comfortable going.
The main incentive here is that night exploration will yield a variety of different Pals that in fact only appear at night. Not only that, they’ll often be found sleeping and thus vulnerable, which increases the damage they take and makes their capture rate easier. All the better for you, and this will help bolster your Paldex even more.
Granted, we don’t necessarily suggest going out as far as you possibly can at night, especially at early levels. Darkness in Palpagos is rough to visually navigate if you’re not well-equipped, and it is possible that you might stumble upon something far too powerful for you to handle. So go with your gut, and explore only as far as you feel confident enough to.
Spend Pal Souls Wisely
Another important item that you’ll probably find yourself passively collecting in your travels is Pal Souls. These little wisp crystals provide some crucial benefits to your Pal Party, but unlike many other items, these are much more difficult to come by.
As of this writing, we’ve only found Pal Souls inside certain treasure chests scattered around the map, and otherwise simply lying on the ground like Pal Spheres or other resources. They come in three different sizes as well, which pertain to different sizes/rarities of Pals in the game.
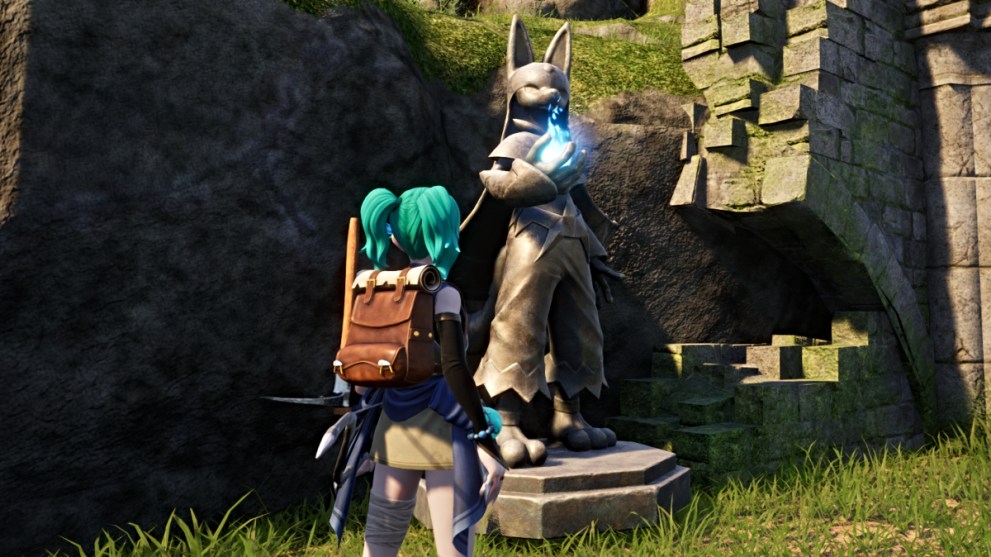
In order to use Pal Souls you’ve collected, you’ll need to build a Statue of Power at your base. It’s a large stone statue that resembles the Pal called Anubis, and you’ll find it on Tier 7 of your Technology menu, so not too far down. Once you have it unlocked, it will cost you 20 x Stones and 10 x Paldium Fragments to build, so not terribly complex by any means.
Once it’s constructed, approach and interact with it. It will ask for a set number of Pal Souls in exchange for increasing the base stats of one the Pals in your current Party. Again, since Pal Souls are so hard to come by, you want to use these very carefully. Give them to a Pal you’re sure that you’ll want to use for at least a good while.
Do note that, unlike Technology Points, Pal Souls can be respec’d. However, doing so is VERY costly, and we mean VERY. You’ll need to fork over thousands of gold coins to do so.
Boost Your Carry Capacity
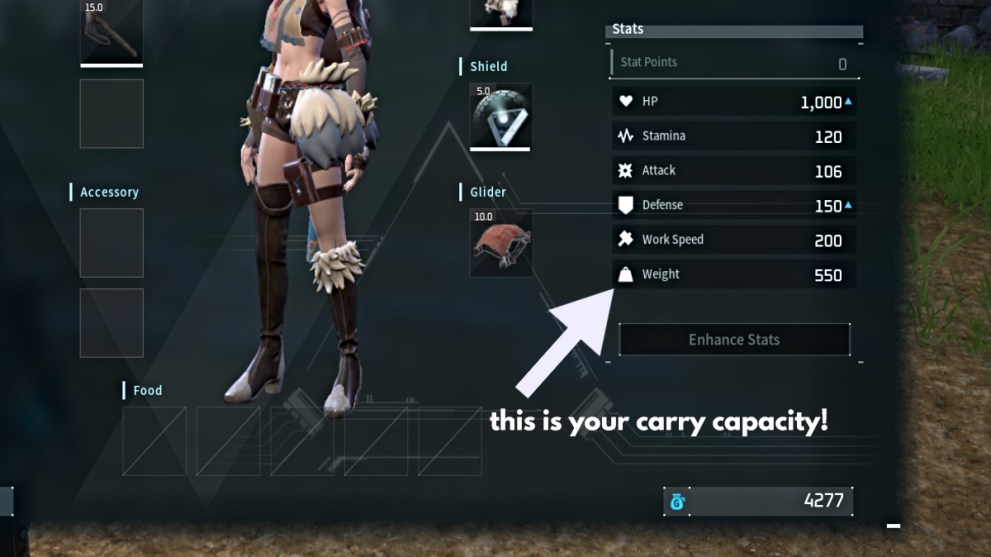
Since a major part of Palworld’s gameplay, aside from collecting Pals, is gathering a wide variety of resources, having a large enough carry capacity to handle all of it is crucially important. You start the game off with a seemingly good capacity limit, but you’ll likely find it filling up quickly as you gather mounds of stones and wood, and start accruing tools and weapons.
If you go over your limit, the capacity bar will turn red, and your movement speed will slow down. Even worse, if you’re way over your limit, you won’t be able to move at all. No one wants that, of course.
The main ways to help increase your carry capacity are using the Stat Points you get each time you level up, and having a Pal in your party (e.g. – Kingpaca) that increases your capacity with a special passive buff.
Overall, managing your inventory is as important as anything else in the game, and ultimately you only want to carry what you absolutely need for your excursions at any time.
Get a Pal Mount Quickly
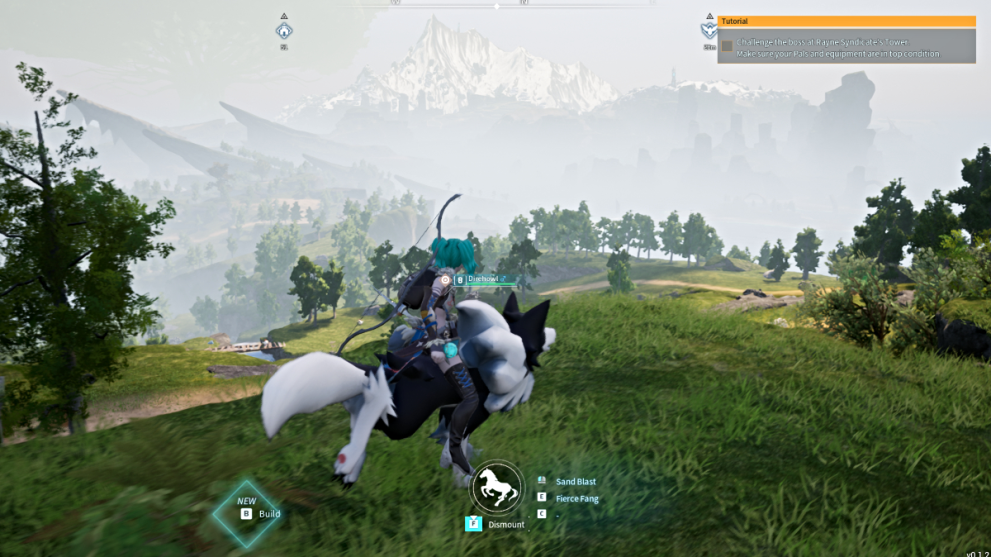
When it comes to getting around the vast map of Palpagos, going on foot isn’t necessarily bad, but the further you need travel, efficiency then becomes priority. Thankfully, with its diverse bestiary of Pals found throughout the game, Palworld gives players to ability to actually use certain Pals as mounts.
There’s no technical level cap for unlocking mounts in Palworld. Rather, it’s a matter of first capturing a Pal that can function as a mount. Early on the game, these will likely include Melpaca, Rushoar, and Direhowl.
Once you do, the recipe to craft its harness or saddle will become available in the Technology tab of your character menu. These are required in order to use those Pals as mounts. You’ll also need the recipe to build a Pal Gear Workbench (Tier 6 Recipe), where harness and saddles can be made.
Use your Technology Points to unlock them all, and then build the saddle/harness for the Pal you want to use as a mount. Once you have it in your inventory, simply summon the Pal from your Party as you normally would for battle or anything else, and a ‘Mount’ prompt will display at the bottom of the screen. Press the button to mount up, and you’ll find yourself running around a lot quicker.
Not only that, you can also manually use the attack abilities of those Pals while mounted, which is pretty cool and effective when you need some extra firepower.
That concludes our list of the top 10 things to do first in Palworld. We hope you found this helpful, and let us know how you’re enjoying the game so far, and if there’s something you think players should do first that we didn’t mention.
Be sure to check out all of our other guides for Palworld as Early Access continues, including our first impression review of the game.


Updated: Jan 19, 2024 07:09 pm