
Items are one of the most important things in Megabonk, and with so many ways to customize the item pool, it’s difficult to discern what is meta and what is not. In our Megabonk items tier list below, we will analyze all items in the game, their effects, synergies, and pros and cons. This guide should serve you as the ultimate cheat sheet on which items to enable, banish, and pick up during your runs.
Megabonk Items Tier List


Tiers Explained
- S Tier: The best items in the game that you want to stack as much as possible.
- A Tier: Low-priority items that you want to pick up at least a few of, and they’ll provide a lot of value. Some can also be banished if you want to free up the pool.
- B Tier: Items that can work for certain builds, but you should banish/disable them if you don’t plan to use them.
- C Tier: Permanently enabled items that you’ll want to banish to free up the pool.
- D Tier: Items that you don’t want enabled at all, most of the time.
NOTE: Some items like Tactical Glasses, Forbidden Juice, etc., aren’t bad but are also not worth enabling as they reduce your odds of getting actually good items of that same rarity.
In the tier list above, we ranked all items in Megabonk based on their overall strength. It should serve as an ultimate guide on which items from each rarity you should target. Note that some items within a tier might be better than the others, depending on your current setup.
Also, know that in some cases it might be better to pick a lower-rarity or a lower-tier item, such as when you’ve already stacked enough of the higher-tier items. Check out the Megabonk’s damage formula below to learn how each item affects damage calculation.
Megabonk Damage Formula: Base * (1 + Damage Tome) * (1 + (Gym Sauce) + (Brass Knuckles + Idle Juice) + Birdo’s Passive + Calcium’s Passive + Megachad’s Passive + 1.5% * Ogre’s Level) * (1 + (Tactical Glasses + Boss Buster) + (Red Credit Card + Beer) + (Beefy Ring + Scarf + Gamer Goggles + Eagle’s Claw + Demonic Soul) + (Joe’s Dagger) + Chaos Tome Damage% + Charge Shrine Damage% + Athena’s Passive + Robinette’s Passive + Ogre’s Passive 10%) * (1 + Speedy Boi) * (1 + Noelle’s Passive) (1 + Chaos Tome Elite% + Charge Shrine Elite%) * (1 + Corrupted Sword)
S Tier – Best Items in Megabonk
| Item | Effect | Pros & Cons |
|---|---|---|
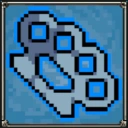
Anvil | Weapon upgrades can now have +1 more stats than normal. | + Provides a chance to get even more stats when upgrading weapons, which is universally good + Self-banishes after picking up one, making it extra valuable to get + Literally requires only one copy to be OP |
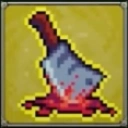
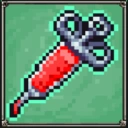
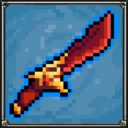
Joe’s Dagger | 1% chance to Execute an enemy. Performing Execute increases Damage by 1%. | + One of the best-scaling DPS items in Megabonk + Chance to execute outscales any HP enemies might have + Works extremely well with the Dexecutioner weapon |
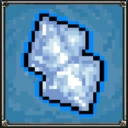
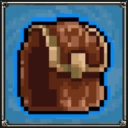
Holy Book | 100 Max HP, 50 HP Regen. Healing will now radiate damage to nearby enemies. | + One of the best DPS items for HP-stacking builds + Scales with Size, making its damage area much bigger + The flat Max HP gain is good even if you’re not building full HP |
Spicy Meatball | Attacks have a 25% chance to explode, dealing 65% Damage to surrounding enemies. | + One of the best DPS items in Megabonk without many stacks needed + Scales really well with extra stacks, increasing proc chance and damage |
Lightning Orb | 25% chance to summon lightning when hitting enemies. Lightning can now stun enemies. | + One of the best DPS/CC items in Megabonk + Provides excellent damage as well as utility + Works really well with the Lightning Staff weapon |
Bloody Cleaver | Lifesteal now triggers Bloodmark stacks. Also gain 50% chance to apply Bloodmark. | + Bloodmark is a very good damage source that scales with your DMG/Level + Doesn’t need many stacks to be extremely effective + Can even be banished after a few pick-ups to clear the Legendary pool |
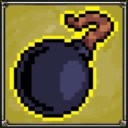
Big Bonk | 2% chance to Bonk an enemy, dealing 20x Damage. | + One of the best DPS items in Megabonk + Scales insanely well and is generally one of the highest-priority items to get |
Overpowered Lamp | Items with on hit effects roll 1 additional time for their effects to trigger. | + Allows all your on-hit effects such as Poison to trigger more often + Doesn’t require many stacks to be really effective – Doesn’t benefit from a lot of stacks unlike most other Legendary items |
Ice Cube | 20% chance to inflict ice damage when hitting enemies. Ice can now freeze enemies. | + Provides a massive DPS increase and also another source of CC + One of the best CC/DPS items in Megabonk + Works really well with any fast-attacking weapon |
Credit Card Green | Increase Luck by +2% when opening a chest. | + Can give you massive Luck boosts if you stack it enough + Stack it early into a run and don’t open any chests until you have a huge amount of these – If you open chests too early, you won’t get enough value out of it |
Time Bracelet | Increase XP Gain by +8%. | + Stacks XP Gain, which is one of the hardest stats to stack + Provides immense value from just a few Time Bracelets picked up + A must-get item if you’re not using the XP Tome + By far the strongest common item in Megabonk |
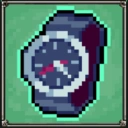
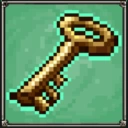
Key | +10% chance to open a chest for free. | + One of the best items to stack early into a run + Chance to open chests for free will preserve your economy + Allows you to make the most out of Credit Card Green stacks – Less value in getting it if you’ve already unlocked a lot of chests |
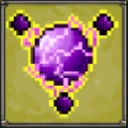
Clover | Increase Luck by +7.5%. | + Luck is a universally good stat that you can’t get enough of + Especially strong scaling because there are only a few sources of Luck + Provides immense value from just a few Clovers picked up + A must-get item if you’re not using the Luck Tome |
A Tier – Lower Priority Items
| Item | Effect | Pros & Cons |
|---|---|---|
Soul Harvester | Killing an enemy summons 2 homing souls. | + Excellent DPS increase without much need for investment + Can provide decent value even with 1 copy and then be banished – On kill effects are usually weaker than on-hit effects |
Sucky Magnet | Periodically drag in all XP Shards around you. | + The ability to collect all XP on the map is extremely useful + One of the best Legendary items that work with just 1 copy + Can even be banished after 1 pick up to free up the Legendary item pool – Doesn’t benefit much from stacking many of them |
Za Warudo | Upon taking damage that would kill you, freeze time for 10s. Breaks after one use. | + Prevents death and freezes time, allowing you to get out of really tricky situations + One of the best utility items in Megabonk – Getting too many of these will slow down your DPS stacking |
Grandma’s Secret | Crits have a 50% chance to explode and damage nearby enemies for 50% damage. | + One of the best DPS-oriented purple items in Megabonk + Provides an excellent damage buff if you can get it early on – Stacking too many of them isn’t worth it |
Mirror | Reflects any incoming damage back to the attacker, and gain a short invulnerability. | + Excellent defensive layer and general utility item + Stacking it on high-HP Thorns builds is very good + Can be banished fairly early to free up the purple item pool |
Turbo Skates | The faster you move, the more Attack Speed you gain. Max 40% per stack. | + Gives Attack Speed, which there aren’t that many sources of + Decent DPS increase with just a few of these picked up – Requires you to have a bit of Movement Speed to max out its effect – Clutters the purple item pool further as it’s a toggle item |
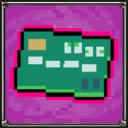
Credit Card Red | Increase Damage by +2.5% when opening a chest. | + Can stack serious damage if you stack it and then open chests – Shares the same place in the damage formula as plenty of other items – A viable banish option if you don’t plan on stacking any of them |
Idle Juice | The longer you stand still, the more damage you do. Max +100% damage. | + Very good DPS increase, especially for AFK builds + Doesn’t require that many stacks to be very useful + One of the strongest rare/blue items for the early game – Shares the same place in the damage formula as some character passives |
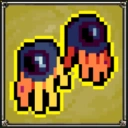
Kevin | +25% chance that Kevin will punch you whenever you hit an enemy. Kevin can not kill you. | + The best blue/rare item in Megabonk + Damaging yourself without dying opens many options for on-damage-received effects + Can help you keep yourself at low HP for several unique passives to work – Doesn’t benefit too much from having a lot of stacks |
Echo Shard | +12% chance to spawn an extra XP shard when killing an enemy. | + Converts to extra XP, which is always useful + One of the best blue items to pick a couple of early on – Doesn’t stack that well as it has diminishing returns |
Golden Shield | Get extra Gold when taking damage. | + Excellent Gold-generation tool when combined with Kevin + The best blue item you can get on Robinette due to her Gold-reliant passive + Requires only a few stacks to ramp up your Gold economy – Virtually useless later into the run when you don’t need Gold anymore |
Thunder Mitts | Upon hitting an enemy, generate a lightning strike that damages enemies (10s cooldown). | + Decent DPS item for the early stages of a run – Doesn’t stack that well and isn’t useful later on |
Coward’s Cloak | Boost Movement Speed upon taking damage. Also gain +5% Movement Speed. | + Helps you get away from enemies when you take damage + The passive Movement Speed boost is nice – There is no point in stacking too many of these |
Unstable Transfusion | +27% chance to apply a stack of Bloodmark when hitting an enemy. | + Helps you proc Bloodmark on enemies and doesn’t require many copies + One of the best blue utility items – Has diminishing returns on stacking |
Electric Plug | Upon taking damage, send out an electric shock to nearby enemies. | + By far the best blue item when it comes to DPS + Can deal very good damage in combination with Kevin to proc it – Picking up utility items is often much better |
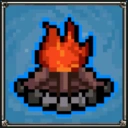
Campfire | Standing still heals you. | + Works well with Idle Juice and any AFK build + Just a few stacks will ramp up your HP Regeneration decently well – Doesn’t work if you’re moving around |
Backpack | +1 Projectile Count for all Weapons. | + One of the best buff/utility blue items in Megabonk + Extra projectiles is what almost every weapon will benefit from + Allows you to stack other stats on weapons besides Projectile Count – The DPS increase becomes less valuable the more Projectile Count you stack |
Feathers | Jump higher and further. | + Very good utility item for kiting enemies that you can pick a few of + Has synergy with Birdo and any Airborne DMG item – Doesn’t provide much additional value when stacked |
Beacon | Charging a Charge Shrine will turn it into a healing zone. Also spawn +2 extra Charge Shrines for future stages. | + One of the best utility items to pick up early into a run + Extra Charge Shrines will provide you with more buffs + Decent healing option, especially if you don’t have any other – Loses value as you progress through the stages |
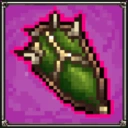
Moldy Cheese | +40% chance to Poison enemies on hit. | + Easily the best Poison-stacking item in Megabonk + Just needs a few stacks to become really effective – Doesn’t benefit much from extra stacking |
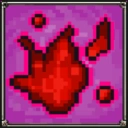
Cursed Doll | Curse up to 5 enemies per stack, dealing 30% of their Max HP as damage per second. Deals reduced damage to bosses. | + One of the best DPS items in Megabonk, with only a few stacks needed to work + Provides insane value that doesn’t even need to scale as it’s a %HP damage + One of the only common items that will provide value in the later stages of a run – Doesn’t benefit much from extra stacking |
Gym Sauce | Increase Damage by +10%. | + Decent DPS-boosting item early on + Pick up a few to accelerate your DPS stacking – Shares the same place in the damage formula as some character passives – Bad scaling and less value compared to other common items |
Battery | Increase Attack Speed by +8%. | + There are less sources of Attack Speed, making it extra good to pick up + Scales very well compared to other common DPS items – Needs to be enabled, cluttering the common item pool further – Attack Speed doesn’t scale with items, which will be your main source of DPS |
Golden Glove | Earn +15% more Gold from killing enemies. | + Excellent item to boost your economy early on + Requires only a few stacks to work very well + A meta common item for Robinette due to her Gold-related passive – Doesn’t provide any value later into a run when you’re already generating a lot of Gold |
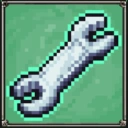
Wrench | Charge Shrines take 4% less time to charge and give +7.5% shrine rewards. | + Pick it up early on to maximize the value of Charge Shrines + One of the best common items to pick up early – Doesn’t provide much value if you’ve already used a lot of Charge Shrines |
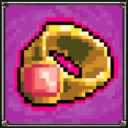
Slippery Ring | Increase Evasion by +15%. | + Adds another strong defensive layer that stacks very quickly + Requires only a few stacks to provide good value – Has diminishing returns, providing little increase after you’ve already picked up a few |
Medkit | Increase HP Regen by +45 per Minute (0.75 HP/sec). | + Decent sustain item that works really well early on – Doesn’t provide much value compared to other common items |
Oats | Increase Max HP by +25. | + Can provide plenty of survivability in the very early stages – Most builds won’t even need these |
Borgar | +2% chance to spawn a healing Borgar upon killing an enemy. | + Helps with sustain if you pick up a few of these – Doesn’t provide much value later, once you’ve got some Lifesteal |
B Tier – Situational Items
| Item | Effect | Pros & Cons |
|---|---|---|
Dragonfire | 15% chance to summon Dragonfire when hitting enemies. Fire damage can now apply Burn. | + One of the best Legendary DoT DPS items + Stacks very well and doesn’t require that many stacks to be useful + Any Fire item will get a lot of extra value from it – Most Fire weapons aren’t that good – Needs to be enabled, cluttering the Legendary pool further |
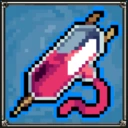
Chonkplate | Healing above Max HP allows you to Overheal by 75%. Also gives 20% Lifesteal. | + One of the best items for tanky builds that focus on HP and Lifesteal + Works well with the Holy Book and any other HP-reliant item – Doesn’t provide extra Max HP (just the overheal) |
Giant Fork | +15% Crit Chance and +14% chance to convert a Crit into a Megacrit, increasing its damage. | + Provides an excellent Crit Chance boost without needing many stacks + Converts Crits into Megacrits, which is excellent if you can’t stack Critical Damage enough – Megacrits don’t work well with Critical Damage, making it not useful for every build |
Cursed Grabbies | +10% Difficulty, 0.8x Max HP. 5% chance to cast Cursed Magic when hitting an enemy. | + One of the best purple-rarity DPS items in Megabonk + Serves as another source of Difficulty if you’re not using the Curse tome + Stacks very well, and gains even more and more DPS from its passive – Doesn’t work well with Holy Book or any health-stacking build/item |
Beefy Ring | Increase Damage by +20% per 100 Max HP. | + One of the best sources of Damage for any HP-stacking build + Works very well with any HP-stacking item or passive – Shares the same place in the damage formula as many other items |
Toxic Barrel | Release toxic waste upon taking damage, poisoning all nearby enemies. | + Very good source of Poison stacks when combined with Kevin + Amog can make very good use of this item – Cheese is just better and doesn’t require Kevin to proc |
Spiky Shield | Gain +2 Thorns for every 1% Armor. Also gain 10% Armor. | + One of the best items for Athena and any other Thorns-stacking build – Clutters the purple item pool, making it a good banish almost always |
Gas Mask | Gain Armor and Overheal for every enemy infected with Poison. | + Very good item for Amog as he works around poison – Needs to be enabled, which clutters the purple item pool further – You can get Overheal and Armor from other sources |
Quin’s Mask | Thorns damage has a 50% chance to explode. | + Excellent item for Athena and any Thorns-stacking build – Useless if you’re not stacking Thorns |
Beer | +20% Damage at the cost of -5% Max HP. | + Provides a decent DPS increase early on – Shares the same place in the damage formula as plenty of other items – Very good Banish option if you’re running any HP-stacking items |
Demonic Blood | Increase Max HP by +0.5 per kill (max 200 stacks). | + Decent HP increase that is easy to stack later into a run + One of the best low-rarity HP-stacking items in the game – Doesn’t have much value on non-HP-stacking builds |
Demonic Blade | Crits have a +25% chance to heal you. | + Extra healing is nice and it doesn’t require many stacks to be effective – The healing heavily relies on your Crit Chance and Projectile Count/Attack Speed |
Moldy Gloves | Create a moldy poison cloud upon hitting an enemy. | + Another source of poison that works when hitting an enemy – Cheese is basically better and doesn’t require to be enabled |
Knuckles | Deal +25% more damage to nearby enemies. | + Can be enabled and used for some melee/close-range builds – Shares the same place in the damage formula as some character passives |
Cactus | Shoots out spikes when taking damage. Damage scales with Thorns. | + One of the best DPS items for any Thorns-stacking build + Excellent synergy with Athena – Useless for any non-Thorns-stacking build |
Skuleg | Increase Difficulty by +7%. | + The best source of Difficulty if you’re not using the Curse Tome – Can’t stack Difficulty enough to be really useful – Needs to be enabled, cluttering the green item pool further |
C Tier – Banishable Items
| Item | Effect | Pros & Cons |
|---|---|---|
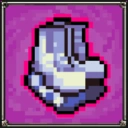
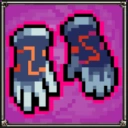
Power Gloves | 8% chance upon hitting an enemy to create a giant blast, damaging and knocking enemies away. | + Can be stacked to deal very respectable damage – Needs way more stacks compared to other Legendary items to become useful – Has diminishing returns and is simply better as a banish option |
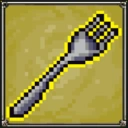
Slurp Gloves | Cast Blood Magic upon hitting an enemy, damaing nearby enemies and healing you for 7.5% (9s cooldown). | + Can work as a DPS/healing item if you’re not looking to banish it + Stacks decently well and deals decent damage considering its rarity – Its DPS isn’t that amazing and it’s often better to stack other items – One of the best purple items to banish to clear the pool for Green Credit Cards |
Scarf | Deal 50% more damage while airborne. | + Can be useful on Birdo and any character that stays airborne – One of the best purple items to banish to clear the pool for Green Credit Cards – Shares the same place in the damage formula as some other items |
Phantom Shroud | After evading, deal 2x damage next attack, and temporarily increase Attack Speed and Movement Speed. | + The extra Attack Speed and Movement Speed after evasion can be useful for Ninja – Doesn’t work well on any build that doesn’t have enough Evasion – One of the best blue-rarity items to banish |
D Tier – Items You Shouldn’t Enable
| Item | Effect | Pros & Cons |
|---|---|---|
Speed Boi | Upon taking damage below 50% Max HP, slow down time and deal 2x damage. | + Great defensive layer, similar to Za Warudo, and also a DPS buff + Doesn’t share a spot in the damage formula with any other item, making it extra worth – Has only a 25% uptime (5s duration; 20s cooldown) – Clutters the Legendary pool while not providing enough value |
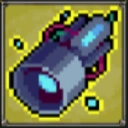
Energy Core | Shoot energy orbs at enemies. | – One of the worst Legendary DPS items with almost no value – Has to be enabled, cluttering the Legendary pool for virtually no value |
Demonic Soul | Increase damage by 0.1% per kill (max 100%). | + Can be good as a DPS buff if you’re not using many of the items with the same spot in the damage formula – Shares the same place in the damage formula as some other items – Clutters the purple item pool further, slowing down Green Credit Card stacks |
Bob (Dead) | For every 14 units moved, summon Bob. | – Requires high movement speed to even proc reliably – Doesn’t provide any value while you’re standing still – One of the worst items in Megabonk |
Shattered Knowledge | XP Shards now slice through enemies, dealing damage as they pass. | – Doesn’t deal nearly enough damage to warrant enabling it – One of the worst items in Megabonk |
Eagle Claw | Deal 66% more damage to airborne enemies. 8% chance to knock enemy into the air. | + Can work with Birdo and other characters if you’re not using other similar items + Ghosts spawning in overtime are always airborne, making it extra worth against them – Shares the same place in the damage formula as some other items – There are other purple items that are much more worth stacking |
Gamer Goggles | Increase damage the lower your HP is. | + Has synergy with Athena and the Corrupted sword – Shares the same place in the damage formula as some other items – Doesn’t work on any build that isn’t staying at low HP |
Slutty Cannon | 20% chance to spawn missiles upon hitting an enemy. | + Can provide a respectable DPS increase without too many stacks + Strong for the early game if your starter weapon has good Attack Speed – Doesn’t provide enough value later into a run to warrant enabling it |
Leeching Crystal | +50 Max HP at the cost of -50% HP Regen. | + Decent HP-stacking item if you want to sacrifice HP Regen completely – Clutters the blue item pool while there are better HP-stacking items you can enable |
Golden Sneakers | Earn money by moving around. | – Doesn’t provide any gold to be remotely useful. – One of the overal worst items in Megabonk |
Boss Buster | +15% more damage to Elites and Bosses. | + Elite and Boss damage is a niche stat, and it can prove useful while solving challenges – Doesn’t have a place in the meta, as the Chaos tome will stack it better |
Ice Crystal | 7.5% chance to freeze enemies upon hitting them. | + Okayish CC item for the early game – Ice Cube makes this item redundant and not worth enabling |
Turbo Socks | Increase Movement Speed by +15%. | + Doesn’t need many stacks to work really well – You can get Movement Speed from many other items, making it redundant |
Ghost | Using an interactable summons ghosts. | – Arguably the worst item in Megabonk – Doesn’t provide nearly enough damage to warrant using it |
Tactical Glasses | +20% more damage to enemies above 90% HP. | – Doesn’t apply to most of the damage that you’ll deal – There are much better green DPS items that don’t even need to be enabled |
Forbidden Juice | Increase Crit Chance by +10%. | + Can be useful if you have no other way of stacking Crit Chance – Most meta builds won’t use it as it clutters the green item pool – If you have ways to stack Crit Chance, it’s fairly worthless |
Megabonk Items Tier List FAQ
The best items in Megabonk, categorized by rarity are:
Legendary: Anvil, Joe’s Dagger, Holy Book, Spicy Meatball, Lightning Orb, Bloody Cleaver, Big Bonk, Overpowered Lamp, Ice Cube, Soul Harvester, Sucky Magnet, and Za Warudo.
Epic: Beefy Ring, Cursed Grabbies, Grandma’s Secret, Mirror, Turbo Skates, Credit Card Green
Rare: Idle Juice, Kevin, Echo Shard, Golden Shield, and Backpack
Common: Time Bracelet, Key, and Clover
Which items should you banish?
The items most worth banishing are Power Gloves, Slurp Gloves, Scarf, and Phantom Shroud.
Which items should you enable?
Items you should enable are Key, Cursed Doll, Echo Shard, Idle Juice, Kevin, Grandma’s Secret Tonic, Turbo Skates, Lightning Orb, Sucky Magnet, Holy Book, Anvil, Soul Harvester, Joe’s Dagger, and Bloody Cleaver.
And that does it for our Megabonk items tier list. To learn more about the current meta, be sure to check out our Megabonk best build guide, Megabonk tomes tier list, Megabonk weapons tier list, and Megabonk characters tier list!


Updated: Nov 10, 2025 11:27 am