
It’s no secret that, much like its beloved predecessor, Deltarune is full of…well, secrets. Not only do they add to the game’s charm, but they also offer unique and challenging experiences for the most ambitious players. These challenges come in the form of secret bosses, and there are plenty to be found throughout the game. Here’s how to find them all.
Table of contents
What are Secret Bosses in Deltarune?
Disclaimer: The following guide contains spoilers regarding characters and areas related to the story. Please read ahead with discretion.
Secret Bosses in Deltarune are otherwise known as “optional bosses”, meaning that encountering and fighting them is entirely optional and not required for story progression. They’re also considered the most difficult challenges in the game, so approaching them well-prepared is highly recommended. If you want to seek out a secret boss in Deltarune, be aware that unlocking them is half the challenge. Not only are they hidden inside unique areas of each chapter, but they often require completing various objectives and finding special items first.
All Secret Bosses in Deltarune (How to Beat)
There are currently four chapters in Deltarune, and each chapter contains its own secret boss with its own special requirements for unlocking said encounter.
Make sure to save your progress often while completing these objectives, in case you make an unintended mistake and need to redo a certain step. Moreover, save before the boss itself to minimize backtracking in case you’re defeated. While these are serious challenges that shouldn’t be engaged without proper preparation, defeating the Deltarune secret bosses leads to special gear rewards and, particularly, Shadow Crystals.
Jevil (Chapter 1)
Jevil is the secret boss of Chapter 1, and you’ll find him deep within the Castle, near the end of the chapter itself.
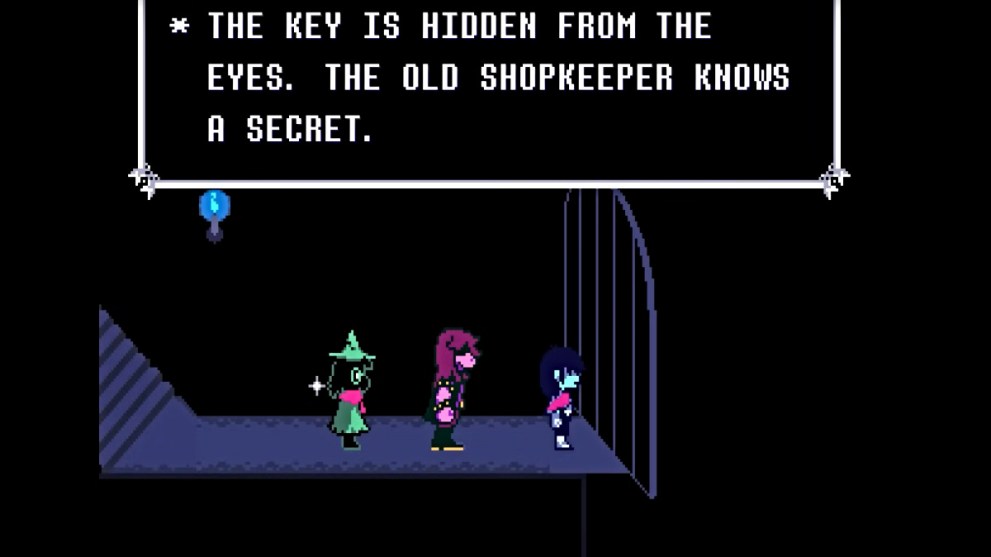
After you escape the Castle Dungeons area with Ralsei and Susie, detour past the shop and look for the elevator to take you to Floor 1. Then follow the path south, then east until you find another elevator that can take you to “Floor ?????”. Upon arriving in this hidden area of the Castle, follow the path until it brings you to a long stairwell leading down. Head down those stairs, use the Save point at the bottom, then approach the locked cell ahead.
During your conversation with the mysterious prisoner, they’ll hint that you need to find a certain key to free them (seen above). In fact, you need to find three broken parts of this key and then repair it to free them.
You can find the three key parts in the following locations:
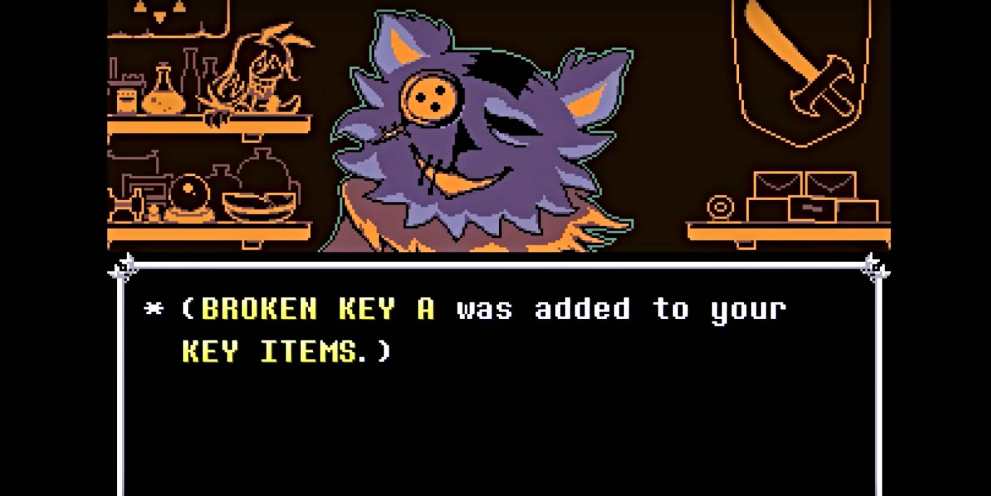
- Broken Key A – Get from Seam the Shopkeeper back in the Forest section. Select the ‘Talk’ option in his shop and then select ‘Strange Prisoner’. Seam will then give you ‘Broken Key A’ and a hint about where to find the next part – “Walk where the stars don’t shine.”
- Broken Key B – This one is also in the Forest section. From the Bake Sale area, head east into the area full of circle loops of Paper Dancer obstacles and make your way as far south as you can. Eventually, you’ll find a hidden path that briefly leads “off” the map, where the stars don’t shine, and to a hidden section of the Forest. Fight/pacify through the Rabbicks there and then you’ll find a treasure chest at the end of a narrow pathway. Inside will be Broken Key B.
- Broken Key C – Make your way back to the Bake Sale area and take the teleport door on the left side to the Field section. Follow the path there through open gates, past a Jigsawry, until you find a symbol puzzle that you need to complete to spawn a treasure chest that contains the last key part. To solve it, press the buttons in the following order:
- 1 – Diamond
- 2 – Switch (arrows symbol)
- 3 – Diamond
- 4 – Spade
- 5 – Switch (arrows symbol)
- 6 – Spade
Once done, make your way back again to the Bake Sale area of the Forest section. From there, head north to find Smith Malius. Talk to him and he’ll fix the key with glee. Now backtrack to the teleport door in the Bake Sale area and choose to return to the Castle. Make your way back to the elevator leading to “Floor ????” and then return to the strange prisoner’s cell. Use the key, and the fight will begin.
How to Beat Jevil
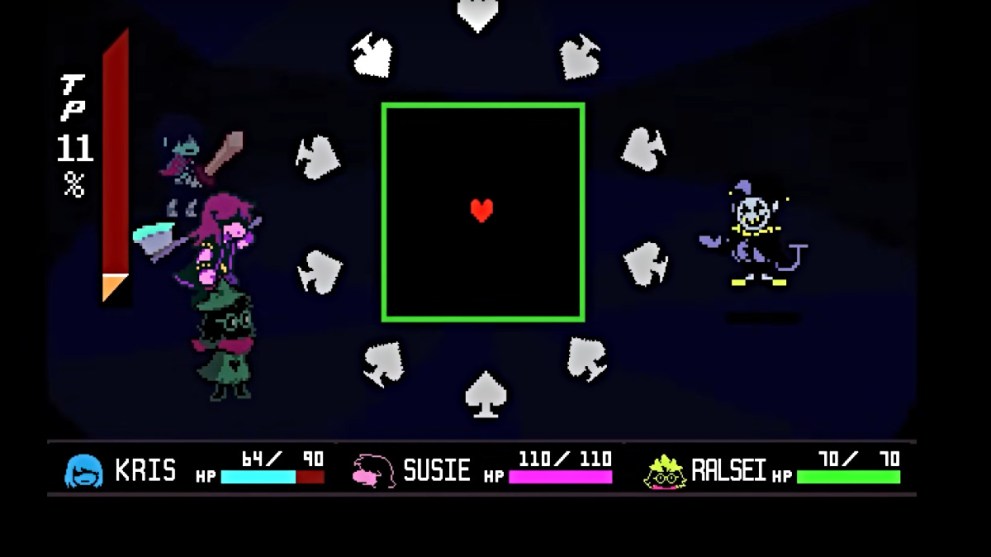
Jevil is no walk in the park, despite being the first secret boss in Chapter 1. His attacks consist mostly of barrages of spades, hearts, and clovers that are difficult to dodge without practice. Just remember that Jevil will have a unique phrase for each attack, allowing you to predict what it’ll entail.
The reward for defeating Jevil depends on how you approach the fight. If you opt to defeat him by ACTing, you’ll receive the Jevilstail Armor. Alternatively, if you take the FIGHTing route, you’ll get the Devilsknife instead.
Spamton NEO (Chapter 2)
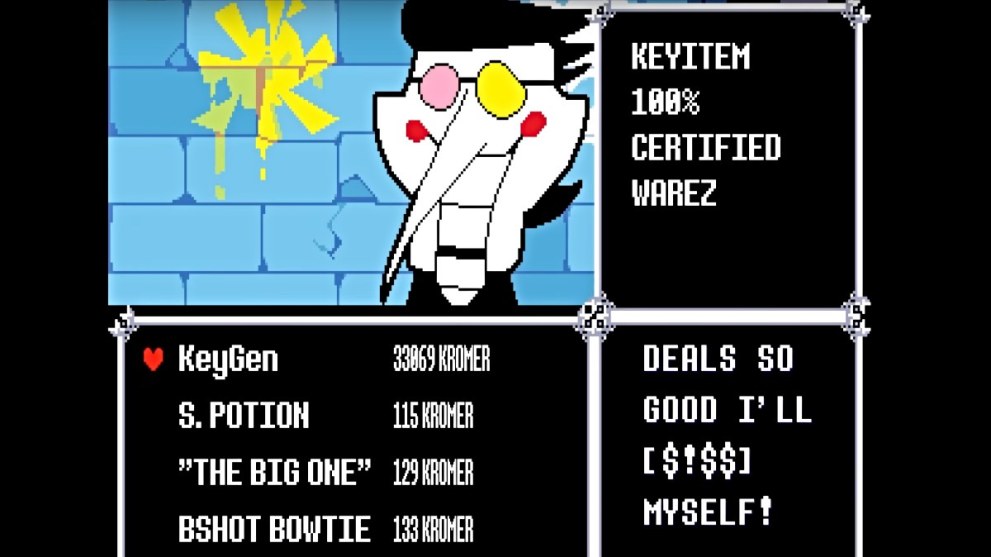
To find this secret boss, you first need to visit Spamton’s shop in the Trash Zone section, located before Cyber City. Once there, head left all the way down the road until you see a black hole in the metal fence nearby. Go through it and then through the door in front of a trash pile. This brings you to Spamton’s shop, which is unique for a very specific reason.
When Spamton shows you his wares, you’ll notice that the prices are converted to “Kromer”. What’s more, the prices themselves change every second. Your goal here is to purchase the KeyGen item at the top for the lowest price possible. Bide your time and wait for it to drop optimally below 100 Kromer (or close enough).
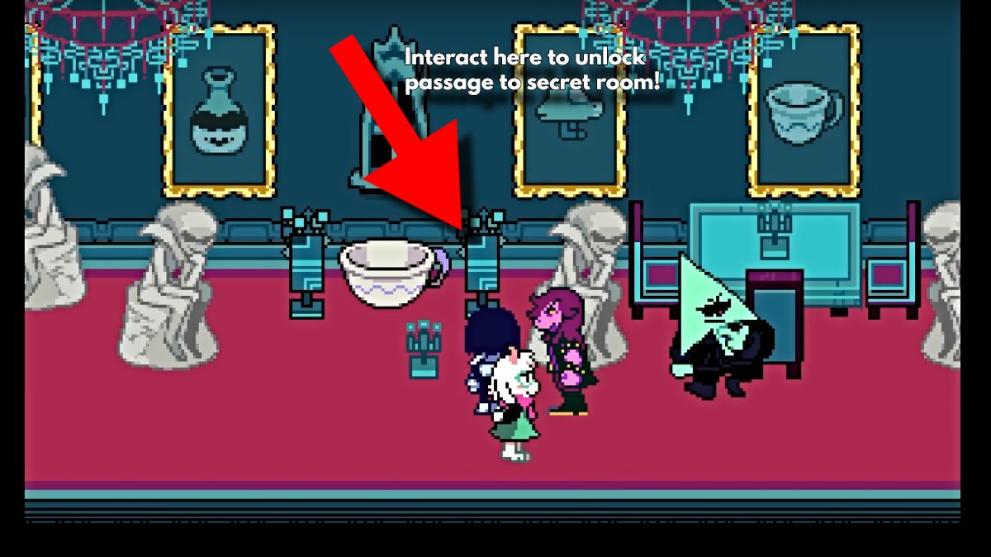
With the KeyGen in hand, you next need to find a Secret Room inside the Queen’s Mansion section. Normally, you’d need to seek out a character in Cyber City named the Hacker and do his bidding as the first step. However, ironically, you can bypass this by simply locating the secret switch immediately to unlock the path to the secret room (seen below).
Next, follow the newly opened hallway to the south to the next room, where a strange lock blocks the path to the right. Turns out that you need the KeyGen item to unlock it, and luckily, you already bought it earlier at Spamton’s shop. Use it, and the barrier will then deactivate. This brings you to a doorway marked B1F, and both Susie and Ralsie will stay put, leaving you to investigate on your own. Start by taking the path all the way down until you reach a fork with a Save Point. Use it if you want, and make note of the laser barrier to the right. Follow the left path until you come to the doorway at the very end.
Go through it and then take the strange teacup platform down to the next pathway that has a wall switch at the very end to turn off the laser barrier you passed earlier. Now make your way back via the teacup platform (it’ll throw a tricky obstacle course at you this time) and backtrack until you find the laser barrier gone and the right path open. Remember to use the Save Point.
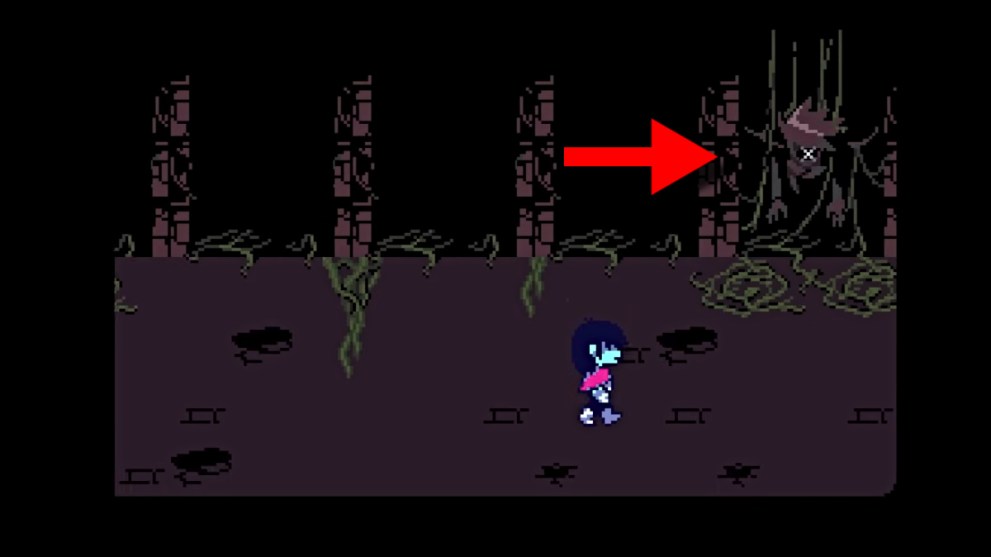
Head down the right path until it brings you to a series of railroad tracks. Go through the doorway at the top right corner (not the left), which will then bring you to a room with a broken robot in the far right corner, covered in vines. Examine the robot to receive the EmptyDisk item. Now you’ll need to backtrack all the way to Spamton’s shop one more time in the Trash Zone. Once there, Spamton will “kindly” ask you to hand over the EmptyDisk in your possession. This will allow him to transfer his code to the disk and thus will shut down his shop permanently. So if there are any other purchases you want to make from his shop, now is the time.
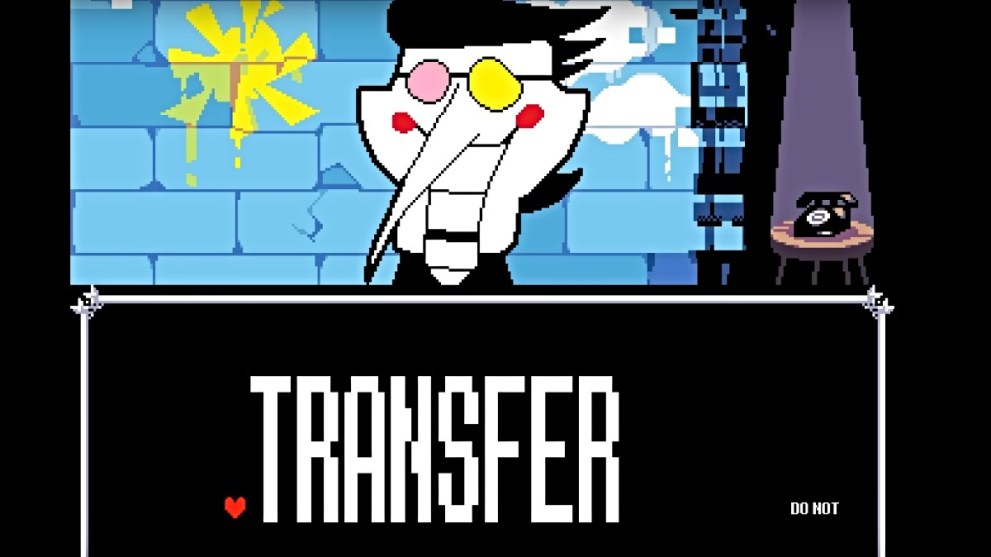
Once done, the shop will effectively deactivate, leaving you with the LoadedDisk item and no other option but to leave.
To complete the final step, return to the Queen’s Mansion, specifically to the room with the broken robot where you got the Empty Disk. This time, interact with it to place the LoadedDisk into a slot. It seems like “nothing happens” but go ahead and leave the room. Back in the railroad track area, Spamton will suddenly drop down, clad in his new body and transformed into Spamton NEO. After an extensive cutscene, Susie and Ralsie will reunite with Kris, and the battle will begin.
How to Beat Spamton NEO
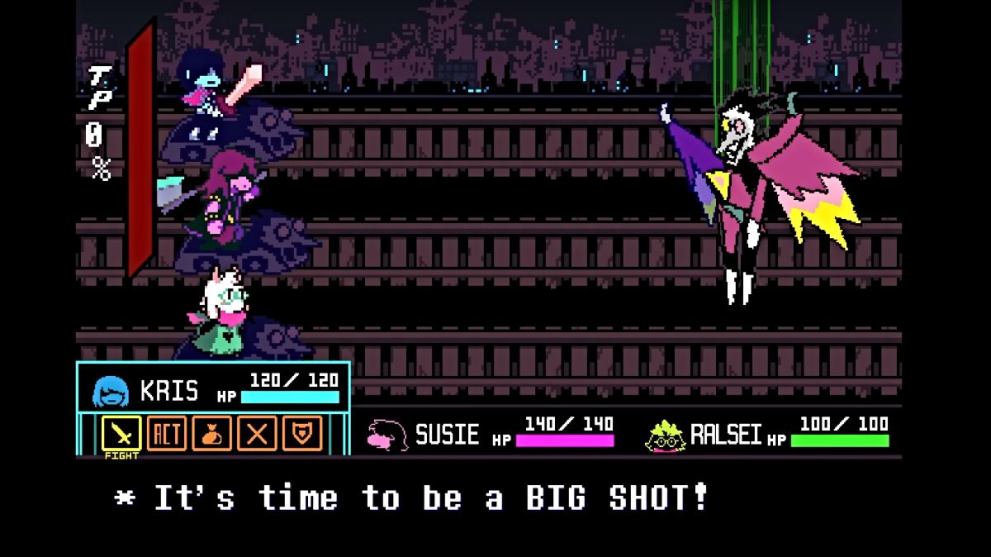
The fight against Spamton NEO takes place on the railroad tracks, with Kris and the party riding monster carts in endless pursuit of the boss. One thing to keep in mind is that he has a hefty health bar, meaning it will inevitably take a while to grind him down (at least to Mercy range). So be prepared to stick it out. When it comes to fending off Spamton NEO’s attacks, you actually have the chance to repel his barrages with your heart’s own projectiles. This is especially important when he reveals his blue-colored heart during certain phases, which you will want to focus your projectile attacks on.
If you defeat Spamton NEO by ACTing, your reward will be the Dealmaker armor. However, if you defeat him by FIGHTing, you’ll receive the Puppet Scarf instead.
Roaring Knight (Chapter 3)

The Roaring Knight is the secret boss found at the end of Chapter 3 after you defeat Tenna. There are actually no task prerequisites to unlock them. Make sure to save your game after you beat Tenna, as this will prevent you from having to fight them again with each Roaring Knight attempt.
Important Note: Before you pursue this boss, it’s highly, HIGHLY recommended to have the Shadow Mantle ready and equipped. If you don’t, this fight will be borderline impossible to survive, as many of Roaring Knight’s attacks will be able to one-shot your party.
Prioritize equipping Susie with the Shadow Mantle, as she needs to be your primary damage dealer while being able to soak damage. In fact, your most important attack during this fight is Susie’s Rude Buster. If you happen to have the Devilsknife from the Jevil secret boss in Chapter 1, this can help lower the TP cost of Rude Buster. Meanwhile, Kris and Ralsie need to focus on defense, which will still allow them to build TP. Make sure to have Kris use the “hold breath” ACT to make dodging attacks easier.
In terms of healing, you’ll also want Kris to be in charge of that as much as possible. This is because if Ralsie (or Susie) dies from Roaring Knight’s attacks, they’ll be left with a staggering -999 HP gauge. However, if Kris goes down, they’ll be left with a -99 HP gauge, which is far more recoverable.
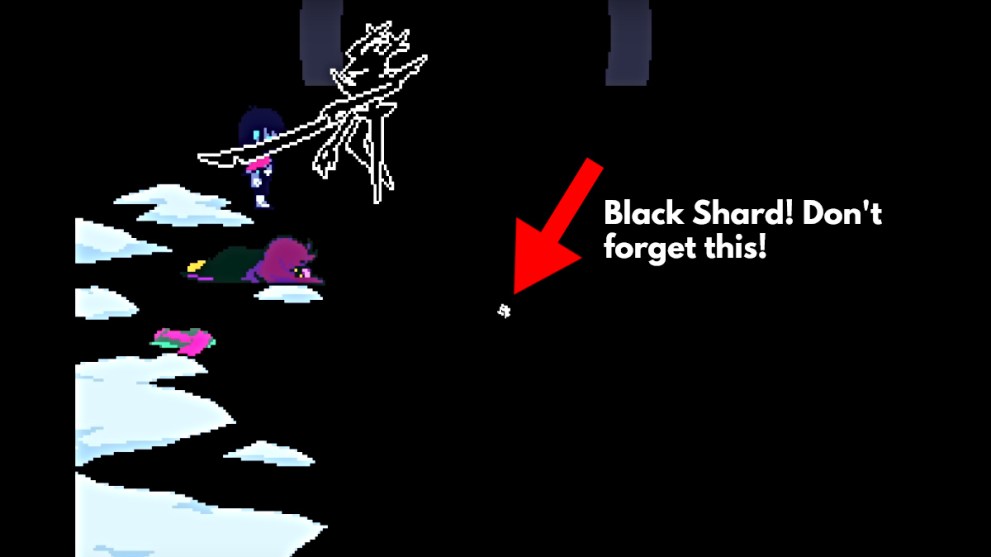
Roaring Knight does not have a Mercy bar, so the only option is to defeat them by FIGHTing. Upon defeat, your rewards will be a Black Shard (weapon for Kris) and a Shadow Crystal. Make sure to pick it up before continuing on.
Hammer of Justice (Chapter 4)
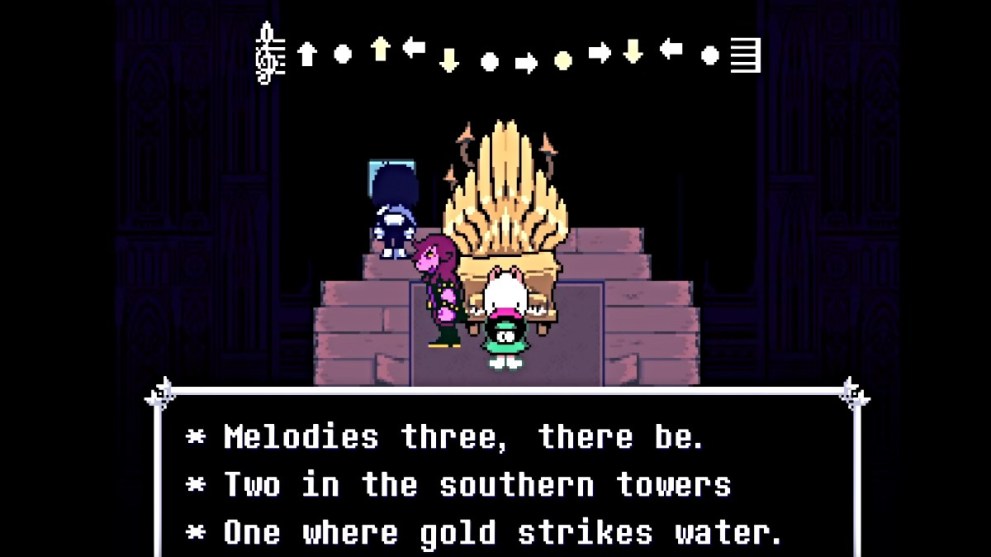
The Hammer of Justice (otherwise known as “Old Man Gerson”) is the secret boss in the Dark Sanctuary of Chapter 4. To be able to unlock the encounter, you will need to first complete the Golden Piano puzzle. This involves getting the climbing ability by defeating the Jackenstein boss (part of the story) and then finding three sheets of music scattered around the Study section.
Once you have the music sheets, you then need to climb up to the Golden Piano at the top of the Library area. Play the musical sequence using your arrow keys (keyboard or controller), and this will cause the fireplace behind Gerson to “open up”. Return to Gerson’s study, use the Save Point next to his desk, then proceed through the open fireplace. This takes the party to a secret room, where a powerful-looking axe lies on a table. Susie goes to investigate and immediately tries to claim the axe for herself.
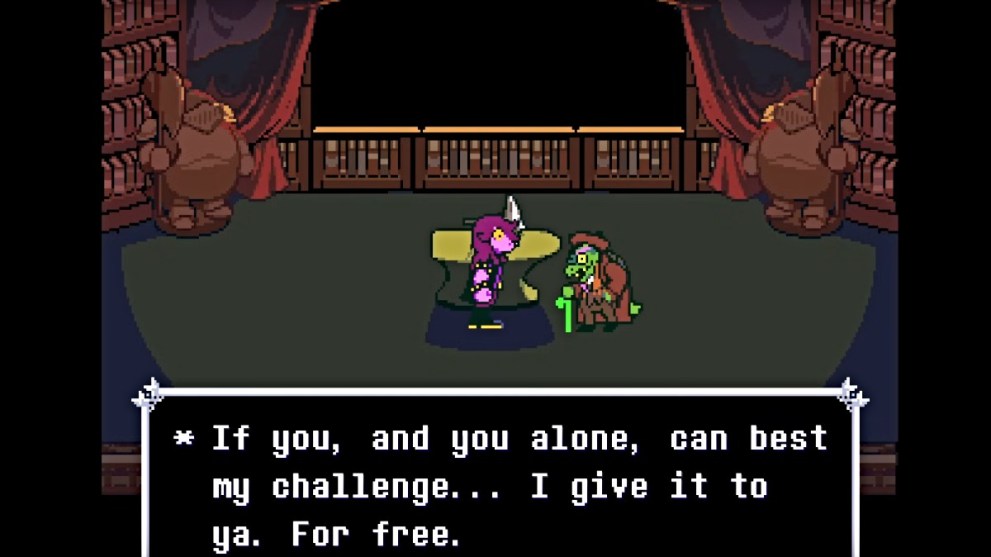
However, Gerson stops her in her tracks, stating the axe is not free to take but discounted at a mere 999,999,999g. However, he offers the chance to best him in a challenge, at which point he’ll give the axe for free.
How to Beat Hammer of Justice
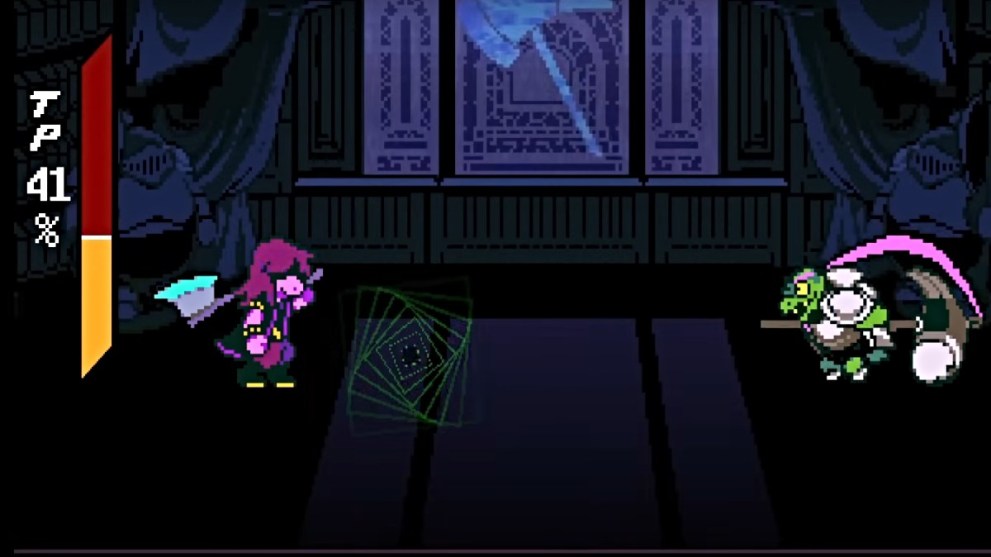
The first unique thing about this fight is that it’s a 1v1, with you as Susie versus Hammer of Justice (Gerson). You also cannot use items during this fight, and Susie’s OKHeal ability isn’t reliable, so dodging as much damage as possible is paramount.
To build TP, have Susie use her basic attack or, preferably, her Rude Buster. During Gerson’s projectile attacks, you need to use Susie’s axe to deflect them away from the heart. At times, when Susie hurls Rude Buster, Gerson will parry and deflect it back, and you need to do the same. This will continue until Gerson eventually misses and takes damage. The parry mechanic will take practice to get used to, so be prepared.
Upon defeating the Hammer of Justice, you’ll receive the JusticeAxe (weapon for Susie) and a Shadow Crystal as rewards.
That concludes how to find all Secret Bosses in Deltarune. Make sure to check out all of the latest gaming guides and news here on Twinfinite, such as Whiteout Survival Codes (June 2025).


Updated: Jun 15, 2025 08:19 am