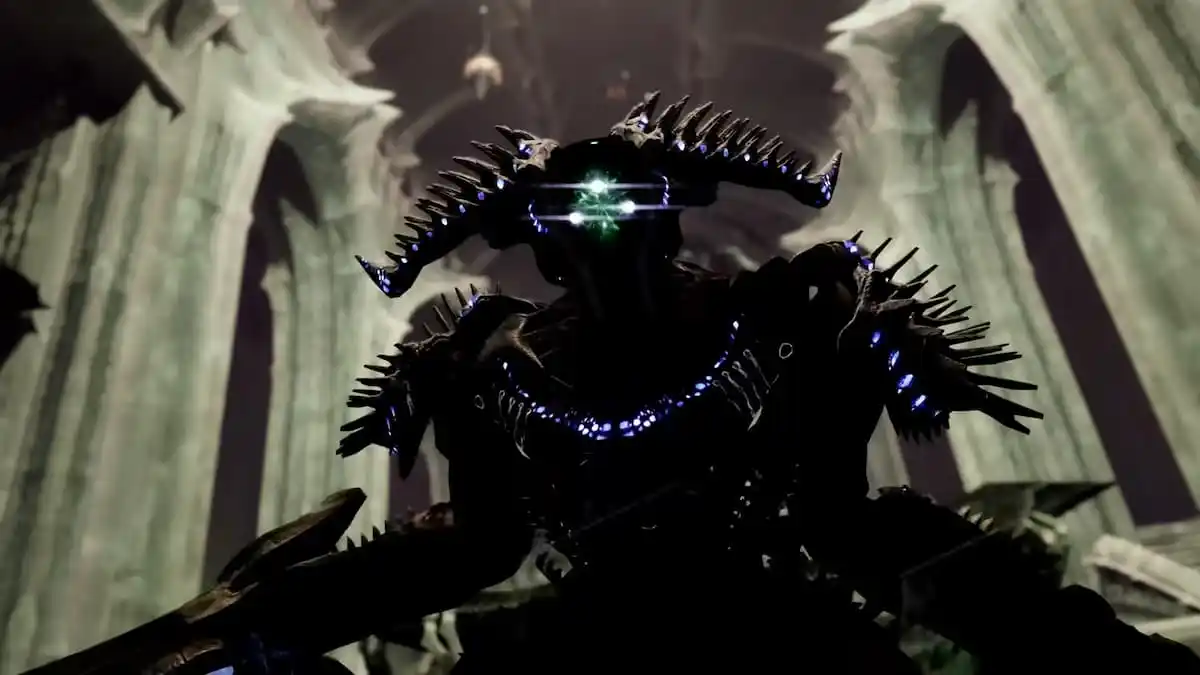
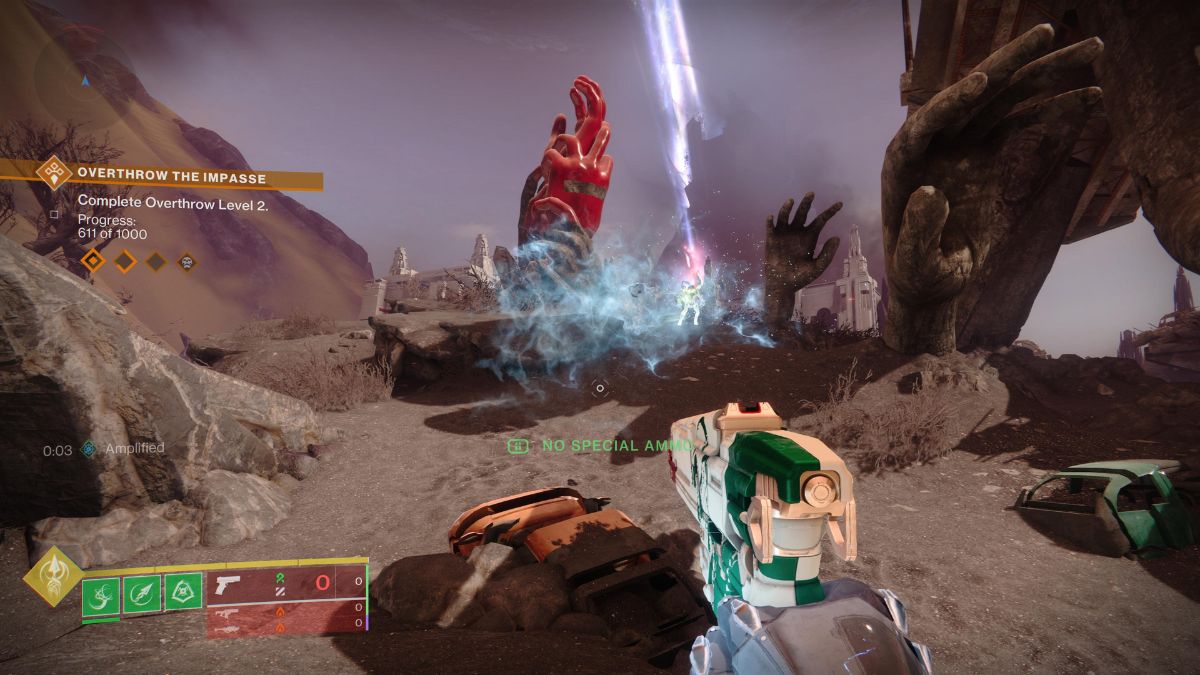
Ecthar, the Shield of Savathun, is the first boss fight in the Ghosts of the Deep Dungeon in Destiny 2. It’s not a hugely complicated fight when you get used to it, but it is risky, and the average Fireteam will have a pretty good risk of getting wiped if they are not careful. Thankfully, there is no enrage mechanic, and while Ecthar may have a huge health bar, this really just boils down to being patient and keeping calm.
Ghosts of the Deep Second Encounter Guide – Ecthar, Shield of Savathun
The arena you will be fighting in is split into two main layers, above and below water. It is a good idea to familiarize yourself with both of them a little bit before you start. For the sake of this guide, we will be calling the raised area with the stairs and the statues (you’ll recognize them from the first encounter) the front of the room. The area with the coffin-like stones and the place for the Banner will be the back of the room.
Much like the first encounter, a central mechanic here will be getting a buff and then interacting with the statues. The underwater area is more complicated and will take some time to get used to, so don’t feel bad about getting lost down there a little bit. Whoever is underwater will need to find specific runes to interact with. The rune positions never change, so after a while, you’ll learn the layout.
Let’s run through things step by step.
To start the encounter, shoot the kneeling acolytes at the large burning flame. Later, this is where Ecthar will spawn, so remember that.

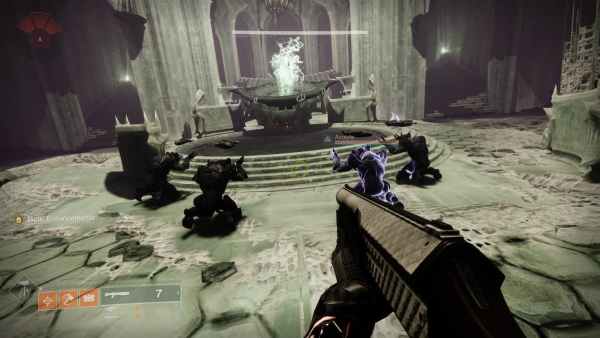
Three Blistered Knights will spawn toward the front of the room, on the left, right, and central raised areas. Take them all out.
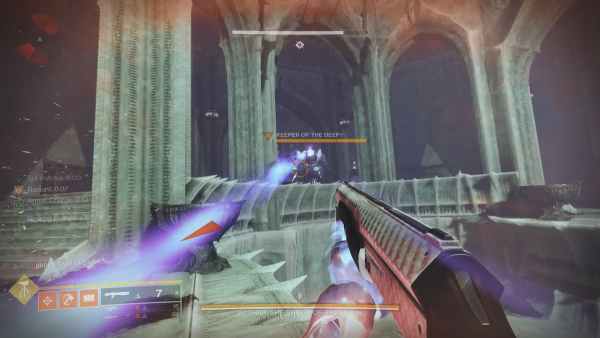
When they are dead, an Ogre called the Keeper of the Deep will spawn. Kill him to generate a Deepsight node back where the Acolytes were kneeling.
Interact with the node and then check the blank hive runs to your left and right. Symbols will spawn on them, three in total, that you will need to find under the water.
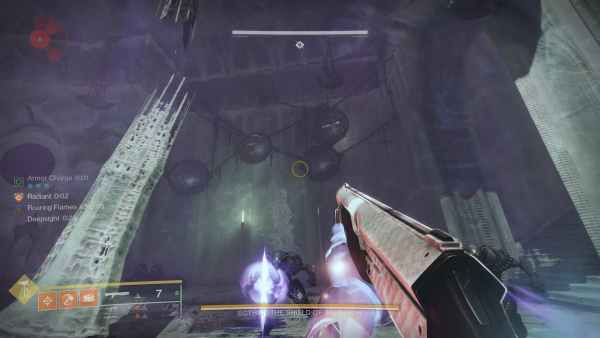
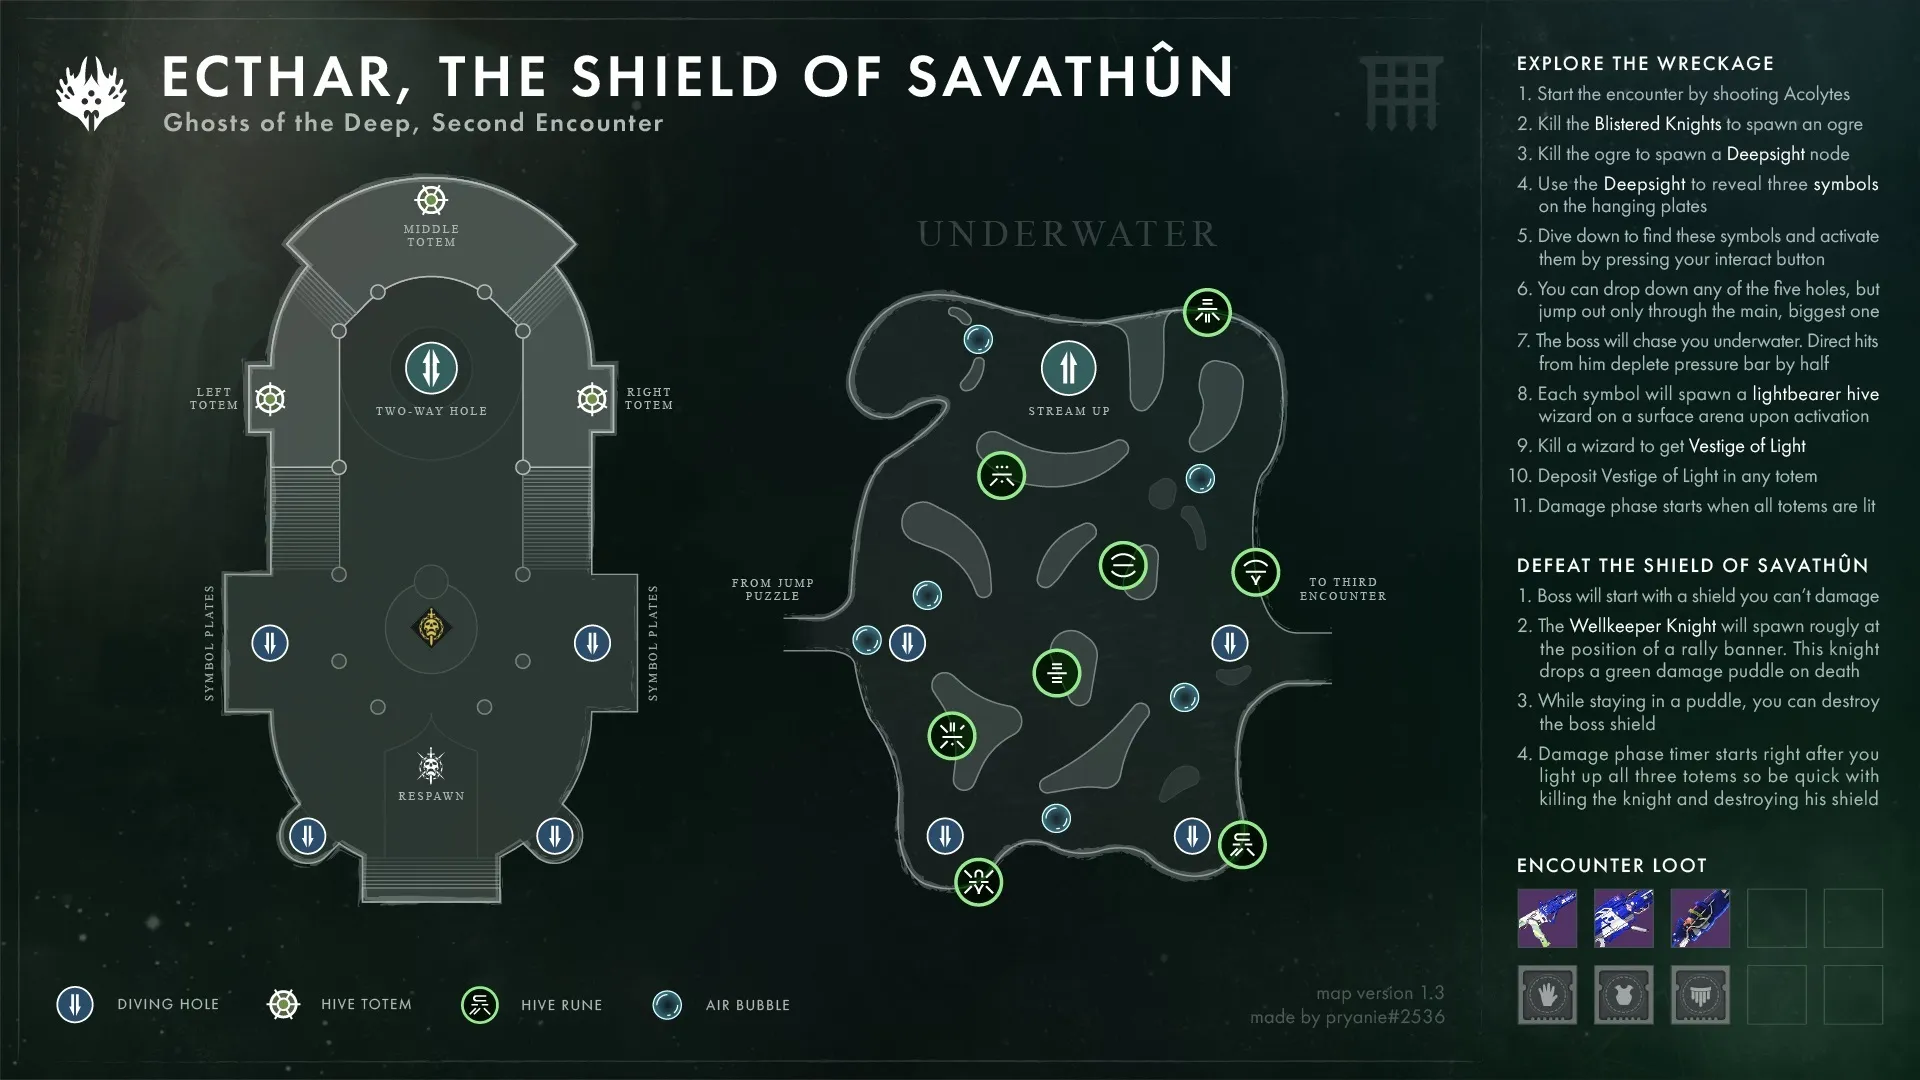
Drop down any of the holes to get into the water (keep in mind you can only come back up the large hole with the bubbles flowing upward). Take your time, keeping as much distance as you can between you and Ecthar, who will be following you. You will find a map of the area is incredibly beneficial here. We have one below, designed by a fantastic member of the Destiny 2 community called pryanie.
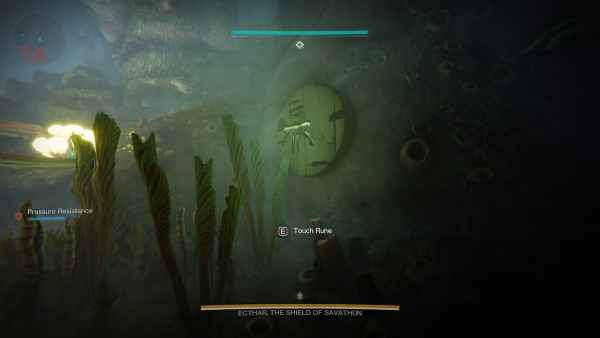
Find all three runes, interacting with them as you go. You can do this in any order. There are air bubbles under the water, and you can leave and go back down at any point should you need to.
As you activate the Hive runs, a Lightbearer Hive Wizard will spawn. The people who stayed out of the water can kill them, making sure to smash their Ghost. Doing so will give them the Vestige of Light buff for a short time.
They can then go to one of the three statues at the right, left, or far front of the room and imbue it with the buff. When all three statues have been imbued, you need to make your way to the back of the room, and the underwater person should already have come up after finding the third rune. It doesn’t matter what order you imbue the statues in, but it does make sense to do one closer to the back of the room last to cut down on travel time.
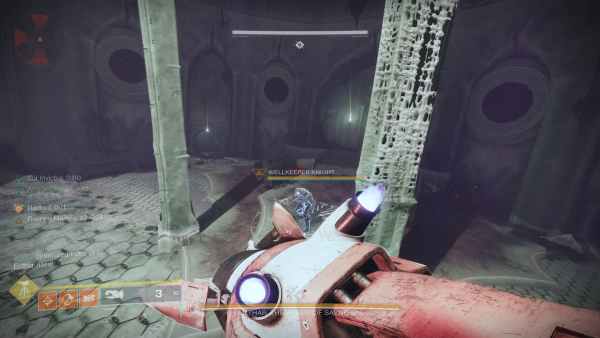
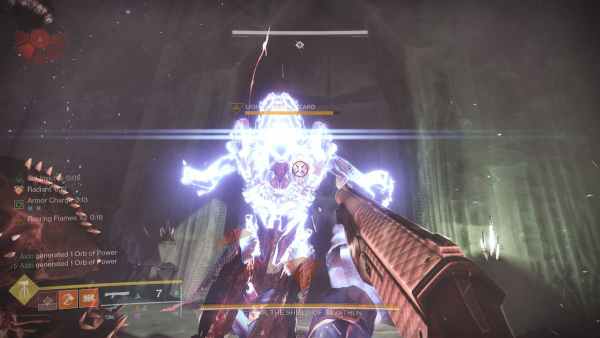
Ecthar will spawn where the Acolytes were, so go all the way to the back of the room. Where the Raid Banner can be placed, a Wellkeeper Knight will spawn. Kill him, and he will drop a pool of green goo on the ground.
Stand in the goo to be able to damage Ecthar’s shield. Once the shield is gone (Arbalest is a good bet, and Supers do plenty of damage to it), pour the damage onto Ecthar. Rinse and repeat until Ecthar is dead. When you “kill” him, make sure you smash his Ghost to properly end the fight.
And that is it. I managed to pull this off solo using the Titan Solar Synthoceps build that is incredibly strong in tougher content. The trick is patience. If someone in your fire team goes down, take your time picking them up. Assign jobs to all three people in the group, and you will be fine.
Below, you will find the map designed and made available by pyranie through the r/RaidSecret subreddit. It is absolutely beautiful, and I would have zero chance of designing something that looks this good for you. Make sure you visit the above link for a full HD version of it to splash on your screen while down in the deep. You can also just click on the image below and it will open in a new screen for you, if you like.
If you are struggling with damage on Ecthar
This is actually quite difficult to give advice on, as it is largely dependent on what weapons you have available. Grand Overture blast, Lament, Supers, Xenophage, and the trusty Bonk Hammer build have all been great for damage in assorted runs that I have done.
Frankly, it boils down to patience. If your Power is low or your damage is lacking, then it just becomes a waiting game that is focused more on not wiping and going through as many damage phases as it takes. It might be better to dive into easier content and just get more Power and equipment than grinding your face into the Dungeon for no real gains.
If you are running low on Heavy Ammo, make sure that you and your team are all running Heavy Ammo Finder and Heavy Ammo Scout on your Helmets to ensure solid drops for everyone.
Once you are done with the fight, you can follow the video below to get to the next encounter. It also covers the secret chest location for extra loot.


Updated: Jul 6, 2023 08:13 pm