Hey there, fellow monster handler. If you are like me, you have probably spent countless late nights listening to the beautiful, chaotic symphonies of your islands while waiting for that one elusive singer to finally hatch. I have been managing my digital islands for years, and I know exactly how frustrating it is when your breeding setups fail, your organic coin production stalls, and you feel like you are just throwing treats into a void.
In my time playing, I have realized that breeding is not just a game of matching elements and hoping for the best. It is a highly optimized system of mathematical models, hidden genetic modifiers, and spatial layouts. Whether you are trying to breed your very first Ghazt or preparing to tackle the brand-new content in patch 5.4.2, I have got you covered. Let me pull back the curtain and show you the exact strategies, formulas, and late-game secrets that I use to maximize my odds and scale my resource generation to the absolute limit.
The Basics of Monster Genetics and Parent Dynamics
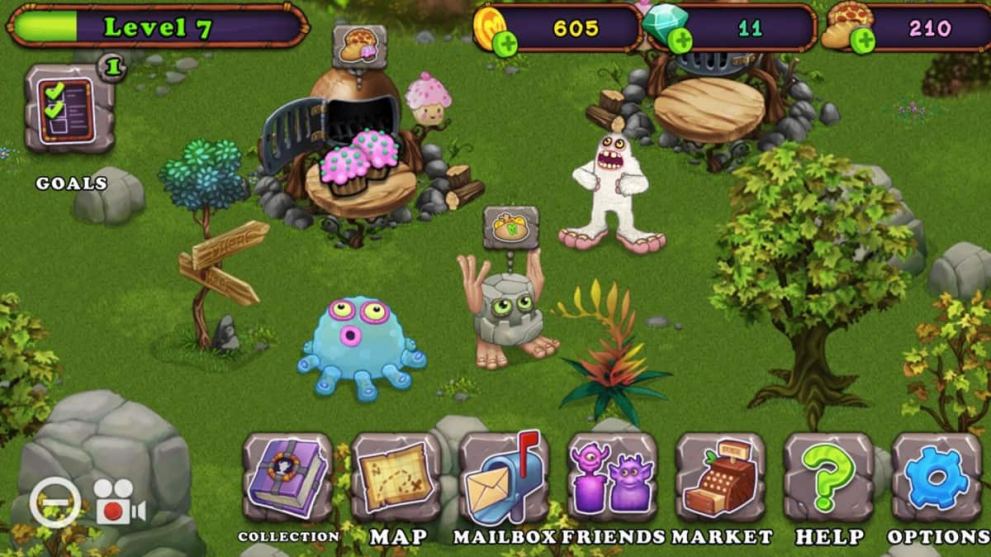
When I first unlocked my Breeding Structure at level 7, I thought the system was completely random. The default heart in the center is beautifully designed to resemble a real-world Bleeding Heart flower, and when you upgrade it, it actually transforms into a yellow variety.
To start your breeding journey, you need to feed at least two of your single-element monsters to level four using treats baked in your Bakery. Single-element monsters cannot be bred from scratch if you do not have them; you must purchase them directly from the Market or obtain them through specific goal rewards. Once you have your parents at level four, you can hit that Breed button in the structure menu to combine their elements into a brand-new hybrid.
For a long time, there was a major debate in the community about whether parent levels actually affected your success rates. My own rigorous testing, backed by the developer notes, has completely settled the score: leveling both parents above level four steadily shifts the game engine’s probability curves away from common duplicate outcomes and toward those incredibly rare breeds.
To make this process as seamless as possible, I always activate the Highest Level toggle in my breeding menu. This handy UI feature immediately sorts my available monsters so I can ensure I am always pairing my most highly-fed, optimal parents to maximize my breeding odds.
Here is a crucial strategy to keep your breeding loops moving: if an attempt fails and spits out a common duplicate, do not let it clog up your Nursery. Always use the Zap option to send those unwanted eggs straight to Wublin Island or Amber Island. It keeps your nursery completely open for consecutive attempts without wasting a single diamond.
Deciphering Ethereal Odds with Real Geometric Math
If you are aiming for the coveted single-element Ethereals on the Natural Islands, you are looking at a baseline success rate of approximately 1% under standard, unboosted server conditions. This class includes amazing monsters like Ghazt on Plant Island, Grumpyre on Cold Island, and Jeeode on Water Island.
Because a 1% chance is so low, you cannot expect a success within your first few tries. Instead, I calculate my long-term breeding plans using a cumulative geometric probability model: P(X >= 1) = 1 – (1 – p)^n, where p represents your single-attempt success probability of 0.01 and n is the total number of independent breeding attempts you make. Plugging in the numbers shows exactly how your cumulative odds scale:
- Completing 70 independent attempts gives you a 50.3% cumulative chance of successfully breeding at least one Ethereal.
- Scaling your efforts up to 298 attempts raises your cumulative probability of success to 95%.
- Pushing all the way to 690 independent attempts mathematically guarantees success at a 99.9% near-certainty.
During special Ethereal Breeding Bonanzas, the game temporarily multiplies the base success rate. These events typically feature boosts of 500%, 750%, or even 1,000%, raising your single-attempt probability to 6%, 8.5%, or 11% respectively. Under a 1,000% bonanza, you only need six attempts to reach a 50% cumulative success chance, and just 60 attempts to reach a 99.9% near-guarantee.
To make your standard unboosted breeding loops as efficient as possible, you must focus on failure path optimization. When breeding a Ghazt on Plant Island, I always pair a quad-element Entbrat with a triple-element T-Rox. If the attempt fails, a duplicate T-Rox egg only penalizes you with an 8-hour wait time (which shrinks to six hours in an upgraded structure). If you make the mistake of using Bowgart, Clamble, or Pummel as your triple-element parent, a failure hits you with a massive 12-hour penalty (or nine hours enhanced). By sticking to the T-Rox pathway, you achieve a 33.3% reduction in failure downtime, giving you significantly more attempts over any given weekend event.
The BunsenH Wishing Torch Regression Formula
Wishing Torches are designed to shift the probability curve away from common results and toward highly-prized special breeds. You can place up to 10 of these structures on any island that supports breeding. For years, the exact percentage boost provided by each lit torch was a closely guarded secret.
To crack this code, fellow player-researcher BunsenH and his team compiled over 10,000 highly controlled breeding attempts of Entbrat and T-Rox on the Windows version of the game. By running rigorous statistical analyses on the success rates, he established a linear regression model that perfectly maps torch performance: S(x) = B1(x) + B0, where S represents your successful breeding probability as a percentage and x represents the number of active, lit Wishing Torches on your island (ranging from 0 to 10). The variables derived from this massive data set are:
- B1 = 1.033% +/- 0.041% (the individual torch modifier)
- B0 = 1.01% +/- 0.24% (the baseline unboosted success rate)
This elegant model proves that Wishing Torches provide a purely additive bonus of approximately 1.033% per lit torch, completely refuting the old theories about compounding geometric bonuses. Here is how this linear progression increases your success rate as you light more torches:
| Torches Lit | Success Rate |
|---|---|
| 0 | ~1.03% |
| 1 | ~1.74% |
| 4 | ~5.62% |
| 7 | ~8.09% |
| 10 | ~11.27% |
Ten lit torches gives you an eleven-fold increase over your baseline chance. To keep all 10 torches lit without draining your diamonds, you must master social coordination. I always make sure to exit my game while actively viewing the specific island I want my friends to light. When visiting players open their map to light a torch, the game server default-lands them directly onto your active island, saving them from having to scroll manually. I also always tap on a torch to highlight it, which causes bright light beams to radiate from the flame icon on my friends lists, instantly signaling my priorities to visiting players.
The Ultimate Time Reduction Equation
To speed up your breeding and incubation times, you can combine breeding structures, cosmetic island skins, and temporary server boosts. The game engine processes these modifiers using a multiplicative reduction formula:
T(actual) = T(base) x (1 – R(structure)) x (1 – R(skin)) x (1 – R(boost)), where:
- R(structure) is your breeding structure tier: 0.25 if you have upgraded to an Enhanced structure using 25 diamonds.
- R(skin) is your active cosmetic Island Skin, which provides a premium 0.10 time-reduction modifier.
- R(boost) represents temporary server-side speed reductions, such as a 25% breeding speed boost rewarded from Titansouls.
When you activate an active Island Skin alongside an Enhanced Breeding Structure, the game consolidates these two modifiers into a flat 35% time reduction, acting as a 0.65 multiplier. If you also have a temporary 25% Titansoul speed boost active at the same time, the math becomes incredibly satisfying: T(actual) = T(base) x 0.65 x 0.75 = T(base) x 0.4875, giving you a total temporal reduction of 51.25%. Here is how that equation shrinks actual in-game wait times:
| Monster | Standard Time | Reduced Time |
|---|---|---|
| Common Maw | 30 minutes | 14 minutes 37 seconds |
| Common Bowgart | 12 hours | 5 hours 51 minutes |
| Common Ghazt | 36 hours | 17 hours 33 minutes |
| Epic Tuskski | 47 hours | 22 hours 54 minutes |
Island Economics and the Entbrat versus Ghazt Return on Investment
A question I get asked all the time is whether players should populate their Plant Island grid with Entbrats or Ghazts to maximize coin generation. To answer this, I ran a complete economic ROI analysis comparing both species at level 15 with 100% happiness. Because space is your most valuable resource, we have to evaluate their performance on a per-bed basis:
| Monster | Beds Occupied | Coins per Minute | Coins per Bed | Max Coin Capacity | Time to Max |
|---|---|---|---|---|---|
| Entbrat | 4 | 288 | 72 | 134,784 | 7 hours 48 minutes |
| Ghazt | 5 | 336 | 67.2 | 288,000 | 14 hours 17 minutes |
The economic verdict depends entirely on your real-world login schedule. If you are a highly active player who checks the game multiple times a day (every five to seven hours), Entbrats are actually far superior for your wallet because they produce coins at a quicker rate per bed. If you are a casual player who only logs in once or twice a day, Ghazts are the hands-down winner — they hold significantly more coins before hitting their capacity cap and shutting down production.
Wublin Grid Design and Tympa Diamond Farming Secrets
Grid planning is a major part of my late-game strategy, and Wublin Island is the ultimate sandbox for diamond farming. The island features exactly 497 usable tiles. The prevailing community meta-strategy centers around the Tympa-Dwumrohl-113 layout, which packs a total of 113 Wublins onto the island.
To understand why this layout is so effective, here is the return-on-investment per grid square based on collections twice a day:
| Monster | Grid Size | Diamonds per Week | Diamonds per Grid Square per Week |
|---|---|---|---|
| Tympa | 2×2 (4 squares) | 2.1 | 0.53 |
| Dwumrohl | 3×3 (9 squares) | 3.7 | 0.41 |
| Wubbox | 4×4 (16 squares) | 7.9 | 0.49 |
Tympas are mathematically the most space-efficient diamond generators on Wublin Island. To maximize your passive diamond generation, densely pack your island grid with 2×2 Tympas, only placing 3×3 Dwumrohls in awkward corner configurations where a 2×2 cannot be rearranged. To help place your monsters perfectly, go to the bottom-left corner of your screen when moving objects and select the Show Grid option.
To save precious grid space on your other islands, I highly recommend picking up a Unity Tree for 1,000,000 coins once you reach level 16. Tapping on the Unity Tree produces a delightful developer Easter egg: it plays one long note followed by three short notes, which translates to the letter B in Morse code to celebrate Big Blue Bubble. The Unity Tree completely globalizes monster happiness, meaning you can pack all your duplicate decorations inside your Storage Structure and house extra monsters inside your Hotel. They will continue to make your active monsters 100% happy from anywhere on the island, freeing up massive amounts of physical grid space for more high-yield resource generators.
Advanced Ethereal Workshop Synthesis and Daily Resonance Rotation
Once you reach level 19, you unlock Ethereal Workshop, which sits inside the massive head of Zarroë, the Ethereal Island Colossal. Instead of standard breeding, obtaining unstable Ethereals here requires you to attune Meeb critters in your Attunement Structure and combine them in your Synthesizer.
The key to mastering attunement is timing your shard spending to the daily Mirror Island rotation, which rotates clockwise every single day at 3:00 PM UTC. The rotation follows a fixed five-day sequence:
- Plant / Plasma resonance
- Cold / Shadow resonance
- Air / Mech resonance
- Water / Crystal resonance
- Earth / Poison resonance
When an Ethereal element resonates with the active Mirror Island on the wheel, attuning a Meeb to that element costs only 500 shards and takes just five hours. The two adjacent elements represent partial sync, costing 1,000 shards and taking 10 hours. The remaining two elements are completely out of sync, costing a painful 5,000 shards and taking 20 hours. Always wait for aligned resonance days to mass-attune your Meebs to save thousands of precious shards.
Once your attuned Meebs are loaded into the Synthesizer, your success rate is governed by an instability gauge. The game assigns stability values to the Ethereal elements where Plasma is 1, Shadow is 2, Mech is 3, Crystal is 4, and Poison is 5. Yooreek (Plasma, Shadow, Mech) has a low instability index of six, making its synthesis incredibly stable and easy. Auglur (Plasma, Mech, Poison) features an instability rating of 15, which is the absolute limit of your basic Synthesizer.
To synthesize higher-tier quads and the ultimate quint-element BeMeebEth, you must spend shards to upgrade your Synthesizer through multiple tiers, culminating in the Ultra-Mega-Super-Hyper-Refined Synthesizer. Keep in mind that synthesizing quads and quints works differently: you must select a pre-existing monster placed on your island to act as a physical base to build upon. Successfully synthesizing a quad consumes your triple-element base, and successfully synthesizing BeMeebEth consumes your quad-element base while triggering a mandatory two-day Synthesizer cooldown. If your attempt fails, you do not lose your Meebs, but their elements are scrambled into randomized attunements, requiring you to spend shards to re-attune them.
Paironormal Carnival and Real-World Day-Night Cycles
Let’s dive into the absolute latest late-game content: Paironormal Carnival, which unlocks once you hit level 22. In patch 5.4.2 released on June 10, 2026, the developers introduced the amazing Raqsoun (the Poise Paironormal) alongside Epic Bona-Petite on Wublin Island. This comes right on the heels of Crystal Islet, which dropped on May 27, 2026, adding the Water Primordial Droah and Rare Flasque.
Paironormals are a fascinating class that exist in two completely different forms: Major and Minor. Their availability is strictly tied to real-world day and night cycles in your local timezone:
- Major form: Available to buy or breed on the main Magical Islands during the day, from 6:00 AM to 8:00 PM local time.
- Minor form: Exclusive to the Mirror Magical Islands and can only be bred during the night, from 6:00 PM to 8:00 AM local time.
Once you feed your Major or Minor monsters to level 18, you can transpose them to the Beyond, sending them directly to Paironormal Carnival. Major forms hatch in Major Mode, a bright, nostalgic backstage rose-tinted circus environment. Minor forms hatch in Minor Mode, a dark, foggy, murky green environment where the sky itself appears shattered. You can switch between the two modes instantly by hitting the Modulate button at the bottom of your screen.
If you transpose both the Major and Minor forms of a species separately, you can select the Paironormal Projection and pair them for free instantly. This combines both forms into a single pair that occupies a single space, doubling their happiness and making them produce starpower three times as fast in Major Mode. If you only have one form, you must upgrade your Centri-Fugue structure using 1,000 Starpower. You can then spend starpower to fugue your monster (costing 100 starpower for a single-element, and 250 for a double-element like Raqsoun). Fuguing has a 50% success rate. A success replaces the opposite projection with the physical monster. A failure takes 22 hours and awards you a consolation prize of monster treats.
Keep in mind that breeding is completely locked in Minor Mode; you can only use your Breeding Structure in Major Mode. Hybrids are bred using combinations of the four core elements: Control, Hoax, Ruin, and Depths. Here are the key combinations to aim for:
- Raqsoun (Control, Ruin): Best bred by pairing Hairionette and Arcorina, taking one day and 21 hours standard (or one day, nine hours, and 45 minutes enhanced).
- Scallyrags (Control, Hoax): Best bred by pairing Hairionette and Owlesque.
- Jerm (Control, Hoax, Ruin): Best bred by pairing Dakktyl and Hairionette, taking two days and eight hours standard. Jerm is the first monster after Wubbox to occupy six castle beds.
Multiverse Lore and Genetic Morphologies
The game handlers weave deep lore directly into these breeding and genetic morphologies. For instance, Buzzinga on Fire Haven and Mythical Island is not just a musician; it acts as a pollinator for the flowers of the Stablo Mjehurica World Tree, utilizing its family’s supersonic interdimensional abilities to open pathways across the multiverse.
In my own breeding runs, I discovered that one in every 55 Yawstriches is born with a specific genetic mutation that converts its avian wings into insectoid ones, resulting in the gorgeous Rare Yawstrich. Meanwhile, prolonged exposure to the thin atmosphere of the Paironormal Carnival causes monsters to contract Space Circus Fever, a localized condition that alters their acoustic properties.
By mastering these probability calculations, time reduction equations, and spatial layouts, you will turn your breeding setups into highly optimized resource generators. Keep your torches lit, coordinate with your friends, and happy monstering.


Updated: Jun 19, 2026 12:55 am