The camera feature has become a staple in modern games, and Final Fantasy 16 also provides a similar mechanic. Although Photo Mode is quite simplistic, it should be enough for many players to take numerous cool and amazing screenshots of their playthrough. If you want to learn more about this feature, we have created this guide that will explain everything you need to know about Photo Mode.
How to Take a Photo in Final Fantasy 16
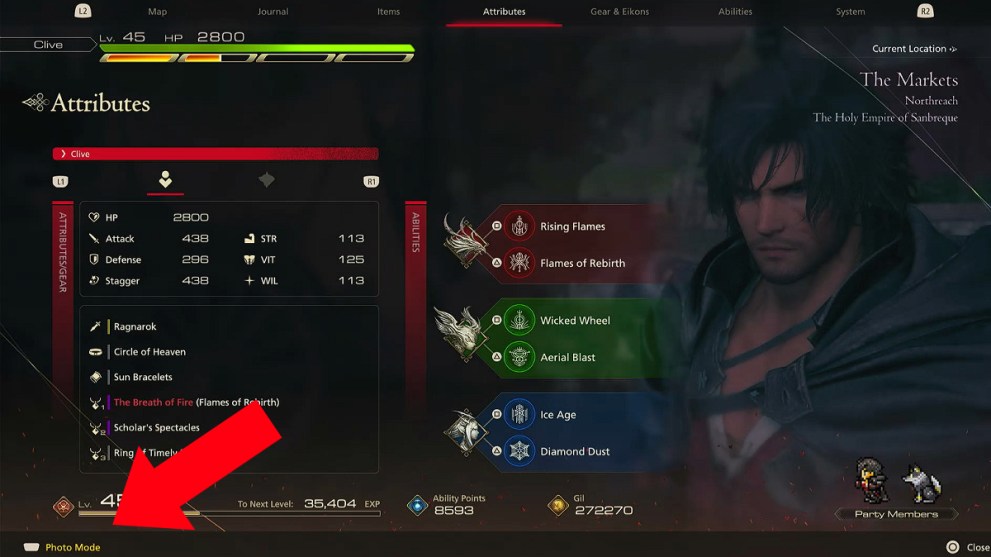
You can access Photo Mode through the pause menu, which you can open by pressing the Options button on the right side of the Touchpad. In the Attributes section, you’ll see the Photo Mode option available on the screen’s bottom left corner. Afterward, you just need to press the Touchpad to enter the camera feature.
You will be given several options to adjust the image you will take. To control the camera position, you can use the triggers and thumbsticks, but keep in mind that the camera can’t stray far away from Clive.
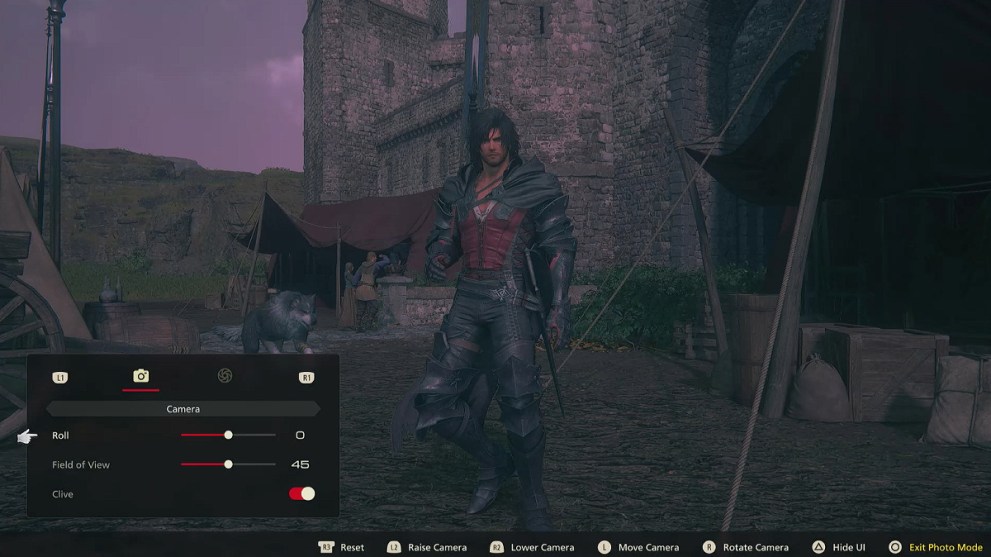
If you’re not satisfied, you can play with the Camera and Depth of Field settings to edit your shot further. Here are the available settings:
- Roll: Rotate the camera angle.
- Field of View: Increase or reduce the camera distance from Clive.
- Clive: Add or remove Clive from the photo.
- Depth of Field: Add or remove Depth of Field.
- Focal Distance: Increase or reduce Focal Distance.
- Blur: Adjust blur strength.
Once you’re happy with everything, you can temporarily hide the UI by pressing the Triangle button. Then, you can take a screenshot through the PS5 Create button on the left side of the Touchpad. Finally, you access your photos in the Media Gallery from the PlayStation home screen.
Now that you’ve got the hang of Photo Mode in Final Fantasy 16, you can use this chance to take cool pictures of various environments and creatures you encounter. In fact, you can even photograph your battles against mighty foes, such as the Eikons, that you must defeat on your journey.











Updated: Jun 26, 2023 07:16 am