With Sucker Punch’s new IP following Jin Sakai, a lone samurai who’s trying to stop the oncoming Mongol invasion, it takes place in 13th century Japan. Therefore, playing with Japanese voices certainly makes for a more authentic experience. If that’s something you want to do, even just for a while, here’s everything you need to know about how to change to Japanese voice track and dialogue in Ghost of Tsushima.
By default, Ghost of Tsushima has English voices, but you can change them to Japanese, adding subtitles too.
How to Change to Japanese Voice Track & Dialogue in Ghost of Tsushima
You’ll get the chance to choose what you want the setting to be right from the start of the game, before the first scene even begins. If you know you want to play the game with the Japanese voice track, you can set that, or leave it as default to see if you enjoy it.
However, this isn’t the only time you’re able to change it. In fact, you can switch back and forth between the settings whenever you want.

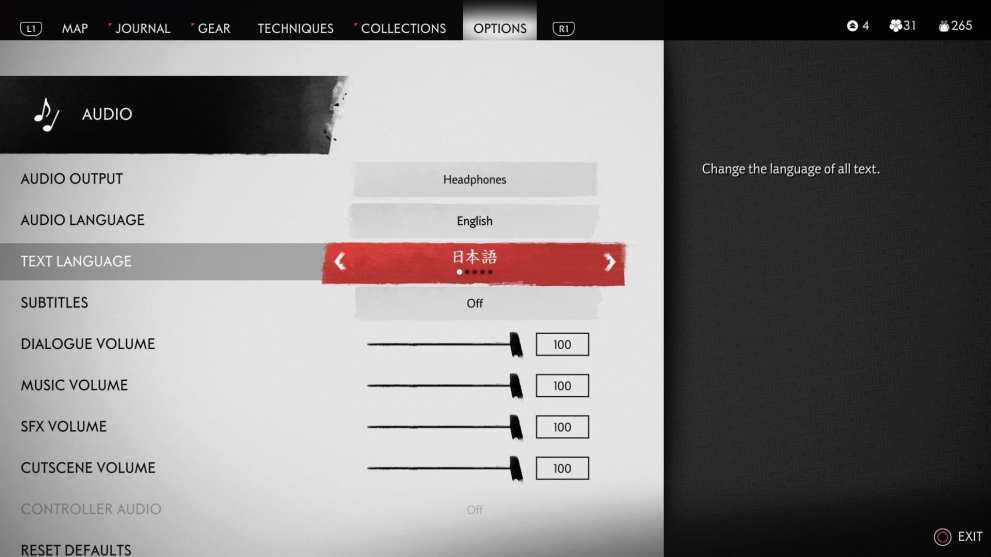
To change during the game, just pause by pressing the Options button, then select the Audio option, and then Audio Language. Change it to Japanese here and the voices will be more authentic for the setting when you leave the menu.
You can also set some subtitles here, which is worth doing if you don’t speak Japanese and still want to know what’s going on.
Also, be sure to save your game before you change to the Japanese voice track because you’ll be taken back to the previous checkpoint if you do not.
Time needed: 1 minute
In short, to change to the Japanese voice track in Ghost of Tsushima
- Pause the game by pressing Options
- Select Audio and then Audio Language
- Change dialogue to Japanese and set English subtitles
That’s everything you need to know about how to change to Japanese voice track and dialogue in Ghost of Tsushima. For more tips and tricks on the game, be sure to check out our wiki guide or read our review.


Updated: Jul 16, 2020 08:17 am