How to Use Photo Mode & Take Photos in Assassin’s Creed Odyssey
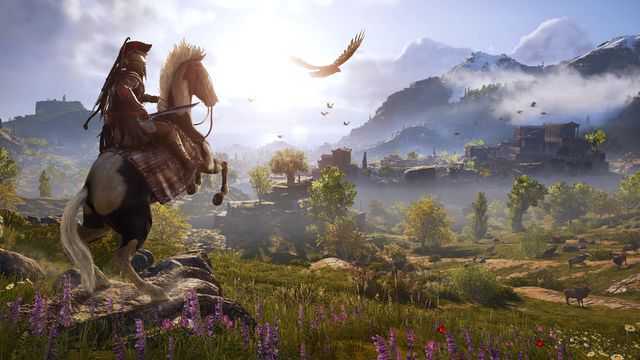
Photo mode is something that’s become more and more common in games over the past couple of years. Assassin’s Creed Odyssey, of course, wasn’t going to miss out. Players are able to take stunning photos of the sprawling landscapes in the game, or get a bad-ass shot of them spartan kicking someone off a cliff. Whatever kind of moment you want to capture in Assassin’s Creed Odyssey’s photo mode, you’ll want to know how to actually use it and then take photos. Here’s how to use photo mode and take photos in Assassin’s Creed Odyssey.
How to Open and How to Use Photo Mode in Assassin’s Creed Odyssey
Before you can tweak the settings and snap your perfect shot, you’ll need to know how to open up photo mode and use the camera. To do so, you’ll need to first make sure you’ve loaded up your game. Surprise surprise, you cannot take pictures of the main menu.
Once you’ve loaded up your save and are free to wander around the game, you can activate this new mode at any time by pressing the L3 and R3 buttons together. That’s clicking down both the left and right analog sticks at the same time. And this is the same for both Xbox One and PS4.
If this doesn’t work, you may need to go ahead and turn the entire mode on in settings. Don’t worry though, we’ll run you through that below.
How to Turn On Photo Mode in Assassin’s Creed Odyssey
Should L3 and R3 not let you use the camera, you’ll need to quickly hop into the settings to enable it. To do this, you’ll need to access your menu by pressing the Touchpad or Options button on PS4, or the Menu or View button on Xbox One. After this, press left on the d-pad to access the main menu.
Now you’ll need to head into the Options setting, and use R1 or RB to tab over to the Gameplay tab. Here, you’ll find Photo Mode as the fourth option down. Simply hover over it and press X (A on Xbox One) to toggle it on or off. Now you’re all set!
Hop back out into the game world and give those L3 and R3 buttons a good ol’ simultaneous press to open photo mode.
How to Take Photos in Assassin’s Creed Odyssey Photo Mode
As soon as you use photo mode, everything will freeze within the game world. You’re now free to use the left and right analog sticks to move around your nearby surroundings and pan to get the right angle. Using L2 and R2 (LT or RT for Xbox One users), you’re able to zoom in and out, and you can reset everything by pressing the R3 button on its own.
However, the most important settings you’ll likely want to play around with are going to be those found in Edit Mode. To access Edit Mode, press the L3 button. This is where you can get into the nitty-gritty artistic settings.
Within Edit Mode, players have the option to tamper with Depth of Field, Exposure, Temperature, Tint, Saturation, Noise, and Vignette. Use the d-pad to scroll up and down through the different options and the right analog stick to adjust each of these settings.
Once you’re finally happy with how your pictures look, you’ll be all set to take the photo.
To finalize the picture, it’s as simple as pressing X on PS4, or A on Xbox One while within the Composition Mode (the one that isn’t Edit Mode). After you’ve done this, the game will save the image either within your PS4’s Capture Gallery or to your Xbox One’s Captures section.
And there you have a complete rundown of it all. Hopefully, we’ve helped guide you through how to use photo mode in Assassin’s Creed Odyssey, and turn it on if it wasn’t already.
Did we do a good job? Then great. If not, and you’re still struggling, don’t be a stranger and let us know in the comments below. We’ll do our best to help you out with whatever issue you’re having.
Want more tips, guides, and handy tricks for Assassin’s Creed Odyssey? Then you’ll want to check out our comprehensive Assassin’s Creed Odyssey guide wiki.
We’re going to continue to update it as we uncover more and more in the game’s massive world. If you want a bit of a taste, here are some at-a-glance:
- Guided or Exploration, Which You Should Choose
- Things to Do As Soon as You Get It
- New Game Plus: Everything You Need to Know
- Best Abilities: Which to Get First
TLDR;
Question: How do you use photo mode in Assassin’s Creed Odyssey?
Answer: To enter photo mode simply click L3 and R3 at the same time, the left and right thumbsticks. If that isn’t working you’ll need to jump into the main menu, go to options, select gameplay, and then enable photo mode. Now you’ll be good to go.


Updated: Dec 20, 2018 12:07 pm