
The Drifter is an adventure game that tells the story of a man named Mick Carter, who left his family but had to come back to save it from the evil scientist Gideon Roth. Usually, the game would take you 6-7 hours to complete, but this guide will help you do that in under two hours.
Table of contents
Prologue

During the Prologue your task is to try to open the locked door in the old train wagon with the help of an old man stuck inside with you:
- Wake up an old man and ask him to help you open the door.
- Once he threatens you, throw a piece of tarp that’s lying on the floor at him.
- Pick up the rebar under the tarp and use it to finally unlock the door.
- Once the old guy gets shot, leave the wagon via the hatch on the left side of the roof.
Chapter 1: Welcoming Party

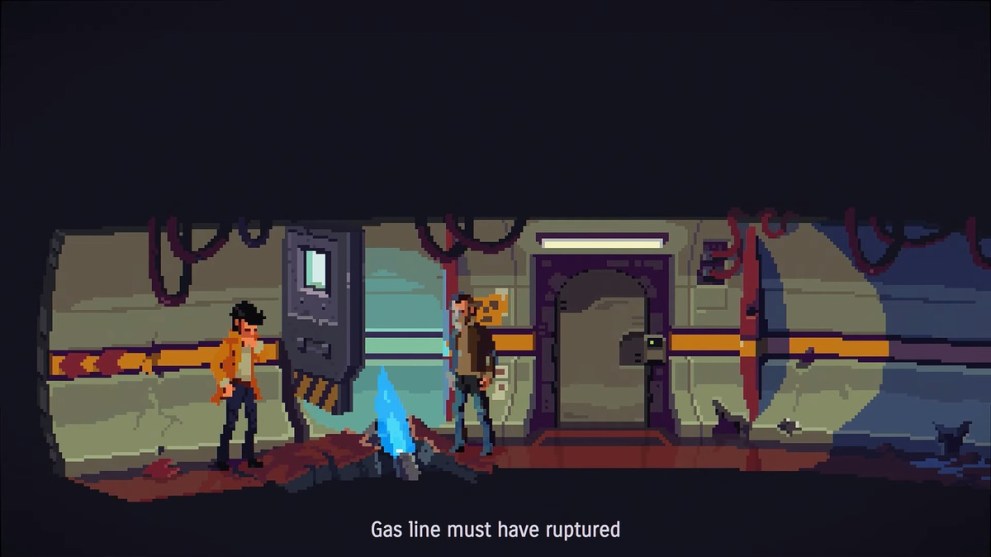
After the train escape, you’ll end up at the railway underpass. At this point, you must find a way out of this situation:
- Begin by picking up your phone and speaking to your sister Annie.
- Talk to Bill standing nearby and find out about the address of Mick’s family.
- Open the bonnet of the car to check for the damage.
- Grab a charger cable for your phone from a backpack (located where you landed).
- Select the cable from your inventory and interact with the car to charge the phone.
- Talk to Bill again and ask for the car keys to start the engine.
- The car also needs petrol, so move to the right screen and get petrol from the jetty.
- You can ask Bill to help you start the engine, but the car won’t start without tubing.
At this point, you need to enter the overpass and speak to the reporter lady, trying to speak to the homeless:
- Get the tubing from the washing machine next to homeless men warming up near the fireplace.
- Ask the reporter to borrow you a knife to open the washing machine.
- She’ll do it only after you talk to Bill about mental issues and deliver her the story she needs.
- Once you get the tubing and go back to the car, you’ll see the reporter being attacked at the jetty.
- When the attackers drop you in the water, use the knife to cut the ropes around your arms and take off the sack from your head.
- Use the tubing on the jerrycan to breathe air, and use the knife again to cut the ropes around your feet.
Chapter 2: Deceased Estate

Return to the underpass and use a piece of paper on the ground to light a fire in the barrel and get warm. Then follow these steps:
- Use a knife on the small opening in the wall behind the barrel to find a bottle of rum.
- When your daughter appears, follow her into the tunnel to find a Zippo lighter.
- Use the lighter to start the fire in the barrel and go back into the tunnel to find Bill’s body.
- Use the knife to cut out an audio tape stuck to Bill’s body.
- When you get threatened by a guy with a pistol, combine a bottle of rum with a piece of cloth and light it up to cause an explosion.
As soon as you flee into the Herald building, speak to the secretary and check out a fresh newspaper from the lot at the entrance, learning that you’ve been set up as the Bucket Butcher.
- Take money out of a sleeping homeless person’s hat nearby.
- Buy the newspaper, head to the dark alley, and go into the tunnel.
- Move to the top-right into the chapel and speak to the caretaker, who’ll throw some coins at you.
- Pick up a piece of brick under the lamp post and go back to the cemetery office.
- Throw a brick to break the office’s window to trigger an alarm.
- Once the caretaker arrives, go to the chapel and take a piece of hanky out of his jacket.
- Wait for the caretaker to leave his leaf blower outside the cemetery office and pick it up.
- Look through the broken window to grab a map.
- Use this map to fast travel between the places you’ve already unlocked.

Now you can return to the Herald and return the money to the homeless person. Once he wakes up and gives you the bottle with alcohol, do the following:
- Go back to the dark alley and close the lid of the garbage container.
- Climb up the container and use the leaf blower to push the umbrella from under the Clark’s sign.
- Use the umbrella to open the door of the cemetery office through the broken window.
- Watch the caretaker return and enter the code “1-2-3-4” to disarm the alarm through another window.
- Enter the office and read the journal to find the location of the grave.
- Leave the office, douse the piece of hanky with alcohol, and apply it to the cemetery map.
- Enter the cemetery.
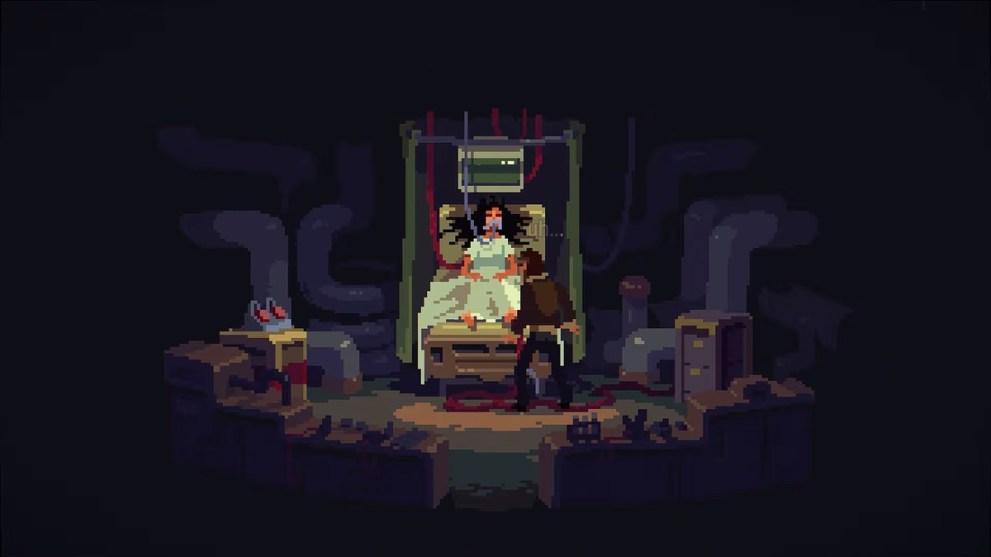
Chapter 3: From Out the Grave

Once you arrive at the funeral, give the vase with Mom’s ashes to your wife and grab the shovel to escape the assault of a man in the yellow jacket.
- Return to the cemetery to speak to Annie.
- Crouch behind the tombstone to hide.
- Use the shovel to squeeze through the grave by following Alec’s ghost.
- Once you land, light your Zippo to enter the tunnel to your right.
- Place the hanky on the hook in your son’s hideout and light it up.
- Use the knife to break through the brick wall to your right.
- Hide in the shadow when the Mulindji monster arrives.
- Use the knife on the pillar holding the mine to trap the monster inside.

When the monster dies under the rubble, hook up a coffin with your umbrella, open it and get inside:
- Light your Zippo inside a coffin and use the knife to break the loose wood planks.
- Once you’re in the hospital, press the red buzzer on the wall.
- After a conversation with the cops, a nurse will attack you.
- Use the TV remote controller to turn on the TV set and distract her.
- Reach out and press the red buzzer on the wall again.
- When the cops appear, and one of them shoots the detective in the yellow jacket, click on the nurse to sneakily take possession of a syringe.
- Use the syringe on the IV bag once the nurse leaves.
- When the crooked cop approaches you, use the syringe on him.
To free yourself from the handcuffs, click on the unconscious cop and change your clothes by clicking on the drawer next to the bed. Head to the exit and watch a short scene with the detective and your wife.
Chapter 4: The Hunter Hunted

When you arrive at your sister’s apartment, check out the answering machine next to the refrigerator and press the red button.
- Take out the pre-recorded tape and leave the other one, covered in glue, inside the answering machine.
- Pick up Annie’s picture from the board on the wall between the phone and the sofa.
- Leave the apartment and go to the Herald office.
- Show the picture of Annie to the secretary.
- When you leave the office, she’ll hand you another tape.
- Go back to Annie’s apartment and use the reporter’s card on the red hanging phone.
- Use the laptop on the kitchen desk and ask your wife to dig up information on Dr. Nazari.
When you leave the apartment again, arrive at the railway overpass to meet the detective in the yellow jacket.
- Ask the detective to trace the phone number from the card.
- Once done, go to the jetty and ask the detective to help you drag the blue barrel out into the light.
- As a result, you’ll find samples of blood and a label on the barrel to investigate.
- Go back to the Herald office and pick up a letter on the floor.
- Return to the cemetery and pick up an empty thermos from the caretaker.
- Go to Annie’s apartment and use the thermos on the cup of hot water in the kitchen.
- Go to the small table with a lamp at the sofa and pick up Annie’s car registration.
- Give your wife a letter from the Herald office and ask her to call there, distracting the receptionist.
- Arrive at the Herald and enter Grace’s office.

Sweep the reporter’s office and pick up the vacuum cleaner bag while checking the file cabinet and her computer. Then, leave the office and:
- Go back to the jetty, where you can use the thermos with hot water on the barrel’s label.
- Give Annie’s car registration to the detective.
- Return to the hospital and use the X-ray on the wall to scan the label from the barrel.
- Speak to Dr. Nazari and pick up the MedCon pen from Dr. Nazari’s table.
- Go back to the jetty and give the MedCon pen to the detective.
- Travel to the location of Annie’s car and pick up the HDD from the vehicle.
- Return to the reporter’s office at the Herald and insert the HDD into her PC.
At this point, you need to return to Annie’s apartment and give your wife a MedCon pen to research on the internet. Then, listen to a new message on the answering machine and follow these steps:
- Insert the reporter’s audio tape into the answering machine.
- Use your wife’s cellphone to call your sister’s phone and listen to the recording.
- After the call, your wife will tell you about Dr. Roth.
- Find this name at the reporter’s office at the Herald and bring the payment list to the detective waiting at the Jetty.
- Use the MedCon pen on the payment list to extract information.
- Bring the payment list to Dr. Nazari at the hospital to uncover the name of Maxwell Holden.
- Find the Holden’s address in the reporter’s computer at the Herald.

Finally, you must escape the reporter’s office by using the trolley and pushing the file cabinet. Pick up the flathead screwdriver from the floor and use it to open the window in the office.
- When enemies throw tear gas into the office, use the vacuum cleaner bag to disarm the bomb.
- But this won’t help for long, so yank out the cord from the PC and switch on the electric fan.
- Now you can open the window and use the cord to climb down the wall, escaping the office.
- Click on the air conditioner, while hanging off the wall, to jump on it.
- Click on the pipe next to it and break it free.
- Use the pipe to jump over to the second pipe on the other side of the wall.
- Jump onto the platform just above it and use the piece of bent pipe to open the lid of the garbage container below.
- Use the piece of broken pipe on the hanging cord and pull it down.
- Lastly, use the cord on the top of the roof above the window and pull yourself up.
When the monsters appear on the roof, you can safely land into the open garbage container below.
Chapter 5: Chains That Bind

You can now safely return to Annie’s car location and use the screwdriver to open the trunk. Pull out the steel car jack from the trunk and follow further:
- Move to the wooden area to your right to explore.
- When you hear a scream, investigate an opening in the ground through the grates.
- Use the car jack to stretch the iron bars of the grates and enter the Butcher’s hideout.
- Investigate the shelf and the table to find the picture revealing that Holden is the Butcher.
- Go through the door to your right, pass the hallway, and go upstairs to your right.
- Interact with the cover in the center of the small room to reveal a monster.
- When the Butcher appears, the lights will go off, and you can’t escape.
After waking up in another room, click on the door to call upon the Butcher. Now you must find a way to escape his clutches:
- Try to break a piece of wall and throw it at the yellow remote control for the cord with a hook.
- This will alarm the Butcher, but now you can ask him questions.
- After you make contact with a captive cop from an adjacent room, throw a piece of wall at the broomstick and pick it up.
- Click the door to call upon the Butcher and ask him for food.
- After eating, you’ll end up with a cat medallion inside your mouth.
- You can use the medallion to unlock the air ventilation on the wall as soon as the Butcher brings you up on a cord with a hook.
- When hanging, click the pipe next to you to alarm the captive cop in the other room.
- Each time you pull over to the air ventilation, you’ll get some tools from him, like clippers and a toothbrush.
- Use the clippers to cut the freezer chord lying on the floor.

Finally, you must hit the Esky freezer with the broomstick and pick up some dry ice from the floor. Now you can escape:
- Combine the cord with a piece of hooked pipe and use the ice on the battery to freeze the water.
- Hook the pipe cord to your legs and attach it to the battery.
- Once you call upon the Butcher, he’ll bring you up again, and the cuffs on your legs will snap.
- When you click on the Butcher, you’ll kick him with your freed legs.
- Go back to the first room and pick up the gas axe.
- Return to the hallway and use the gas axe on the gas bottle next to the first door with a welded iron bar across it.
- This will release the door open and free the captive man inside.
When you move further into the lab, the Butcher will try to attack you, but the captive cop will prevent him from hurting you. However, the captive cop is actually the Trinity soldier, so hit him with a rebar. Pick up a rifle from the unconscious soldier and use it on the metal ladder to trigger a surprise visit from the detective.
Chapter 6: Best Laid Plans

Mick, the Butcher, and the detective appear in Annie’s apartment. Here, you need to ask your wife to find the location of the lab in Wunyerra:
- Go to the table with a lamp and pick up a new map of Wunyerra.
- When your wife overlays the locations she found on her laptop with this new map, you can leave the apartment.
- When in Wunyerra, help the Butcher to open the gates by handing him the EM pulse coil from his bag.
- Use the EM pulse on the cameras over the gates to disable them.
- Enter the area once the gates open and pick up a metal detector and a rifle from the Butcher’s bag.
- Use the metal detector to reveal an old sign on the other side of the gates.
- The sign will warn you about the landmines.
The Butcher will stumble upon one such mine and trigger an explosion, which will reveal the entrance into the underground facility. Move through the air ventilation tube until you reach Annie’s office. The following conversation will reveal that Mick was the subject of an experiment.
Chapter 7: Rogue Hypothesis

After a long conversation with Gideon Roth, follow your sister Annie to the elevator. Enter the cafe and speak to the reporter:
- Pick up a picture of Roth and Holden from the table.
- Order a ticket for a soup at the entrance and redeem it at the machine on the other side of the room.
- Pick up some cutlery at the table, too.
- Leave the cafe and check out a few rooms using the access card.
- Be sure to pick up a coat hanger from one of the drawers.
- Use the elevator to reach the top floor and meet the detective inside the storage facility.
- Show the detective a picture of Roth and Holden standing together.

Here, you can find the way out of the facility if you follow the stairs going up at the right side of the screen. Keep it in mind and follow these steps:
- Return to the storage and use the screwdriver on the wooden pallet at the entrance.
- Pick up some coffee beans and return to the elevator.
- Descend a floor and investigate wet footprints on the floor from the leaking pipe.
- Click on the part of the wall where footprints end.
- Use the screwdriver to open a panel, but leave it just like that for a while.
- Head over to the room that says “Accelerator Lab.”
- Speak to Sanjay and show him the picture of Holden and Roth.
- Ask him if he knows anything about the woman, a third founder of the Trinity.
After that, return to the elevator and descend to the bottom floor, the reactor facility:
- Speak to Dr. Klein and investigate the floor.
- Use the elevator to reach the third floor and go to Gideon Roth’s room.
- Speak to Roth and return to Annie’s room, where you can pick up a make-up kit from the floor.
- Speak to Annie and show her the picture of Holden and Roth.
- Go to the cafe and put coffee beans into the coffee grinder.
- Scoop up some ground coffee into the makeup kit.
- Go back to Sanjay and use the screwdriver on the Geiger counter in your inventory to fix it.
- Speak to Dr. Klein, who will ask you to fix the leaking pipe.

Now you can return to the reactor facility on the bottom floor and watch Annie drown in the pool. This will trigger a series of the following events:
- Roth will bring you to the Interface Lab and send you back in time, before Annie drowns.
- When you’ve been sent back in time, speak to Annie and the detective.
- Open the closet in the reactor facility and pick up a pack of nicotine gum.
- Return to the area with the leaking pipe and use the nicotine gum to fix it.
- Report to Dr. Klein in the Accelerator Lab that you fixed the leaking.
- Pick up a keycard from the lab coat on the table and return to the reactor facility.
- Investigate the area behind the generator and pick up the petrol can.
- Bring the petrol can to the detective in the storage facility.
When that’s done, you need to convince Annie to leave the lab. You can find her in the Interface Lab:
- Speak to Annie and Sanjay, who will give you a plastic cartridge.
- Insert the cartridge in the machine and follow the procedure.
- Use the nicotine gum on the measuring data needle.
- Return to the Accelerator Lab and grab the plastic access card from the Roth’s lab coat.
- Go to the fixed leaking pipe and use the makeup kit full of ground coffee on the keypad to the secret door.
- Go to the Roth’s room and use the access card to open the door.
- Investigate the table and find the complete picture of the Trinity founders, including Roth, Holden, and Roth’s wife.
- Enter the shower to find the detective and speak to him.
- Return to the secret room’s keypad and enter the code 7-7-4-2.
Inside the secret room you’ll find Roth’s wife in a coma. Investigate the room and find a pair of forceps, which you can use to untwist the coat hanger in your inventory.
- Go back to Roth’s room and hand the untwisted coat hanger to the detective.
- When the detective finds the gas mask, he will leave.
- Go to Annie and ask her to exchange your soup for her steak.
- She’ll agree and hand you the ticket, which you can use at the cafe.
- Now you should be able to grab a knife for your steak.
- Return to Roth’s room and use the knife to cut off the gas mask.
- Use the screwdriver on the mask to reveal a Geiger-Muller probe inside.
- Replace your old Geiger counter with the new component in your inventory.
- Return to the reactor room and check the radiation levels with your new Geiger counter.
The results will clearly show that the radiation levels are over the top. Speak to Dr. Klein about this and show him the gas mask:
- Return to the Accelerator Lab and put back the access card into Roth’s lab coat.
- Speak to Roth, and then to the detective at the storage facility.
- Speak to Sanjay and show him the gas mask, then report to the detective.
Chapter 8: A Lesson in History
After speaking to Annie, go to the reactor room and report to Dr. Klein. At this point, the entire lab starts to crumble down:
- Use the ladder provided by Dr. Klein as a way out of the reactor room.
- Approach another electrified leaking pipe and use the screwdriver to open the panel on the wall.
- Use the knife on the cables to cut them off and stop the electricity.
- Move to the left screen with the leaking gas pipe and enter the Accelerator Lab.
- Pick up a fire extinguisher and use it on the gas pipe to stop the fire.
- The detective will give you a gun.
- Return to the Interface Lab and threaten Roth with a gun.

Roth will offer you to use the machine again, which will trigger a set of new events:
- After a scene in the hospital, threaten Roth again, and he’ll turn into a monster.
- Use the gun on Mick instead of Roth to escape to the previous timeline.
- Flip the switch at the Accelerator Lab to cause another chain reaction.
- Once you appear at the leaking pipe, use the coat hanger on the previously cut electric wires.
- This will electrify the water again, so step over it to go to another timeline again.
- Once you’re at the reactor room, try jumping over the gap.
- Tell Dr. Klein about the passcode, then return to the leaking pipe in the hallway.
- Cut the wires again, as before, and use the extinguisher on the leaking gas pipe.
When you meet Roth again in the Interface Lab, replace the cartridge in the machine with a new one you got, and follow these steps:
- When appearing underwater, swim upwards, and use the knife to cut the wire holding your legs.
- Swim to your right until you see a ladder protruding from the water.
- Open the shaft and go inside.
Chapter 9: Ascent Into Madness
In the final chapter, you’ll appear back in the destroyed lab full of scout monsters. Use ladders instead of elevators to move from one floor to another:
- When you meet the detective, ask him to help you flee the monster.
- Pick up a pole and use it against the monster in the hatch to no avail.
- Enter Dr. Klein’s room and pick up a battery and Max’s EM Pulse from the table.
- Pick up dental floss from the bathroom.
- Use the battery on the pole you picked up earlier in your inventory.
- Use the electrified pole against the monster to finally defeat it.
- Go to the top floor’s storage facility and pick up an empty jerrycan.
Speak to both Annie and Sanjay about the situation in the lab. Return to the detective and give him the jerrycan:
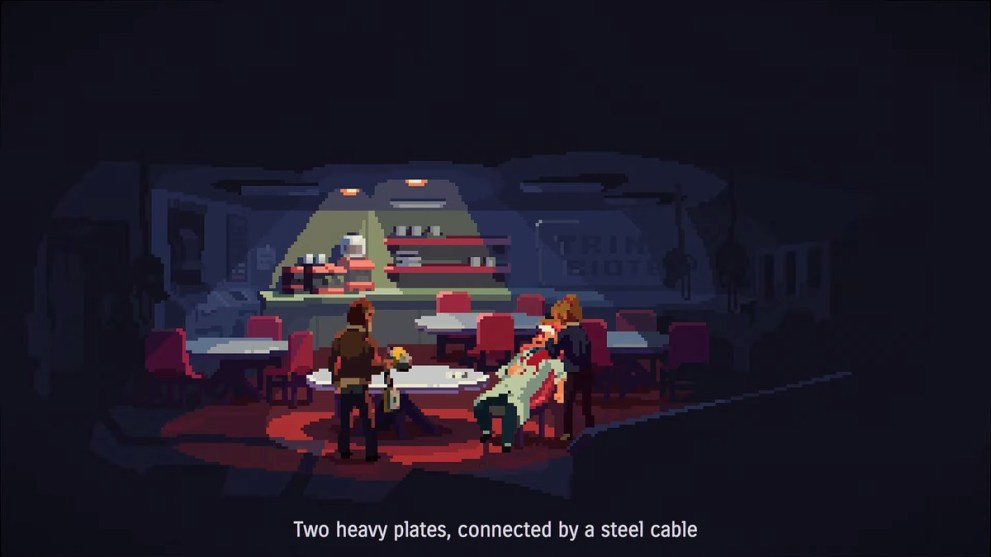
- Go to the cafe and speak to Grace, who’s trying to stitch up Dr. Klein’s wounds.
- Pick up two heavy plates from the table.
- Return to the storage facility and take a pair of scissors from Annie.
- Move along the corridor to your right from the cafe and investigate a pile of fishing line.
- Use the scissors to cut off the hook and combine the dental floss with the hook.
- Go back to the cafe and use the dental floss with a hook at the coffee machine to sterilize it.
- Give the sterilized hook on dental floss to Grace so she can stitch up Dr. Klein.

Once Dr. Klein’s awareness comes back, ask him about the heavy plates. Then, bring the plates to the detective so he can lock the hatch.
- Return to the storage facility and speak to all the survivors.
- Walk upstairs that leads out of the lab onto the surface and investigate a blinking light on the ceiling.
- Once Sanjay fixes the elevator, use it to descend into the reactor room.
- Check out the diesel generators and watch Sanjay die in the attack.
- Pick up an access card from his pockets and squeeze into the shaft with the ladder.
- Move along the corridor to your right and enter the secret room with Roth’s wife.
- Use the defibrillator to revive her and pick up the first aid kit from the drawer.
Now use Sanjay’s card to enter his room and pick up an empty sprayer from the table. Return to the reactor room:
- Combine diesel with the sprayer and bandage in your inventory.
- Touch the soaked bandage to the burning rubble and use this flamethrower to kill the monster in the reactor room.
- Return to the hallway via the shaft and kill another monster.
- Go to Roth’s wife and give her the knife. She will follow you now.
- Combine the scissors with the defibrillator, and then combine the defibrillator with Max’s EM Pulse.
- Use this device to unlock the hatch from below the ladder and leave the hallway.
- Torch the swarm of insects appearing on the top floor with your flamethrower.
- Once they all burn, Annie will open the hatch to the storage facility so you can leave.

Finally, you need to use the pulse device to unlock the ceiling of the storage facility and leave the lab for good. But at the last moment Roth will appear as a monster:
- When the detective drops his pistol, give him a flamethrower to distract Roth.
- Once Roth is busy with the detective, reach out to the pistol.
- Shoot Roth once and he’ll drop the detective.
- Give the detective a pulse device and watch Roth grab him again.
- When Roth decides to use the device, it’ll explode in his hands.
- Once he falls onto the platform, he’ll see his wife and beg her to forgive him.
- But she’ll use a knife to stab him, and they’ll fall together into the abyss.
- When you reach the surface, pick up a piece of shrapnel to signal the helicopter in the distance.
Although Mick’s wife arrives to save the group, Roth is still alive. The detective manages to shoot Roth, but the evil scientist still manages to wound Sarah. Fortunately, Sarah survives Roth’s attack and ends up reuniting with Mick at the hospital for a happy end.
That’s everything you need to know on how to complete The Drifter walkthrough. For more guides, check out Dawn of Man Walkthrough and LUTO Full Walkthrough – All Achievements and Collectibles.


Updated: Jul 30, 2025 09:55 am