
As per tradition with the Five Nights at Freddy’s franchise, the depths of Murray’s Costume Manor in FNAF: Secret of the Mimic are full of dark secrets. From puzzles to collectibles to intriguing lore, there’s plenty to find throughout the game. Here’s a detailed walkthrough of Five Nights at Freddy’s: Secret of the Mimic to explain everything from the story to endings and achievements.
- FNAF Secret of the Mimic Walkthrough
- All FNAF Secret of the Mimic Trophies & Achievements
- Escape the Animatronic and Reach Main Hallway
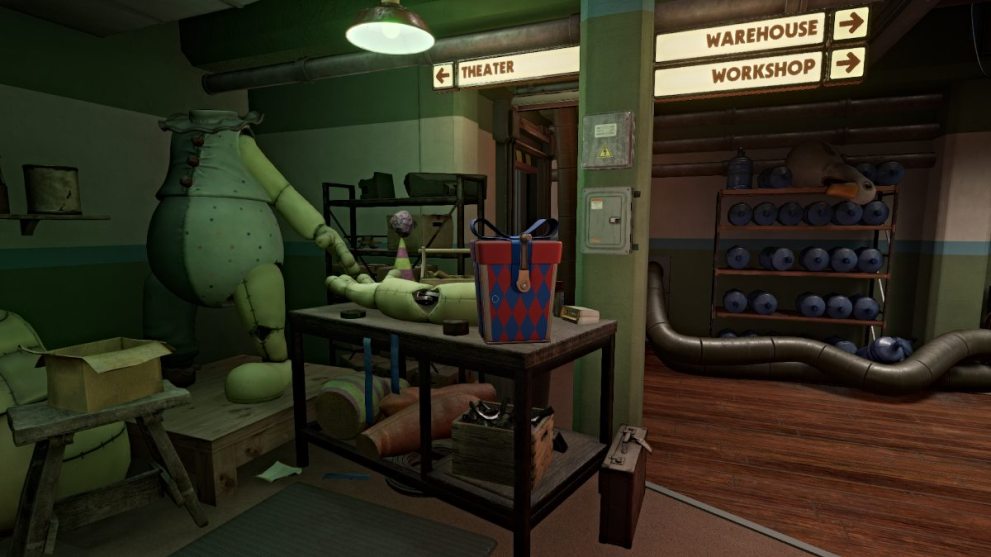
- Big Top Showroom
- How to Solve Big Top Showroom Hat Puzzle
- Creator Clearance Upgrade Level Puzzle
- Escape Big Top on the Roof
- The Workshops and Making a Springlock Suit
- Springlock Suit and Demonstration Theater
- Backstage Area
- How to Solve Backstage Magnet Bridge Puzzle
- Start the Show and Shoot the Targets
- Escape the Doll Hospital
- The Furnace
- Toss More Trash and Send Dollie to the Furnace
- Escape Melted Nurse Dollie
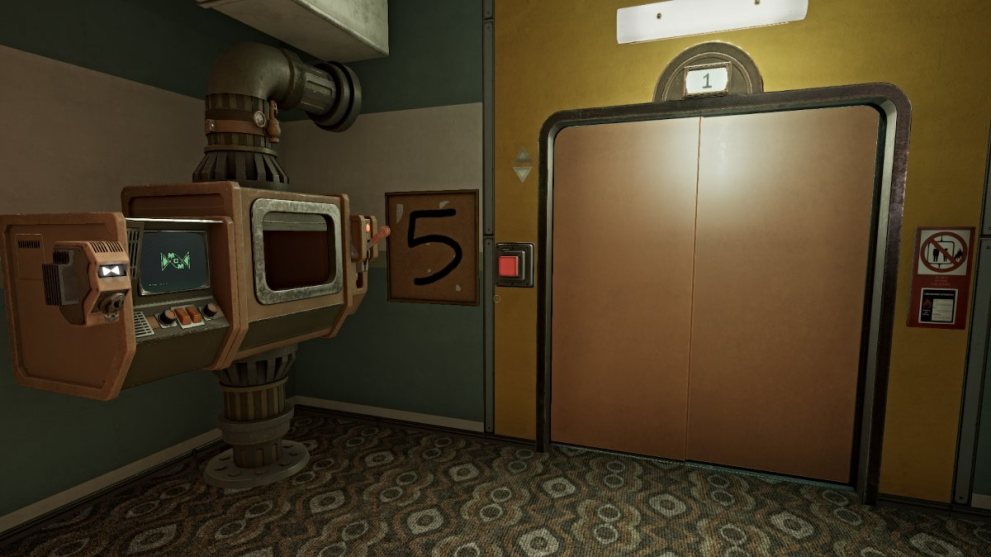
- How to Repair Furnace Elevator
- How to Repair Furnace Elevator, Again
- Security Office and the Warehouse
- Loading Bay
- Reaching the Admin Wing
- Admin Wing
- Admin Wing – Second Floor
- Edwin’s Office
- Basement – Escape White Tiger (Final Boss)
- All Endings in FNAF Secret of the Mimic
FNAF Secret of the Mimic Walkthrough
Disclaimer: Similar to other titles in the Five Nights at Freddy’s franchise, this game frequently employs jump scares throughout the story, so proceed with caution if you’re sensitive to this type of gameplay.
Side Note: There are no adjustable difficulty settings in FNAF: Secret of the Mimic, so this walkthrough reflects gameplay and choices based on the game’s preset universal difficulty.
All FNAF Secret of the Mimic Trophies & Achievements
There’s a total of 25 achievements to unlock in FNAF: Secret of the Mimic, including over a dozen hidden achievements. Due to the nature of the game’s endings, unlocking all trophies/achievements does require a New Game Plus playthrough.
| Trophy/Achievement | How to Unlock |
|---|---|
| Golden Hours | Obtain all other trophies/achievements |
| Unfinished Business | Keep the Data Diver and walk off the job. (Unlocked via the ending where you run the Parachute.EXE program instead of giving up the Data Diver.) |
| Story Time | Fix what is broken. (Unlock the Secret ending. Read below.) |
| Clock Out | Hand over the Data Diver and leave the building. A job well done! (Unlocked via the ending where you place the Data Diver in the Inventory box in the Security Office.) |
| Memorabilia | Deposit every collectible into the inventory system. (Get all 25 collectibles; requires New Game Plus to unlock them all) |
| Olly Olly Oxen Free | Played party games with a Jackie in the Box. (Escape Jackie.) |
| Tickets Please | Return from the Big Top Showroom (Escape Big Top.) |
| Doctor’s Orders | Return from the Recycling Center. (Escape Nurse Dollie.) |
| Fundaphobia | Take a ‘shortcut’ through the basement. (Escape White Tiger.) |
| Think Positive! | Take a ride to the main house. (Get a ride to Edwin’s house after talking to F10-N4.) |
| Pleasant Dreams | Stay up past your bedtime. (Turn on the power in the basement of the retail showroom.) |
| Non-Zero Chance | Get jumpscared. (Get jumpscared by any animatronic for the first time.) |
| Technician | Complete all repair tasks. (Repair all elevators in the game.) |
| Parachute | Run Edwin’s “Parachute” program. (Run the Parachute.EVE program on the HELPER computer instead of giving up the Data Diver during the ending.) |
| Master Adventurer | “You have found my presents. You have completed my tasks.” (Successfully complete the Moon.EXE mini-game and get rewarded with “Glitched” clearance for your Data Diver.) |
| Executive Permissions | Get executive access to the MCM. (Unlocks as part of the story; Get Executive-level clearance upgrade on second floor of Admin Wing.) |
| Pew Pew | Shoot a ‘threat’ with a ball gun. (Shoot Big Top with the ball gun from the carnival game.) |
| Boop | Boop the nose. (Hit the nose instead of the teeth in the Smack a Clown carnival game.) |
| Mail Call | Collect all text logs. (There are a total of 61 text logs from 23 mailboxes total. Use your Data Diver to retrieve them all.) |
| Goodnight, Sleep Tight | Enter the Storytime Showroom. (Knock out all teeth at the Smack a Clown carnival game and go through the door behind the display. Requires Repair-level clearance to access.) |
| We Have a Winner! | Get high scores on all carnival games. (Get high scores for all games in the Big Top Showroom, the ball toss mingame in the upper warehouse, and the shooting mini-game in a storage area by the warehouse.) |
| Dental Coverage | Knock out all the teeth in a single round of ball toss. (At the ‘Smack a Clown’ carnival game in Big Top Showroom, knock out all the teeth in a single round.) |
| Good Listener | Listen to every Audio Log. (Find and play all 22 cassette tapes.) |
| Belated Birthday | Find the party room. (Unlock the conference room in the Admin Wing where David’s birthday party was held.) |
| Aye Aye, Captain! | Teach the pirate crew a valuable lesson. (Survive Foxy’s puppet show by shooting green targets.) |
Prologue – Arrive at Murray’s Costume Manor
The game opens with a cutscene that introduces you to the game’s protagonist, Arnold. In true FNAF fashion, he’s overworked and exhausted, but Fazbear Dispatch contacts him about a job to recover a mysterious prototype created by someone named Edwin Murray, located at a nearby facility called Murray’s Costume Manor (or “MCM” as the game more commonly refers to it).
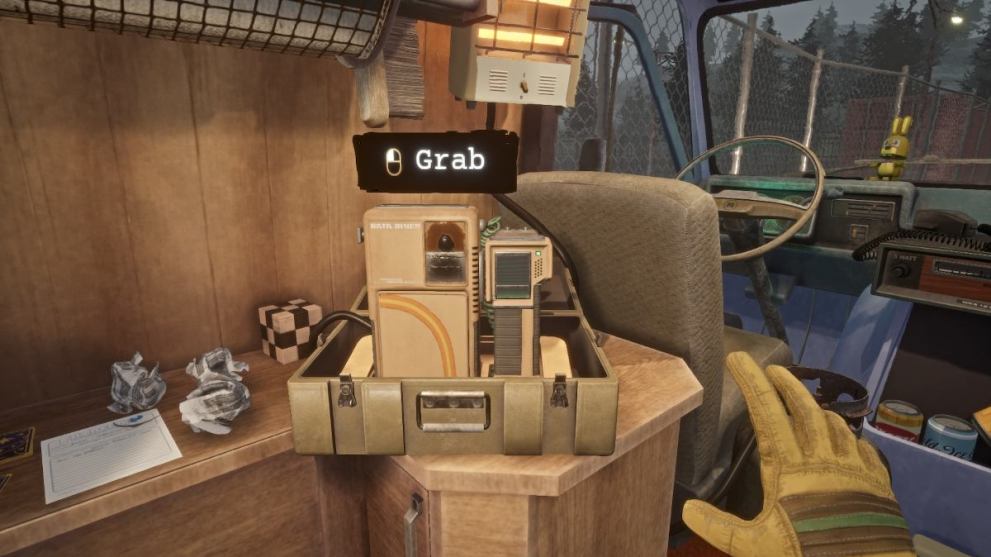
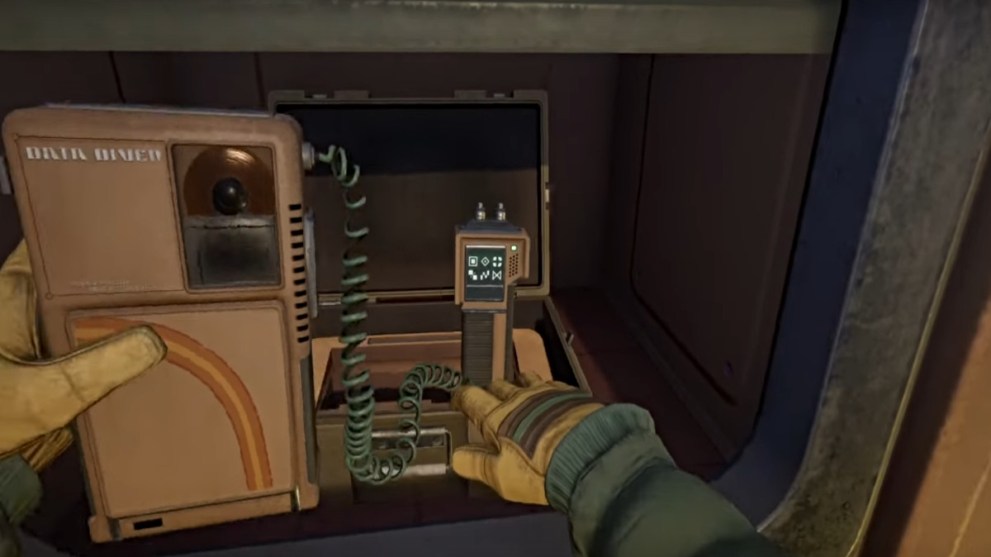
Once the cutscene is over, Dispatch will ask you to pick up the Data Diver Tool near the driver’s seat, so do so. There’s nothing else to pick up in the van, so use the appropriate ‘interact’ button to head out. Go over to the building directly across from the van that has a ‘Closed’ sign and a big red button next to it.
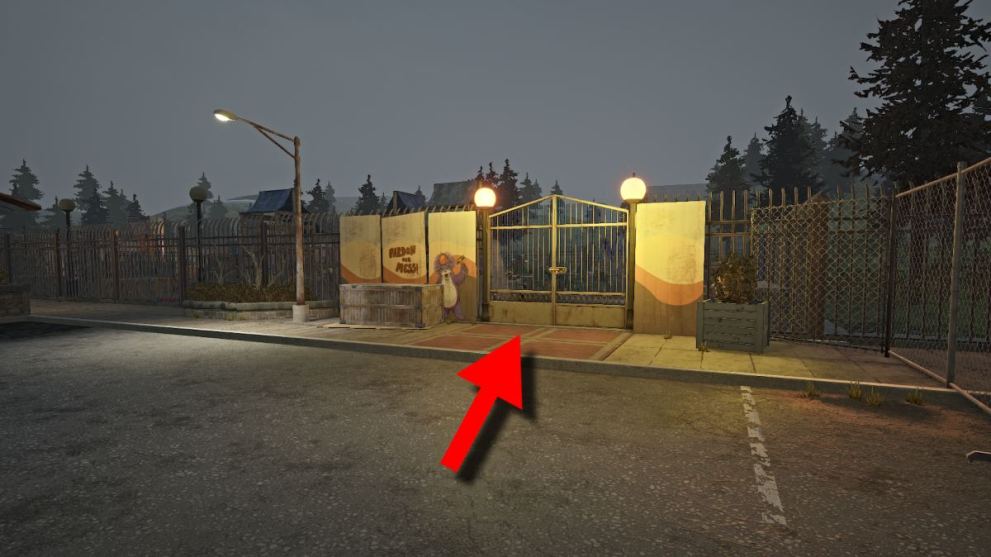
Press the red button and an automated system will tell you that the facility is “temporarily closed” and to use the Delivery entrance on the side of the building. With that, turn and head right, straight ahead to the metal gate entrance where piles of supplies and contraptions are stored. Interact with the handle to open the gate and head inside.
Navigate your way through the maze toward the left side, until you come across a gap to ‘Crouch’ through (a “pardon our mess” sign is directly above it). On the other side, maneuver your way up and around the catwalk. This brings you to the side entrance of the facility, which is conveniently unlocked, so head inside.
How to Use the Data Diver

At the climax of the animatronic-filled opening ceremony, the power will suddenly go out, just before you can get through the doors leading to the rest of the tour and the facility. Instead of getting the grand entrance, you’ll need to find an alternate route inside instead.
Start by going toward the stuck doors and then look immediately to the left side of the stage. You should see a crank mechanism nearby (as seen below). Go over to it, interact with the crank, and turn it to the right until the octopus animatronic (Rocktopus) is reeled back in place. This opens a path for you.
Now walk along the same stage until you see a sealed door with a pad next to it. Go to the door and use your Data Diver on the pad to open it and then go through. Once you arrive at the concourse full of animatronics and equipment, immediately look to the left to see the Power Room.
Like you just did with the previous door, use your Data Diver on the pad next to it. This time, however, you’re not allowed access because you don’t have the proper clearance (yet). Make note of the poster on the nearby wall, which handily explains the different levels of clearance you’ll need for different areas of the game. They range from ‘Basic’ up to Executive’.

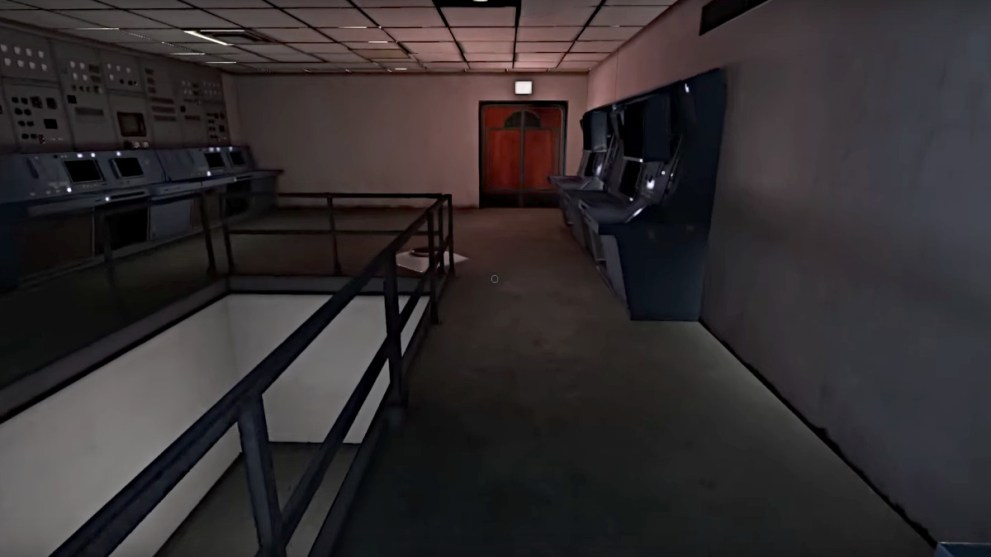
For now, head right down through the rest of the concourse. Your next objective is to get to the Security Office. You’ll see it on the right side of the concourse, with a yellow power generator in front of it.
Before you approach it, however, explore the rest of the area first and get your bearings. In particular, make note of the locker hiding spots scattered around, as you’ll need them in due time.
Get Into Security Office and Update Data Diver Clearance

Now head over to the Security Office entrance, where you’ll notice that you also don’t have the clearance for this door. However, your solution here is the power generator next to it. Grab the handle and steadily rev up the generator (not too fast!) until the gauge fills and the light turns green. The door to the office will then open.
Go inside, and press the button on the intercom microphone next to the main computer. The Dispatch will then tell you that you need to reset the power to the facility via the Power Room. To do that, you need the proper clearance, which you can get by using the Data Diver upgrade machine across the room.
Furthermore, these machines will be found at different Access Stations around the facility, and using each of them is an absolute priority.
The Dispatch also drops ominous hints about an active endoskeleton entity called a Mimic wandering the facility. It can make its way into any animatronic suit and effectively “mimic” its behavior and mannerisms, making it especially dangerous.
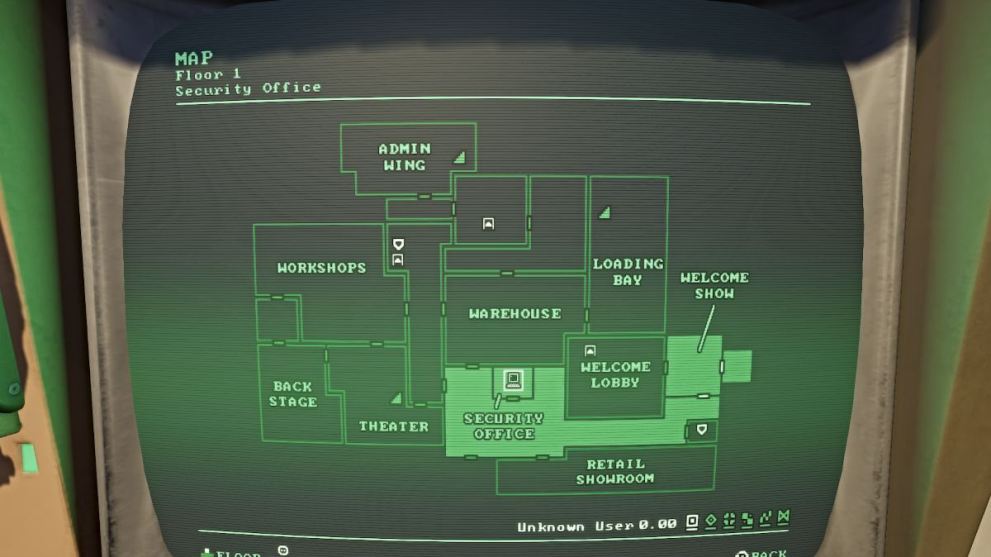
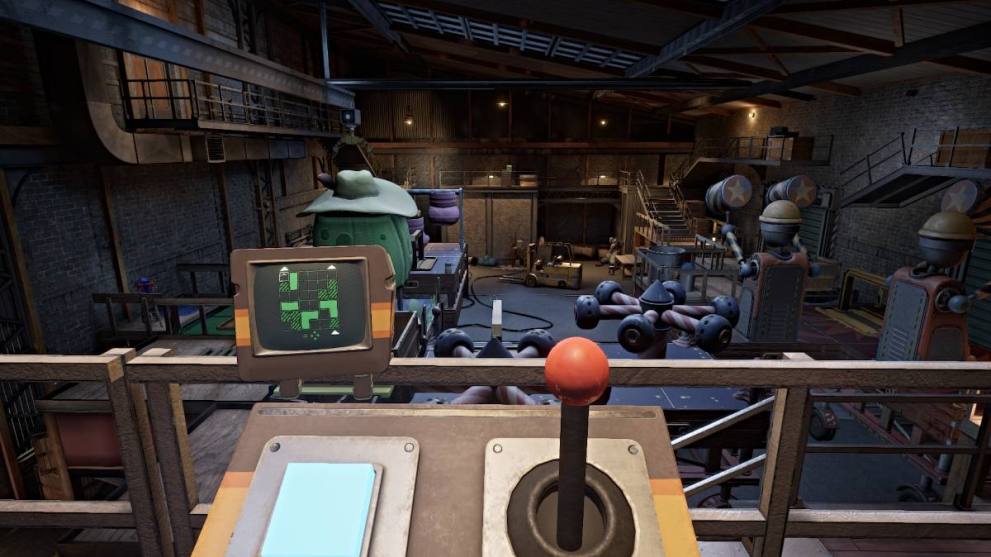
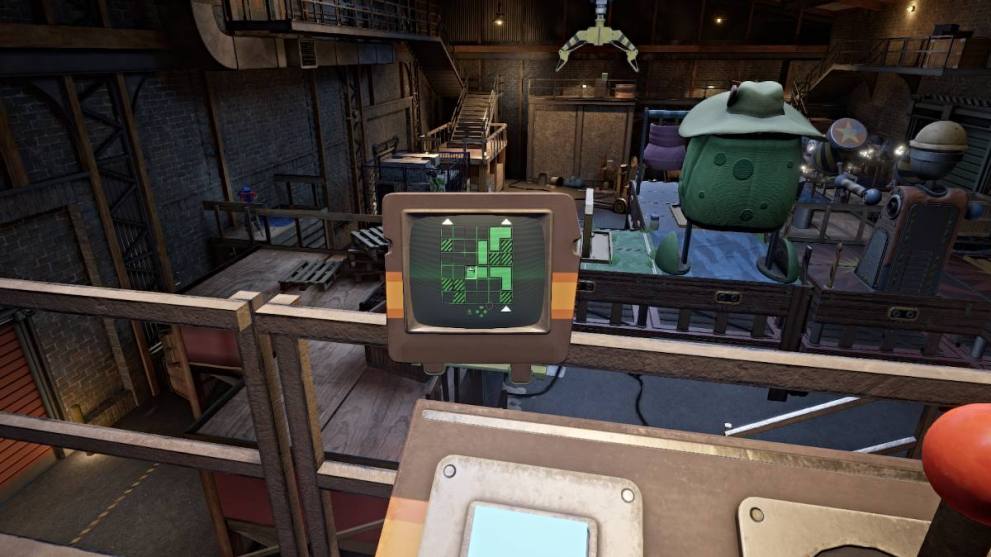
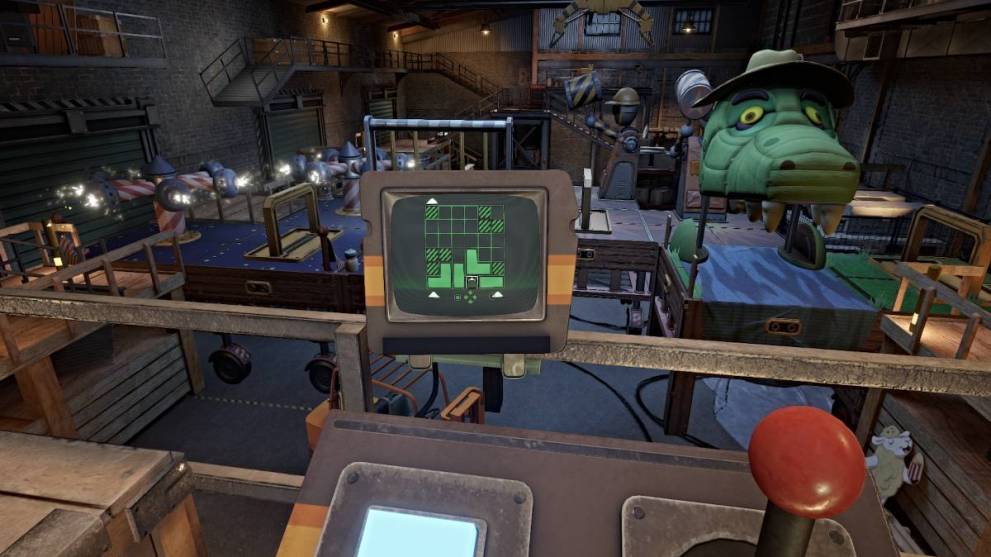
First, plug your Data Diver into the H.E.L.P.E.R computer right next to you and a menu will pop up. There’s a map option that shows you the layout of the facility on Floor 1 and Floor 2, and the names of each area.
This will be very helpful for your upcoming objectives. Also, every area you explore on the map will light up, helping to distinguish where you’ve been and where you still need to go.
Return to the main menu and you can also see a RUN: MOON. EXE option. This brings you to a cryptic mini-game (a true FNAF tradition) called ‘MOON’, but you’ll want to return to this later.
How to Use Data Driver Upgrade Machine

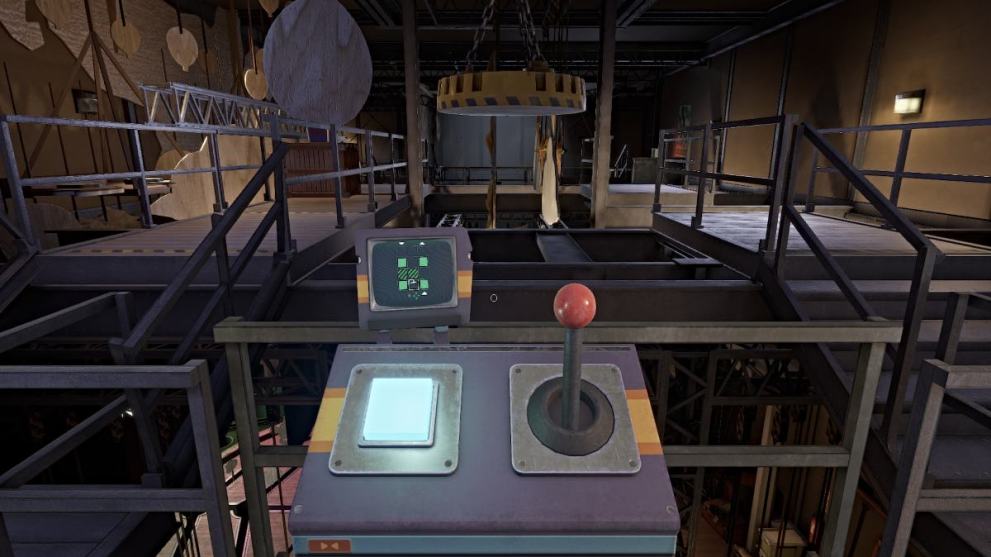
For now, go over to the Data Diver upgrade machine and plug in your Data Diver to upgrade your clearance. You should see a screen with three rows of numbers. Your goal here is to flip all three rows of numbers to “1”, without touching any corrupted ones. However, there aren’t any corrupted numbers on this machine to worry about, so you can rest easy.
You’ll start the process with the cursor flipping the middle row of numbers to 1. Once it has, then move the cursor up to the top row (or “High Track”) and flip those three numbers to 1 as well. The bottom row is already taken care of.
Once done, your Data Diver will be successfully upgraded to ‘Security’ level. This will enable you to get into the Power Room.
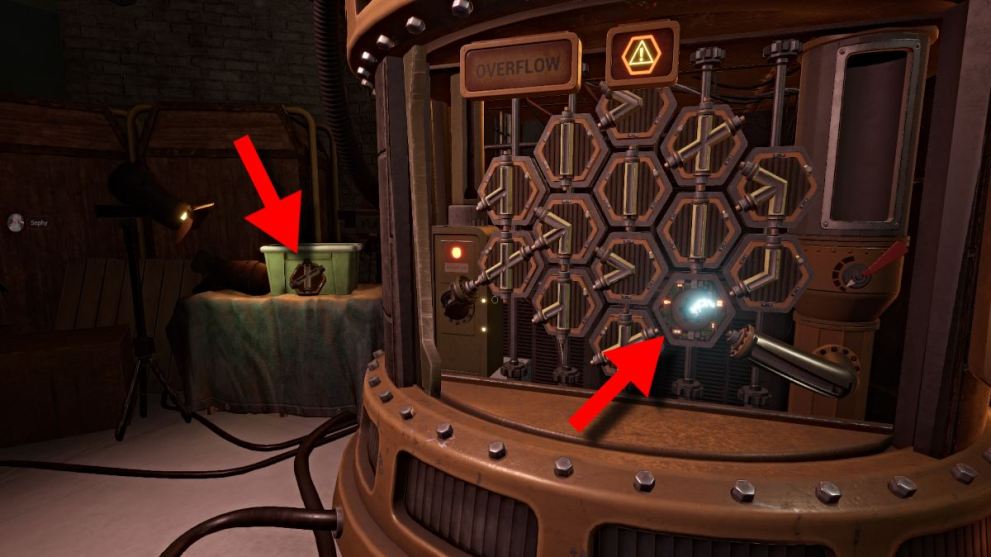
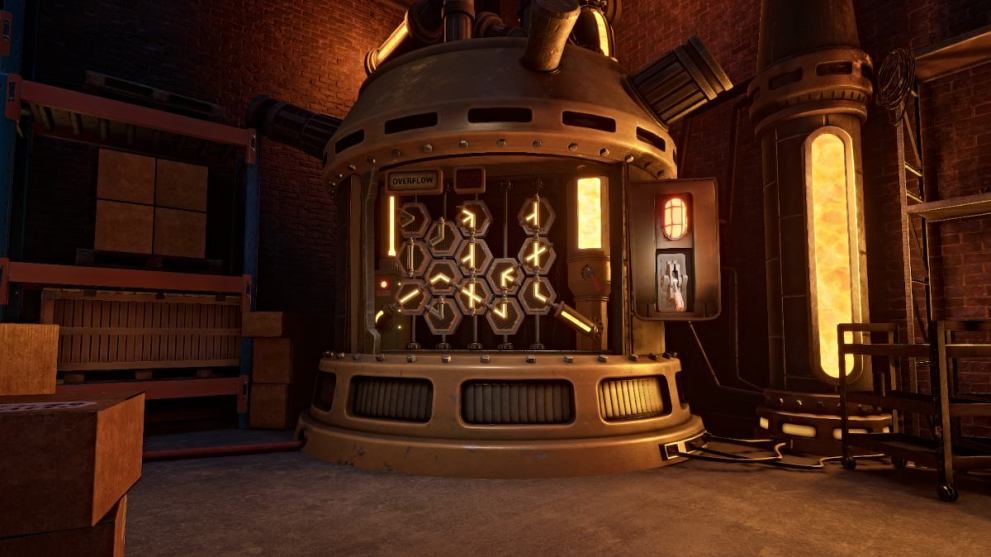
Restore the Power (How to Solve Overflow Puzzle)

Backtrack to the Power Room, go inside, and then pull the lever on the big machine in the center of the room. A hatch will then open, revealing a tile puzzle inside for you to solve.
Essentially, you need to reroute the “juice” slowly filling up the tank on the right side to the power module on the bottom left side. This means you’re on a timer, so you need to start finding the solution as soon as possible.
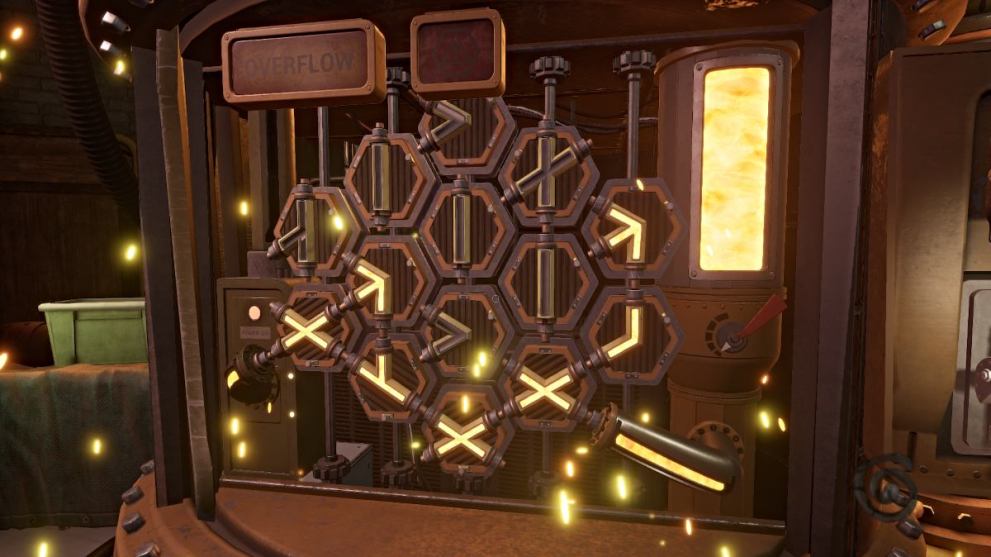
Thankfully, you don’t need to worry about any of the tiles on the upper half of the puzzle, only the six tiles on the lower half (as seen below). However, most of these overflow puzzles have more than one possible solution, so use what works best for you.
Use your ‘interact’ button to turn each tile and connect the pipes until they feed to the power module on the left side. Once done, it should resemble the pattern seen above. The Dispatch will then announce itself on the facility intercom, which is now functioning again.
They’ll ask you to then return to the security office but remark that suspicious movement in the area leading that way has been detected. If you need a hint as to what that is, look over at the nearby window for a small jumpscare.
Now leave the Power Room and head back through the Showroom to the Security Office.
Security Office and the Hand Crank
While you might suspect it, there actually aren’t any animatronic dangers to worry about just yet, so head back inside the Security Office. Answer the call from Dispatch on the intercom.
They’ll explain that you need to find a schematic for the mysterious entity lurking in the facility inside Murray’s Executive Suite. Furthermore, if you manage to find it, there may be a solution for how to deactivate the entity before it acts on its “homicidal tendencies”.
However, to reach it you first need to find more Data Diver upgrade machines to upgrade your clearance all the way up to ‘Executive’ level. The Dispatch will then tell you that the next upgrade machine can be found in the Warehouse Manager’s Office.
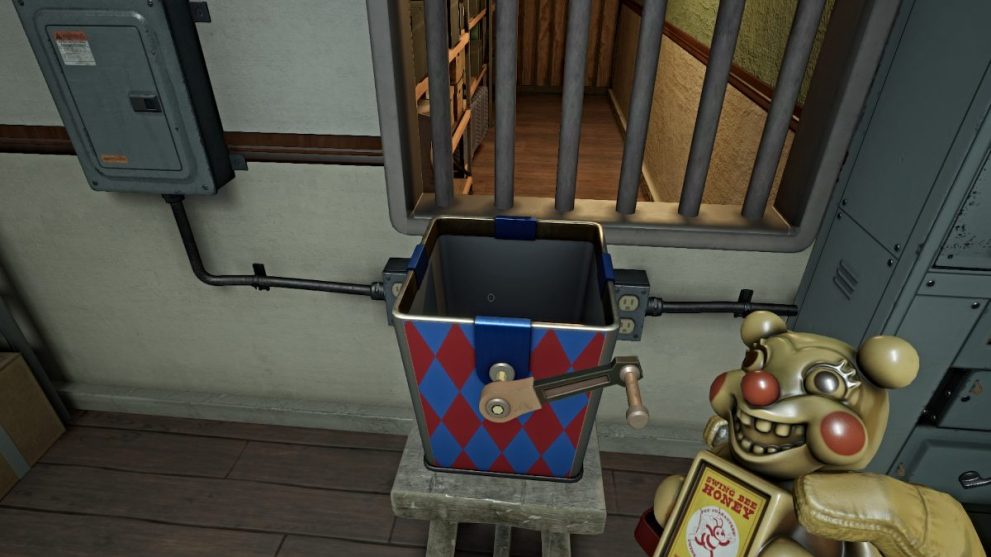
Before you go, however, you first need to grab the Hand Crank from the nearby Inventory Tube System machine (right of the H.E.L.P.E.R computer). Plug your Data Diver into the machine and select ‘Tools’ from the menu. The Crank will be the only available option, so select it. The hatch will open, where you can grab the tool.
While not required, take a moment to also double-check the map on the H.E.L.P.E.R computer, to see where exactly the Warehouse Manger’s Office is. Turns out that it’s on the second floor, so you’ll need to find your way there.
With that, now leave the office.
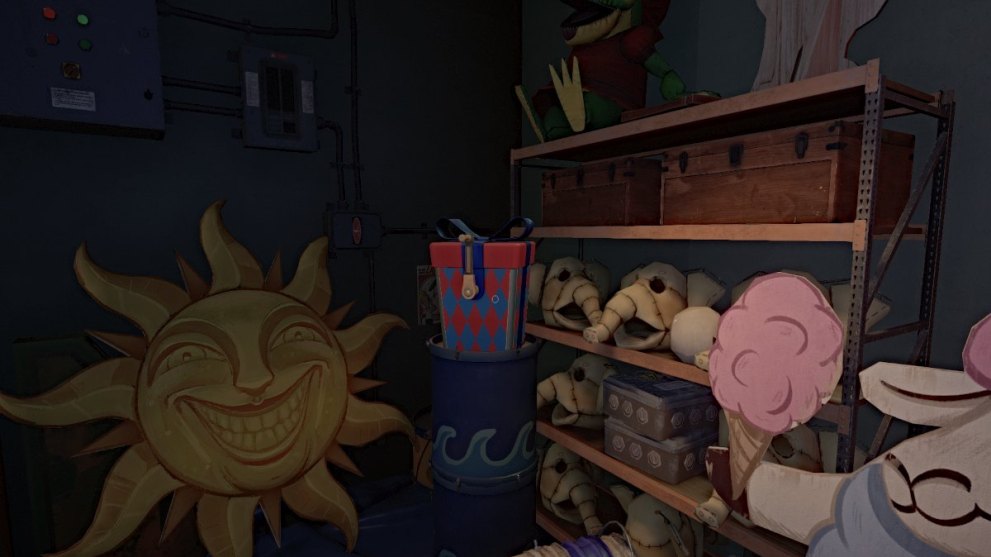
Collectible – Deadeye Roxy Rodeo Hat
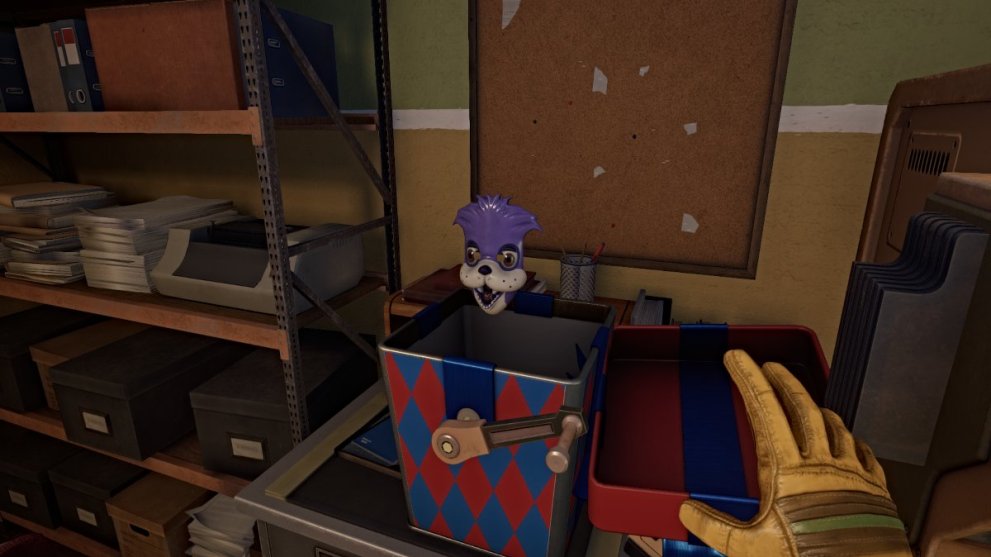
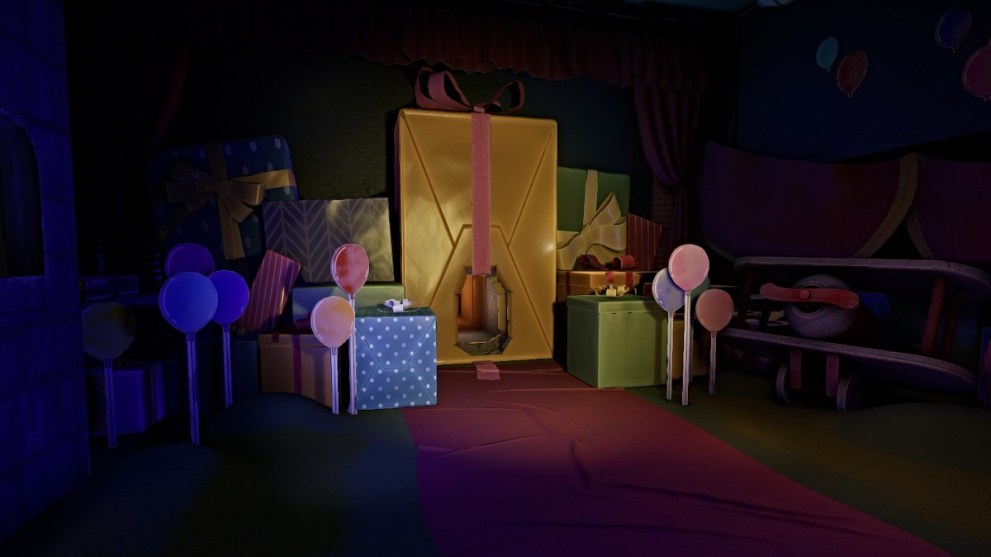
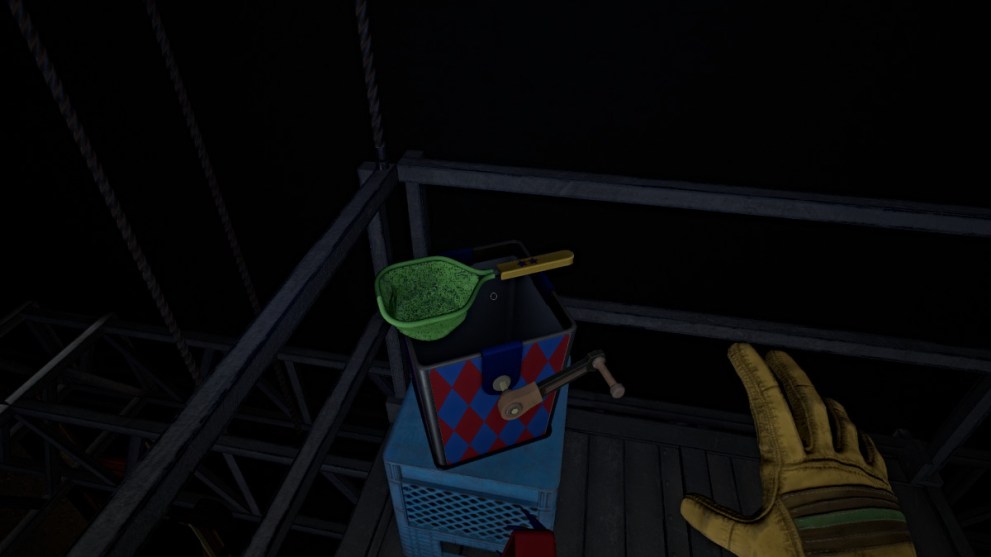
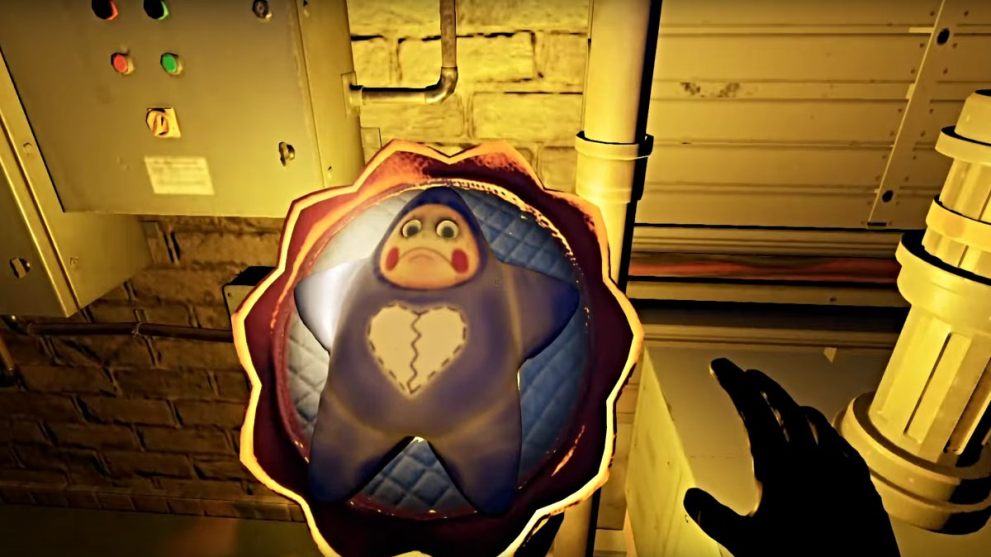
Before you progress further, there is one other thing you should do before leaving the concourse. Go to the left side where the door to the Retail Showroom is. On a workshop table nearby is a colorful present box with a crank on the side.
Interact with the box to turn the crank until it opens to reveal a small red cowboy hat. This is the Deadeye Roxy Rodeo Hat, the first of many collectible items you can find in the game.
Return to the Security Office and place the collectible in the Inventory machine, where you got the Hand Crank from. Use the lever on the right side of the machine to close the hatch and safely store the collectible.
Escape the Animatronic and Reach Main Hallway

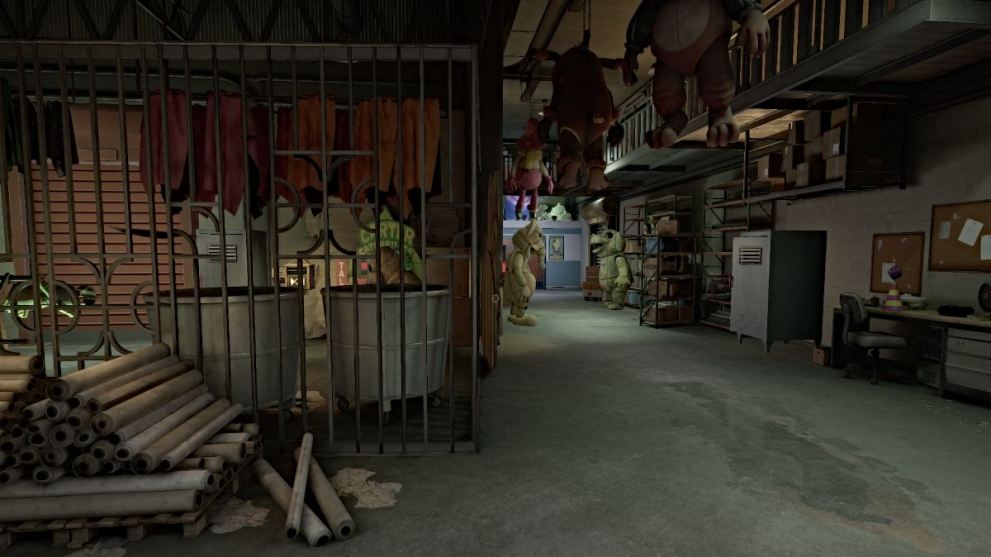
Once you leave the office, go forward and bit and then turn right. You should see a lineup of animatronics inside containers and a locked metal gate leading to the Main Hallway.
Go over to the gate and look to the right where there’s a mechanism to place your Hand Crank. Turn it to the right until the gate opens. However, an elephant animatronic will then burst out from its container right in front of your destination and attempt to give chase.
First, put distance between yourself and the animatronic. Get out of its line of sight, and hide in one of the metal lockers around the concourse. Once you’re safe, you then need to figure out how to get past it. This is your first test for dealing with animatronic patrols.
This animatronic only patrols in the area in front of the gate, leaving you plenty of room to maneuver around. It’s also not particularly sensitive to sound, so don’t worry about having to crouch everywhere. Your goal here is to distract the animatronic, to get it away from the gate.

To do that, look for one of the open crates full of wind-up squirrel toys (seen above) and grab one with your interact button. Wind it up and toss it ahead of you, far enough away from the gate while still in hiding. The noise will cause the animatronic to come running, so get ready to move and make sure you have a safe shortcut past it.
While it’s distracted, use your Data Diver to get through the security door beyond the gate and into the next area.
Collectible – Sharpay Plushie
The Main Hallway is another concourse of sorts that leads to multiple areas, including the Theater, Warehouse, and Workshop. First, make sure to open the present box on the table in front of you for another collectible – the Sharpay Plushie.
Now double back to the Security Office (the animatronic is gone so it’s safe) to store the plushie in the Inventory machine, then back to the Main Hallway.
Elevator and Workroom
Head down the hall to the right to find the Warehouse entrance but it requires Admin clearance, which you don’t yet have. All other security doors in the area also have higher clearances, which shrinks your options for a way forward considerably.
For now, make your way to the far end of the hallway where you’ll find an elevator that so happens to lead to the Manager’s Office. There’s also another Inventory machine here next to it, so make note of that.
Take the elevator to the second floor, where it’ll shut down, leaving you stranded up there (for now). There are three main paths on this floor. The one directly ahead is locked behind another gate requiring another Hand Crank so that one will have to wait.
Take the left path first, which will lead you to a security door you can actually open. Go inside, and it turns out to be a workroom full of helpful tools and yet another collectible.
Collectible – Hedgehog Mask
First, go open the collectible box on the desk next to the Inventory machine, which reveals the Hedgehog Mask. Go and place it in the Inventory machine for safekeeping.
Data Diver Upgrade – Repair Clearance
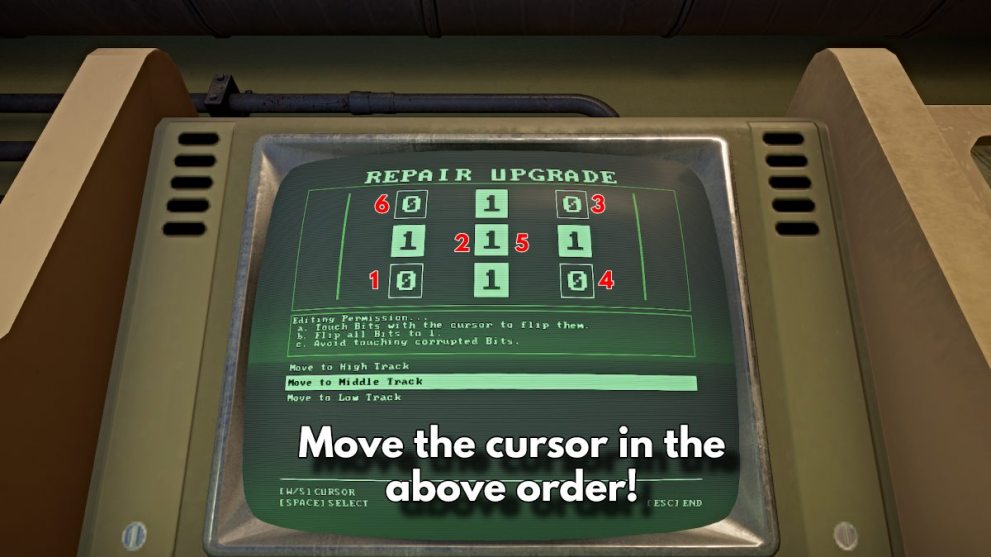
Now go over to the Data Diver upgrade machine and plug in to start the puzzle to complete the clearance upgrade to ‘Repair’ level.
This time, to successfully turn all the bits to “1” you need to move the cursor in an x-style formation (as presented above). Start from the bottom left, then up through the center (turn the center bit to “0” for now), then up to the top right.
Now from the right side, start at the bottom right, then back up into the center (turn the center bit back “1”), then up to the top left. This will turn every bit to 1 and complete the clearance puzzle.
Now leave the workroom and head back to the foyer area where the elevator is. This time, take the right path through a hole in the wall to the next room over, where you find a strange playroom full of animatronics. In the center of the room is a large present box with a crank.
However, before you dare to open it, first detour over to the play castle on the left side of the room, where another collectible is hiding inside.
Collectible – Fall Fest Snow Globe
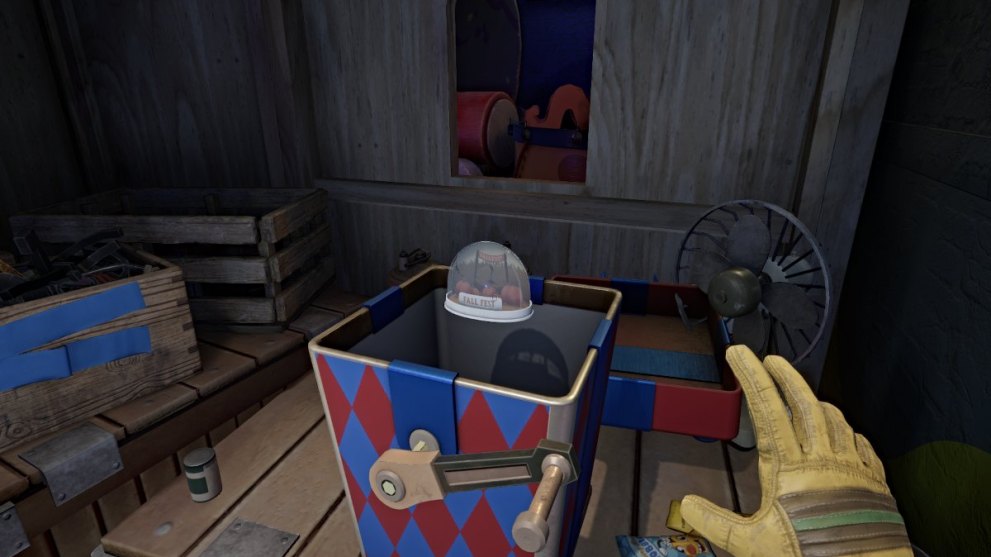
Go inside the play castle via the small doorway and then turn the corner inside to see the collectible box. Open it to obtain the Fall Fest Snow Globe collectible. Quickly backtrack to the office where you got your Repair clearance and place it in the Inventory machine.
Manager’s Office and Escaping Jackie

Return to the playroom and now go interact with the large crank box. Turn it to the right until a large jester animatronic named Jackie appears from it. This also allows you to take the Crank, which, as you can guess, you need to use on the gated path back in the foyer area.
Use the crank to open the gate, though it won’t open all the way so you’ll need to crouch to get under it. Go through the security door ahead, which brings you to the Manager’s office. Note that the door you just came through is now broken and left wide open.
Your only objective here is to turn on the nearby generator to open the next door. Use the ramp on top of the boxes to access the side of the generator with the handle. Note this effectively traps you in the corner until the objective is done.
Grab the handle and rev the generator up just like last time. However, while you’re doing this, Jackie will burst in and start ransacking the office. Make sure the generator is lit green, then wait for the moment that the ramp you used to get the generator falls, allowing you to escape the corner.
Make sure to go through the hole she opens in the wall next to you when she throws the mail bot (NOT the door you were trying to open). This will drop you down into the vent system, where Jackie will continue to stalk you.
Jackie Vent Chase Sequence
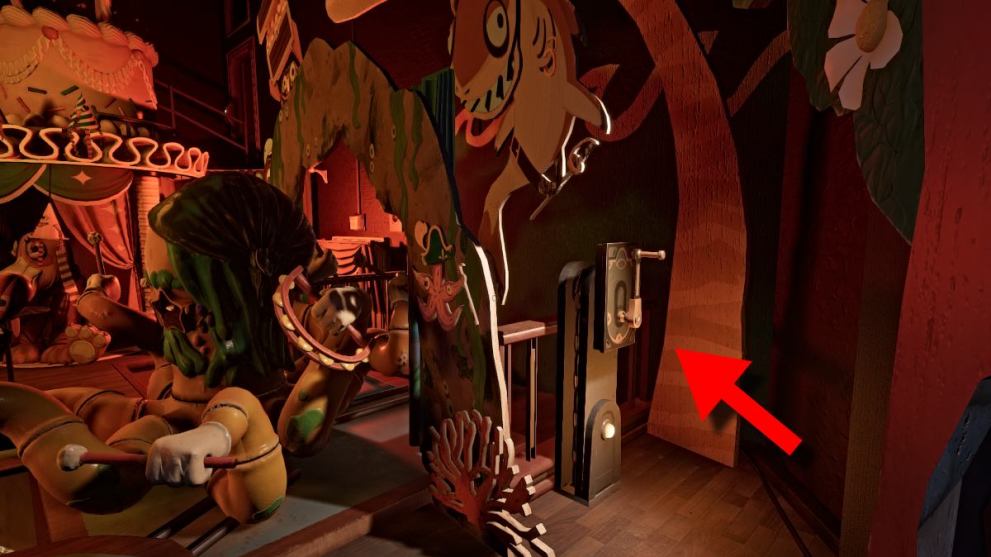
Start by making your way through the passageway and turn left when you can. Continue along the path until you come to what looks like a dead end with bars in front of you. Look for a lever on the wall to your right and pull it (seen above).
Continue along the path (it’s completely linear, so don’t worry about getting lost) until you reach a lift. Pull the lever there to have it take you to the upper level. Jackie will burst through a vent shaft and now you need to run full tilt to stay out of her clutches.
Keep running up and along the catwalk, until you come to a point where you need to crouch down and crawl forward. You need to pull all of the levers along this crawlspace to continue opening small gates to let yourself through. Be quick about it too because Jackie leaves little room for error here.
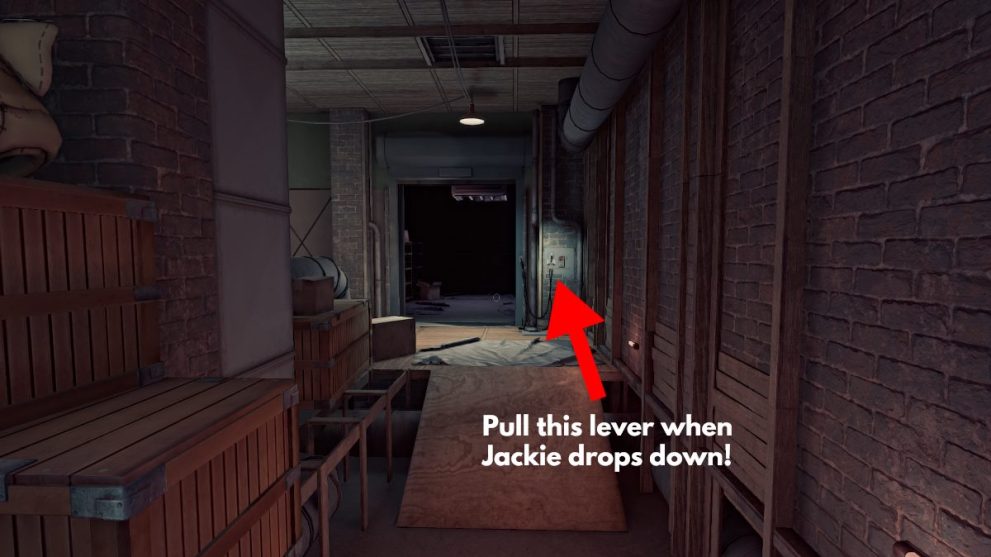
Once you’re through, look to the large hatch door straight ahead in the next room where Jackie will drop down and attempt to ambush you from the front (seen above). You MUST pull the lever beside the door to trap her in there and give yourself time to escape.
After doing so, immediately run over to the generator at the top of the ramp and rev it up to get the conveyor belt moving and allow you to escape through the next vent shaft. Continue forward and Jackie will ambush you yet again, until the the vent shaft breaks and drops you back down into the Security Office, ending the chase.
Getting to the Big Top Showroom
Follow up with the Dispatch on the intercom mic, who gives more backstory about the endoskeleton entity’s existence and what you need to do next. They also note to look at the security screens for where you need to go, and there’s actually a number code hint to watch for on those screens.
The code is 26294 and you can choose to go use it now if you want before the next main objective.
Floor 1 Keypad Door

If you want to detour to use the code, then backtrack to the Main Hallway area nearby. Go right where you’ll see a door straight ahead with a large red keypad next to it. Put in the aforementioned code and the door will open, revealing a worker rec room area.
Check the closet on the left side after walking in to find a container you can open. Inside is a Film Reel, which you’ll want to go store in the nearest Inventory machine box for later. The only other thing of note in this area is another security door in the break room, but you need ‘Creator’ clearance to open it, so leave for now.
Head back to the concourse area, where the elephant animatronic from earlier makes another appearance. Same as before, stay out of its sight and use another wind-up squirrel as a distraction if needed.
When you’re ready, make a break for the entrance where you first arrived. Again, make sure the animatronic doesn’t spot you because it is WAY too fast to outrun.
Reset the Welcome Show and a Broken Elevator
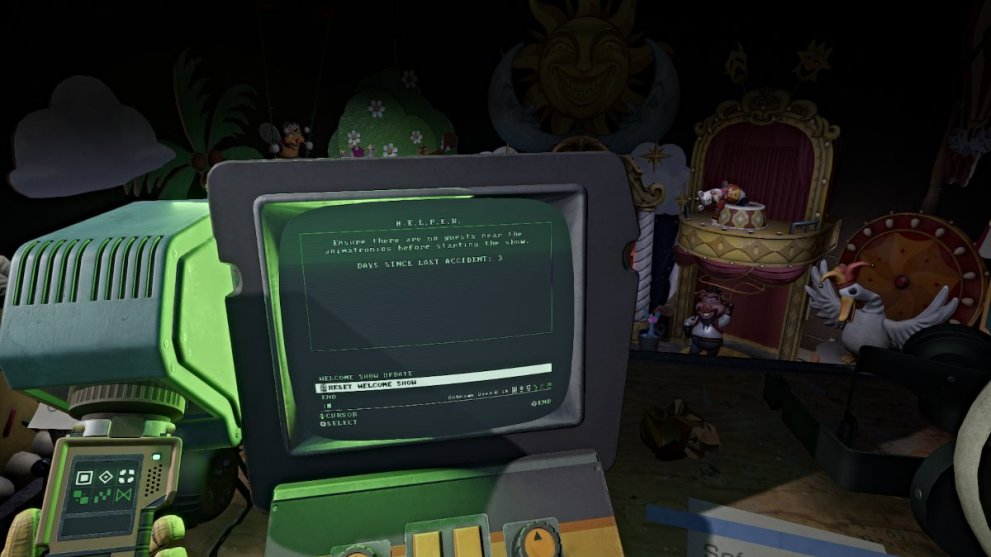
Once you’re in the Welcome Show entrance room, use the nearby lift on the right side to get to the control panel on the upper platform. Plug into the computer with your Data Diver and select ‘Reset Welcome Show’.
Watch the show replay and then return to the lower level via the lift. Use your Data Diver to go through the doors that are now accessible and enter the next area. This brings you to a large showroom full of animatronics, and most of them are about to pose a threat.
For now, make your way to the right side of the room where you’ll find a security door with ‘Repair’ level clearance. Go inside and the first room doesn’t have much aside from an inventory machine. Go into the second, smaller room where you’ll find an elevator that needs to be repaired.
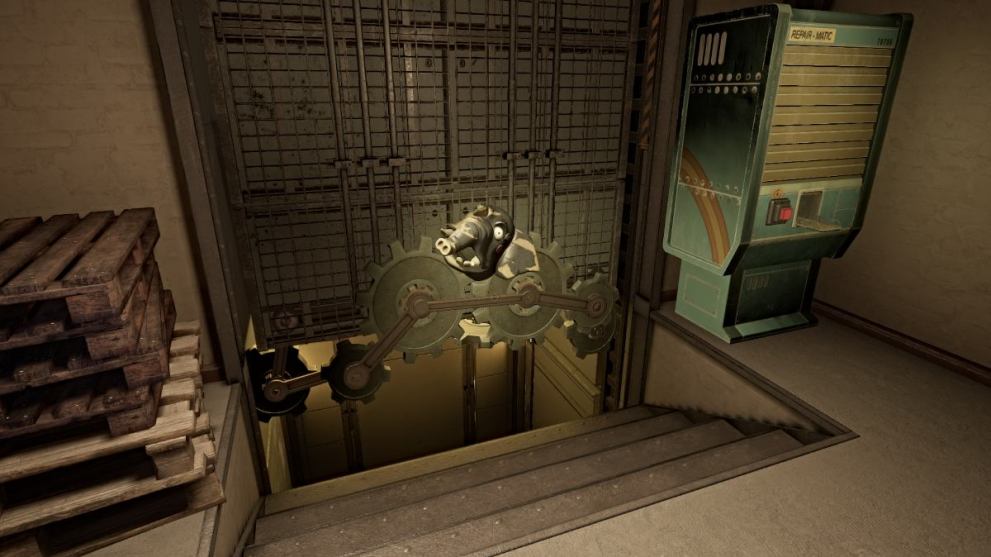
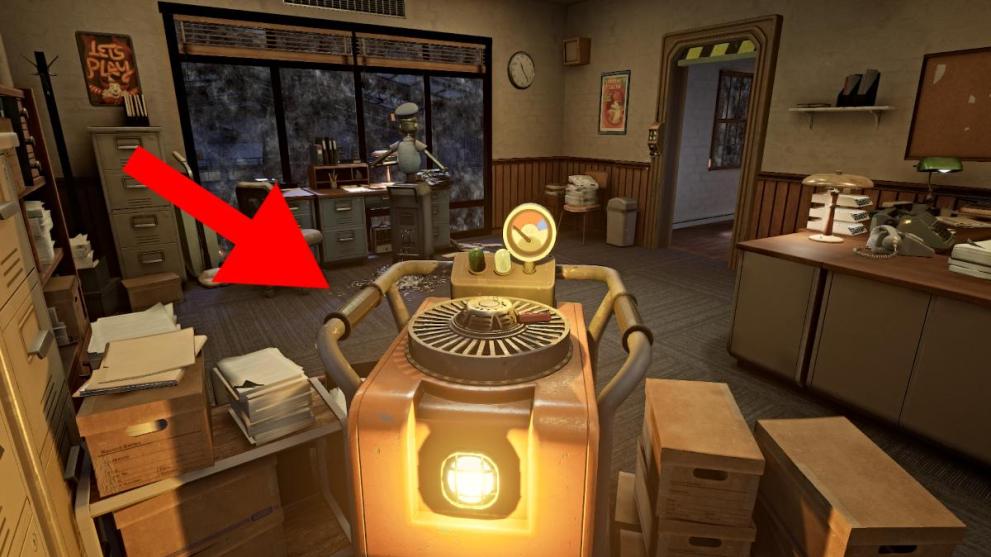
First, you’ll notice that there’s an animatronic elephant head stuck in the gears but you won’t be able to remove it just yet. Instead, go over and plug your Data Diver into the Mrs. Helpful machine. Turn the dial on the left side to the ‘Repair’ clearance level, then unplug and press the red button.
Mrs. Helpful will reveal that you need a Repair Instructional Tape located on the second floor of the showroom to make the necessary repairs to the elevator. She also provides the code 0158, which you need to access the tape.
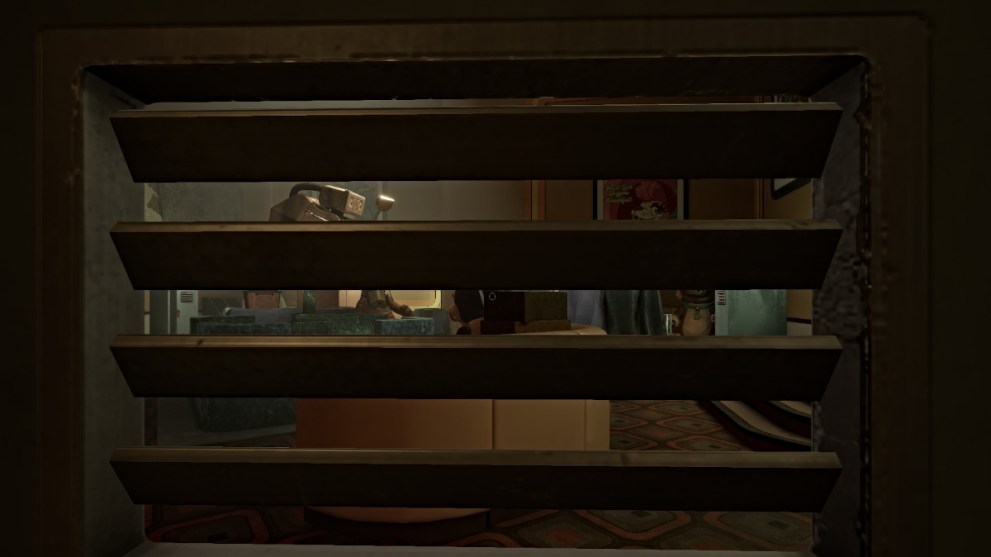
With that, leave the repair room and return to the showroom. This area is now a minefield of dangerous animatronics, and you’ll need to carefully sneak your way upstairs on the other side of the room. Occasionally, a random one will spring to life and patrol the room for a period of time before becoming inactive. Remember to use the lockers on each side of the room as hiding spots.
Once you’re upstairs and it’s safe, look for the red keypad on the back wall. Quickly put in the 0158 code and retrieve the Repair Instructional Tape from the nearby lockbox on the same wall.
Now carefully make your way back to the repair room.
How to Repair the Elevator
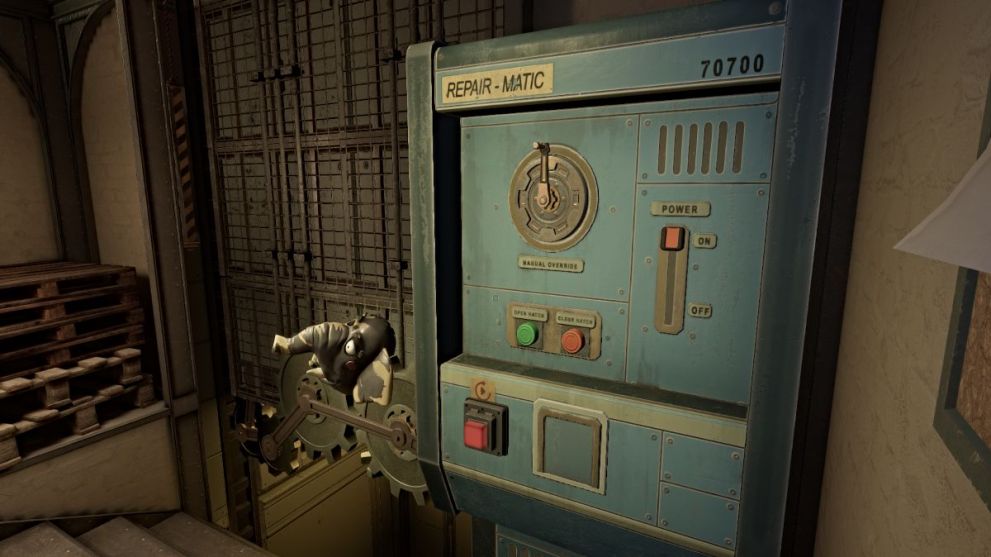
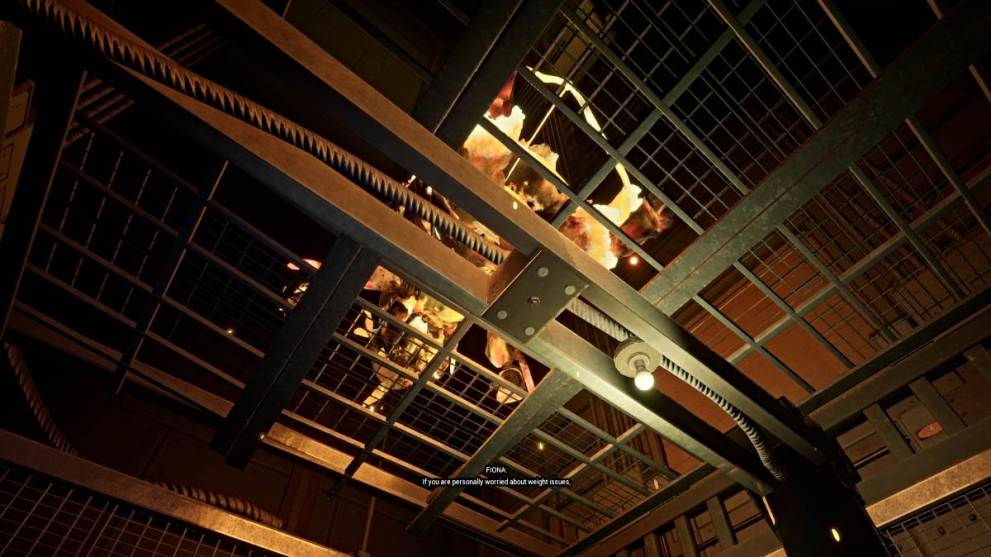
Once you’re back in the repair room, put the Repair Instructional Tape into the Repair-Matic machine next to the broken elevator (seen above). A voice named Fiona will give verbal instructions on how to repair the elevator. Do the following steps:
- Slide the Power switch to ‘Off’
- Remove the animatronic elephant head from the gears
- Rotate the hand crank clockwise to raise the elevator
- Press the green button to open the hatch
Now go under the elevator to the control panel on the back wall. On the right is the Emergency Brake lever, so pull it down to switch it on.
Now you need to fix the elevator’s alignment, which is done via the sliders on the panel. From left to right, push the sliders until the balance meter for each rests in the blue section of the gauge. They’ll each light up when done correctly.
After that, you need to press the red buttons around you in the following order: 4-1-3-2. Make note of the numbers under the sliders and which one the red buttons connect to via red wires.
Next, flip the Emergency Brake lever back to the ‘Off’ position and then back out of the crawlspace. Press the red button on the Repair Matic to close the hatch. Then turn the crank counter-clockwise to lower the elevator. Finally, turn the power on and the repair will be done.
Collectible – Party Time Chica Vacuum Cup
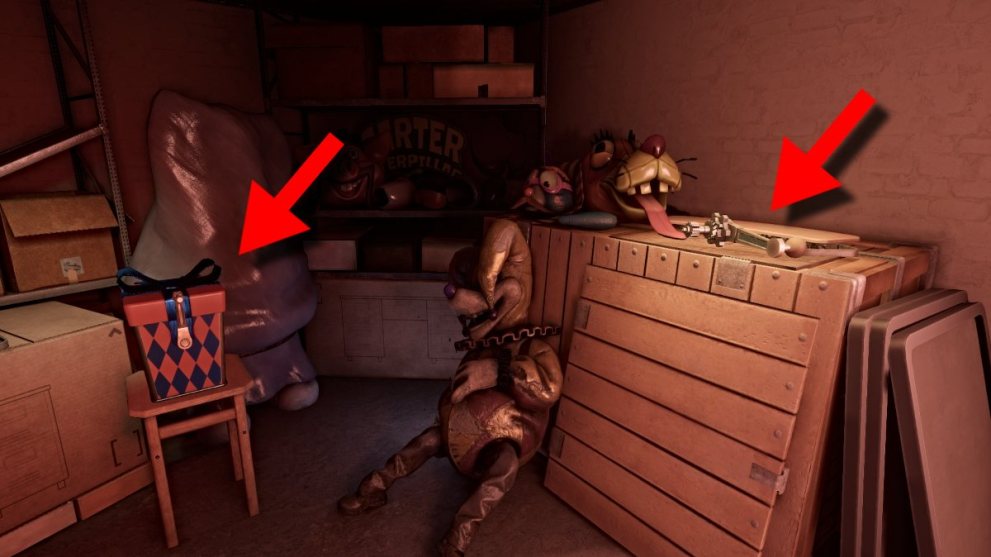
Before you head back to the Big Top Showroom, there’s a collectible you can grab from the room on the opposite side that’s sealed by a gate shutter. To get to it, use the open crawlspace in the elevator repair room, next to the computer console. Go through the crawlspace, across the top of the elevator through the shaft, and make your way to the far end of the crawlspace where a hole lets you jump down.
This brings you to the sealed-off room, where there’s a Hand Crank and a Collectible box to open. First, use the crank to open the gate nearby. Then go open the box and it’ll give you the Party Time Chica Vacuum Cup.
Go drop the collectible off in the nearby Inventory machine and then leave the repair room to continue on.
The Birthday Showroom
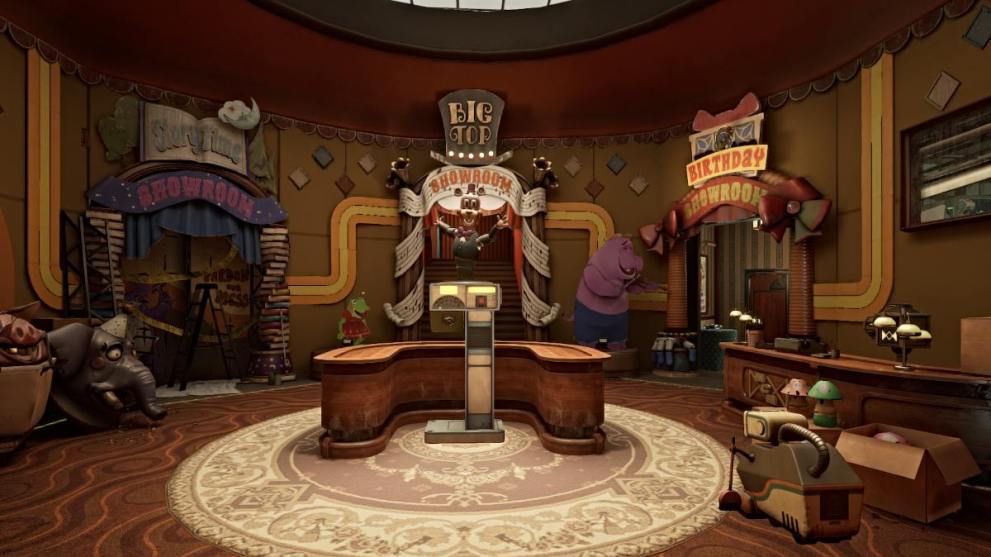
Remember to duck in cover when an animatronic springs to life in the Showroom. When it’s safe, head into the repair elevator and take it to the second floor. Then make your way down the hallway until you reach a room that leads various showrooms, including the Big Top Showroom where you need to go for your next security clearance.
First, check in with the Mr. Helper machine behind the center counter. Use your Data Diver to turn the clearance dial to ‘Repair’. Through the security door immediately to your right, you’ll find an Inventory machine and a HELPER computer. There’s also a tape player you can listen to for some backstory about Fiona the Mr/Mrs Helpful bots.
The most important thing in this room is actually the secret code you get via the security screen next to the computer. Watch it carefully and it’ll reveal the following code: 4782.
Head first into the Birthday Showroom on the right. Inside you’ll find another keypad door, and thankfully you already have the code from the security screen to unlock it.
Go inside and you’ll find yourself back in the room where you first encountered Jackie. This time, however, there’s a hole where her wind-up box was, so go inside. This takes you through another vent shaft. At the other end is a gated storage room, where you’ll notice some locker hiding spots.
Go over to the Sharpay display and pull the lever in front of it. This will open the gate to let you out. However, soon after you walk out one of the Hudgie animatronics will spring to life and start patrolling. Duck into one of the lockers and wait for a safe moment to make a break for it.
Run straight down the hallway and then make a right into another storage area. Maneuver around until you come across yet another keypad door ahead and a vent shaft to your right. The code to this keypad door is: 0434.
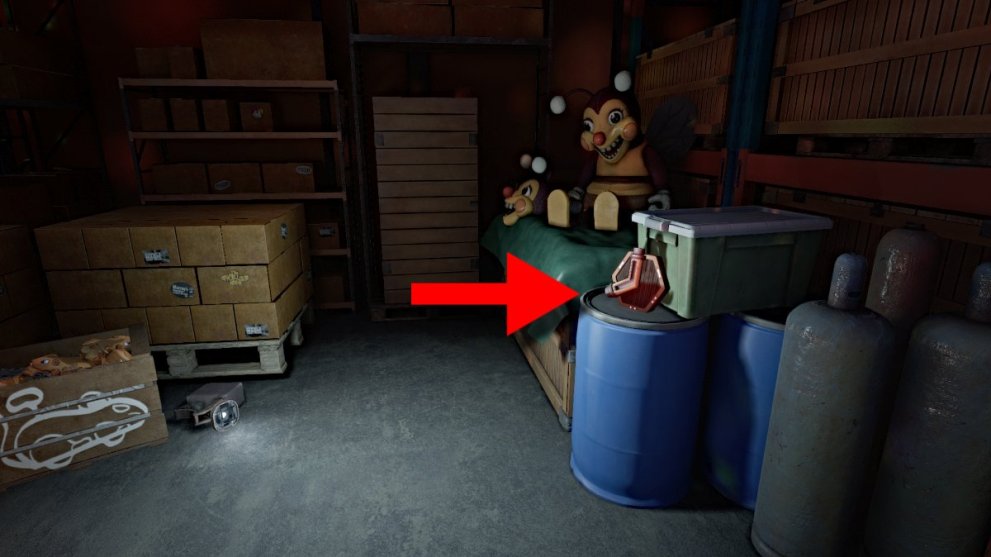
Collectible – Swing Bee Honey Bottle
Go inside to find another collectible box, an inventory machine, and two levers next to each other. First gather your next collectible, which is the Swing Bee Honey Bottle. Secure it in the nearby inventory machine.
Now go over and pull the two levers down, then leave the room. Use the vent shaft you passed earlier to navigate back through the storage room and then through the birthday playroom.
Big Top Showroom Overflow Puzzle

Now to get into the Big Top Showroom, you first need to pull the lever next to the schedule display on the right side. Upon doing so, it’ll reveal another overflow tile puzzle, exactly like the one you did back in the Power Room.
Remember that this puzzle is timed as you need to correctly align the pipes before the tank fills and flows to the power module. While there can be slightly different solutions for these puzzles, below is an example of one that works.

Once you’ve finished the puzzle, go over to the ticket booth and use the blue machine to crank out one ticket. Give to the hand peeking out of the curtain and asking for it and you’ll be allowed into the Big Top Showroom.
Big Top Showroom

Inside you’ll find a room full of carnival-style games, with Big Top himself in the center (bearing a striking resemblance to DJ Music Man). Your goal here is to get a successful Grand Prize spin on the Prize Wheel in the center booth.
You’ll start with one free spin with your admission ticket but it’ll be a guaranteed miss. To get another spin you need to play one of the other mini-games. Once you finish, the room will suddenly lose power and go dark, save for Big Top who is now in security mode with a spotlight.
You need to avoid detection by Big Top and his spotlight, otherwise, it’s game over. Carefully maneuver your way around the mannequins and duck into a locker if they start talking, as it’ll get Big Top’s attention. Make your way back to the entrance to the showroom and pull the lever for the overflow puzzle again.
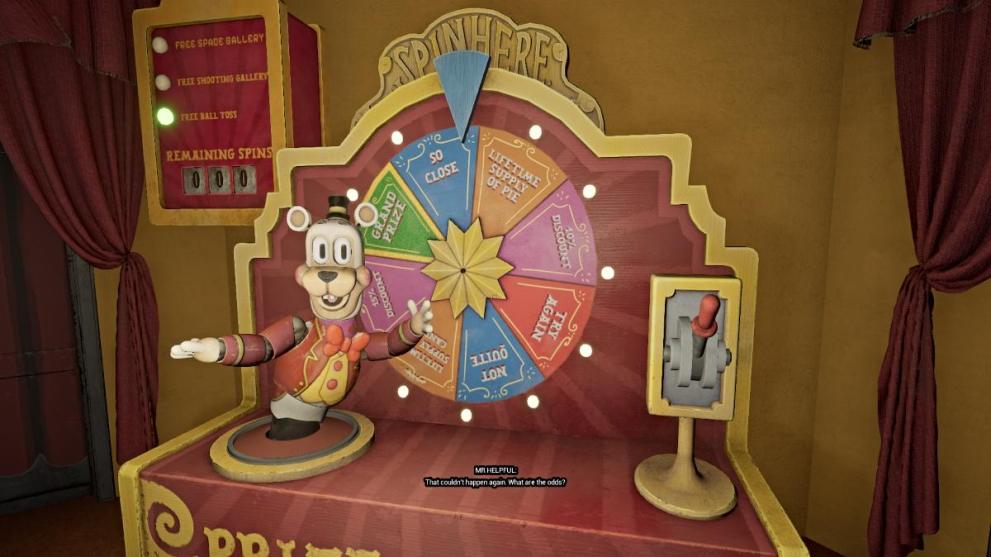
Another reason you need to be quick this time is because Big Top will slowly make his way toward you. Solve the puzzle again to restore the power, and Big Top will become docile, allowing you to return to the Prize Wheel.
You’ll need to repeat this process at each mini-game until the Prize Wheel finally lands on the Grand Prize target, opening a staircase path behind the booth. Go up the stairs and Big Top will disappear through the roof.
Collectible – Most Valued Customer Trophy
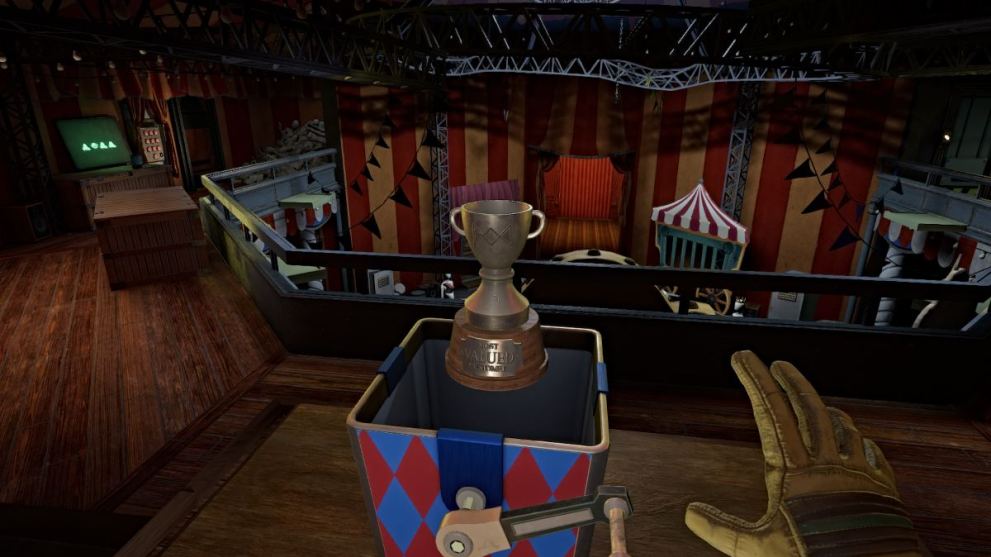
At the top of the stairs, you’ll find another collectible box near the balcony overlooking the showroom. Open it to get the Most Valued Customer Trophy collectible and hold on to it tight until you find the next Inventory machine.
How to Solve Big Top Showroom Hat Puzzle
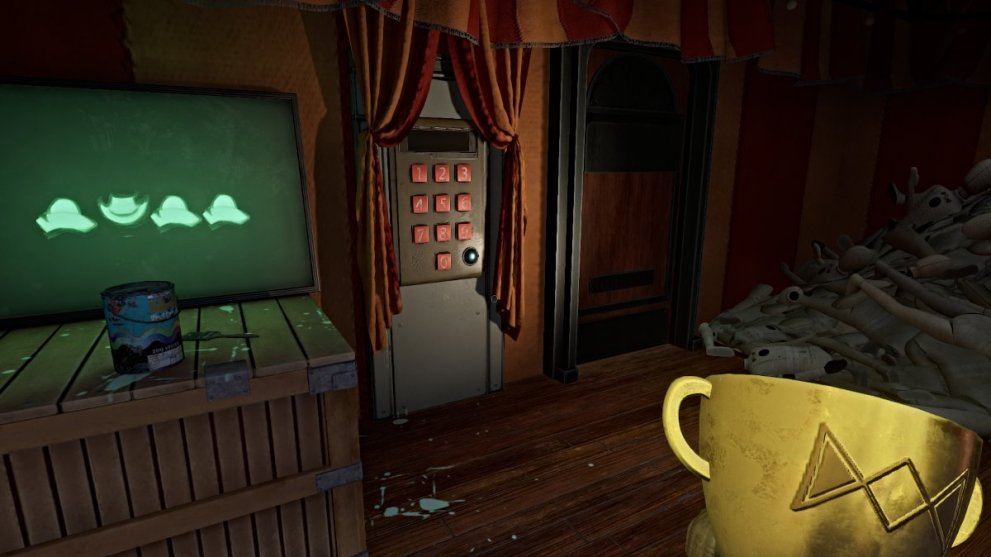
On the left side of the balcony, you’ll find another keypad door and a screen next to it with hat symbols. To open the door, you need to decipher these symbols into numbers, and each playthrough presents a different symbol pattern. This means your solution will be different each time.
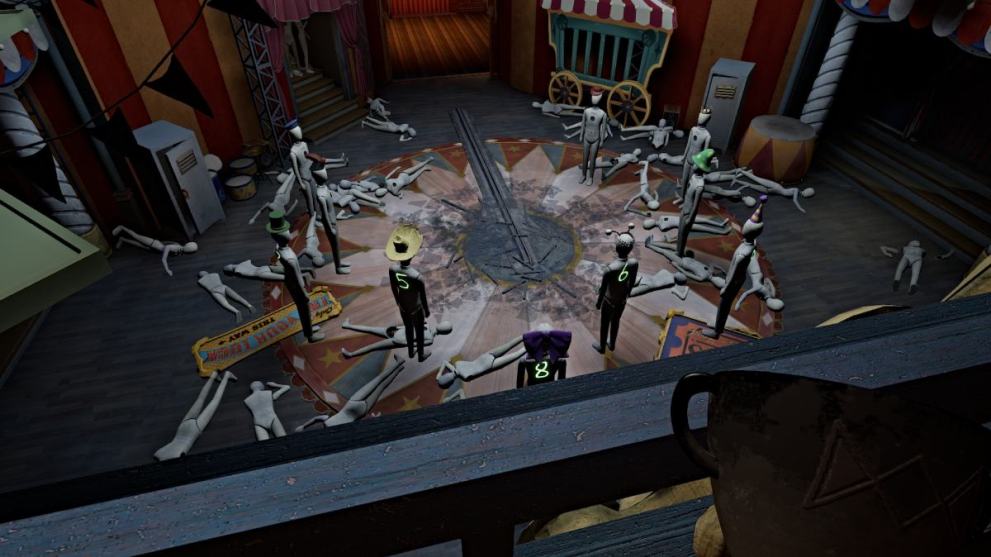
Either way, to solve it, look to the mannequins down on the lower level. You’ll notice that they’re lined up in a circle, each with a different hat and number drawn on their back. Find the correct hats and use the respective numbers to form the code for the door.
Once done, the door will open and lead you to an office containing an Inventory machine for your collectible (upper level) and the Upgrade machine for your Data Diver.
Creator Clearance Upgrade Level Puzzle
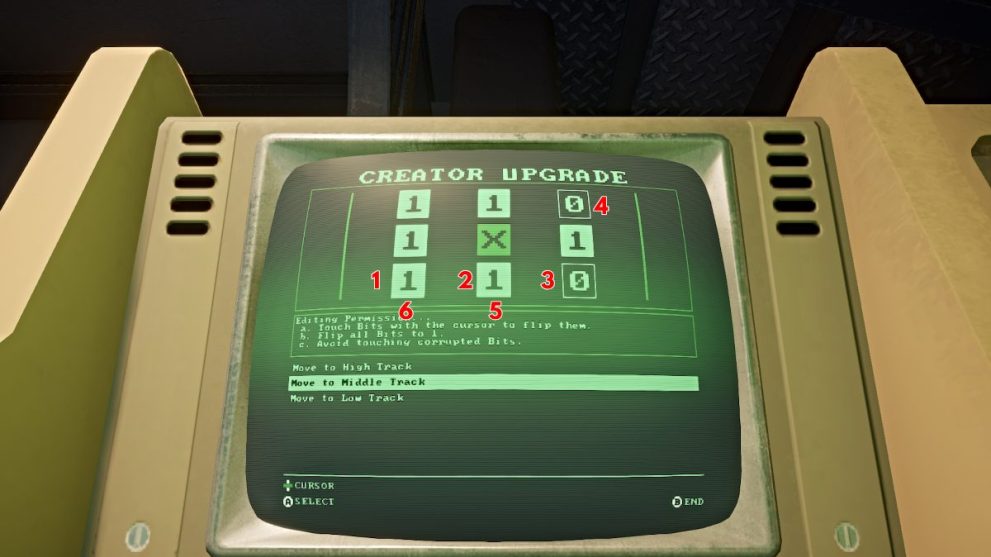
It’s now time to get your ‘Creator’ Clearance Upgrade, so plug your Data Diver into the upgrade machine to start the puzzle for this one. For the first time, you’ll have one corrupted bit to watch out for (the ‘X’ in the middle), so make sure to avoid it.
Start by sending your cursor along the entire lower track, where the first two numbers will flip to ‘0’ while the third flips to ‘1’. Then quickly move your cursor to the high track to turn the third number to ‘1’, then quickly down to the lower track to turn the first two numbers back to ‘1’. This will complete the puzzle.
Escape Big Top on the Roof

With your new upgrade in tow, it’s time to make your way back to the Security Office again. However, the entrance to the Big Top Showroom is still sealed, so you need another route. Go over to the closed shutter labeled “Roof Access” and open it with your ‘Creator’ clearance.
Go up the stairs and through the next security door, which brings you out to the roof where it’s now snowing. Make your way across the roof until another stairwell brings you up to a catwalk with Big Top-related advertisements blocking the way.

Press the red button and this will cause Big Top to reappear and attempt to attack you. Wait for the barricades on the catwalk to disappear and dash for the door ahead. Sprint down the stairwell as Big Top will continue to chase you, similar to how Jackie did earlier in the game.
When you see an open doorway on your left in the stairwell, go through it and continue running down the hall until you see a halfway-closed door on the left. Crouch under it and continue sprinting and maneuvering through the halls until you come to a big hole in the floor.
Jump down the hole, which will then bring you to a crawlspace where Big Top will smash through repeatedly with their claws.
Avoid the attacks and carefully crawl toward the red-lit exit on the other side. This brings you to another area full of mannequins, or rather, obstacles. It may seem like you need to tread carefully through here, but you actually just need to run full speed. Big Top will be hot on your heels, so keep running until you come back to the big stairwell.
There’s nowhere to go at this point, so wait for the stairwell to collapse, landing you right back in the Security Room and ending the chase sequence.
Security Office and Getting to the Workshops
Talk to Dispatch who will reveal that your next destination for the next Data Diver upgrade is the Demonstration Theater. To get there, you’ll need to work your way through the Workshop area first.
From the Security Office, head back to the Main Hallway concourse and first unlock the security door immediately to your right, now that you have Creator clearance.
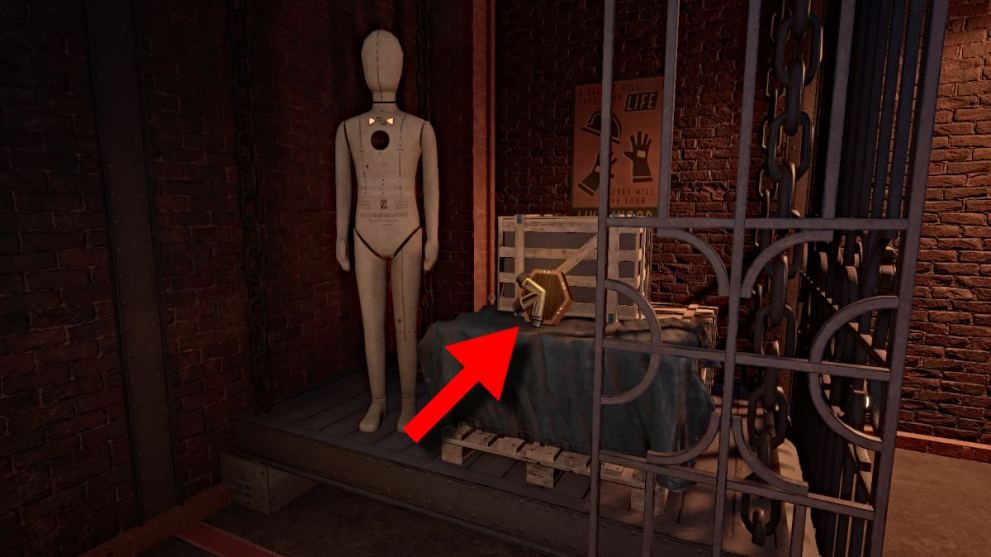
Collectible – Ranger Army Knife
Go inside to find a small storage room full of supplies and a collectible box. Open it to collect the Ranger Army Knife. Backtrack to the Security Office and drop it off in the Inventory machine.
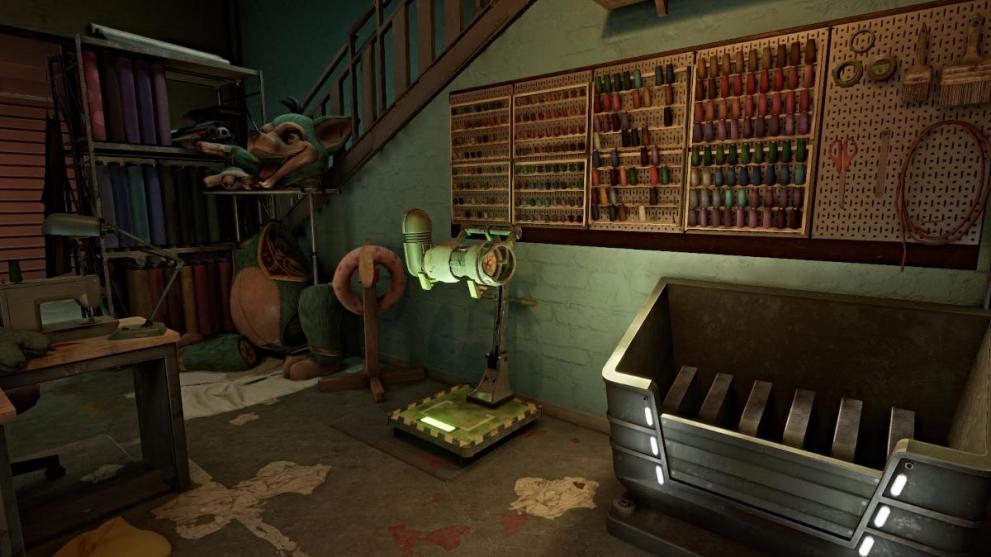
The Workshops and Making a Springlock Suit
Head right down the Main Hallway concourse to find the door shutter entrance to the Workshops. It’s directly across from the Warehouse. Use your Creator clearance to enter and take in your surroundings.
Make your way down the hallway on the right and through the two sets of doors ahead. This brings you to an assembly room with a platform in the center. Head for the office on the other side of the room.
Press the button on the Mrs. Helper kiosk to get your next objective. To access the Demonstration Room as a “director”, you first need to assemble a Springlock Suit. The assembly platform currently only has the chest piece, so you need to find the rest of the parts.
Since you can only carry items one at a time, keep in mind that you need to bring each piece back to the assembly room individually. When you do, go up to the assembly platform and attach the piece to the chest. The game will autosave after each piece is attached.
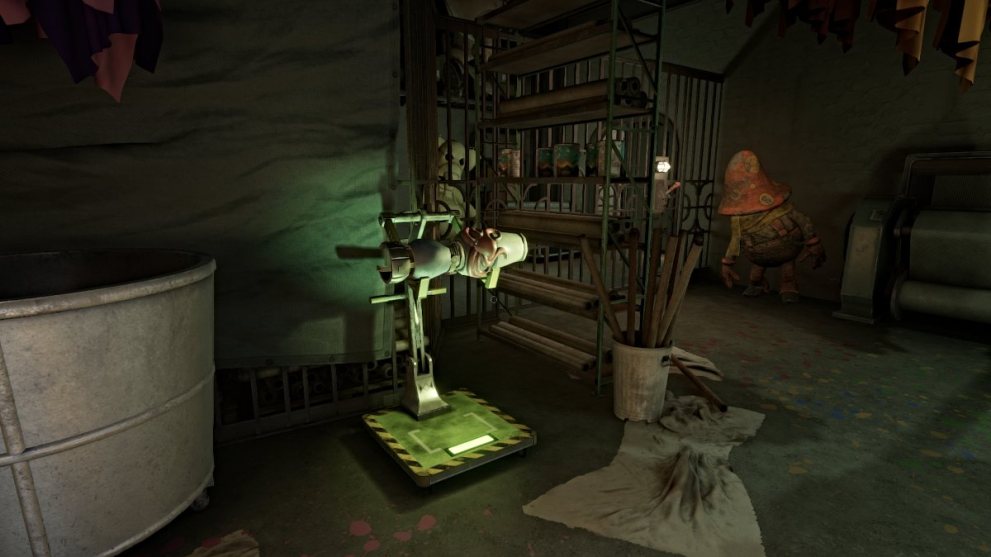
Springlock Suit – Head Piece
Backtrack to the entry room and go through the now-open doorway immediately to your left, which brings you to a two-level workshop. Tread carefully as animatronics will now randomly become active and patrol the area.
You need to make your way up the stairs to the upper floor in this room, and then to the area in the back. Here you’ll see the Springlock Head Piece dangling on a chain. Use the crank on the back side to lower it to the bottom level.
Carefully make your way back downstairs and retrieve the headpiece. Return it to the assembly room before going to find the next one.
Springlock Suit – Leg Piece 1
One of the leg pieces of the Springlock suit is found in a back corner room of the workshop’s lower level. Aside from the main area of the workshop, you can also access this room from the upper catwalk that wraps around it.
Simply grab the leg piece off the contraption and bring it back to the assembly room.
Springlock Suit – Leg Piece 2
The other leg piece of the Springlock suit is found down in a closed-off area of the workshop. You can access it from the catwalk, which you get to from the upper level (where you find the headpiece). Grab the leg piece and use either the upper or lower routes to return to the assembly room.
Springlock Suit – Arm Piece 1
To get to this piece of the Springlock suit, pull the lever next to the shutter door in the room where you find the second leg piece. It leads to a gated-off section of the entrance area, which you saw on your way in.
Grab the arm piece from here and return it to the assembly room by opening the gate via the lever.
Springlock Suit – Arm Piece 2
The second arm piece is actually right out in the open (compared to the other pieces). You can find it hanging from a chain in the lower open area of the workshop room, along the left wall.
Springlock Suit and Demonstration Theater
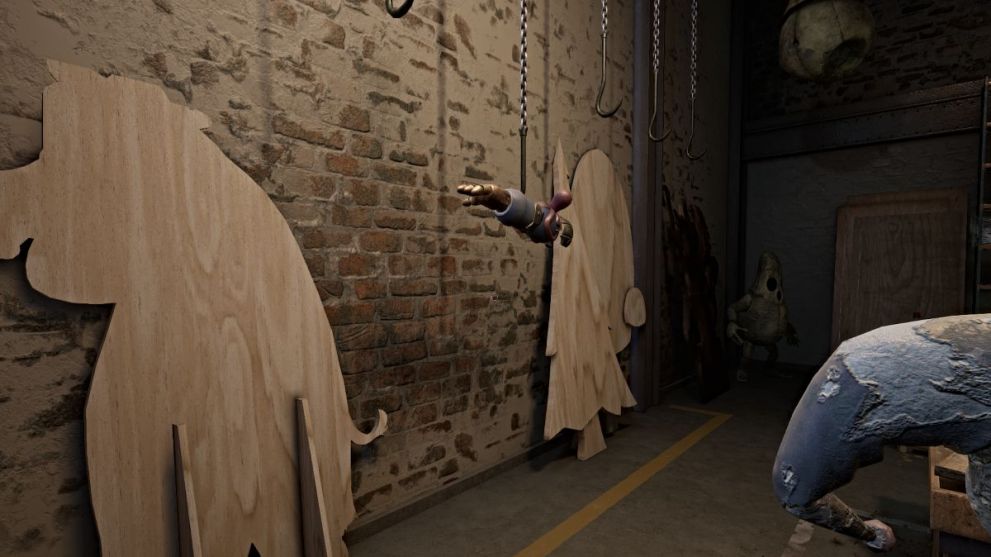
Once the Springlock Suit is complete, go back into the side office and use the computer to ‘power up the springlocks’. Now go over to the assembly platform and interact with the suit to “put it on”. Now step forward to the platform opposite (the one with yellow footprints on it) and it’ll take you up to the Demonstration Theater.
Make your way through the backstage area and a Sharpay animatronic will (likely) jumpscare you around the corner. However, it’s docile since it recognizes you as a fellow animatronic, meaning you’re safe for now.
Make your way through the next room until you find an open vent shaft. Exit the Springlock Suit and crawl through the vent to reach the power room for the theater.
Demonstration Theater Overflow Puzzle
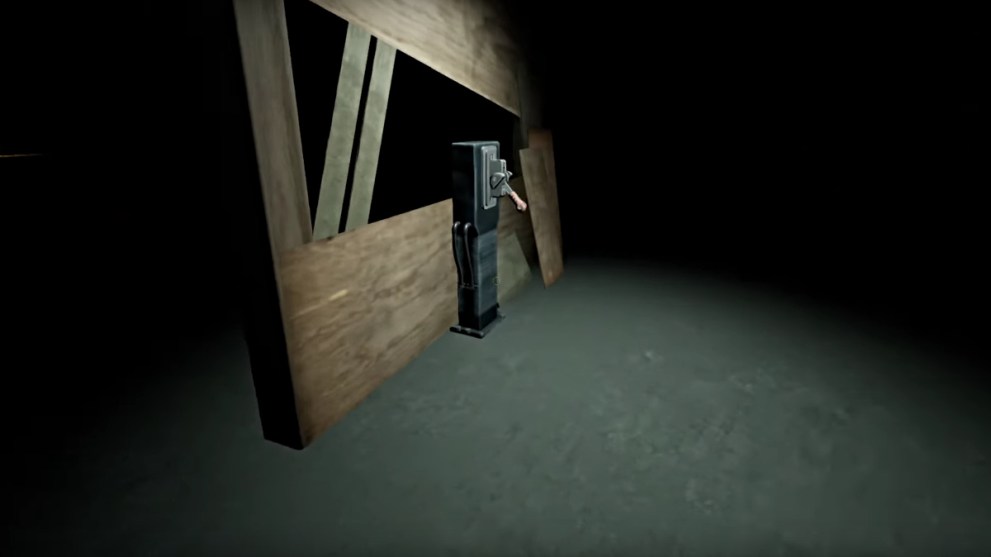
In the power room, you’ll find a lever to reveal yet another overflow puzzle to help power up the Demonstration Theater. This time, however, you’ll notice there’s a tile missing. The tile is sitting on a box to the left nearby. Pick it up and place it to start the puzzle (and its timer).
This one is trickier than previous ones in the game but the quickest solution is to use the bottom tiles, as seen below.
Once done, to get back out of the power room you need to use the ramp on the right side. Go up it until you can drop down and use a crawlspace to get out. Bear in mind this means you don’t have your suit for protection and you need to go retrieve it while avoiding the Sharpay animatronic.
Use the locker hiding spots in the room to navigate your way to the suit and get back inside. Take the suit to the next platform lift (directly across the from one you came in on) and ride it up to the next area.
Backstage Area

This brings you to the Backstage area right underneath the theater (which you can see thanks to the huge hole in the stage above). There’s also a gaping hole in the floor below, where the Moon animatronic appears to have fallen through. Make note of the small office to the right, which has
For now, exit the Springlock Suit and take the vent passage across to the other side. As Edwin’s voice plays overhead, head left and crawl underneath the debris blocking the stairs. Make your way toward the back of this area and the lights will suddenly flicker.
If you feel up to a detour, grab the Film Reel from the nearby filing cabinet labeled “film” and bring it back to the Inventory machine in the office at the start of the area.

Take the lift in the back left corner, as the security door on the opposite side requires ‘Admin’ access. Up top, you’ll find a catwalk area that you need to re-arrange using a magnetized crane in order to get across.
How to Solve Backstage Magnet Bridge Puzzle
This bridge puzzle consists of 12 squares total, with squares (stripe pattern) that you can’t move or change. Essentially, you need to arrange the bridge pieces with the crane to allow you to get across safely. There 4 bridge pieces total (the lit up ones) that you can move.
To do this, you need to magnetically grab and move parts to complete a full bridge on the far right side. This means you need to arrange all four movable pieces to that side until they all connect.
Once done, go across and continue left on the catwalk until you come to a crank mechanism connected to a long chain. There’s one on the other side of the catwalk as well, and these are holding up the main bridge in the center of the room.
Your goal is to lower it to make the entire room accessible for the Springlock suit. First, turn the cranks on both sides of the room. Next, go take the nearby lift back down to the lower level and return to your Springlock Suit.
Once inside, use the suit’s cannon to shoot the chain target holding the bridge. Now walk across the lowered bridge and step onto the springlock lift straight ahead.
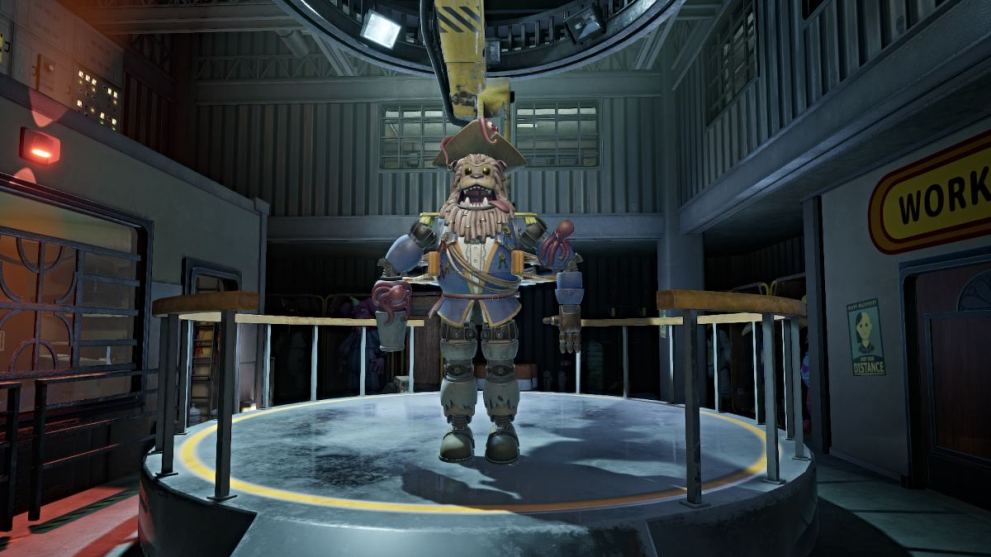
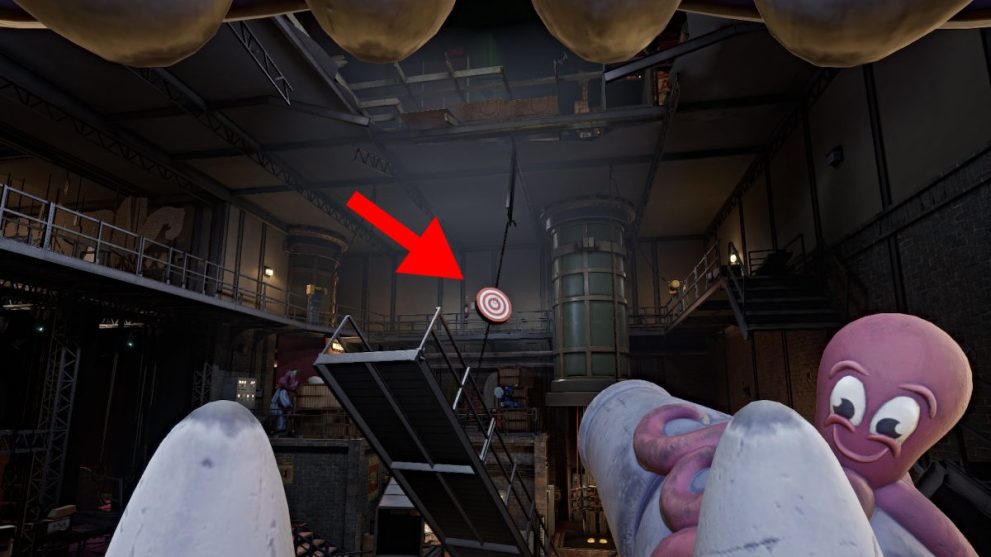
Start the Show and Shoot the Targets

The lift brings you up to the main stage for the puppet show demonstration, with you as the Captain. Foxy also makes a nostalgic cameo. As the show goes on, there will be multiple phases where sets of bullseye targets appear.
To ensure you get the best audience reaction, focus on shooting the green targets when they pop up. If you shoot too many red targets, the audience reaction will turn negative and a puppet will jumpscare you, causing a game over.
Continue this shooting mini-game until the show descends into utter chaos and the platform you’re standing on collapses, sending you back into the depths.
Escape the Doll Hospital
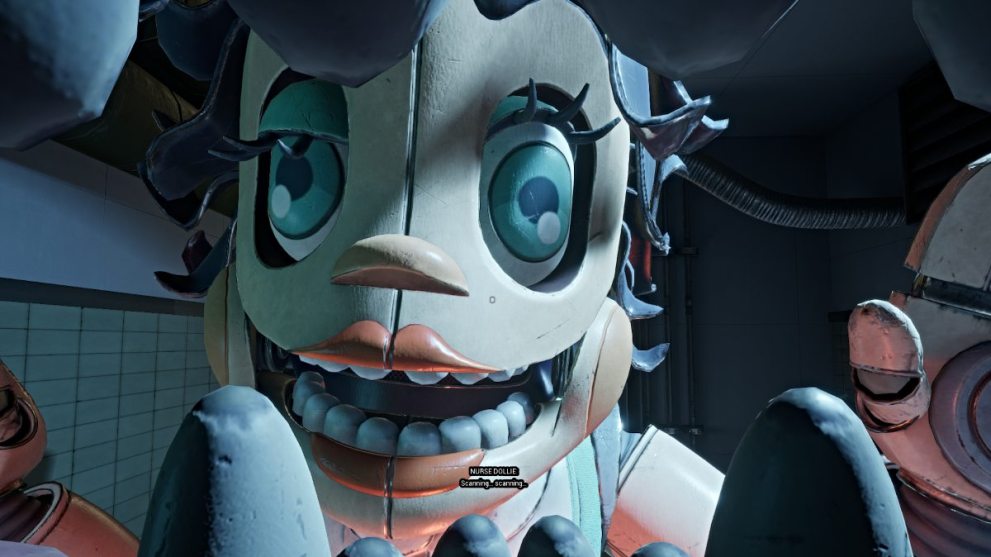
It turns out you’ve ended up in an area of the facility called the Doll Hospital, where animatronics are treated, or rather, recycled. Nurse Dollie diagnoses you as a “foreign contaminant” that needs to be scooped out but also notes that you’re at the end of a very long line of “patients” and leaves the room.
Leave the Springlock Suit and head out of the room. Use your Data Diver to get through the door on the right side, and you’ll be brought to a viewing area for Edwin’s “recycling project”. Wait for the demonstration to end, then continue along the catwalk and go through the security door on the other side.
In this area, Nurse Dollie runs on a track at a fast pace, and you need to carefully maneuver through each pathway while staying out of her way. First, plug into the computer on the desk straight ahead and select the ‘open the vent’ option.
Now make your way to the pathway along the back wall and beeline it for the open vent shaft straight ahead. Crawl through into the small room and brace for a small jumpscare from a broken mail bot. Pick up the Gear item on the same table and leave the room.
Go and place the gear on the door along the back wall. Now backtrack to the computer you used earlier near the front of the area. This time, select the ‘open the door’ option, which will open the back door to the next area of the hospital.
Go through, and you’ll discover that Nurse Dollie is now off her track and she gives chase. Immediately go right and through the security door (which is broken on the other side). Duck into the nearby locker until Nurse Dollie resumes her patrol.
You need to get to the other side of this small section, where there’s a generator you need to power up. To distract Nurse Dollie, push the red button on the little jackhammer bot near the locker. After she runs over to check it, duck out of the locker and go rev up the generator.
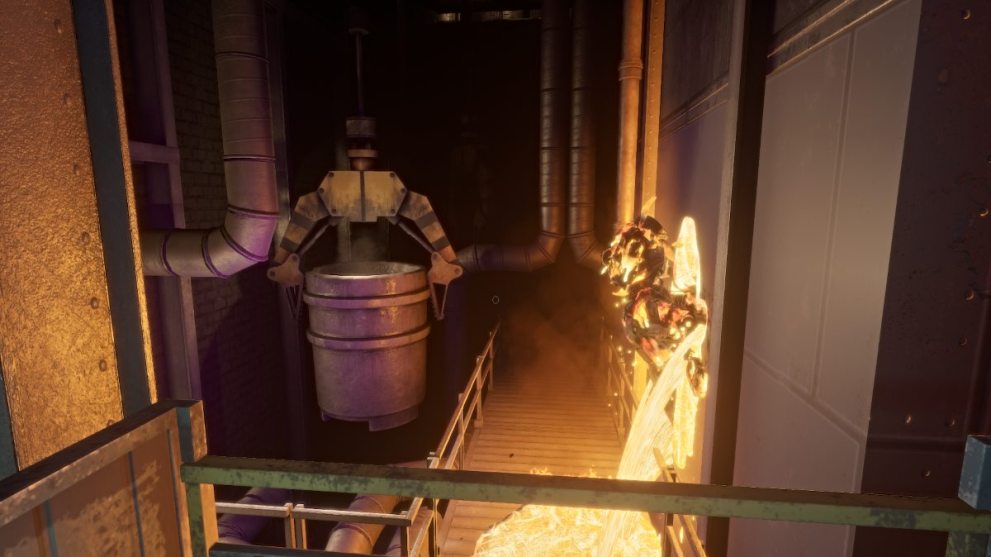
The Furnace

This will turn on the fan in the nearby vent shaft, allowing you to crawl through it. Cross to the other side to another shaft, and on the other side, you’ll arrive at what appears to be the Furnace room.
Hit the red button on the Mr. Helpful kiosk for instructions for operating the furnace. Next, plug into the nearby computer and select the ‘access the doll hospital’ option. This will open the hatch to the furnace and activate the conveyor belt that leads into it.
Now you need to fill the incinerator to open the exit and escape the doll hospital. To do that, you need to collect and dump recycling cubes into trash chutes.
Go over to the door shutter that leads back to the doll hospital (the side you couldn’t access earlier). You still need to watch out for Nurse Dollie, so move carefully. Ahead on the right is a Trash Compactor and a Trash Chute next to it.
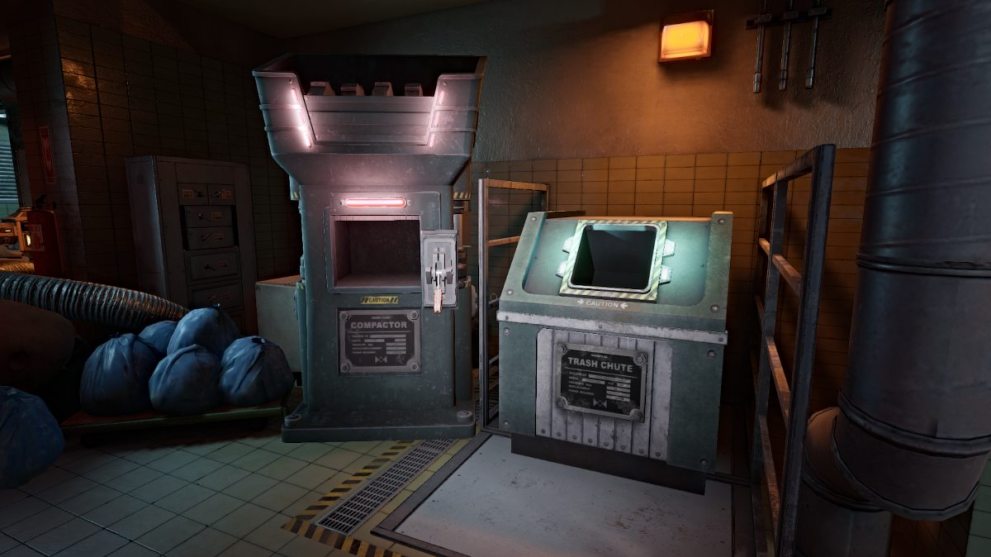
Pull the lever on the Compactor to reveal a trash cube. Pick it up and place it down the trash chute. Now you’ll need to find more trash cubes around the area to transport.
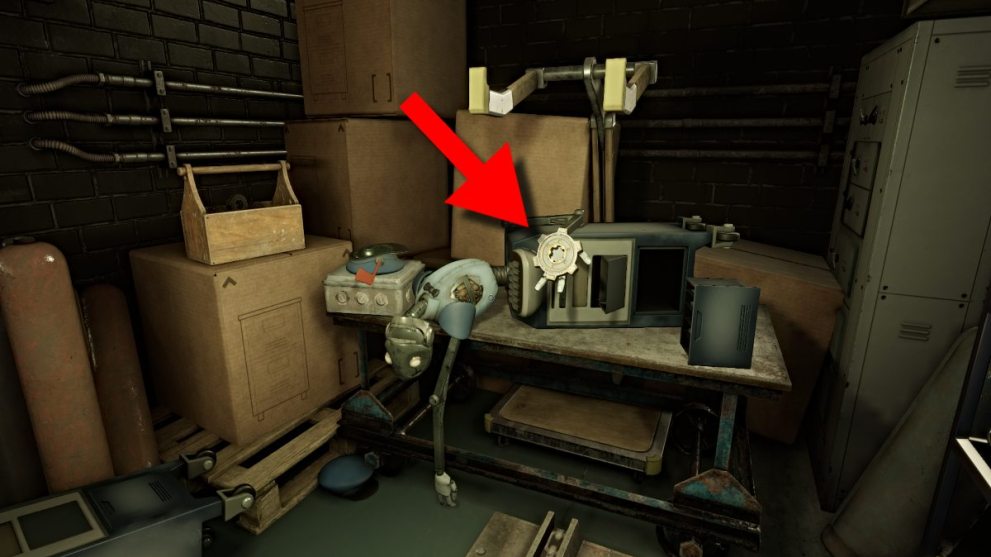
Make your way to the far right side of the hospital along the back hallway and crawl through the short vent shaft ahead. This brings you to a small room containing the Admin Clearance Level Upgrade Machine, along with a trash cube.
Admin Clearance Upgrade Puzzle
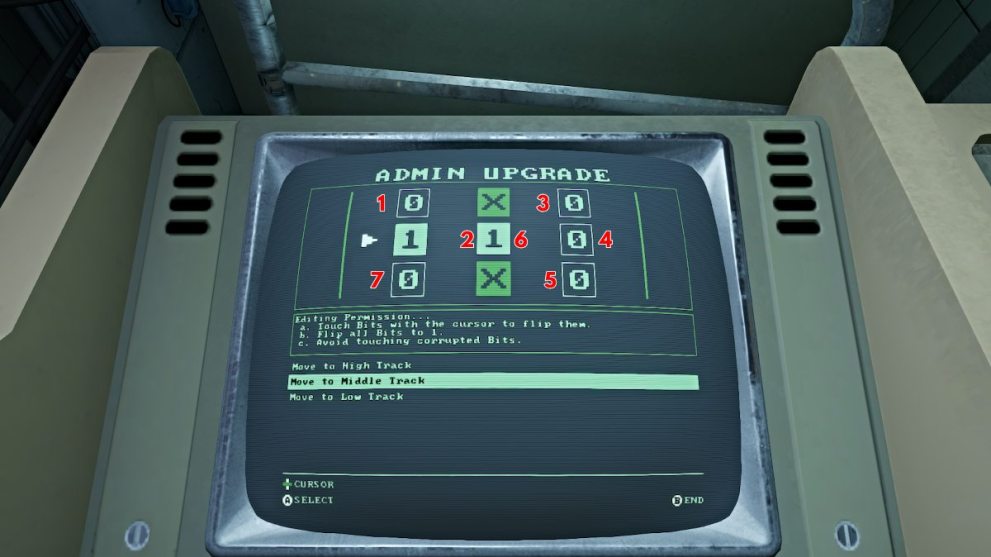
This upgrade puzzle is definitely the most challenging one yet, with two corrupted bits now introduced.
Start by flipping the top left bit to ‘1’, then move to the middle track and flip the center bit to ‘0’. Next, move back up to the high track and flip the top right corner bit to ‘1’, then quickly move back down to the middle track and flip the center right bit to ‘1’.
Finally, going back, move to the low track and flip the bottom right bit to ‘1’, then up to the middle track to flip the center bit to ‘1’, then back down to the low track to flip the bottom left bit to ‘1’. This completes the puzzle and your upgrade to Admin.
Toss More Trash and Send Dollie to the Furnace
Grab the trash cube in the upgrade room and toss it into the chute right outside the door. There’s also a box of wind-up squirrels you can use for distractions here.
Continue to collect all of the trash cubes on this side of the hospital and toss them in the nearest chute. Once you’ve done enough, a loud beep sound will be heard.
Return to the center area where the control panel will say ‘Chute Full’. Press the button on the panel and now the chute will need to be unclogged manually. Lucky for you.
Go through the nearby Maintenance door that’s now open and down the stairs. This brings you to the conveyor belt area, with multiple levers on both sides. As soon as you cross to the first lever, Nurse Dollie will drop down and attempt to pursue you up the conveyor belt.
Advance and pull each lever in order to drop trash onto the belt and cause her to stumble. Keep doing this until you reach the front and hit the button on the wall, sending her into the furnace.
With that, head back up to the main level via the vent shaft and back to the Furnace Room. Use the computer to unlock the door to the Power Reactor Room.
Escape Melted Nurse Dollie
Once inside the Power Reactor Room, take the lift down to the lower level. Go down the catwalk and take the next lift down. Suddenly, Nurse Dollie will burst out from the side of the furnace, definitely looking worse for wear.
When you’re able to, immediately turn left and run, beginning a brief chase sequence. Follow the catwalks and conveyor belts until one brings you face-to-face with Dollie again. Run up the belt until you see a spot on the right side you can dive into. Go through the vent shaft and you’ll arrive in a room with a generator.
Rev up the generator and then proceed to the next area. Dollie will start patrolling there, so move carefully. This next section is essentially a stealth challenge, as you need to crouch through the hallways as Dollie moves around. Make note of the chains hanging from the ceiling everywhere, so staying crouched is optimal for this part.
Continue until you see a large elevator lift straight ahead in a room full of barrels. Press the red button to summon it and run in as soon as you can, as Dollie will come running. Press the button inside to shut the elevator, taking you back up. However, the elevator breaks mid-ride, forcing you to fix it.
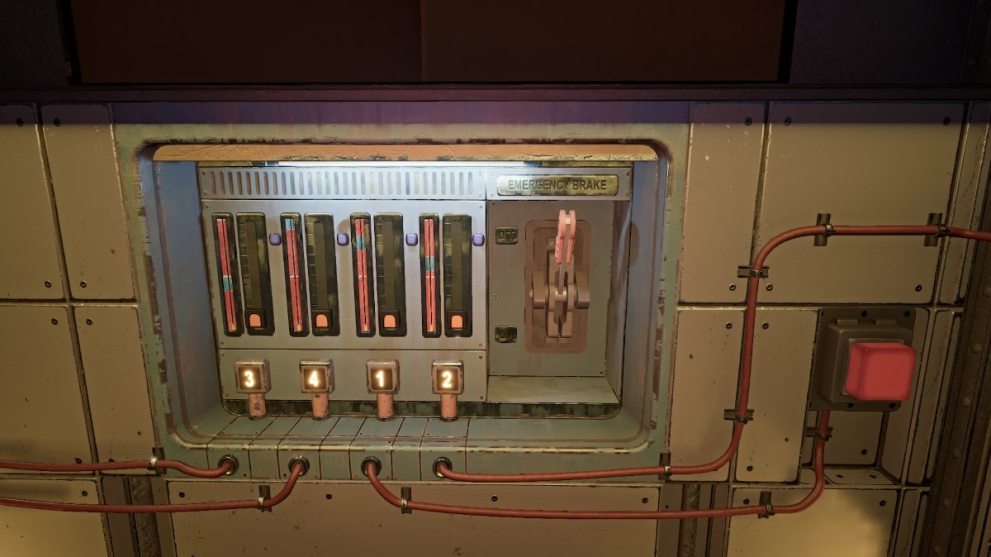
How to Repair Furnace Elevator
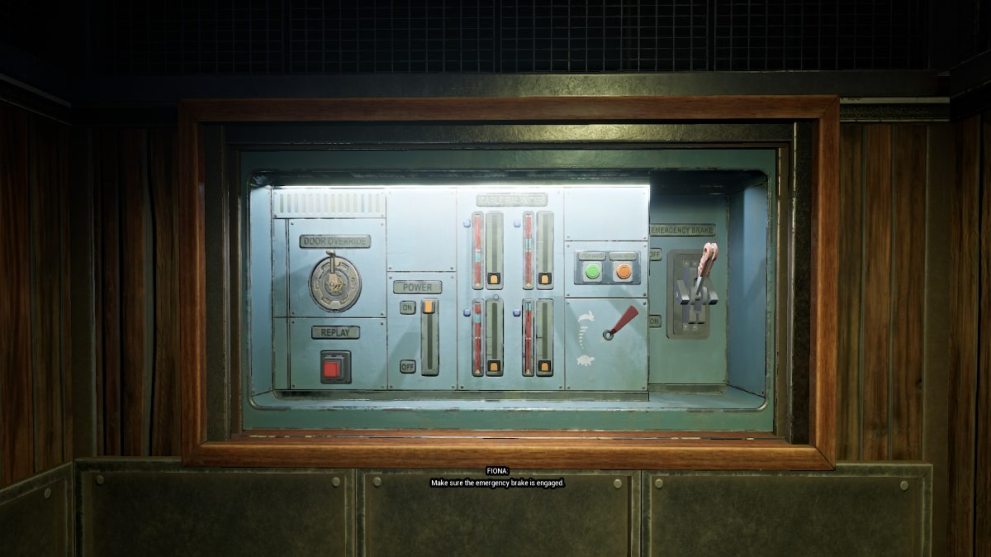
As Fiona talks you through repairing the service elevator, the panel should look familiar. First, pull the Emergency Brake Lever down to engage it. Next, turn the power off.
After that, same as before, you need to adjust the four sliders to rebalance the elevator. Shift them until they’re balanced in the blue section of each gauge and lit up. Once done, turn the Door Override crank until the doors are open.
Next, press the green ‘Open Hatch’ button to reveal a series of four red buttons on the elevator. Press them in the order 4-3-2-1, as instructed. Make note of the numbers on the power modules on this panel and follow the red wires to the correct buttons.
Once done, press the red ‘Close Hatch’ button and turn the Door Override crank the other way to close the doors. Turn the power back on and disengage the emergency brake.
However, just as it seems like all is in order, Dollie drops down onto the elevator and starts trying to break in.
How to Repair Furnace Elevator, Again
Fiona’s voice will take you through a different set of instructions this time around, with the same panel as before. Do your best to ignore the banging from Dollie above.
Engage the emergency brake and readjust the balance sliders. The power is already off. Fiona will then tell you to increase the elevator’s speed, which you can do via the handle with the turtle and rabbit icons on either end of a gauge. Turn the handle toward the rabbit to increase the elevator’s speed.
Turn the power back on, disengage the emergency brake, and Dollie will be sent hurtling into the ceiling of the elevator shaft, seemingly defeated this time. Crawl out of the elevator to continue on.
Security Office and the Warehouse

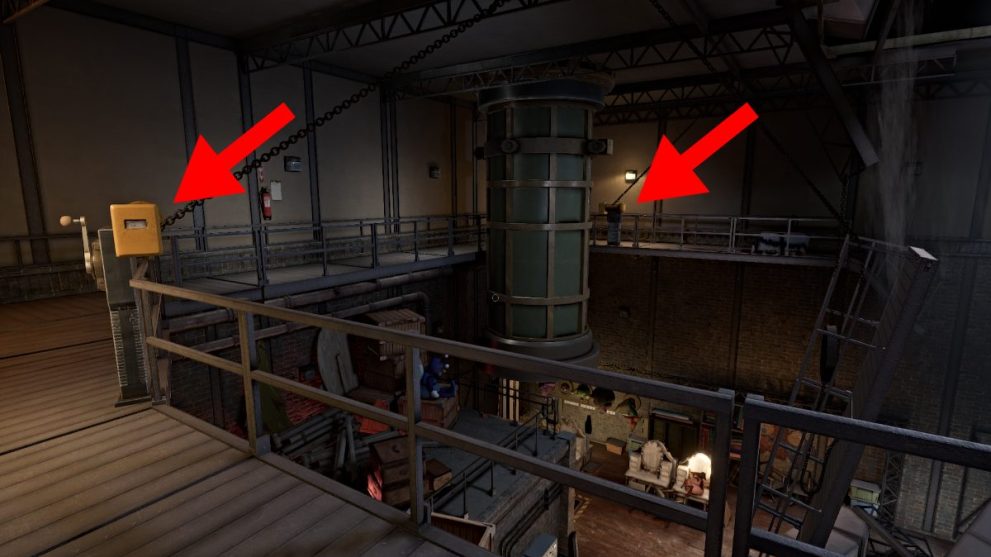
Head through the next room that looks like a cart repair service, and go through the Storage door shutter. Midway up the stairs, grab and turn the crank to open the doors above.
This brings you back into the concourse area by the Security Room, where you’ll hear Dispatch calling. Go inside the office and pick up the call. You’re now instructed to get to the Admin Wing where Edwin’s office is located, to get the blueprints for the mimic endoskeleton.
To get there, you first need to make your way through the Warehouse area, which is accessible from the Main Hallway. Head there and go inside.
The Warehouse’s layout is sort of like a maze, so it’s a matter of navigating your way through. Start by cranking the lever immediately to your right after walking in. This gets a Rocktopus animatronic out of your way.
Missing Tile 1
Go through where you’ll find a Spare Tile for another overflow puzzle just ahead. First, crank the next lever ahead to open the gate, then grab the tile. However, just as you walk forward, a new animatronic busts out of its container. Turns out that it’s an early version of Chica. She presents a unique challenge, as she moves around on rollerskates, making her faster than other animatronics.
This means you’re going to need to sneak through more diligently. Make note of every hiding spot you can as well. Make your way along the right side of the room, staying out of sight. In the back right corner is the overflow puzzle where you can use the spare tile you found.
Use the lever to open the puzzle’s hatch, and you’ll see that there are actually three tiles missing. Replace the one you just found, and now you need to go find the other two.
Missing Tile 2
To find the next tile, you need to sneak around to the far back left corner of the Warehouse main room, opposite the overflow puzzle. To make things even harder, talking mannequins are scattered around this particular area. If you trip one, Chica will likely come running so be careful.
To get the tile itself, go to what looks like a shaft for a lift and turn the crank next to it. This will bring down the lift full of boxes and the second missing tile will be sitting on the pile. Backtrack to the overflow puzzle and replace the next tile.
Missing Tile 3
The third and final missing tile is in the bottom left corner of the room, in the area behind the small office. Next to a pile of wooden palettes resembling stairs, there’s a lever to lower a green trolley car. Use the makeshift stars to climb into the trolley where the tile will be in one of the seats.
Backtrack once more to the overflow puzzle and place the missing tile. You’re now ready to solve it.
Again, you’ll need to be careful here as Chica can come rolling through at any moment. On top of the timer these puzzles already have, you’ll need to be even more diligent with solving it before Chica rolls by and sends you to a game over.
Once the puzzle is done, it will send power via the red cord on the ground to a nearby gate you can open via a red button. Do so and then hack your way through the next security door to the next area – the Loading Bay.
Loading Bay
This next area is an obstacle course of dangerous animatronic equipment that’s currently impossible to pass through safely. To fix that, head up the stairs to a catwalk overlooking the Loading Bay, where you’ll find a control panel for a familiar puzzle.
How to Solve Loading Bay Puzzle
This puzzle functions similarly to the one found in the Backstage area earlier on. Again, you need to use a crane to move pieces around and make a path for Arnold to cross safely. The main difference is that these pieces are bigger with different shapes. Remember that the solid-colored shapes are the only ones you can move.
- Start by picking up the southmost piece (Sparkle Spinner) and move it up to the northeast corner.
- Next, pick up the piece in the northwest corner (the purple foot stompers) and move it over to the east side, one tile down from the top. Basically, it almost forms a bridge between the two solid pieces on the east side.
- Next, pick up the Crocodile piece on the west side and place it in the space between the Construction piece and the Purple Stomper Piece. Essentially, just move it straight across without going north or south.
Once you’re done, it should look like the pattern below.
Now carefully make your way across to the other side of the loading bay. Once there, you’ll find a second control panel to complete the second half of the puzzle.
- Start by picking up the Purple Stomper piece and move it straight forward toward you.
- Next, pick up the Crocodile piece and move it all the way into the bottom right corner toward you.
- Next, pick up the Construction piece and move it right and then down toward you until it sits just above the Crocodile piece and next to the Purple Stomper piece.
Once done, your screen should resemble the one below.
Now it’s time to make your way across again. Before you do, however, go over to the filing cabinet on the walkway to your left to grab another Film Reel. When you’re ready, make your way across toward the right side of the loading bay where there’s a set of stairs to get to a door high up at the top.
Reaching the Admin Wing
Go through the doors where a strange cat animatronic makes a brief appearance before disappearing. Shrug off the obvious hallucination and head into the nearby office to the right. Drop the Film Reel into the Inventory box.
There are several doors scattered around this area. Start by going all the way left down the hallway and through the ‘Welcome Show’ door. This brings you to the rafters high above the welcome showroom where you first entered the building.
Collectible – Pet Fish Net
In the back right corner of the rafters you’ll find another collectible box. Open it to get the Pet Fish Net collectible. Leave this area and bring it back to the Inventory box in the office on the other side of the hallway.
Leave the office and go through the doors immediately to the right. Look for the elevator lift straight ahead and take it down to the lower level. You’ll see the shutter door to the Admin Wing ahead. Use your Data Diver to get inside.
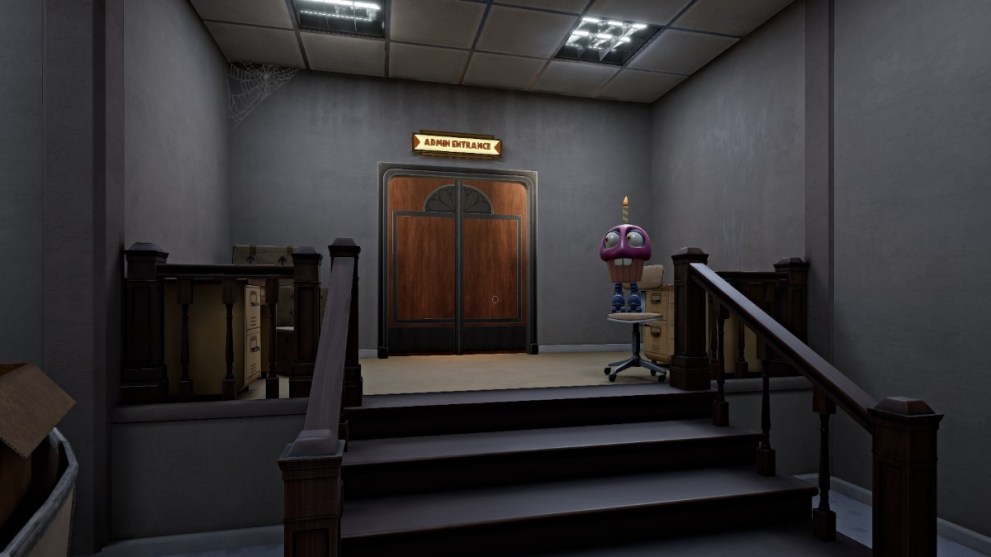
Once inside, look for the Admin Entrance door immediately to your right, where you’ll see a cupcake animatronic standing watch. Approaching it will alert it but head inside anyway.
Admin Wing
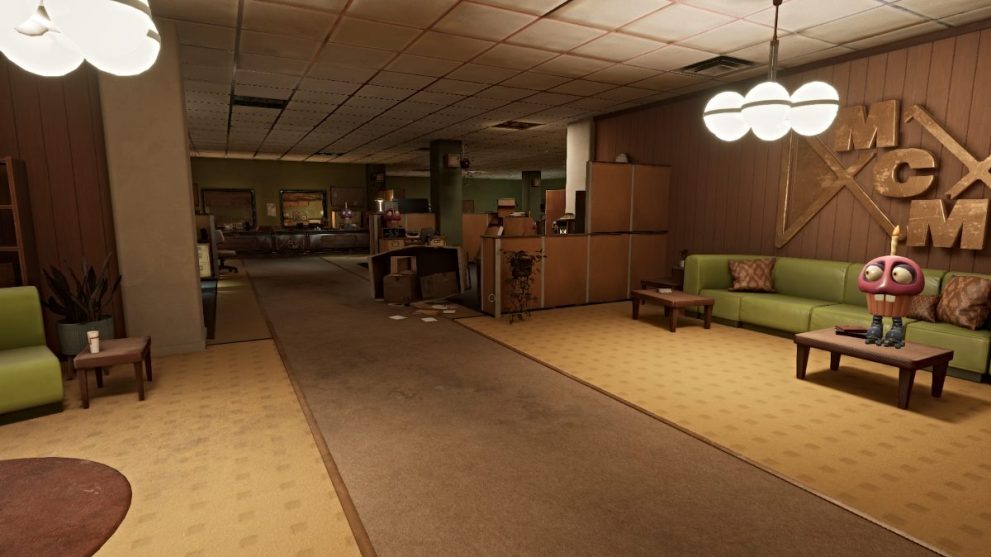
Well, turns out that cupcake was a legitimate warning as there are far more cupcakes inside, everywhere. These act as alerts for Chica, who’s now rolling around inside the Admin Wing. Your goal here is to find the missing blueprints, so move around carefully while making your search.
Start by getting into the conference room on the left side of the wing, but it’s locked with another keypad. The code for this one is 01350. Not only do you unlock the ‘Belated Birthday’ achievement for getting inside but there’s another collectible to get too.
Collectible – Birthday Cake
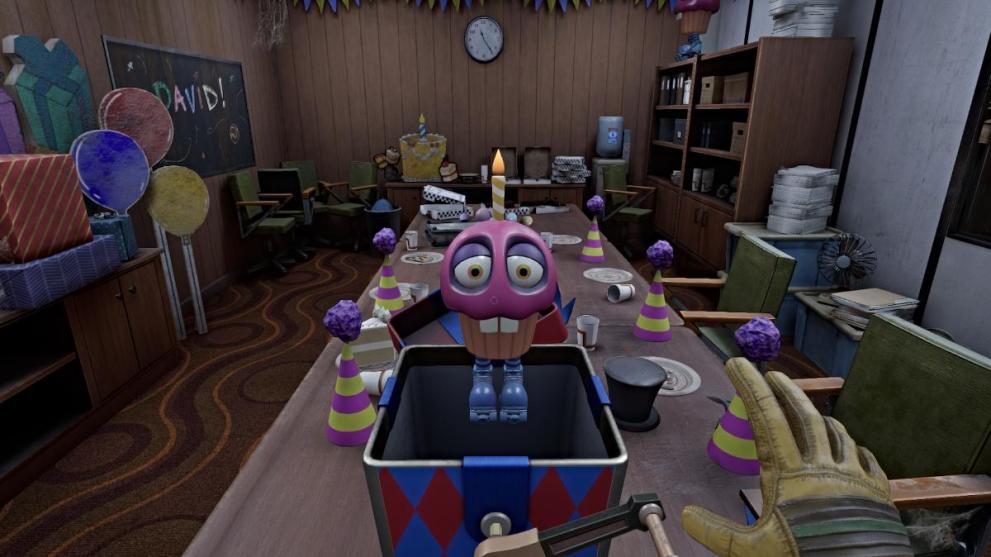
Go inside the room, which is still eerily decorated for David’s birthday. Beware of the cupcake animatronic sitting on top of the cabinets in the corner.
Open the collectible box on the table to get the Birthday Cake collectible, which is certainly fitting. You can bring it to the Inventory box in the break room in the center of the wing.
Your next step is to get to the second floor of the Admin Wing, which can be done via the stairwell on the right side of the room. You’ll need to navigate in a loop around the first floor, from the left side through a hallway along the back wall to the right. When it’s safe, make a beeline for the stairs and hack through the security door at the top.
Admin Wing – Second Floor
On the second floor, you’ll find a few different rooms to explore, including one with a film projector in it where you can watch the Film Reels you’ve collected so far in the game. There’s also a Mrs. Helpful kiosk which you can use to get more backstory lore.
The focal point here, however, is the Executive Clearance upgrade machine in the room on the left. To get to it, go into a nearby room where a projector machine is shining on an open vent shaft. Go through it and it’ll bring you to the room with the upgrade machine. It’s time to get your final Data Diver upgrade.
How to Solve Executive Level Clearance Puzzle

To solve this last clearance puzzle, you’ll need some quick thinking.
- Start on the middle track and turn the center-left bit to ‘0’.
- Go up to the high track and turn the center and right bits to ‘1’
- Quickly go back down to the middle track and turn the center-right bit to ‘1’
- Going back, go to the low track and turn the bottom-right bit to ‘1’ then the bottom center bit to ‘1’
- Finally, go back up to the middle track and flip the center-left bit to ‘1’ and then quickly to the high track to turn the top left bit to ‘1’
Once done, your Data Driver is now fully upgraded with all clearances, allowing you to access any functioning security door in the facility. For now, leave the room and plug into the Executive-level door next to it. Go up the stairs and walk into Edwin’s office.
Edwin’s Office
Once inside, go over to the desk and plug into Edwin’s personal computer (the blue one). Select the ‘access surveillance room’ option and a bookcase to your right will move, revealing a hallway to another room.
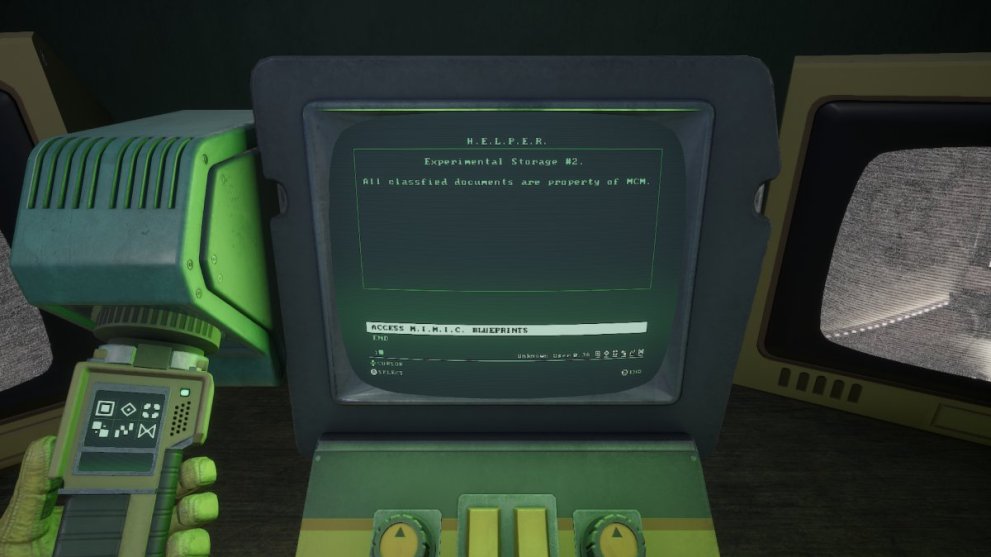
Walk to it and you find it full of security cameras (classic FNAF). Make note of the vent on the left side as well, as you’ll need it in a moment. Go to the computer console in the center and plug in. Select the ‘access M.I.M.I.C blueprints’ option.
Before you can do anything else, Chica will appear in the office and charge down the hall at you. Pull the lever by the door to close it and then duck into the vent shaft. Crawl through until you can drop down into another room. Take the elevator in the center of the room down to the B2 level of the building.
Basement – Escape White Tiger (Final Boss)

Make your way through the main basement room from the elevator. The other side of it is blocked off, so there’s nowhere to go but down the stairs in the center. Pull the lever to open the door to the next area.
As soon as you enter, White Tiger, the cat animatronic from earlier makes its official appearance. The room itself is vast and uncomfortably dark, and you’ll need to find your way around while avoiding the cat’s clutches. It’ll project hallucinations in an attempt to further disorient you, so keep your bearings.
Your goal here is to keep White Tiger from sneaking up on you while you find a lever to pull. If you’re in the vicinity of it, a ceiling light will expose it. Go and pull the lever when you spot it, which will open a door directly ahead in the distance for you to escape through.
Make a break for it and grab the red starlight from the pedestal (seen below), to help light your way through the tunnels ahead.

Follow the tunnel until you can place the starlight on another pedestal. Turn and go to the lever ahead of you. Pull it and another door in the distance will open that you need to get to while avoiding White Tiger.
Rather than a wide open area, this section is a maze that will require patience, as White Tiger will try to block your path at different points. If he’s blocking where you need to go, back off and wait for him to disappear. Take your time and make sure not to get turned around.
Make your way to the back of the maze where the next starlight pedestal is. Grab the blue starlight from it and find your way through the next part of the maze until you find another empty pedestal. Place the starlight into it to open the door ahead.
This brings you back to the wide open area and you need to find another lever to pull. Make your way around while continuing to avoid White Tiger, and wait for the lever to light up. When it does, go pull it to reveal the next door with a starlight inside.
Keep in mind that completing each of these steps (pulling a lever, placing a starlight) is an autosave checkpoint, so if you die, you’ll be sent back to your last checkpoint.
Grab the starlight and make your way through one more maze. Tread carefully so that you don’t run into White Tiger waiting around a corner. After this, the last area to survive is an open one, and you need to find the last starlight pedestal. When you do, place your starlight and a door to a stairwell will open. Go up the stairs and you’re now on the other side of the main basement level that was blocked off.
Look for a set of double doors in the corner (seen above) and go through them. Go down the hallway to the elevator and take it back up to the main level.
Dispatch will come over the intercom to commend you for finding the schematics. Go through the Executive clearance door and head for the Security Office to start “wrapping things up”.
Important Note: This will bring you to the end of the game, and the ending you get will depend on the choice you make in the security office.
All Endings in FNAF Secret of the Mimic
There are a total of three endings that you can unlock in Five Nights at Freddy’s: Secret of the Mimic and each has different requirements. Two of the endings are triggered simply by the choice you make in the Security Office at the end of the game, regardless of anything else.
Meanwhile, the third “secret” ending ties in those collectibles you’ve been gathering. If you happened to miss any (and it’s definitely easy to), you’ll have the opportunity to get the rest in New Game Plus.
Below are the requirements for each ending a basic explanation for what happens without divulging full spoilers. Experience them for yourself!
Ending 1 – Give Up the Data Diver
The first ending you can get is where you choose to hand over the fully upgraded Data Diver with the schematics to the company. Dispatch will ask you to place the Data Diver in the Inventory box and they’ll commend you on a “job well done”. They’ll say you can return to your van which is conveniently parked in the garage nearby.
Head to your van and a dramatic cutscene will play out where the Dispatch turns out not to be who they seem. Furthermore, a surprise visitor ambushes Arnold in the van, leading to an unexpected demise.
This ending will give you the ‘Clock Out’ trophy/achievement.
Ending 2 – Keep the Data Diver
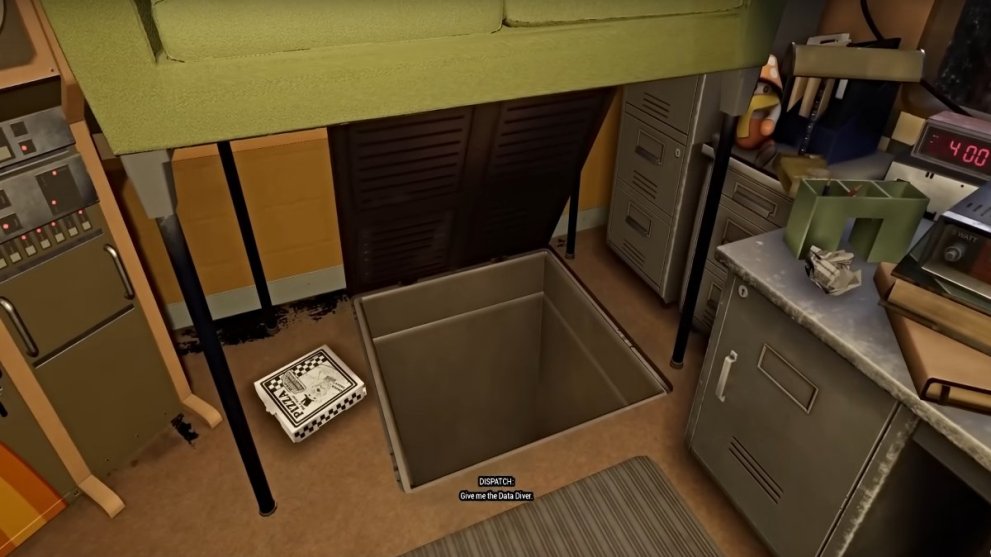
To get this ending, have Arnold keep the Data Diver instead of placing it in the Inventory box. Plug it into the HELPER computer and run the ‘Parachute.EXE’ program. This causes the couch nearby to rise and reveal a secret vent shaft in the floor.
Jump into the vent which leads through a crawlspace back to the entrance showroom. Use the control panel there to run the ‘Goodbye Show’. Return to the center of the room and suddenly you’ll be taken to an unknown location that kicks off a sequence of revelations about Edwin and his family.
This ending will give you the ‘Unfinished Business’ trophy/achievement.
Secret Ending – Beat Moon.EXE Mini-Game
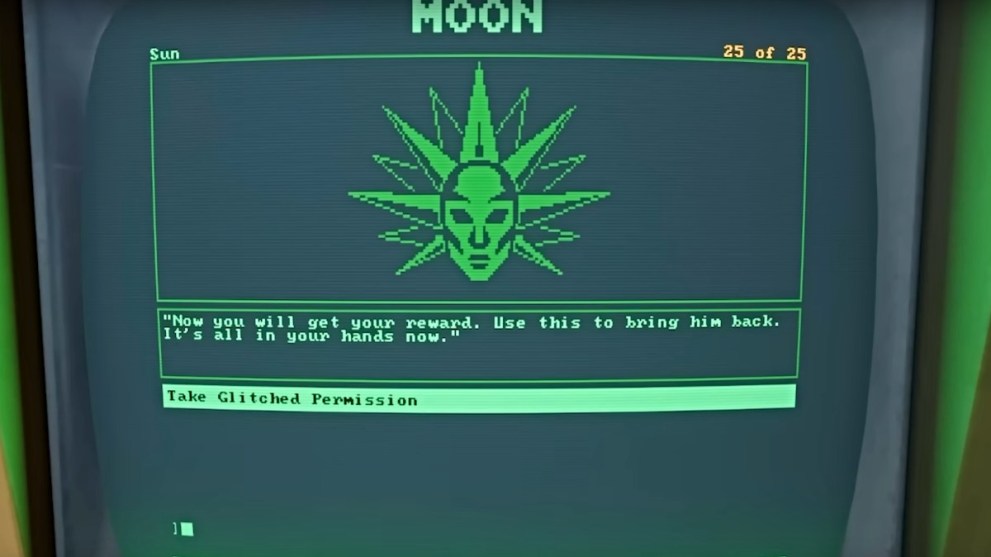
To unlock the game’s “secret” ending, you first need to find and secure all 25 collectibles in the game. These are the items you find inside the wind-up present boxes scattered throughout each section of Murray’s Costume Manor. To get all of them, you will need to start a New Game Plus playthrough, as the final collectible (the Tiger plushie) will only spawn at that point.
Once you have every single collectible and get to the final point of the story, you then need to run the Moon.EXE mini-game on the HELPER computer. The collectibles are necessary props that help you beat the mini-game and obtain a special “glitched” clearance for Edwin’s house.
This ending will give you both the ‘Master Adventurer’ and the ‘Story Time’ trophy/achievement, along with others you receive in tandem for gathering the collectibles such as ‘Memorabilia’ and ‘Belated Birthday’.
That concludes our Five Nights at Freddy’s: Secret of the Mimic walkthrough. Be sure to check out all of our latest FNAF-related guides and news here at Twinfinite, such as How to Play Five Nights at Freddy’s in Chronological Order.


Updated: Jun 16, 2025 01:05 pm