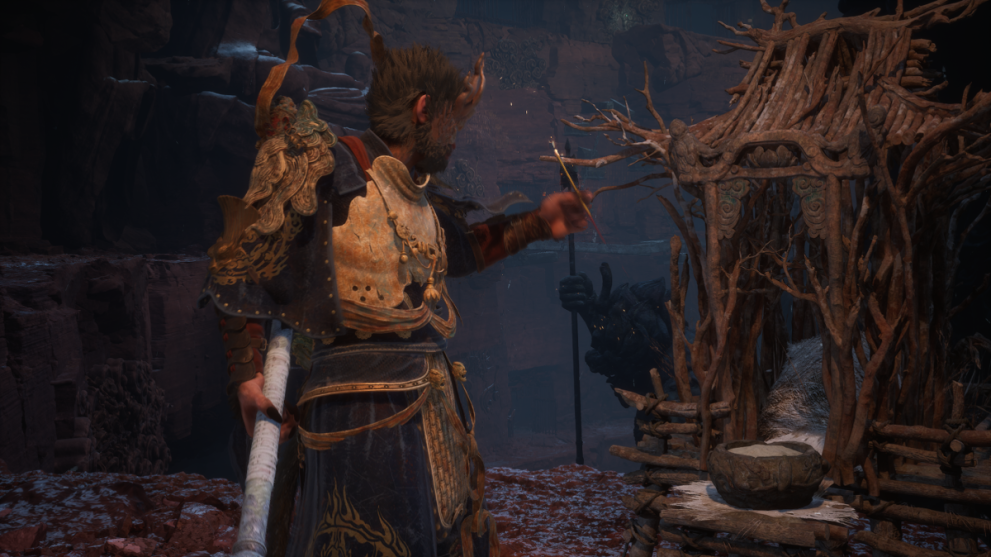
As with any good Soulslike, the world of Black Myth: Wukong is filled with checkpoints where you can heal, fast travel, and level up. In this case, these checkpoints take the forms of Shrines. Here’s how to find every shrine in Black Myth: Wukong.
Note: This article is a work in progress. We’ll continue to update it as and when we have more detailed information.
Chapter 1 Shrines
Forest of Wolves
- Front Hills: Follow the path from your spawn point until you reach a chest. Turn right here for the Shrine.
- Outside the Forest: After you defeat the Bullguard, follow the path uphill and head through the cave on the left.
- Loong Claw Grove: You’ll need to revisit the area after receiving the Loong Scale in Chapter 2. Head to the Outside the Forest region and look for a large waterfall to the west. Use the Loong Scale to climb it for this Shrine.
- Guanyin Temple: Head right across the bridge from the Outside the Forest region to find a Wandering Wight. Defeat (or avoid) it, then head down to the wooden platform near the temple.
Bamboo Grove
- Back Hills: After you defeat Lingxuzi, head through the back exit to find this Shrine.
- Snake Trail: Follow the path from the previous Shrine until you reach a set of stairs near a river. Climb these stairs.
- Marsh of White Mist: From the area where you fight Guangmou, take the stairs on the right-hand side.
Black Wind Cave
- Cave Interior: Enter the cave and head passed the area where you fight the Whiteclad Noble. Go right at the fork to find this Shrine.
- Outside the Cave: Head through the curtains after defeating the Black Wind King.
- Bodhi Peak: From the previous Shrine, follow the main path to a higher area.
Ancient Guanyin Temple
In addition to the above shrines, there’s a hidden one in the Grand Chamber at the Ancient Guanyin Temple, a secret location you can reach by ringing three bells in the areas where you fought Guangzhi, Guangmou, and Whiteclad Noble. Once you’ve unlocked it, you can fast travel to it just as with any other Shrine.

Chapter 2 Shrines
Sandgate Village
- Village Entrance: From the spawn point, cross the river and head uphill.
- Bottom of the Well: Defeat the Tiger’s Acolyte to get the Old Rattle Drum, and use it in three specific areas in Sandgate Village and Yellow Wind Formation. Doing this will let you enter the well. As with the Ancient Guanyin Temple, you’ll be able to fast-travel to the well after using it.
- Valley of Despair: This Shrine is in the arena where you fight the King and Second Prince.
Crouching Tiger Temple
- Temple Entrance: From the Valley of Despair Shrine, head through the First Prince Cave.
- Cellar: To unlock this Shrine, you need to interact with the statue where you fought the Tiger Vanguard to open a hatch. Jump down and follow the path to find the shrine. You can also reach the cellar a little later on by taking a door next to the Windseal Gate.
Fright Cliff
- Squall Hideout: From the Valley of Despair, take the right path across the bridge, then head through an archway to find this Shrine.
- Rockrest Flat: Head through the cave near the Squall Hideout. Which path you take doesn’t matter as they’ll both lead to the same location.
- Hidden Loong Cavern: Use the Loong Scale on the falling sand near the Rockrest Flat Shrine.
- Rock Clash Platform: Outside the area where you fought the Stone Vanguard.
Yellow Wind Formation
- Windrest Bridge: From the area where you defeated the Tiger Vanguard, exit out onto the other side of the temple.
- Windrest Hamlet: Follow the path from Windrest Build.
- Windseal Gate: From Windrest Hamlet, cross the Tiger’s Acolyte bridge and head through the cave.
To unlock this secret area, you need to find the Yellow-Robed squire – a drunken boar at Rockrest Flat. Complete the quest he gives you.
- Sandgate Pass: After completing the Yellow-Robed Squire quest, follow the Squire through the doors in Rockrest Flat.
- Sandgate Bound: Head deeper into the desert past the Sandgate Pass. The Shrine is near a rock formation.
Chapter 3 Shrines
Snowhill Pass
- Frost-Clad Path
- Mirrormere
Pagoda Realm
- Lower Pagoda
- Upper Pagoda
- Mani Wheel
- Outside the Wheel
- Snow-Veiled Trail
- The Great Pagoda
- Warding Temple
Bitter Lake
- Turtle Island
- North Shore of the Bitter Lake
- Precept Corridor
Valley of Ecstacy
- Mindfulness Cliff
- Forest of Felicity
- Melon Fields
- Brook of Bliss
- Towers of Karma
- Longevity Road
New Thunderclap Temple
- Temple Entrance
- Mahavira Hall
- Floating Sculpture Upper Level
- Floating Sculpture Lower Level
Chapter 4 Shrines
Village of Lanxi
- Estate of the Zhu
Webbed Hollow
- Upper Hollow
- Pool of Shattered Jade
- The Verdure Bridge
- Middle Hollow
- Bonevault
- Cliff of Oblivion
- Lower Hollow
- Hut of Immortality
- The Purifying Stone
- The Gathering Cave
Temple of the Yellow Flower
- Mountain Trail
- Forest of Ferocity
- Court of Illumination
Purple Cloud Mountain
To reach this secret area, you’ll need to fight the Venom Daoist Boss in the Pool of Shattered Jade and Temple of the Yellow Flower. After the second encounter, he’ll paint on the wall. Interact with the painting to reach Purple Cloud Mountain.
- Valley of Blooms
- Bounds of Diety’s Abode
- Petalfall Hamlet
- Cloudnest Peak
Chapter 5 Shrines
Woods of Ember
- Ashen Pass I
- Camp of Seasons
- Height of Ember
- Ashen Pass II
Furnace Valley
- Valley Entrance
- Rakshaka Palace
- The Emerald Hall
Field of Fire
- Ashen Pass III
- Fallen Furnace Crater
Chapter 6 Shrines
Foothills
- Verdant Path
- Rhino Watch Slope
- Deer Sight Forest
- Mantis-Catching Swamp
Water Curtain Cave
- Return Peak
- Peak of Innocence
Birthstone
- Heart of Birthstone
Still not had your fill of Black Myth: Wukong? Here’s how to find every spirit in the game.


Updated: Aug 21, 2024 06:23 am