
While it’s an out-and-out survival horror game, you spend a lot of time in Alone in the Dark solving puzzles. These often involve the mysterious Talisman you find early on in the game: a portal to other dimensions that provides clues to the location of Jeremy Hartwood. In this guide, we’ll explain how to solve Talisman puzzles in Alone in the Dark.
Alone in the Dark Talisman Puzzles Guide
First and foremost, the only way to solve Talisman puzzles in Alone in the Dark is by referring to Perosi’s Journal, then cross-referencing the symbols in that to numbers on the Talisman.
It may sound complicated at first, so we’ll break it down for you. In the very early stages of Alone in the Dark, you pick up a key item called Perosi’s Journal. It looks like this:

If you look carefully, you’ll notice some of the symbols along the circular chart have a number above them. Pay close attention to this, because it’s a key to determine which number the rest of the symbols align to.
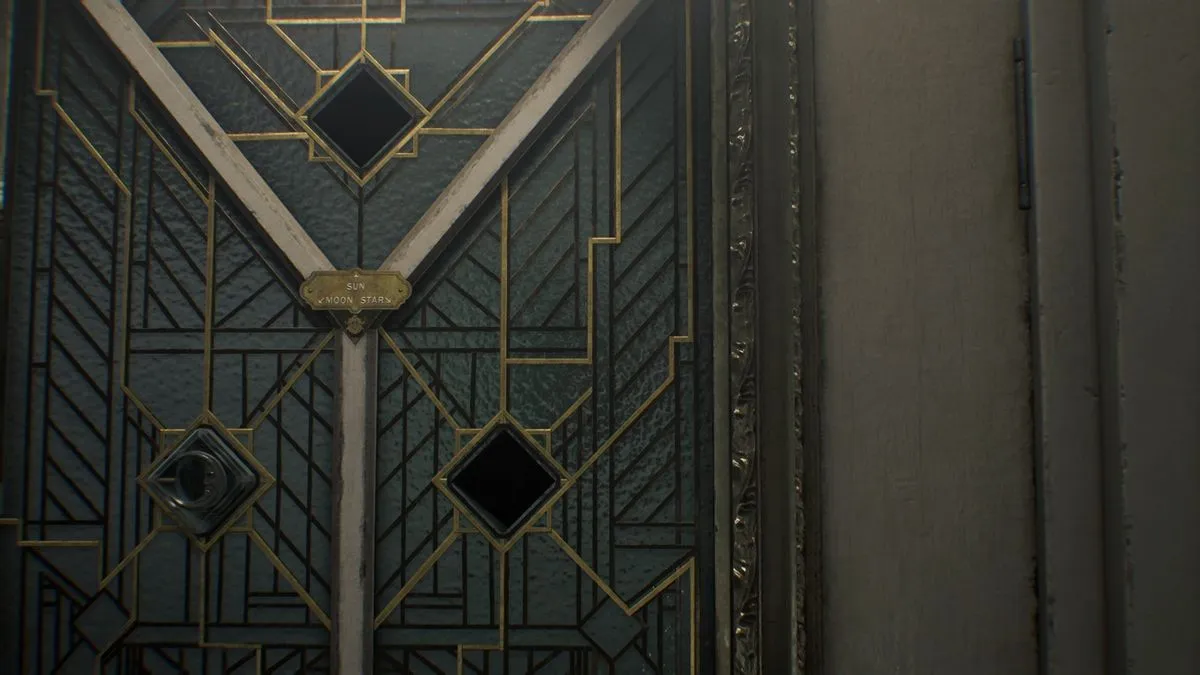
Throughout both Emily and Edward’s campaigns, the talisman is a common item used to solve three-digit puzzles that appear across Derceto. In the first instance, you use it to unlock the grandfather clock in the manor’s main hall. Looking at the Talisman Document schematic it shows three symbols, which correspond to 3-5-8 when you translate them with the chart above.
Talisman Puzzle Tips
Puzzles of this type are very common throughout Alone in the Dark. Most of the time when you’re instructed to use the talisman, the three digits you’re looking for are either written across walls (either as numbers or symbols to translate using Perosi’s Journal) or in text logs you pick up. Helpfully, any clues that can assist with figuring out the three digits are usually bolded, so you can’t miss them.
One other thing to note is that getting the Talisman combination correct can involve some trial and error. Even if you read the number in the right order, sometimes you’ll need to play around with their position on the Talisman to get them working. When you’ve got the order right the game takes control and you can’t move the dials any further, so you know the puzzle is complete.
That’s everything you need to know about Talisman puzzles in Alone in the Dark! For more on the game be sure to check out our review. We’ve also got a guide on whether to play as Emily or Edward.


Updated: Mar 20, 2024 05:26 am