
It’s no secret that the Sims 4 camera has lots of room for improvement. After all, Maxis built in an option for Simmers to revert to the Sims 3 camera, which says a lot about their confidence in the newer version. But even that doesn’t solve some of the most frustrating camera problems in the game – like the fact that you can’t get a good look at the whole front of your two-story house because the camera keeps bouncing around. To that end, here’s a guide on how to fix the bouncing camera in The Sims 4 for better building and screenshots.
The Sims 4 Bouncing Camera: What it Is and How to Fix it
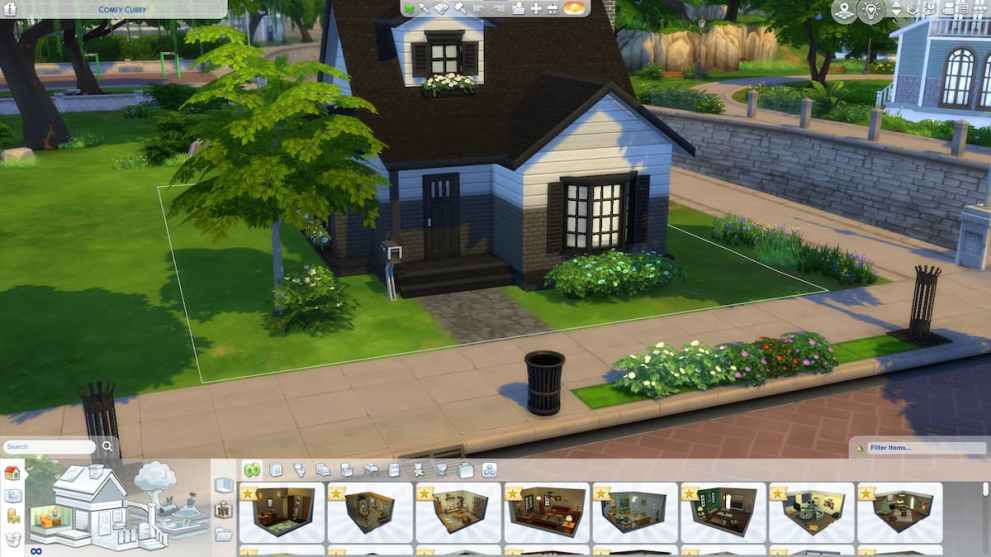
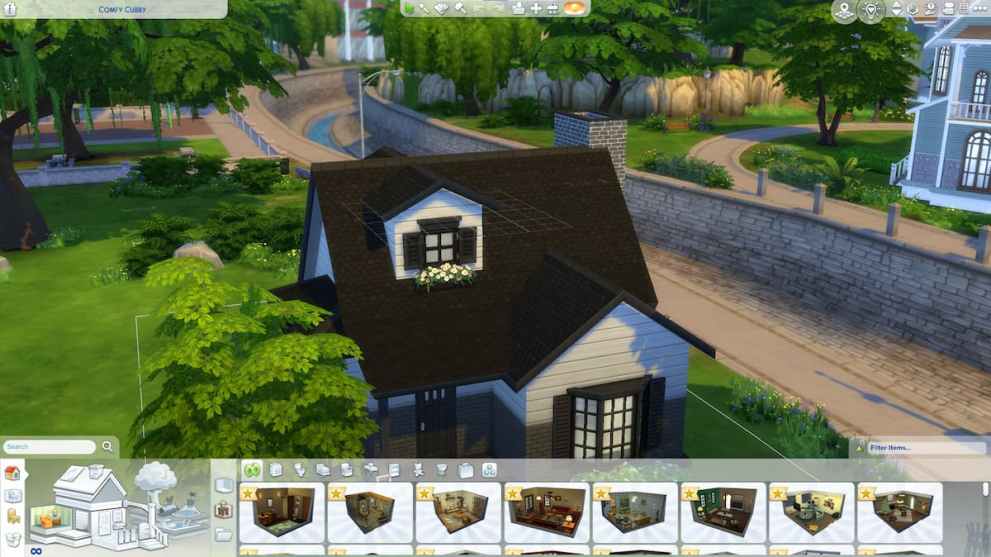
To ensure you’re at the right place, we’ve included examples of the bouncing camera in The Sims 4 via this cute starter home I built! Unfortunately, the screenshot shown above cuts off the top of the roof. If I scoot the camera forward just a little though, it results in the screenshot shown below.
The Solution
Fortunately, there’s a super simple DIY mod that any PC or Mac player can take advantage of to get the camera to behave more cooperatively. If you’ve never done any programming before, this tutorial may look a little intimidating at first, but don’t worry – you’re not going to break anything here.
Locate the Camera File
The hardest part of this whole “hack” is locating the file you want to modify – camera.ini. The file location may vary depending on whether you’re on a Mac or PC, and whether you installed the game via CD, Origin, or Steam.
On Mac
Find your Sims 4 game icon and right-click or CMD+click on it. Select “show package contents” from the dropdown menu. Open Contents > Res. There, you’ll see the camera.ini file.
On PC
You can use the search function in file explorer to locate the camera.ini file, but because it’s so many folders deep, your computer may not be able to locate it. Instead, start by opening your file explorer and go to C:\Program Files (x86). Where you go next will depend on how you installed the game.
- Steam: Look for and open Steam > Steamapps > Common > The Sims 4.
- Origin: Look for and open Origin Games > The Sims 4.
- CD: Look for and open EA Games > The Sims 4.
Once you’ve found The Sims 4 folder, open Game > Bin > Res folder. You should see the camera.ini file there.
Make a Backup
We’re not going to be doing anything complicated to the camera.ini file, so the risk of breaking anything in the process is very low. But just in case, make a backup of the file before you make any changes. To do that, double-click on camera.ini to open the file in Notepad (or TextEdit if you’re on Mac).
Then, go to the File menu and select “Save As,” and save a copy of the camera.ini file to another location on your computer. I created a “Backup” folder on my desktop to save mine, so it’s easy to find if I ever need it. Once you’ve saved a copy of the file, close Notepad or TextEdit completely.
Tweak the Code
Reopen camera.ini from the Game > Bin > Res folder. Press Ctrl+F (or CMD+F on Mac) and enter:
IgnoreLotLevel
Press Enter, and you’ll see a line of code that says:
IgnoreLotLevel = false
Replace “false” with “true” and click Find Next. Repeat the process three times, replacing “false” with “true” in every “IgnoreLotLevel” line. Save the camera.ini (not Save As), then close the file.
Open the game, find one of your Sim builds, and try out the camera. You should see something like this:
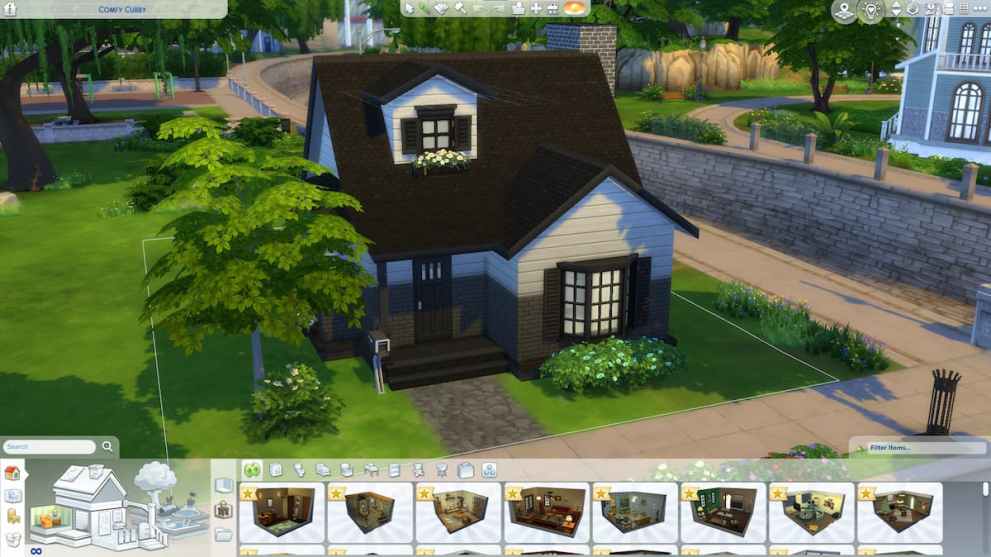
In exvhange for all of your efforts, you’ll be able to take perfectly centered screenshots which will let you share your beautiful builds with your friends! Now you don’t have to worry about the camera bouncing around while you’re trying to build or show off your lot.
A quick note though: You’ll have to repeat this fix (and replace your backup file) every time there’s a game update or you download a new pack. You’ll know it’s time when your camera starts bouncing again.
Congratulations! You’re a modder now!, and you’ve learned how to fix the bouncing camera in The Sims 4. Before you go, be sure to check out our other Sims 4 content in the links below!


Updated: Mar 4, 2023 04:03 pm