Beating the Post Game Final Boss Galdera in Octopath Traveler
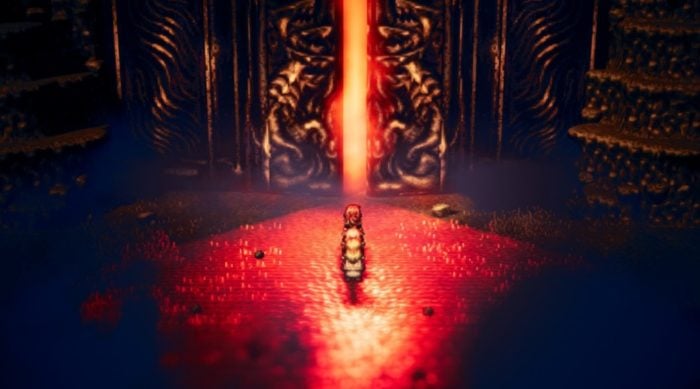
Octopath Traveler features a post-game area called the Ruins of Hornburg, and there’s a dungeon called the Gate of Finis that you can venture into once you’ve completed all the prerequisites. In it is a room where you have to face a gauntlet of eight bosses before you can finally face the true final boss, Galdera. There are no save points at all, which means that once you enter the dungeon, you’ll either beat the whole thing, or die and reset.
The eight bosses themselves honestly aren’t that challenging, as they’re all just dark versions of the chapter 3 and 4 bosses. Once you’ve got their patterns down, you’ll be blowing past them in no time. It’s Galdera that’s the real problem here. Do note that at the time of writing, we’ve only gotten to phase 2 of the final boss fight, but we believe that the strategy detailed below is solid, and we’re extremely close to clearing the whole thing.
UPDATE: We’ve beaten the final boss with the following strategy as detailed below, and can confirm that it’s effective for the encounter. Also, special shout-out to Collector Togami from the Octopath Traveler Discord, who came up with the bulk of the strategies for this fight. You can check out his full boss encounter on YouTube here.
The Setup for Octopath Traveler’s Final Boss, Galdera
Before you go rushing into the Gate of Finis, it’s worth noting that the Galdera final boss consists of two phases, and you have to form two parties of four. The first phase is elemental-based, while the second focuses more on physical attacks.
For the first party, we recommend going with the following classes: Cleric, Apothecary, Merchant, Sorcerer, Dancer. These are pretty much the must-have classes for the elemental phase, and how you class your characters is up to you, but this is our current setup:
- Primrose: Dancer/Cleric
- Cyrus: Scholar/Sorcerer
- Therion: Thief/Merchant
- Olberic: Warrior/Apothecary
As for passive support skills, we have Saving Grace on all eight characters so that everyone can be overhealed. This is pretty much a requirement, as it allows you to take more hits in one turn. Patience is also critical for your support/healing characters, but if you can get them on your entire party, that means every character has a 25 percent chance of acting again at the end of the turn, which is huge. We also recommend having Surpassing Power on your Sorcerer. Lastly, make sure that you’ve unlocked the divine skills for every single class you’re bringing into the fight.
For the second party, we recommend the following classes: Starseer, Warmaster, Runelord, Cleric, Dancer. Our current setup is as follows:
- Alfyn: Apothecary/Starseer
- H’aanit: Hunter/Warmaster
- Tressa: Merchant/Runelord
- Ophilia: Cleric/Dancer
Again, make sure you’ve got Saving Grace on everyone, along with Patience. Surpassing Power should be on your Warmaster and Runelord, or anyone with exceedingly high elemental defense/attack, like Ophilia. Again, make sure you’ve got the divine skills for all classes. The most important ones here are Dohter’s Charity for the Apothecary and Aelfric’s Auspices for the Cleric.
First Phase for Octopath Traveler’s Final Boss, Galdera
The eye is the main target in the first phase, and it’s weak to dagger, axe, and light attacks. It’ll have an add at the start of the phase with only three shield points. In this phase, the eye will keep summoning adds, and you have to defeat them all at the same time so that the eye will be unprotected, and you can start dealing some real damage to it.
At the start of the fight, you’ll want to have your Sorcerer cast Lux Congerere to break the add’s shield immediately, and then start wailing at it with everything you’ve got. The main strategic loop you’ll want to adopt here is, cast Peacock Strut on your Sorcerer, cast Aelfric’s Auspices on your Sorcerer, then have him go nuts with boosted light magic. On a normal turn, you can start by using Energizing Pomegranates on your Cleric, then spend 3 BP to cast Aelfric’s on your Sorcerer. Have your Dancer cast Peacock Strut on your Sorcerer, and he’ll be set for the next couple of turns. Next, you’ll want to use another Energizing Pomegranate on your Apothecary, and then cast Dohter’s Charity on your Merchant. This is primarily for healing purposes, and your Merchant can start using Refreshing and Revitalizing Jams on your party to heal up your HP, SP, and BP as needed. As an aside. try not to use Revitalizing Jams without Dohter’s Charity. This is a huge waste of items, and you’re gonna need a few of them in the next phase.
When you’ve got a free turn, using the Merchant’s Hired Help ability (paired with Aelfric’s Auspices if you’ve got time), you can deal good physical damage to break shields as well. If you’re running the Warrior/Apothecary combo, your Warrior can also use their divine skill if you’ve got the time and BP, and Dohter’s already been cast.
The trickiest part about the fight is managing the adds. You’ll eventually reach a point where there are three adds in the fight, all with rotating weaknesses. What you want to do here is exploit the weakness of the top add to break its shield (assuming Aelfric’s is still active), focus on the second add, then the third. Taking one out too early will just cause another to respawn, and it’ll be much more difficult to take them out at the same time.
Towards the end of the fight, the eye will consume all three adds for an additional 150k HP, and you’ll need to take it down quickly, as it’ll start acting more frequently. This is a good time to cast the Dancer’s divine skill on your Cleric, then cast Reflective Veil on the whole party. This reflects all elemental attacks, giving you a bit of protection while your Sorcerer and Merchant focus on bringing down the shield and nuking the eye.
Second Phase for Octopath Traveler’s Final Boss, Galdera
In the second phase, you’ll finally see Galdera himself, along with Lyblac, and you’ll take control of your secondary party. First things first, use an Energizing Pomegranate on your Apothecary and cast Dohter’s Charity on your Warmaster. That will be your temporary healer, alongside your Cleric. Next, have your Warmaster use an Energizing Pomegranate to refill everyone’s BP.
The key to winning this phase is having Tressa cast Transfer Rune on herself, then casting Sidestep on the whole party to dodge physical attacks, and your Warmaster should be spamming their divine skill whenever they can to deal AoE damage to all three parts of the boss. Lyblac is weak to sword, dagger, and light attacks. The head is weak to sword, spear, and bow attacks. The blade is weak to lightning and wind, and will have a weakness to fire later on when it changes form. Your Runelord should focus on putting Light Rune on everyone first, and then using the other elemental Runes later to take out the blade.
Once all three parts are taken care of, Galdera himself will become vulnerable. Galdera is weak to polearm, dagger, bow, ice, and light attacks, though he will cover different weaknesses as the fight continues. The scary thing about Galdera is that he can nullify all of your party buffs in one turn, and you’ll get a bit of a warning when he’s about to do that with the message that says he’s “looking at you forbiddingly.” This means that you’ll need to pull off a shield break before the next turn, or you’ll have to reapply all your buffs.
The trickiest part about this phase is managing Tressa’s abilities properly. Tressa needs to be in charge of recasting Sidestep (with Aelfric’s if possible) and keep Light Rune on everyone. If she gets a free turn, though that’s gonna be rare, have her use Hired Help with the Veteran Soldiers.
We used to have the Apothecary and Cleric classes on one character, which means we had Alfyn as a Cleric in phase 1 and Ophilia as an Apothecary in phase 2. However, because the both the Apothecary and Cleric divine skills are so crucial to the fight, having both classes on one character felt inefficient, and it seemed better to share the load between two characters instead.
If you’ve got any additional tips for beating Galdera final boss in Octopath Traveler, feel free to share them in the comments down below. For more information on Octopath Traveler, be sure to check our wiki.


Updated: Sep 20, 2018 03:16 pm