Here’s How to Connect the Nintendo Switch Pro Controller to A PC
The Nintendo Switch Pro controller is one of the best controllers on the market and works great with PC. Here’s how to connect the Nintendo Switch Pro controller to PC.
Much like how the Pro controller works with the actual console it was made for, the Pro controller can connect to a PC both wired and wirelessly. Naturally, a wired connection comes with a much easier (and quicker) set up, but it’s wired which means there’s only so much distance allowed between you and the PC.
Wireless, on the other hand, allows you to play from farther away from the PC, but it does require you to set up a Bluetooth connection. Let’s start with the easiest setup.
How to Connect Nintendo Switch Pro Controller to PC via a Wired Connection
To set up a wired connection between the controller and a PC, you will need the cable that comes with the Pro controller. If you don’t have it, any USB-C to USB-A cable will work. If your PC has a USB-C connection available, a USB-C to USB-C cable will work too.
With the cable and controller in hand, plug the USB-C side of the cable into the controller. Then, plug the other side into the PC.
After that, wait for your computer to recognize the controller and then you’re all set. Now, to use it via Steam there is some additional setup, but we’ll get to that later.
Here’s a summary of what you need to do to connect a Switch Pro controller to PC:
- Connect the Nintendo Switch Pro controller cable (that’s included in the box) to the controller
- Connect the other end of the cable to your PC
- Allow your computer to recognize the controller and you’re all set
How to Connect Nintendo Switch Pro Controller to PC via a Wireless Connection
Before setting up a wireless connection, you need to determine if your PC has Bluetooth integrated into it or not. If it does, you’re set. If not, you’re going to need a Bluetooth adapter. You can get one off of Amazon for less than $10.
With your PC ready for Bluetooth, press and hold the sync button on top of the Pro controller until the light indicating that it’s searching for a connection has lit up.
Next, on your computer, open your Start menu and go to Settings. Select Devices, and then ‘Bluetooth & Other Devices’ from the side menu.
You’re looking for “Add Bluetooth or other Device” which can be found at the top of this screen. After that, your PC should show you a list of Bluetooth devices in the vicinity that it can hook up to and as long as the Pro controller indicator light is still blinking, you should see the Pro controller in that list of devices.
Select it and your PC should pair with it. With that done, your next step is Steam setup.
Here’s a summary of what you need to do to connect a Switch controller to PC via Bluetooth:
- Determine if your PC has Bluetooth integrated within it
- If it does, move on — if not, purchase a Bluetooth adapter
- Press and hold the sync button on top of the Pro controller until the indicator light is blinking
- Now, go to your PC’s Bluetooth settings and search for an option to add a new Bluetooth device
- Select that and look for the Pro controller in the list of devices your PC can connect to
- Select the Pro controller and then your PC will pair with it
Steam Setup for a Nintendo Switch Pro Controller on PC
With your Pro controller connected to your PC, you now need to ensure it will work well with Steam. Upon connecting your controller, it should automatically open up Steam in a large window.
If that doesn’t happen, open Steam. With Steam open, navigate to General Controller Settings. Then, select Switch Pro Configuration Support.
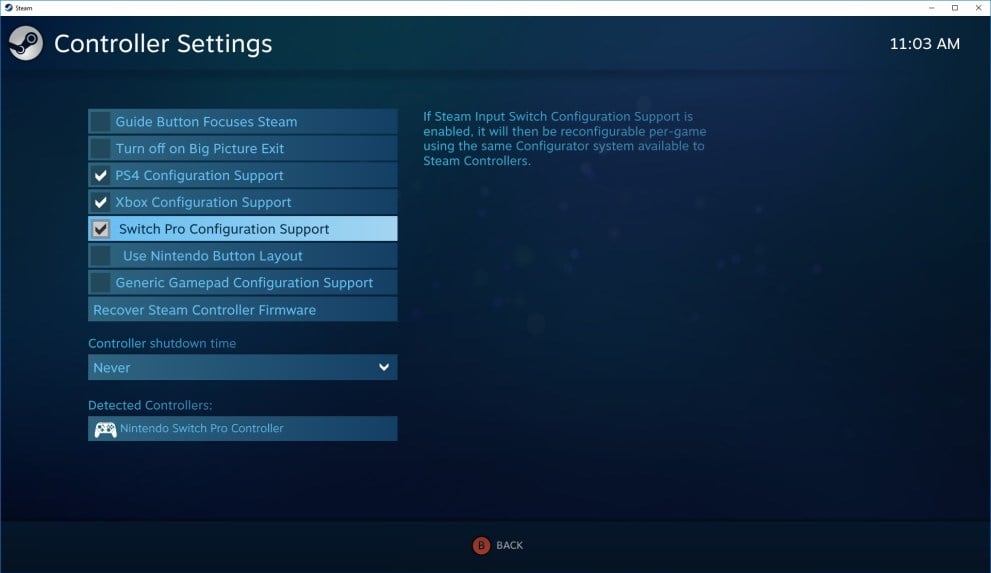
After this, you should notice that your Mouse cursor disappears, which means you must now control your PC with the Pro controller.
From here, you can adjust the settings to however you’d like. In default, the Pro controller will work almost identically to the Xbox One controller.
Because of that, though, the button mapping might be strange. The games you will play will default to the Xbox One button mapping which, from the top, is Y, B, A, X.
Nintendo, though, has their buttons mapped differently (X, A, B, Y from the top), so we recommend changing the button mapping to match that of the Xbox One to clear up any possible confusion.
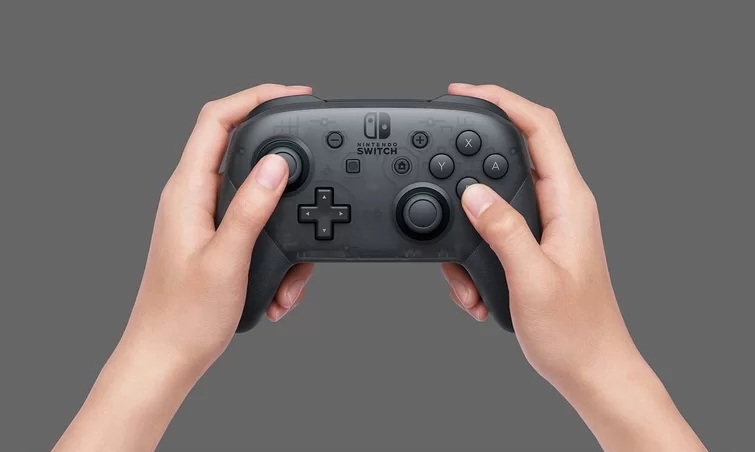
Feel free to mess around with other settings, but after completing the button mapping, you should be set to play all of your Steam games.
Here’s a summary of what you need to do:
- Open Steam
- Go to General Controller Settings
- Select Switch Pro Configuration Support
- Adjust the settings based on what kind of experience you want
That’s everything you need to know to connect a Nintendo Switch controller to a PC, both wired and wirelessly. For more tips, tricks, and guides, be sure to search for Twinfinite.








Updated: Jan 4, 2019 12:36 pm