While F1 2020 features more accessibility options than ever before, it still requires you to focus intensely and get the settings perfect for you. Each player will find F1 2020 more natural to play on a particular camera setting. If the default one isn’t for you, here’s everything you need to know about how to change camera setting in F1 2020.
There are quite a few camera options to choose from in F1 2020, with TV Pod being the default one, but you can choose others that are further behind the car, inside the cockpit, or on the floor by the track.
How to Change Camera in F1 2020
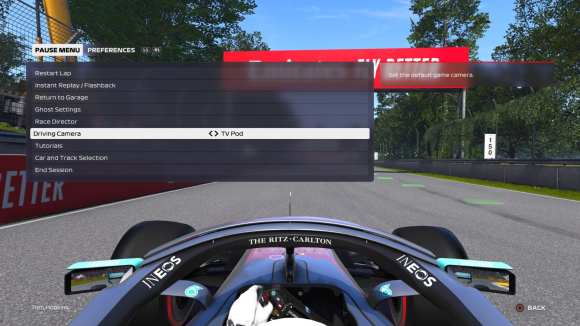
The first and easiest way to change camera while racing is to pause the game (Options on PS4 and Menu on Xbox One) and scroll down to the Driving Camera option. You can then use the d-pad or thumbstick to cycle through the options.

However, there is a way to make it so that you’re able to switch between camera options without having to pause the game.
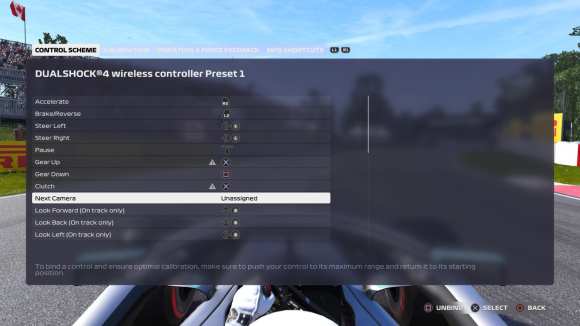
If you pause the game (just one time, I promise) tab over to Preferences, select the Controls, Vibration & Force Feedback option, and then select the controller setting you’re using, you’ll be able to bind a button called Next Camera, allowing you to change camera easily.
Not many buttons are free, but you can use one of the L3 or R3 buttons to add a Next Camera button. That will mean you’re able to cycle through all of the camera options while racing by just pressing the button, rather than having to pause.
When you’re on the screen below, just press the button you want to bind to it to while you have Next Camera and Unassigned highlighted.

Save the options as a controller setting and return to the race. You’ll then be able to cycle through the options as you race to choose the one you want.
That’s everything you need to know about how to change camera setting in F1 2020. For more tips and tricks on the game, be sure to search for Twinfinite.


Updated: Jul 13, 2020 02:51 pm