Are you struggling trying to complete the dark and twisted point and click adventure Fran Bow? No worries, we have the complete Fran Bow walkthrough guide here, so you will never get stuck with a difficult puzzle. Keep reading!
Fran Bow Walkthrough
Chapter One
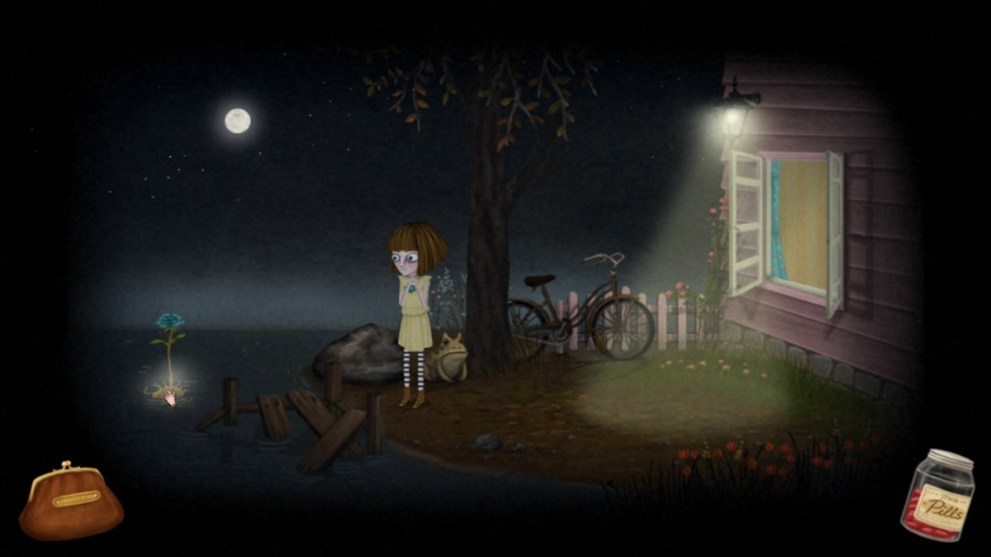
After the intro and a small cutscene, you will be back in your room. Click on the curtain next to your bed, so you can break it and pick up its hook. The white drawer is locked, but try to open it anyway so you know what step to take next. Go right and talk to Phil who will mention that to solve everything you need to get into the doctor’s office and to do that you need a code. Now, take the small box at the foot of the bed.
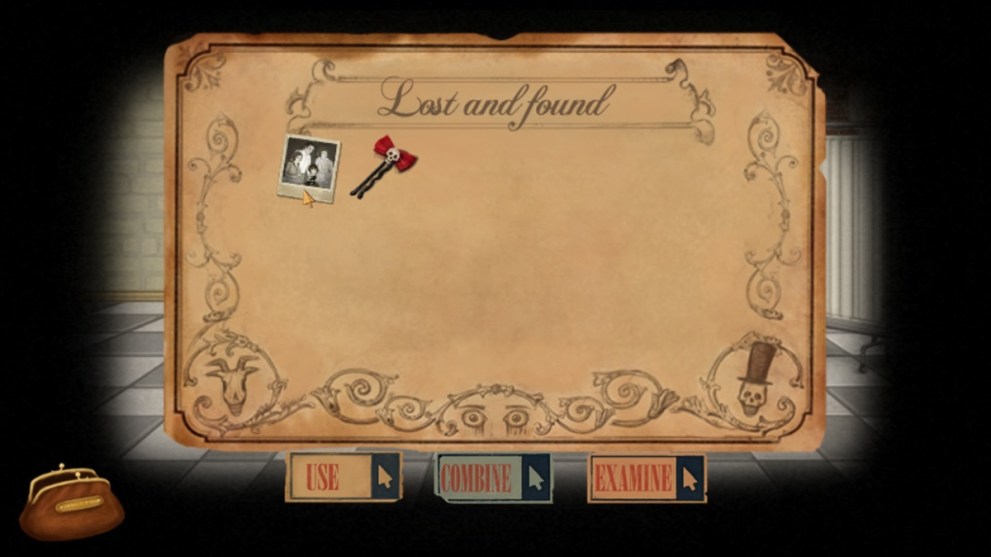
Open your purse and also use the small box (drag it to the “use” banner below) so you can get a key. Go back to your room, open the drawer with the key so you will get two new items: photograph and a hair pin. Now, head left to talk to the nurse and mention you have done something bad: you broke the curtain. She will leave, but you need her to leave even more. So go talk to her, and now she will leave for good. Go back to her desk, examine it, open the drawer, and take several items such as the band-aids and box. Also, open the blanket to examine the gun, and read both notes and the book.
If you examine the white box in your inventory, you will notice that it has a clue: the word “hide”. With this word and the notes on the blackboard, by entering the number 8945, you can open the box and find the pills. Take one right away, as this will be one of the main mechanics over the following chapters, as you can use them to visit the “Other World”.
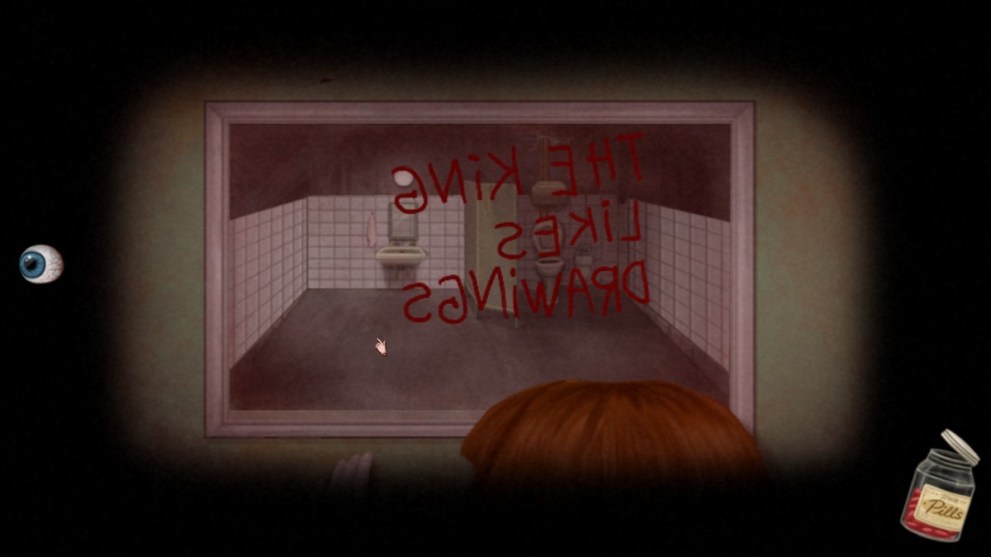
Once in there, pick up the needle which is close to the wheelchair. Head to the far right, use your purse to combine the needle with the pin, which is a new key which you can use on the door. You can go back now to the normal world, but also find a clue in the bathroom on the mirror that says “The king loves drawings”.
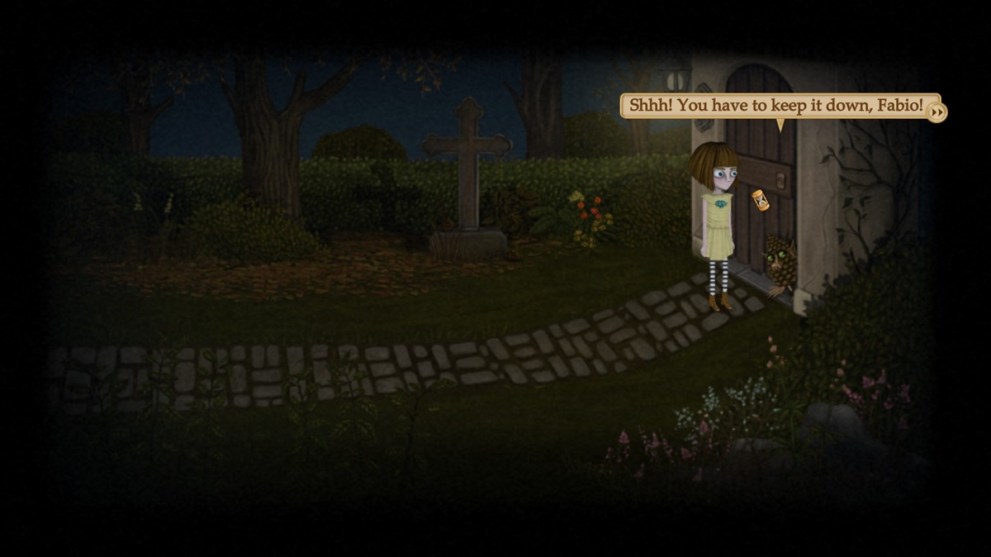
Once you are in the real world, enter the other door on the right and talk to Adelaida. You want to take one of her crayons and she will refuse until she shows your her wounds and you give her a band-aid. With the green crayon in hand, leave the room and try to go downstairs, Fran will get caught by a nurse. You can convince her you were out to get some food, otherwise she will bring you back to your room, but the doctor will come pick you up. Either way, once you’re free to move, head down the stairs. Continue left and talk to the pervert guard, who won’t allow you to take the key. So, go left again and talk to the girl here.
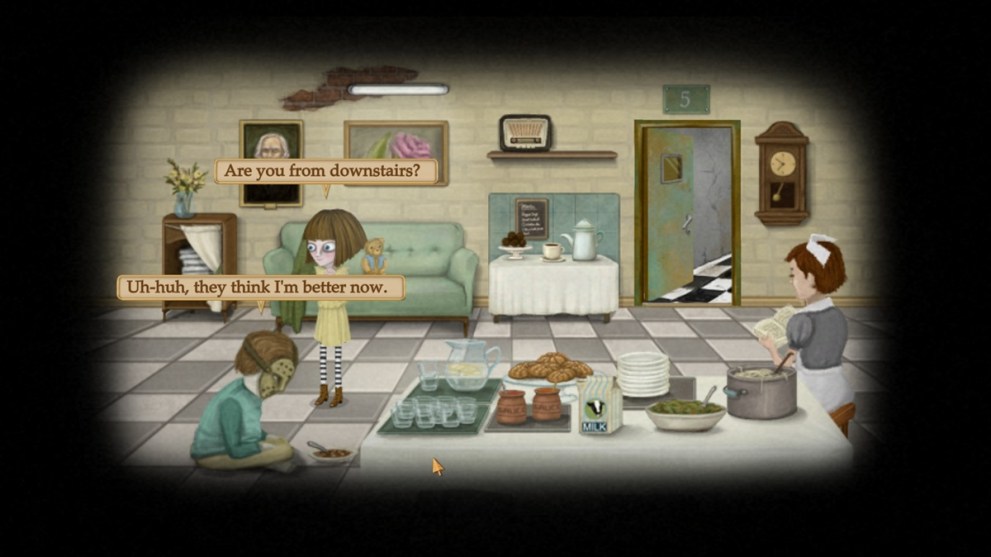
Now, head to the TV room, through the right door. The boy mentions a special channel you need to turn to so he can use the Papervision. Change channel to 8, and then you can pick up a piece of paper. While you’re there, take the pink sash from one of the coats on the rack. Leave, and find the kitchen through the door on the left. Talk to masked Jason and the nurse as well. Now, take one cinnamon bun from the table, then head to the left. The King is here and you need to get his cane, which he won’t allow. If you remember the clue from the bathroom, you know you have to give him a drawing. Simply combine the green crayon with the paper in your inventory, then exchange the drawing for the cane. Now, find Annie who should be resting on the couch (if not, wait for her to sit), she will give you a sleeping pill.
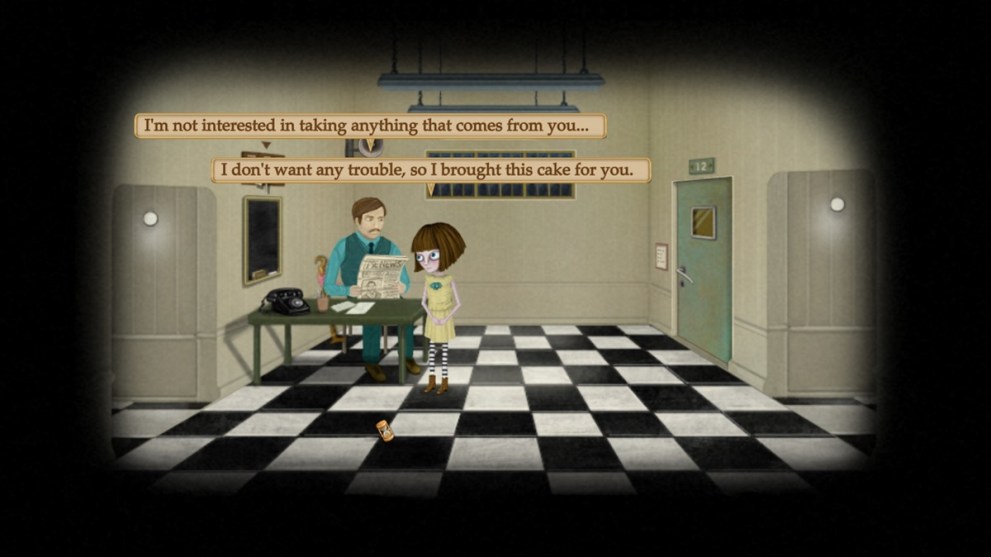
Now, we need to put the guard in the room to the right, to sleep. But first, you need to make it clear that you want the key, so first combine the pink sash, the hook and the walking cane. Voilà, you get the Grab-O-Matic 2000, so try to use it on the keys. The guard will take it, and now is the time to offer him something sweet. Combine the sleeping pill with the bun and offer it to him. Mention that “I have a cake for you” and if he doesn’t take it “he’ll regret it” and that it is good “fresh out of the oven.” He will eat it and fall asleep. Now take the keys and open the office, the door on the right.
In the office, take the key hanging from the hook to the left, plus the note with the code from the board on the right. As soon as you try to leave, Phil will come in and lock you in the office. Go to the other world, open the small vent and crawl inside. Continue crawling to the left, until you will fall down. Wake up, take the cover from the box, open it and look at all things inside. Climb the stairs now, try to use the key to unlock the door, but they won’t let you. Go up the stairs again, quickly look through all the doors, then continue up the stairs. Wait for the nurse to stop talking, go to the other world and put the key back on the holder to the right, she will leave.
Now time to disable the alarm, use the note in your inventory for the clue to the number. The solution is “17 + December (12)” which is 29, and 25 + July (7), which is 32. Finally, leave through the yellow door, and continue walking left, until you find the maze. This can be skipped if you want, but the idea is to go north and right, avoiding the monsters, shouldn’t be too difficult. This ends the first chapter.
Chapter Two – Part I
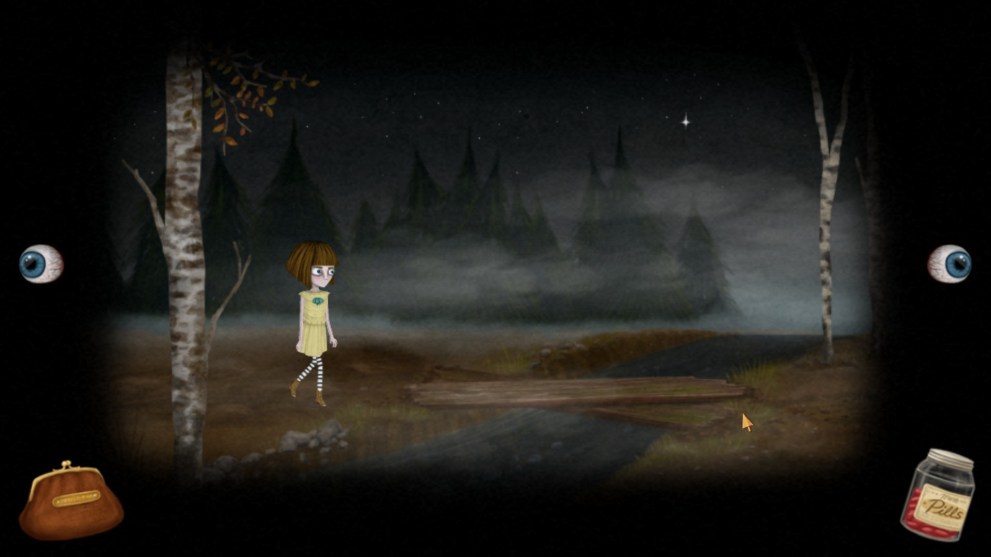
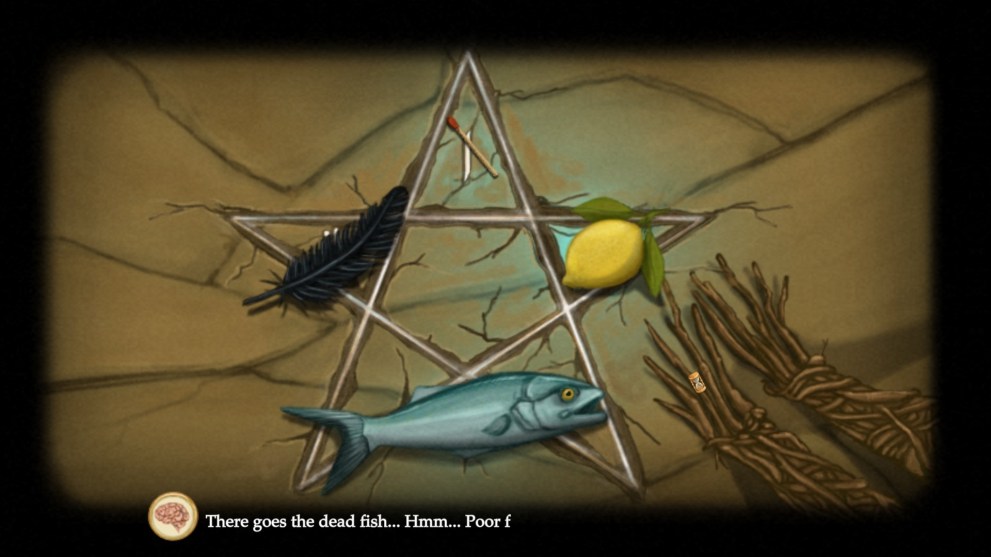
As soon as you are back in control, pick up the door which is lying next to the piano. Now go left and go to the other world, try to take the key, but the spirits won’t allow it. They want a comb from you, which has been stolen from a rat. Continue left and talk to the huge ant, who is waiting for some company, after the conversation is over continue left and take the axe, as we need it to kill off the Beetlepig. Before going back to the ant, take a pill and use the axe on the well which will scare away the owl, and take its feather.
Now, go back to Antonio and try to use the axe on the Beetlepig. It will get scared and run away, so talk to Antonio again, but he’s fallen asleep, so wake him up with the feather. Now go to his house, through the new path to the north and use the axe to break Antonio’s door. Before going in, pick up the handle, take the glue inside, which is on the cupboard, and jump on the blue bench to grab the meat. Take a pill, and feed the ants with the meat so you can grab the bag. Inside it, in your inventory, there will be a worn out business card and a rat trap.
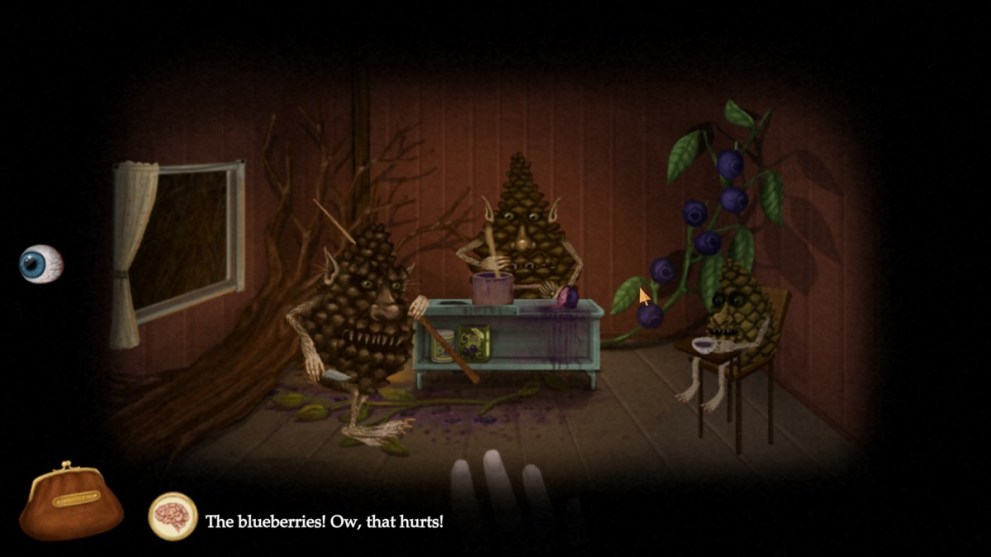
Look at the small house on the right, that is where the blueberries are which you need to bring back to Antonio. Try to take them and Mr. Pincone gets angry, so trap him with the rap trap. Up next is Mrs Pinecone who will also get angry, so push the baby pinecone, and now you can grab the blueberries.
Time to feed them to Beetlepig, who is on the last screen to the left. After drugging it, use the axe and get the rat out. Talk to it and after the first conversation, and you will receive a comb, so bring it back to the spirits. Take a pill, use the comb on the spirits and take the key. Now go left back to the well, combine the door handle with the small door and then on the well. Use the key, open it and enter the well.
Chapter Two – Part II
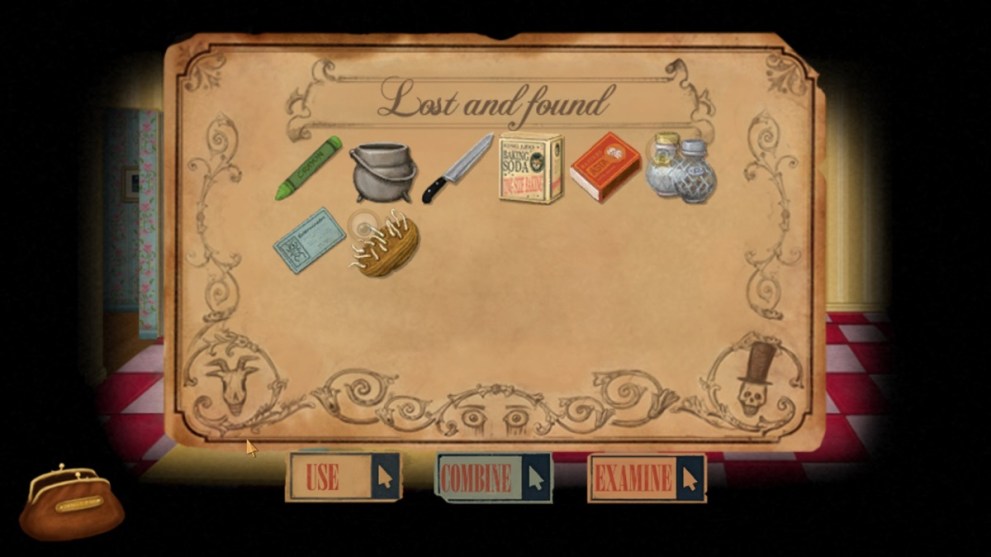
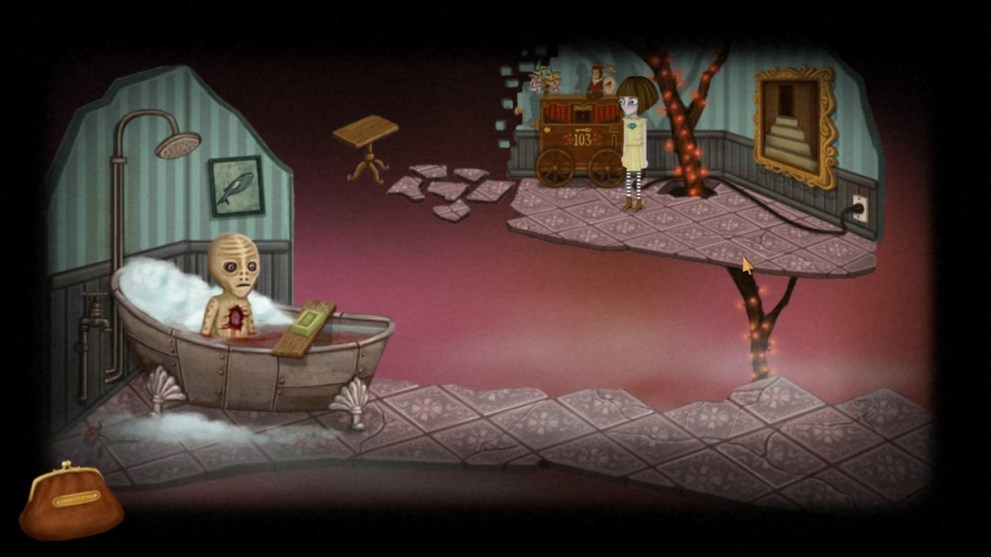
After waking up, check out the note on the cat’s bed. Now, there’s a bunch of things to take, first baking soda and a knife from the shelves, then the metal pot from the other shelves on the right. Close the window then head left and take the matches, which will be one of the main items in the game. Now open the faucet and fill the pot with water, then close it. Now, check out the small shelves and pick up: salt, pepper, and one seed from the drawer. Now, head left.
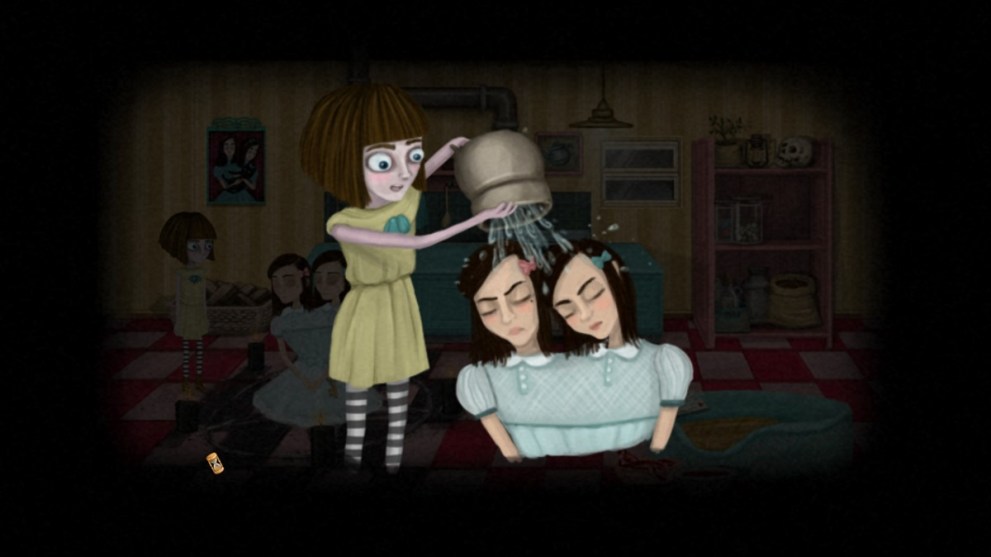
In the dining room, pick up the vase containing ash next to the fireplace. Climb the stairs and pick up the broom, while in the drawers you will find black candles. From the dressing table, pick up the tweezers and go back and pull the rope hanging from the ceiling. Time to climb up to the attic, find the rope in front of you to turn on the light, take a look at the cage on the right and finally you will find Fran’s cat, Mr Midnight. Time to deal with the twins now, go downstairs and talk to them in the living room, and they will give you a recipe.
Time to climb out the window and talk to the toad who will reveal that the twins need to be defeated. Take the plank before going back in. Take a pill and you will find yourself in a well, start climbing up and use the plank on the last two steps in order to cross. Use your knife or matches to cut the rope, so you can go down and take the bottle, but a frog will get to it first. No matter, it will resurface dead, so get the bottle with your tweezers, take a look at this new recipe that you need to swap with the right one.
So, with the evil recipe in hand, go back into the house, left twice and use the paper with the typewriter so you can amend that recipe. Now go right, climb out the window and dip the seed in the moonlit water, so you can get a blue rose. Now go back, and the twins will tell you that they are waiting for you in the dining room. Time to trick them, so show them the “new” recipe and they will be tricked into giving you some hair. Now return to the first room in the kitchen, and get some of Fran’s blood by using the knife on her. Time to get cooking.
First put the pot on the stove and light it with your matches. Now, add the following:
- Salt & Pepper
- Fran’s blood
- Twins’ Hair
- Blue rose
While it is cooking, use the ashes on the black and white floor of the kitchen, then add the black candles and light them with the matches. Go back left to the twins and tell them it is ready so they will follow you back to the kitchen. They will be in a perfect position for you to pour the potion on them, and after the spell has been recited by Fran, they will disappear for good.
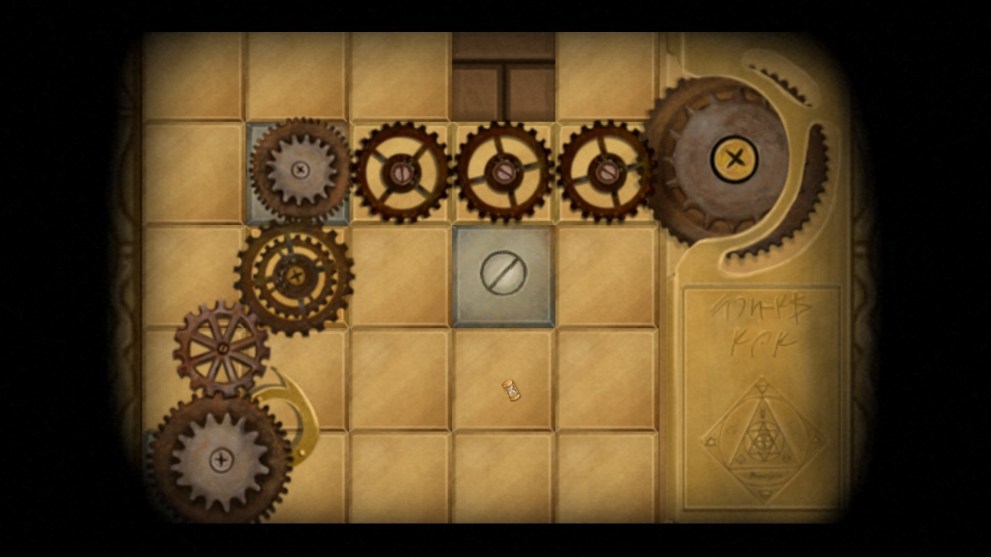
Take their key and go upstairs, then in the bedroom, use the key on the mirror’s lock and you will find a sliding puzzle. This is all about sliding the pieces around so that the gears are in the right place, it shouldn’t be too difficult. This is what you are aiming for:
Examine the section of the mirror that is now open and grab the key, so you can go free Mr. Midnight in the attic. Together, go back outside through the window and to the toad, who suggests that it might help you escape if you give them a little something. You need to sprinkle the toad with baking soda and now you can climb aboard. This will also trigger a small minigame where you need to time the jumps on the logs and leaves.
After the cutscene, you will find that you are in control of the cat. Reveal Fran by interacting with her dress, then talk to her in her new tree form. After the cutscene, go to the right and take a look at Fran’s purse in the river.
Try to extend the bridge with the handle, next to the tree, but you will find it doesn’t work. Return to Fran and she will suggest sticking something in the gears. Go back, take a crystal from the right and stick it in the gears after using the lever again. Grab the purse and bring it back to Fran, who will suggest showing the picture to the creature. This finishes Chapter II.
Chapter Three
Things are definitely more fantasy in this chapter after the long cutscene sees Fran leave the castle by going left and down the steps. At the crossroads, find the market on the left, and talk to everyone you can in the first screens. You will find merchants who are selling several goods that we will need later. Head left again and talk to the snail, you can play some tic-tac-toe which should be really easy. Get at least four coins. The boat maker will give you some clues for later but now return to the crossroads. Head to the center path.
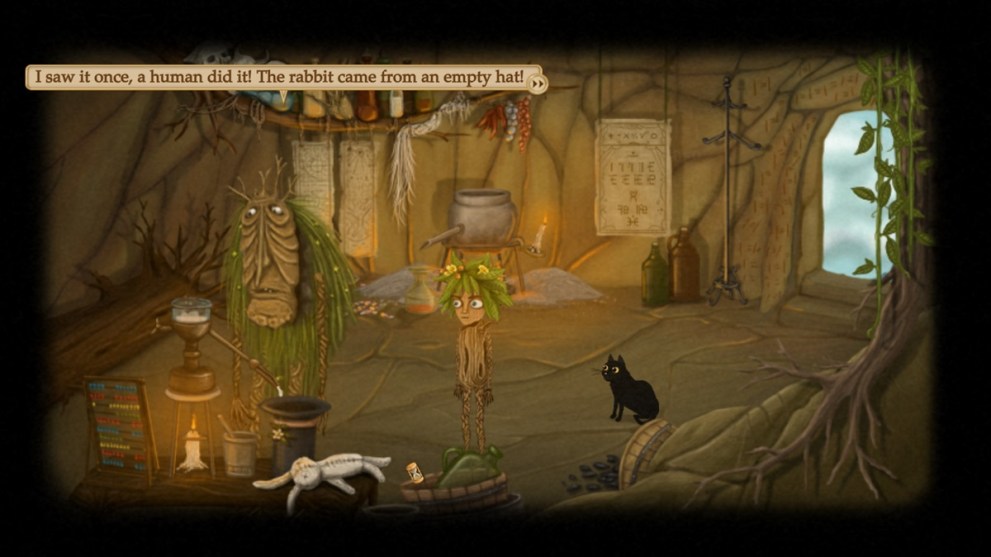
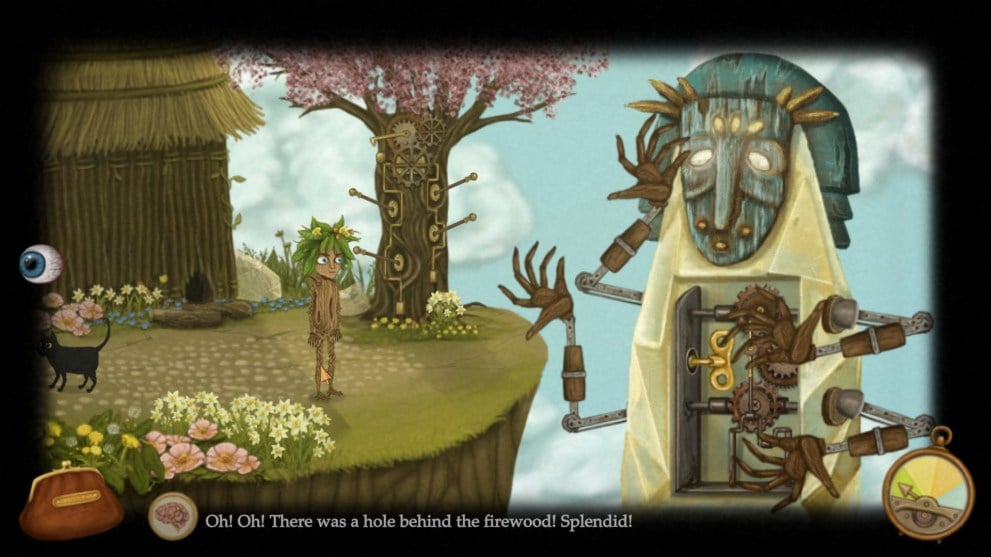
You will find the seasons clock, try to use it by pulling the lever, but you will break it. Time to repair it, so go back to the market and talk to the clockmaker who will ask for a gold coin and for you to politely ask him to repair the seasons clock. Follow him to the tree and he will also give you a controller. Head to the right and at the base of the mountain change the season to winter with the controller. Head up and enter the cave to find the Grand Wizard. You will be tasked to find four different items for him, as your initial task.
One item you already have, the matches. For the second item, go up the mountain and you will see a quick battle. After it, go down to the base of the mountain and back to the tree so you can pick up a feather from Palontras. The third item is a lemon, which you can try to get from the grasshopper during summer but it won’t let you. Change the season to autumn and use the knife on the basket to create a hole. Go back to summer, and the grasshopper will leave, dropping one lemon, so take it.
For the final item, go left from the tree and find a small pier. Grab the broken fishing rod which you’ll have to bring to the market to repair, and the smith will ask for three coins to repair it. Give them to him, then get some fishing line for free from the tailor. Combine them for a working fishing rod, and now go back to the crossroads and fish in the river on the right to get a fish.
Go back to the mountain, after changing it to winter, and enter the cave. Place the four items in these places to solve the first riddle:
Time to find the wizard’s hat now. Go to the top of the mountain and find that Kotrem wants you to find his estranged wife. Go to the pier, change the season to summer and get in the boat. Go left and find his wife, talk with her to discover she wants a red flower. Head back with the boat, go to the base of the mountain and change the season to autumn to get the flower, just using the knife to cut it. Return to the boat, give the flower back to the wife. You can also proceed to the left again, and pick up Fran’s clothes which you’ll need later. Now time to go back to Kotrem to get the hat, change the season to winter before you head up to the top of the mountain.
Bring back the hat to the wizard, who will now send us to find his spellbook. It is in the royal library, so go back and give the beetle the password that the wizard gave you. There is another numerical puzzle here and it is all about learning how the local number system works. You need to enter their numbers while doubling the value of the previous number. Here is the solution:
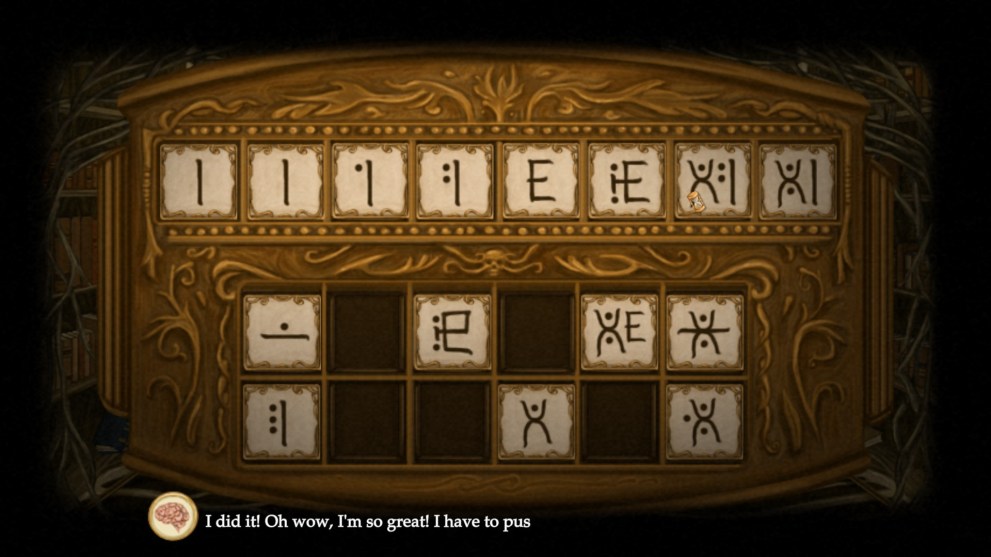
After finishing it, turn the lever three times in a row and a book will pop up from the top. Before you can push the ladder, you need to change the season to summer and push it until it is close to the book. Climb the ladder and pick up the spellbook. Go back to the mountain, change the season to winter and bring back the book to the Wizard. And now, time to find his shoes, will this never end?
His shoes are in a bar, but first you need to let Mr Midnight in. Head to the base of the mountain, go right and change the season to spring, reveal a hole in the hut by clicking on the wood. Now change the season to autumn, and get Mr Midnight to enter the hole. You need to get a purple ticket from the bee, so wait for it to drink itself to sleep and then steal it. Bring it back to Fran so you can examine it and create a fake one, by using the green crayon one with the blue ticket. Go left and use the fake invite with the beetle, it will let you inside.
The shoes you need are being used, so first talk to the grasshopper barman then change the season to summer so you can talk to the dancer. It will reveal that it won’t let you take them until he can dance to the right tempo, well time to change that. Change the season to spring and open the bottom of the piano to reveal the controls from the metronhome. Make it go really fast by pushing the red and yellow button to the right. Go back and change season to autumn, and the dancer will fall over. Get the shoes and bring them back to the Wizard, after changing season to winter.
Time for another quest, to get his magic wand. The large doll has it, the one next to the hole in the bar. You will see one of its hands with the wand, so use the levers on the right to shift the wand to the hand closer to you, on the left. Click on the upper right lever, then the one below it, then the bottom left one and then the upper left lever. Just make sure the wand is being passed from hand to hand. Get it and take it back, again, to the Wizard. He now needs your clothes, which you should already have, but you can go grab them now. Now you are turned back to human, finally.
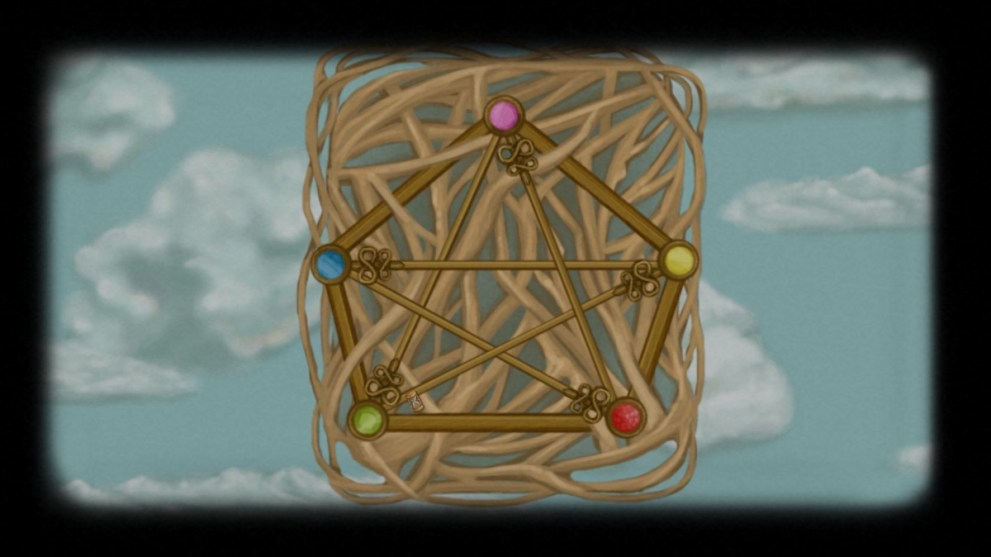
Time to head back to the castle and to the throne room. The King says he will send you home, so follow him and then examine the lock that appears. To solve the puzzle, you basically just need to click on the colours in order, until a line appears from them to the other stones. Follow this order: pink, red, blue, yellow and green. Here is the complete sequence:
The minigame will simply require you to time your jumps, follow your cat in case you’re confused, but it is also possible to skip it altogether. This completes Chapter 3.
Chapter Four – Part I
As soon as you are in control, try to get your pills which will mysteriously move away. Follow them and, after a bit, you will be trapped in a net, which you can cut open with your knife. Talk to Itward, follow him to the left and receive a bucket and your pills. Go back and take a pill. In the first screen, talk to the spirits and use your bucket so they will get you some water. Head to the left and talk to the dead moose, which will allow you to climb over it. Use the bucket on the fireberries then grab them with the knife. Go back down and bring them to Itward.
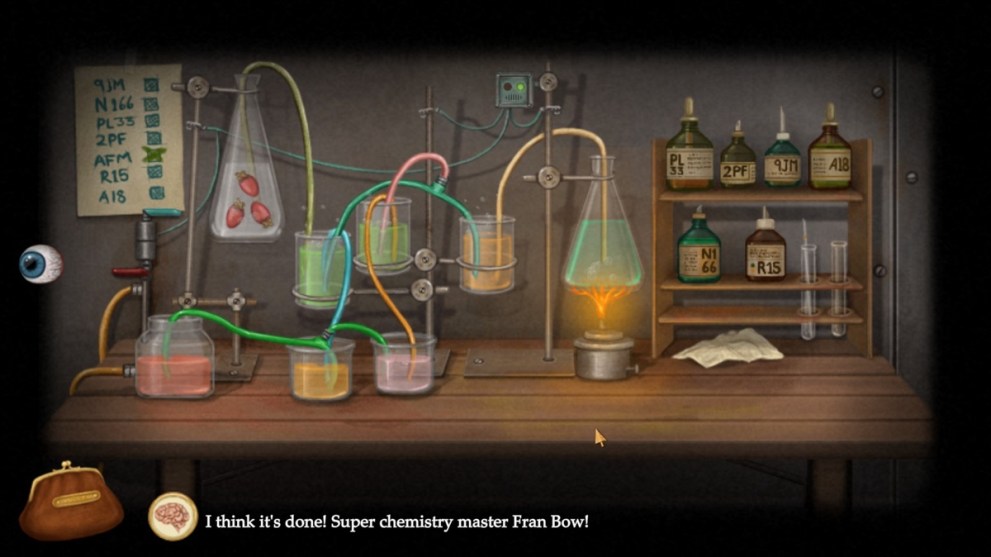
Give everything to Itward and go into the spaceship. After the conversation, you will be tasked with doing some science, so first grab the duct tape from the shelf below. Head through the door upwards, by clicking the button. Take a pill and grab two hoses from the shelves, the green one and the octopus one. Go back to the real world and grab the other two hoses, the blue and pink ones. If you need clues on what you’re doing, examine the diagram on the left and start with the machine on the right.
First, you need to fix the tube by using the duct tape. Now use the green switch by flipping it down, then move the black lever to the right and the brown walve so that it is horizontal. Pour the water in the tank, by first opening it, then closing it after you’ve done. Light the gas with the match. Time to head to the worbench, first insert the hoses in the beaks, and looking at the diagram put the chemicals where they belong. First the fireberries in the bigger vase on the left, then going to the right, use the A18, 2PF, R15 and N166. This is what it looks like completed:
Turn the blue handle right, and the red handle left. Finally, use the matches to light the beaker and that will get the circuit going. Itward will appear to complain about a rabbit, follow him and get the rabbit in the room and Itward will lock the door and leave you locked in. Pick up the wrench from the table and check out the cards around the room. If you take a pill and look at them again, you will find that they will give you clues, or rather, directions.
Now, press the blue button on the door on the left, a battery will appear, so grab it. Time to take a look at the panel on the back wall, which you can open by removing two bolts with the wrench. Insert the battery, then turn the wheel that you find on the wall so that, after pressing the blue button, another button will be pressed. You will go up and find a hatch, so now it is the time to use the cards to open this hatch. Basically, just move the dial a certain number of times: eight to the right, five to the right, eight to the left, six to the right, and nine to the left. You should hear a click each time if you are on the right track. The hatch will now open.
Climb down the ladder and press the blue button on the wall to be surprised by Itward, you can open the present now or later. After the Kamala warning, time to find it and climb the ladder. Pull the lever on the side of the pump, then use the bucket on the teapot to get water. Go back to the engine room, and take a pill to see the Kamala. Use the bucket of water on it, follow it to the top of the ship and use the pump to spray it again. Now continue using the wheel to rotate the pump to spray the Kamala twice and it will leave for good. Go back to Itward and that concludes the chapter, with a big crash.
Chapter Four – Part II
This is the shortest part of the entire game, for sure. Walk to the left, following the path in the background, then continue down the street. Your old house seems to be locked, and after trying the door you can take a look under the three vases next to the door. But only a note is there, from yourself apparently. So, now time to tell Mr Midnight to climb inside, while we wait and after trying to open the door again, Dr Deern will show up. He will bring us away, so talk to him and read the news about your death.
After the drive, enter the cemetery and talk to Deern. Time to find shoves, so go to the right and try to open the door. No dice. Go back to the car and pick up a crowbar so you can force the door. The pinecone will ask us to get it some leather, so go back to the car and use the knife on the leather seats. Go back to Sebastian and hand over the leather patch. Now, go back and Dr Deern will ask you to dig up the graves and open the coffins with the crowbar. After that, talk to him again, and leave the cemetery to finish the chapter.
Chapter Five
Time to take control of young Fran, since you are chained to the bed. Look at the portrait and you will head inside yourself. Young Fran can open the closet and take the keys. Use them on the chains until you find the right one. Since you are yourself again, open the closet again and take both the balloons and the case. Now, examine the doll house, take the small piano and, after that, move the watch and pinecone to the room to the right. You will see something behind those items, try to lift the wallpaper, then cut it away with the knife. Take the key. Now, time to solve Palontras’ riddle and open its box.

Do the following and listen for the clicks:
- click left ear twice.
- click the right ear.
- click the middle eye twice.
- click the left ear.
- click the middle eye.
Get the key and instructions about how to create what is called the “Ekog clock.” Take a look at the present in your inventory, which is a cat doll. Open the chest and find a lock which you can open with the key you just got. Open the door, head to the hallway and use the key to open door 104 and enter it. Talk to the big eye, and it will give you permission to get everything. First, slide the blue switch on the pillar down. Now take the hairbrush from the table, plus one of the light bulbs from the pillar.
Pull the rope to the left to reveal a painting. Climb through to a new area, pick up the bottle, and take a look at the machine, which requires a button. Go back to your room, 101, and examine the closet again. The dresses have a button, examine the third one and use the knife to get it. Now go back to the machine, insert the button, turn the crank and get the pliers. Now get the black electrical cord before leaving.
Now, take the key from the hallway table and use it to open room 105. Get the key from the skull on the wall, by removing its teeth with the pliers. Go to the left, pick up the soap after a brief conversation, then open the tap and fill both the water baloons and your bottle. Go back to room 101, take a look out the window and find the Kamala attacking a tree. Throw the water baloons to force the Kamala to leave and you will be rewarded with a stick. Time to head to room 102, which you can open with the new key.
The big kitty can be used to create the clock but first, get the alarm clock from around its neck by cutting it free with the knife. Then pull the lever, head across and grab the glove. Now enter the elevator and go up with the button, again use the brush on the spirit, then grab the key by using the stick. Time to create the clock, so put the following items inside the cat:
- black cord
- light bulb
- alarm clock
- water bottle
- soap
- glove
- school case
- small piano
Get the Ekog clock. Go back down and open room 103 with the new key. Talk to Makuba, then use your Ekog clock on it. A new area will open so go down. Talk to the nurse, then press the button on the right to get a number. Go to the left and after a conversation, try to offer a trade to the tall patient by showing them your ticket. But they want to know what illness they have, so go back to room 104.

Okhula knows all about the sickness, so ask about it and you will cry and get tears in a vial. Go back to the patient and give them the flask. Return right and show your number two to the nurse, of course she will tell you you need an appointment and give you a phone number. The phone is in room 105, so go there and dial the number on the card. Then go back to the nurse once again, then head through the doors to the right. After the conversation, go through the door at the end of the hall. To finish the game, simply use the syringe on the doctor. That’s the end of Fran Bow!
For more walkthroughs for other exciting games, check out our articles on Dark City Vienna and how to beat There is No Game.


Updated: Jul 10, 2024 10:26 am