Mass Effect Legendary Edition is finally available on PC and consoles, which means that both longtime fans and series newcomers can now experience the epic sci-fi trilogy in 4K and with a better framerate. There are a few new additions too, such as a photo mode that lets you take pretty screenshots in the game’s iconic environments. Here’s how to use photo mode in Mass Effect Legendary Edition.
With the entire Mass Effect trilogy now available in 4K and with improved visuals and character models, it’s only natural that BioWare would throw in a photo mode as well to let players take all sorts of pretty screenshots on different planets.
Using Photo Mode in Mass Effect Legendary Edition
To use photo mode, bring up the menu by pressing the Options button on PS4 or the Menu button on Xbox. The old-school Mass Effect menu is still intact, but with one big change: you can now press the Triangle or Y button from the menu to enter photo mode.
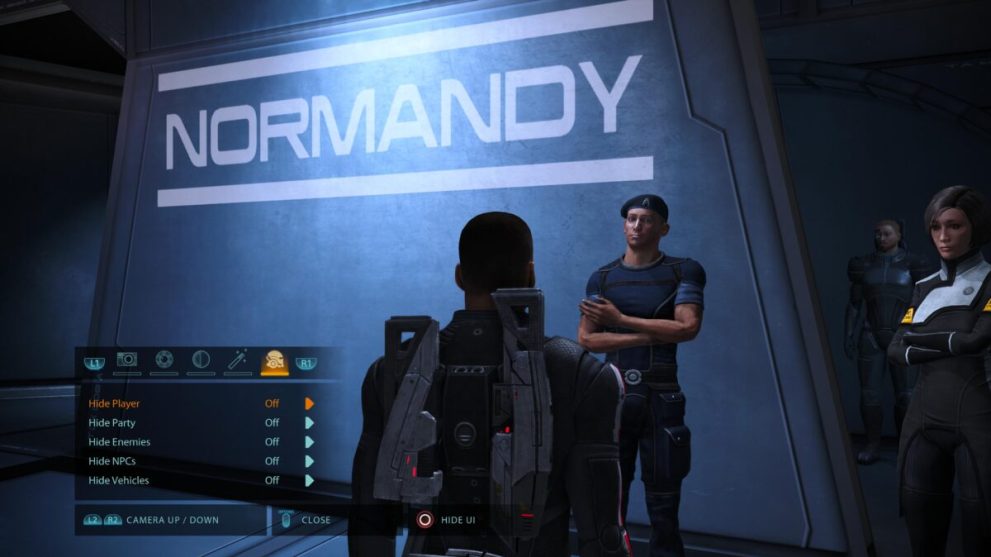
Once you do this, you can start shifting the camera around to get the exact angle you want, and you can also adjust depth of field, remove NPCs and enemies from the shot, and play around with a few filters and add a film grain effect if you’d like. This allows players to capture some dynamic shots from all over space, and then share them on social media.
Once you’ve lined up the shot, press the circle or B button to hide the photo mode UI, then capture the screenshot.
That’s all you need to know about how to use photo mode in Mass Effect Legendary Edition. Be sure to search for Twinfinite or check out our wiki for more tips and tricks.







Updated: May 14, 2021 05:16 am