If you have spent as many late nights as I have dodging infinite waves of bats and skeletons in Vampire Survivors, you know that the difference between a triumphant 30-minute run and getting crushed by a sudden mob comes down to mastering your weapon evolutions. With the release of the massive v1.15 update, nicknamed the Wet Update, the game has officially entered a new era. Poncle has rebranded the franchise to Vampire Survivors: First Survivaton, set up a brand new development studio in Japan led by Sawaki Takeyasu, and given us amazing quality-of-life upgrades like multiple save slots and the gorgeous underwater Lycaeum stage.
But even with all these fresh changes, the core gameplay loop still relies on one major mechanic: combining a max-level weapon with a passive item to evolve your gear into game-breaking tools of destruction. In my time breaking the game’s limits, I have analyzed the math, mapped out hidden stages, and figured out exactly how the underlying code handles your stats. Let us dive deep into the ultimate evolution blueprint so you can optimize your builds and crush the end-game waves.
Master the Hidden Rules of Weapon Evolutions

To turn a basic weapon into its highly powered evolved form, you cannot just pick items at random. I remember when I first started playing, I arbitrarily leveled up everything and hoped for the best. To actually trigger an evolution, you need to understand the precise mechanics behind the curtain:
- The Max Level Rule: You must raise your base weapon all the way to Level 8. For standard evolutions, your matching passive accessory only needs to be at Level one, though some modern DLC expansions require you to max out both the weapon and the passive item.
- The Catalyst Requirement: You must hold the matching passive accessory in your inventory. When the evolution triggers, your base weapon is replaced by its evolved form, but you keep your passive accessory, allowing you to continue benefiting from its stat boosts.
- The Ten Minute Boss Chest Rule: On most standard stages, weapon evolutions will only drop from treasure chests left behind by elite bosses that spawn after the 10:00 mark. If an elite boss spawns at 9:59 and you kill it at 10:05, that chest still will not trigger an evolution because the chest rewards are determined at the exact millisecond the boss spawns.
- The Stage Exceptions: In my testing, I have mapped out several exceptions where you can bypass the 10-minute lock. In the Dairy Plant, every single chest can evolve a weapon from the very first minute. In the Mad Forest, the glowing bat that spawns at the 1:00 mark drops a chest capable of early evolutions. Additionally, the first chests you open in Cappella Magna and Il Molise ignore the timer completely.
If you ever get lost mid-run, you do not have to alt-tab to look up combinations. You can press the escape button on your keyboard and select Open Grimoire to view your discovered formulas.
The Secret Math Behind Additive and Multiplicative Scaling
One of the biggest hurdles I see players run into is not understanding how the game calculates damage and stat caps. This is not just a semantic argument; it is the difference between a build that struggles to tickle late-game bosses and one that melts the screen.
The Unified Stat Equation
The game engine handles your total stat value by summing all your passive items and character bonuses first, and then applying your Arcanas as a final multiplier:
S(total) = (100% + S(additive)) × M(arcana)
In this formula, S(additive) represents the sum of your character’s innate perks, weapon level upgrades, and passive items like Spinach. Meanwhile, M(arcana) acts as an independent multiplicative operator applied by specific Arcanas.
This is incredibly important because passive items are subject to a strict +1000% hard cap on stats like Area and Might. However, Arcanas like Boogaloo of Illusions (XVIII) act as a separate multiplier, allowing me to push my weapon hitboxes way past the +1000% barrier and project a defensive wall across the entire map.
Additive Diminishing Returns
Because your passive stats are additive, stacking the same stat over and over actually hurts your build efficiency. Let me show you how the math works. If you have a weapon with a base damage of 50 and you pick up a Spinach card for +10% Might, you add a flat five damage to your attacks, bringing you to 55.
If you already have +180% Might from Golden Eggs and character passives, your weapon is dealing 140 damage. Adding another +10% Might card still only adds that same flat five damage based on your weapon’s innate base value. This moves your damage from 140 to 145, which is a marginal relative increase of just 3.57%. To maximize your damage-per-second (DPS), I always recommend balancing your stats across different axes: grab some Cooldown reduction (Empty Tome), increase your projectile Area (Candelabrador), and boost projectile Speed (Bracer) instead of just brainlessly stacking Might.
The Quadratic Growth of Pickup Area
While most stats scale linearly, your pickup range scales quadratically. The total pickup area for a given Magnet level n with a baseline radius r and a unit upgrade value u is:
A(n) = π(r + n×u)²
The marginal increase in pickup area between successive level upgrades is:
ΔA = 2nπu² + 2πru + πu²
This quadratic scaling ensures that each subsequent level of Attractorb you pick up yields an exponentially larger pickup zone on the stage, rapidly pulling in distant experience gems and coin bags to accelerate your character level-ups.
How to Break Stage Item Caps and Overfill Your Inventory
If you want to achieve the ultimate high-level run, you need to know how to bypass the standard six-slot passive item limit. The trick is to wait until your six passive slots are completely full before picking up any accessories that spawn naturally on the ground. By using specific stage layouts and topographical landmarks, you can easily carry eight or more passive items at the same time:
- The Inlaid Library Horizontal Loop: The Library is a horizontally looping stage. When I run this map, I fill my six standard passive slots first. Then, I run west for about two in-game minutes until I find the Empty Tome spawning on the northern bookshelves. After grabbing it, I turn around and run east for exactly four full loops along the top wall to pick up the Stone Mask, giving me an eight-passive inventory.
- The Mt. Moonspell Out-of-Bounds Glitch: If you are playing on Mt. Moonspell with a character carrying a high Golden Egg count, you can clip right through physical barriers. If you head straight north through the archway in the top-left corner of the map, you can walk past the boundary line of your mini-map. This leads you to a hidden dojo building that makes an incredible battle arena. Also, if you travel southwest of the frozen lake, you will find a concealed forest grove filled with ents and plants that drop red experience gems at a significantly higher rate than the rest of the map.
- Gallo Tower’s Mirror Warp and Leda: To unlock the guitar-shredding Concetta Caciotta, you need to find her coffin, but the standard green arrow on your screen will mislead you. You have to head north from spawn, hugging the left corridor wall until you spot a sparkling, lit-up mirror with bats flying near it. Walk directly into the glass to warp into a secret room, defeat the guardians, and open her resting place.
Sammy vs Big Trouser: The Ultimate Gold Farming Showdown
Once you enter the end-game loop, your primary goal shifts to gold farming. You will want to accumulate millions of coins to purchase Golden Eggs, which permanently boost your characters’ stats. In my hours of optimization, I have tested the two best characters for this job: Sammy and Big Trouser.
The Sammy Exponential Loop
Sammy, the adorable caterpillar from the Tides of Foscari expansion, is the queen of rapid gold generation. Her passive trait converts gold coins into experience points at a flat 1:1 ratio:
XP = Gold(coin) × Multiplier(stage gold) × Greed × Growth
Because Sammy starts with Vicious Hunger, she transmutes enemies and light sources into gold coins on contact. This triggers an unstoppable runaway loop: coin collection yields experience, which triggers a level-up, which applies a Limit Break upgrade to Vicious Hunger, which kills enemies faster and spawns more coins.
Vicious Hunger’s base gold transmutation chance is normally a tiny 0.5% to 1.0% on standard characters, but Sammy’s unique internal coding starts her chance at 16.5% and scales it additively by +0.5% per level:
Chance(transmute) = min(0.65, 0.165 + 0.005 × Level) × Luck
By level 98, Sammy hits a massive 65% base transmutation chance. Multiplied by her Luck stat, almost every single hit from her weapon converts an enemy into gold. This conversion is so strong that it completely bypasses the Game Killer (0) Arcana. Even though Game Killer locks your level-up Growth to 0%, Sammy’s gold-to-experience coding ignores this modifier, allowing you to reach level 10,000 and accumulate millions of coins within a 15-minute run.
The CPU Render Queue Bottleneck
However, Sammy has a major weakness that only active players would know: her build will absolutely destroy your frame rate. Vicious Hunger renders unique, moving eyeball sprites and falling gold coin assets for every single enemy hit. On high-egg builds, this completely oversaturates your CPU’s render queue.
In my testing on mobile and lower-end PCs, the game slows down so heavily that rendering a single in-game second can take up to 20 real-world seconds. This means your real-world return on investment (ROI) is cut in half. Even though your gold-per-minute stat looks incredibly high on your screen, you are waiting ages in real life for the timer to tick up.
To solve this, I recommend switching to Big Trouser once you reach around 1,000 Golden Eggs. Big Trouser gains a permanent Greed bonus on every single level-up, and you can start your run by selecting a low-VFX, low-lag weapon like Garlic or Lightning Ring. When you pair these with the Disco of Gold (XV) Arcana, you can farm gold at a smooth 60 frames per second, maximizing your real-time gold yield without melting your gaming machine.
Cracking the Glimmer Code and New DLC Mechanics
The recent expansions have introduced incredibly creative procedural evolution paths that step away from the classic weapon-matching structures.
Tsunanori Mido and the Glimmer System
The Emerald Diorama crossover introduced the Glimmer mechanic, which Poncle borrowed directly from the SaGa JRPG series. When you attack with a SaGa weapon, there is a Luck-scaled chance for a lightbulb icon to appear above your character’s head, signaling that you have sparked a new technique mid-run. This spark is a strict evolution gate.
For example, Tsunanori’s Splashers weapon scales its damage directly from your Duration stat. To evolve Splashers into Pursuant Blades, you must successfully spark the Dual Whirlwind technique at least once during your match, regardless of your weapon level.
If you are struggling to trigger the spark, you can use the Showstopper mechanic. When a SaGa character’s health drops below 30%, they enter Showstopper mode, gaining massive temporary boosts to Might, Cooldown reduction, and Luck. Best of all, every single weapon activation is guaranteed to trigger its respective Glimmer technique during this window, allowing you to easily clear the evolution gate even on low-Luck runs.
The Gallo Tower ARG and the Wicked Ruler Exception
In late 2025, Poncle launched an alternate reality game centered around the gallotower.com portal. Solving the cryptographic puzzles across the 11-floor web layout revealed a secret spell: guinigigi. Casting this spell in your Secrets menu permanently unlocks the Chaos Rune weapon. When you evolve the Chaos Rune with a max-level Spellbinder, it transforms into the Wicked Ruler.
If you are playing on mobile, console, or legacy Switch versions, you might encounter a bizarre bug where the game freeze-locks about 10 seconds after obtaining the Wicked Ruler. Both your character and the enemies will stop moving while a loop of strange dog barking sounds plays in the background. While the community initially speculated this was an intentional ARG puzzle, Unity log files reveal a fatal exception:
ArgumentException: Expression must be readable Parameter name: expression at System.Dynamic.Utils…
The game’s tweening manager, GamePerfFixManager, crashes when processing the Wicked Ruler’s chaotic rune expansion vectors, breaking the physics update loop. While this bug is fixed in the PC Steam version of the v1.15 patch, you should avoid evolving the weapon on other platforms until a console-specific hotfix drops. When it is working correctly, the Wicked Ruler scales its massive shockwave damage multiplicatively with your Projectile Speed and Duration stats, easily out-damaging standard end-game weapons.
The Suikoden Secrets and Castlevania Lore Pairings
One of the reasons I love Vampire Survivors so much is the incredible amount of love and care put into its references. The weapon pairings are not just random designs; they are built on deep gaming lore.
The Soul Eater and the Suikoden Duality
Evolving Garlic with Pummarola transforms it into Soul Eater, which is a direct homage to the Soul Eater Rune from Konami’s classic Suikoden JRPG series. This rune governs the absolute duality of life and death, which the game reflects through a unique healing-scaling damage equation:
ΔD = min(60, floor(HP(healed) / 60))
In this formula, HP(healed) is the total life points you restore, adding a flat damage bonus directly to Soul Eater’s base damage. This flat damage completely ignores your Might stat, capping out at +60 flat damage once you have healed 3,600 HP.
Because of this, Soul Eater has a massive synergy conflict with Laurel. Laurel shields you from taking hits, which prevents you from taking damage and healing it back up. To stack your Soul Eater damage quickly, you want to avoid Laurel, equip Armor, and pair Soul Eater with Bloody Tear to safely cycle your health pool through active lifesteal.
The Belmont Whipline and the 0 Vampires Paradox
The Whip, which evolves into Bloody Tear when paired with Hollow Heart, is a beautiful homage to the Belmont family’s legendary whip, the Vampire Killer, from the Castlevania series. While the base Whip is incredibly weak due to its narrow horizontal attack range, its utility completely shifts when you select Sarabande of Healing (VI) or Slash (XVI) as your starting Arcanas. Sarabande of Healing doubles all healing received from Bloody Tear and releases a massive damaging shockwave equal to the HP restored, transforming a basic survival tool into a screen-clearing offensive aura.
Of course, the ultimate joke of Vampire Survivors is the zero Vampires Paradox. Despite crossing over with Castlevania and unlocking Alucard, the dhampir son of Dracula, you will never actually find a single vampire in the game. Alucard is a hybrid with human DNA, meaning his health pool and immunity to health-drain mechanics do not make him an actual vampire. The search across our stages continues endlessly!
The Ultimate Weapon Evolution Codex

To help you plan your next high-level run, I have compiled an exhaustive, search-friendly breakdown of our weapon formulas. Instead of messy grids, here is a clean, deeply detailed codex of the best combinations in the game.
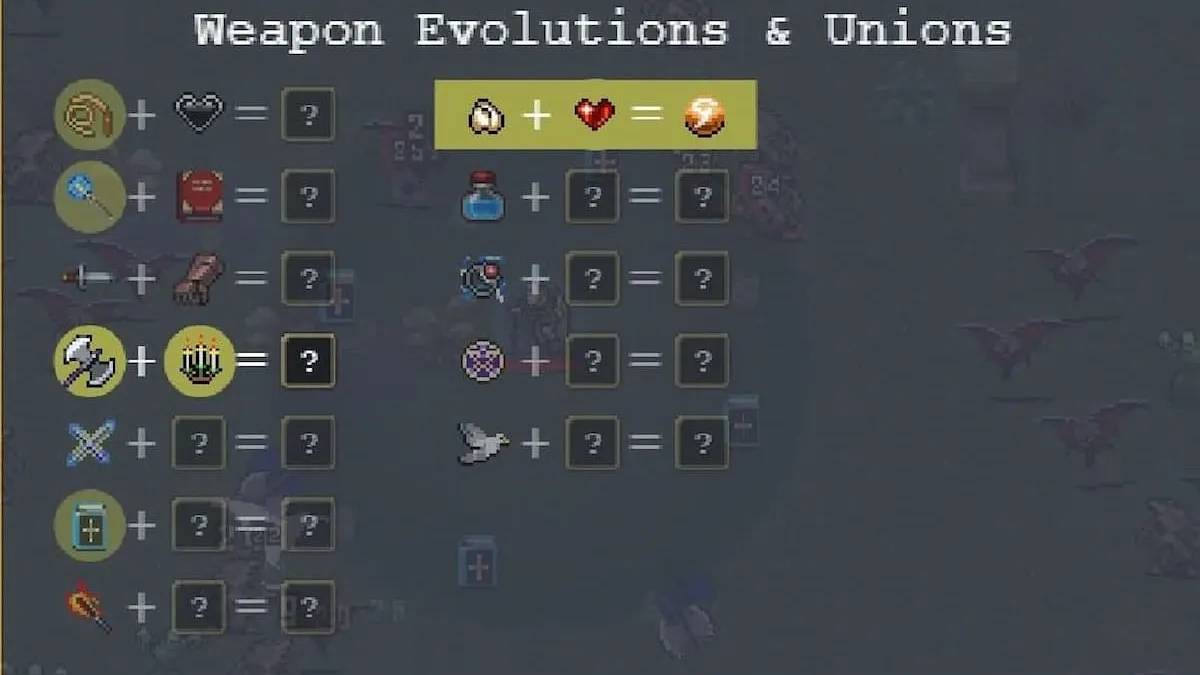
Classic Base Game Recipes
- Bloody Tear: Combine the Whip and the Hollow Heart. This is my go-to choice for early-game survival because it adds critical damage and lets you leach health points from defeated enemies.
- Holy Wand: Pair your Magic Wand with the Empty Tome. It completely removes your weapon cooldown, allowing you to fire a rapid, non-stop stream of holy bolts at the closest target to easily melt boss enemies.
- Thousand Edge: Combine the Knife and the Bracer. This projects a continuous, rapid-fire stream of high-speed daggers in the exact direction your character is facing.
- Death Spiral: Pair your Axe with the Candelabrador. It transforms your sluggish throwing axes into massive, high-damage scythes that spiral outward, piercing through infinite enemies to clear your screen.
- Heaven Sword: Match the Cross with the Clover. This fires massive, spinning homing blades that can deal devastating critical damage.
- Unholy Vespers: Combine the King Bible with the Spellbinder. This eliminates your weapon cooldown entirely, keeping a permanent, rotating ring of protective books orbiting around your character.
- Hellfire: Pair your Fire Wand with Spinach. It launches slow-moving, massive fireballs that deal heavy damage and pass through entire enemy formations.
- Soul Eater: Combine your Garlic with Pummarola. This places a pulsing black aura around your character that debuffs enemy resistance to freeze and knockback while growing stronger as you heal.
- La Borra: Match your Santa Water with the Attractorb. This hurls holy water bottles that create expanding, damaging pools that slide toward your character’s position.
- NO FUTURE: Combine the Runetracer with Armor. This fires fast, ricocheting laser beams that release massive explosions every time they bounce off walls or hit enemies.
- Thunder Loop: Pair your Lightning Ring with the Duplicator. This calls down lightning strikes that hit targeted zones twice, ricocheting between enemies.
- Gorgeous Moon: Match the Pentagram with the Crown. It erases every non-boss enemy on your screen and vacuums up all the experience gems on the map.
- Vicious Hunger: Combine Gatti Amari with the Stone Mask. This summons massive, crawling cat eyeballs that have a chance to transmute enemies and pickups into gold.
- Mannajja: Pair the Song of Mana with the Skull O’Maniac. This projects pulsing vertical waves of light that slow down affected enemies.
- Valkyrie Turner: Combine the Shadow Pinion with Wings. This releases sweeping wings of light when you move, charging up a massive flame blast when you stand still.
- Ashes of Muspell: Match the Flames of Misspell with a maxed-out Torrona’s Box. This creates black fire waves that grow permanently stronger with every enemy you defeat.
- Vandalier: Evolve both Peachone and Ebony Wings to Level 8. This is a unique Union that merges both birds into a single slot, firing clockwise and counterclockwise barrages.
- Phieraggi: Merge a max-level Phiera Der Tuphello and Eight the Sparrow alongside any level of Tirajisu. This Union fires a spinning laser array that scales its damage and projectile amount based on your remaining Revivals. Pugnala is the ideal character for this build, and if you want to optimize your revives, you can follow our guide on Seventh Trumpet endless mode to run long-form testing.
- Fuwalafuwaloo: Combine Zi’Assunta’s Vento Sacro weapon at Level 8 with an already evolved Bloody Tear. This Union creates a rapid whip attack that triggers massive explosions on critical hits.
- Sole Solution: Max out both the Victory Sword and Torrona’s Box. This is a unique Gift upgrade that awards you a reality-erasing void attack that clears your screen while keeping your Victory Sword active in your slot.
Modern DLC Expansion Recipes
- Festive Winds: Combine the Silver Wind weapon and the Pummarola passive, maxing out both items. It fires massive, swirling wind bursts that convert defeated enemies into healing hearts.
- Godai Shuffle: Max out the Four Seasons weapon alongside a max-level Spinach and Candelabrador. This releases five massive, screen-clearing elemental explosions.
- Echo Night: Max out the Summon Night weapon and the Duplicator passive. This summons dark cloud zones that deal persistent damage over time.
- J’Odore: Max out the Mirage Robe and the Attractorb passive. This shoots out expanding perfume clouds that leave behind damaging decoy duplicates of your character.
- Muramasa: Max out the Night Sword and the Stone Mask. This cursed blade unleashes rapid slashes that absorb enemy power, boosting your character’s Might indefinitely.
- Boo Roo Boolle: Max out the Mille Bolle Blu weapon and the Spellbinder passive. This fires a stream of persistent, colorful soap bubbles that bounce across your screen.
- SpellStrom: Merge SpellString, SpellStream, and SpellStrike at max levels. This Union combines three spells into a massive, concentrated beam of raw arcane energy.
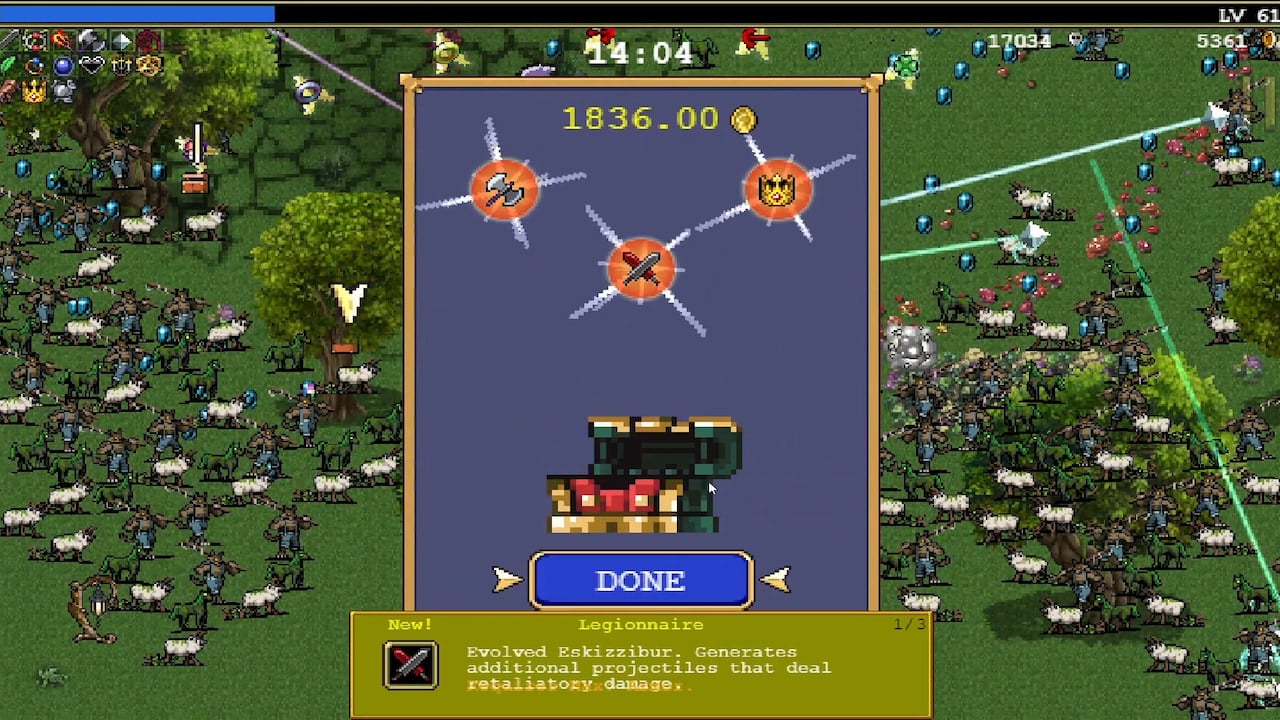
- Legionnaire: Max out the Eskizzibur weapon and the Armor passive. This launches character clones forward in a spinning charge attack, smashing the ground on every fifth strike.
- Millionaire: Max out the Flash Arrow weapon alongside a max-level Bracer and Clover. This shoots rapid-fire golden arrows that rain down gold on critical hits.
- Luminaire: Max out the Prismatic Missile weapon and the Crown passive. This fires massive rainbow beams that grant temporary invincibility and boost your Luck stat.
- Ophion: Max out the Shadow Servant weapon and the Skull O’Maniac passive. This summons stationary dark energy orbs that have a chance to instantly defeat non-boss enemies.
Emergency Meeting Crossover Recipes
- Clear Asteroids: Combine Clear Debris and the Mini Guardian. It transforms your debris blasts into homing asteroids that track visible targets.
- Unjust Ejection: Combine Just Vent and the Mini Shapeshifter. This fires massive, metal escape hatches across your screen.
- Paranormal Scan: Combine Lifesign Scan and the Mini Ghost. This periodically scans your character, granting a permanent, random stat boost.
- Crossed Wires: Combine Lucky Swipe and the Mini Engineer. This spawns broken electrical wire stubs that deal chain-lightning damage to close enemies.
- Emergency Meeting: Combine Report! and the Mini Crewmate. This periodically selects a random enemy type and instantly defeats all on-screen targets of that type.
- Rocket Science: Combine Science Rocks and the Mini Scientist. This generates a control panel grid on the floor, launching high-damage rockets.
- Impostongue: Combine Sharp Tongue and the Mini Impostor. This unleashes a giant, piercing tongue lash that scales its range with your Curse stat.
Operation Guns Crossover Recipes
- Prototype A: Combine the Long Gun with a Weapon Power-Up. This fires a high-velocity, piercing horizontal laser beam.
- Prototype B: Combine the Short Gun with a Weapon Power-Up and the Bracer passive. This unleashes a rapid-fire, dual-barrel plasma spread.
- Prototype C: Combine the Spread Shot with a Weapon Power-Up and the Empty Tome passive. This launches massive, bouncing explosive spheres across your screen.
- Pronto Beam: Combine the C-U-Laser with a Weapon Power-Up and the Tirajisú passive. This projects a screen-wide, vertical death ray that freezes targets.
- Fire-L3GS: Combine the Firearm weapon with a Weapon Power-Up and the Candelabrador passive. This summons mechanical leg units that stamp the ground to clear mobs.
- Wave Beam: Combine the Sonic Bloom weapon with a Weapon Power-Up and the Armor passive. This projects expanding sonic waves that reflect enemy projectiles.
- Multistage Missiles: Combine the Homing Miss weapon with a Weapon Power-Up and the Duplicator passive. This launches cluster missiles that split into secondary rockets.
- Atmo-Torpedo: Combine the Diver Mines weapon with a Weapon Power-Up and the Attractorb passive. This spawns vortex gravity mines that pull enemies together.
- BFC2000-AD: Combine the Blade Crossbow weapon with a Weapon Power-Up and the Clover passive. This rains colossal light spears vertically down on targets.
- Time Warp: Combine the Prism Lass weapon with a Weapon Power-Up and the Wings passive. This spawns temporal dilation fields that slow down enemy physics.
- Big Fuzzy Fist: Combine the Metal Claw weapon with a Weapon Power-Up and the Hollow Heart passive. This retaliates with colossal physical punches when your character takes damage.
Ode to Castlevania Crossover Recipes
- Alucard Swords: Level up the Alucart Sworb to Level 8. In my testing, this is one of the most unique evolutions in the game because it requires absolutely no passive items. It summons phantom apparitions of Alucard that teleport and slash at random enemies. Evolving it also unlocks Christopher Belmont.
- Alucard Shield: Evolve the Alucard Swords while holding six other evolved weapons and six maxed passive items in the same run. When you trigger the chest, Alucard Shield absorbs all your active weapons into a single slot, keeping their effects active while freeing up five slots for a massive, double-sized weapon build.
- Vampire Killer: Combine the Alchemy Whip with the Tirajisú passive. This classic holy whip deals massive diagonal strikes, burning and exploding enemies on contact.
- Stellar Blade: Combine the Discus weapon with a Level five Parm Aegis passive. This launches reflective, spinning buzzsaw blades that orbit your character.
- Wrecking Ball: Combine the Iron Ball weapon with the Armor passive. It swings a giant iron ball on a chain, crushing any targets in its path.
- Jewel Gun: Combine the Silver Revolver weapon with the Karoma’s Mana passive. This fires piercing jewel shots that cause defeated enemies to drop money bags.
- The RPG: Combine the Hand Grenade weapon with the Candelabrador passive. This launches massive, high-explosive rockets across your screen.
- Thunderbolt Spear: Combine the Alucard Spear weapon with the Wings passive. This unleashes electric lightning thrusts that chain damage between targets.
- Dark Iron Shield: Combine the Iron Shield weapon with the Parm Aegis passive. This projects a colossal shield that reflects all incoming projectiles.
- Thunder Tower: Merge the Endo Gears, Epi Head, Myo Lift, and Peri Pendulum items at max levels. This Union summons a screen-wide, ticking clock tower that freezes and damages enemies.
Master Librarian Fusion Recipes
- Million Cut: Merge Valmanway with an already evolved Thousand Edge. It fires infinite, vacuum-like horizontal slashes that shred bosses.
- Ninth Circle: Merge Icebrand with an already evolved Unholy Vespers. This creates permanent, orbiting ice fields that freeze and shatter targets.
- Dies Irae: Merge the Arrow of Goth with an already evolved Mannajja. It projects massive, vertical holy light pillars that slow down enemies.
- Kardía Phlegeton: Merge Aura Blast with an already evolved Hellfire. This triggers expanding fire shockwaves that incinerate the entire screen.
- Arch Angle: Merge the Grand Cross with an already evolved Heaven Sword. This projects colossal, spinning cross blades that deal guaranteed critical hits.
- Spirit of Light: Merge Summon Spirit with an already evolved Holy Wand. This launches a continuous stream of holy light bullets with automatic target tracking.
- Power of Lire: Merge Soul Steal with an already evolved Vicious Hunger. This creates lifesteal damage fields that transmute targets into gold.
- Soul River: Merge Dark Rift with an already evolved Death Spiral. This summons spinning dark scythes that absorb health points to heal your character.
- Vjaya Sisters: Merge Sword Brothers with an already evolved Thunder Loop. This rains down phantom swords accompanied by massive lightning strikes.
- Venus Crescent: Merge Summon Spirit Tornado with an already evolved Gorgeous Moon. This vacuums up experience gems while releasing lunar crescent waves.
- Dark Frogamorphosis: Merge Anura with an already evolved Soul Eater. This releases waves of toxic frogs that melt enemy armor ratings.
Now that you have the ultimate blueprint, it is time to boot up the game, select your favorite stage, and start evolving your gear. Let me know if you run into any tricky combinations, and happy hunting!


Updated: Jun 15, 2026 05:36 pm