In Stellar Blade, players are going to be very busy with the threat of the Naytiba, but that doesn’t mean that Eve doesn’t have the time to check out other interesting sights in this futuristic world. From fulfilling the requests of needy NPCs or checking out the latest happenings on the bulletin board, there are many other things that demand the heroine’s attention. For those trying to find all 49 collectable cans and their locations in Stellar Blade, this is the best place to start.
All Can Locations in Stellar Blade
When it comes to this particular line of collectibles in Stellar Blade, it isn’t just the case of stumbling upon them in the wild. There are puzzles involved sometimes, and more often than not, players will have to go through some platforming challenges to reach some of the harder-to-find cans and their boxes.
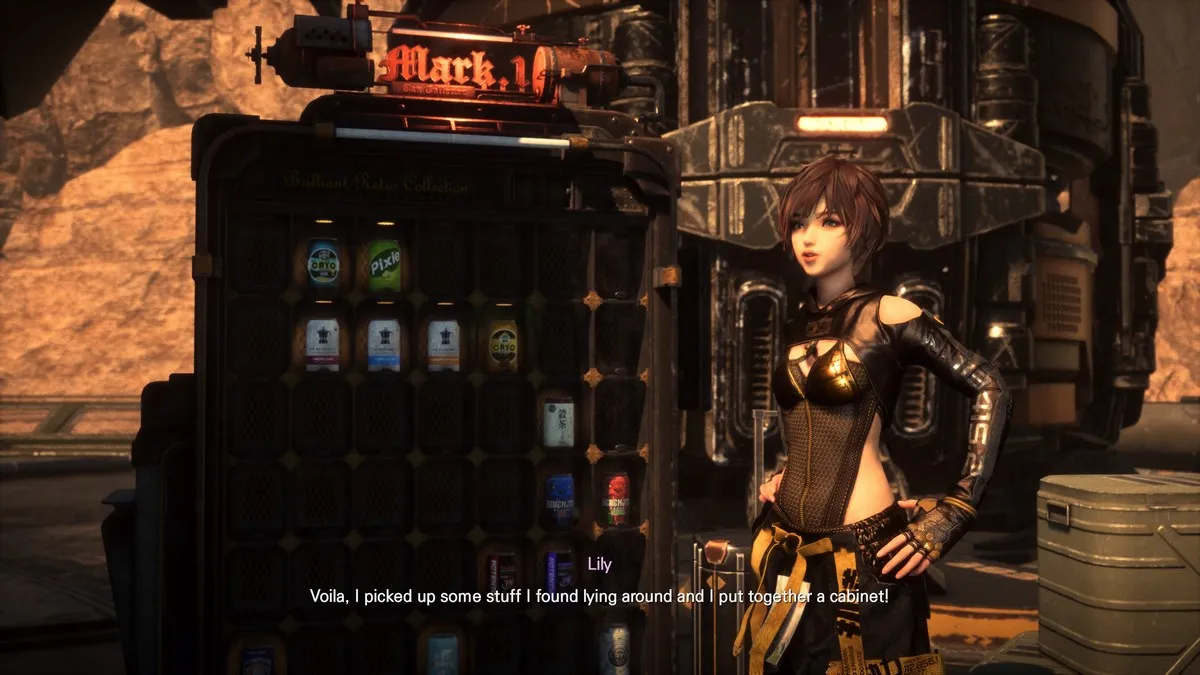
A good way to track just which cans have been found and which are still missing is back at the safehouse at Xion. Lily will construct a special vending machine to house all of your finds, and thankfully, they are numbered. Here’s the full list of cans and their locations:
Can #1 – Cryo Original – Eidos 7


Drain the flooded commercial zone on Eidos 7 during the side mission, Oblivion, and locate the vending machine at the bottom of the area.
Can #2 – Cryo Zero – Wasteland


Head to the four-way intersection location just south of the center of the map. Open up the chest and a target will appear, keep shooting and following it and it will eventually drop the can.
Can #3 – Pixie – Xion


Found on the floor just outside a store in the northern part of the city. Use the scanner to easily locate it.
Can #4 – Pixie Zero – Wasteland


Go to the eastern side of the map, where there is a wall-running section on the way to Altess Levoire. Find the stuck maintenance bot just underneath the broken bridge, and shoot down the metal beams blocking it. It will escape and drop the can.
Can #5 – Newfoundland Dry – Matrix 11


After defeating the Juggernaut, use the blue cargo containers to get high up and walk down the stairs to find the can on the floor.
Can #6 – Newfoundland Dry Zero – Great Desert


Just to the east of the entrance to Xion, seek out the nearby Lesser Lurker. There will be a crate that is hidden beneath the sand. Shoot it to find the can.
Can #7 – Milky Pop – Spire 4


After your first encounter with Belial, make your way to the next supply camp. Before leaving, look for the wall behind it and jump over. There will be a path that leads to the can.
Can #8 – Milky Pop Zero – Great Desert


East of the Hypertube entrance, look for the cliffs with the yellow handholds. There will be a target here that can be shot, which drops a rope that will get you over to the can.
Can #9 – The Machinetta Americano – Xion


Next to Gwen’s Hair Salon will be an alley; just head there and use the vending machine to receive the can.
Can #10 – The Machinetta Café Latte – Wasteland


In the southeast part of the map, you will find a facility with a lake in the middle. Scan and find the three heavy objects that can be moved. Shift them onto the pressure plates, and a box will drop with the can inside.
Can #11 – The Machinetta Caramel Macchiato – Xion


In the plaza, head to the eastern side to find a vending machine that will dispense this particular can.
Can #12 – Cryo Café Original – Wasteland


The can is found in the southwest corner, just behind the wrecked ship. Head out the hole to find it next to a cliff’s edge.
Can #13 – Cryo Café Vanilla – Matrix 11


After beating the Stalker, use the terminal to turn the train platform. Use the train to jump onto a ledge on the left to find the can.
Can #14 – Cryo Café Mocha – Great Desert


Found in a box on top of some containers. Head to the northwest corner of the Great Desert, and interact with the box. Three targets will then appear. Shoot them down in order to get the can.
Can #15 – The Haven Earl Grey – Great Desert


From the Oasis, look to the northeast and climb up the Hypertube structure. Go all the way to the end and the can will be there.
Can #16 – The Haven Milk Tea – Great Desert


In the ruined city area, jump over the fences to find an area where there is a locked door and a code above. Use the nearby carts and move them to the various pressure plates to hit the required number. Complete all three and access the door to find the can inside.
Can #17 – The Haven Green Tea – Wasteland


Instead of going across the gaps, look down in the area to find more handholds and swinging bars. You will require the Double Jump ability to reach the other side where the can is found.
Can #18 – GrainT Barley – Wasteland


Climb up the nearby cliff to reach some swinging bars. Get across and cross the bridge, before dropping down into the area behind the gates. Here, move the weights onto the left plate to form the code and get the can.
Can #19 – GrainT Oolong – Xion


From the Tetrapod, head across the bridge towards Xion proper, but in the middle, use the rope to get down and jump onto the rocks to get the can.
Can #20 – GrainT Corn – Wasteland


On the way to the wall-running section, there will be a vending machine just on the path which houses this can.
Can #21 – Nectar Orange – Wasteland


Next to the Central Great Canyon Camp will be a billboard with a box. Use the nearby crate and move it into position beneath the bar. Use Double Jump to reach up and get the can.
Can #22 – Nectar Grape – Great Desert


By the Oasis will be a big rock formation with a vending machine. Use it to get this can for the collection.
Can #23 – Nectar Apple – Spire 4


After reaching the first camp in the Space Center, look to the top-right corner of the room to find a couch. The can will be behind this couch.
Can #24 – Nectar Cranberry – Great Desert


At the wall will be a climbable ledge; grab onto it and wait for it to rise. Then use the robots to make your way over to the box.
Can #25 – Elixir Carrot – Eidos 7


After emptying the Flooded Commercial Zone during the Oblivion side mission, there will be a shop on the bottom levels that has the can within.
Can #26 – Elixir Green – Wasteland


With the Double Jump ability, head over to this area and use it to get onto the metal platforms from the nearby ramp.
Can #27 – Behemoth Red – Xion


In the central part of Xion, go southwest towards the bar where Enya and Su are. There will be a vending machine here with the can.
Can #28 – Behemoth Green – Wasteland


At the Western Great Canyon Camp, you will be able to find two metal balls in the area. Push them onto the pressure plates to activate the box.
Can #29 – Behemoth Black – Great Desert


There will be a parking lot here with several parking lots. Move the boxes onto the lots corresponding to 2, 12, and 13 to activate the box.
Can #30 – Liquid Fire – Great Desert


Scan for a crate on top of the rooftops in this area. Activate it, and a bunch of flying drones carrying explosive barrels will approach. Shoot them out of the sky to open up the box.
Can #31 – Liquid Lightning – Spire 4


After the conveyor belt sequence, look to the right of the cargo container to find the can on the floor.
Can #32 – Liquid Nuclear – Great Desert


Found inside a collapsed building, use the nearby scaffolding as platforms to get inside. Then, use the yellow box to reach the ledges and reach the can.
Can #33 – Potential Blast – Eidos 7
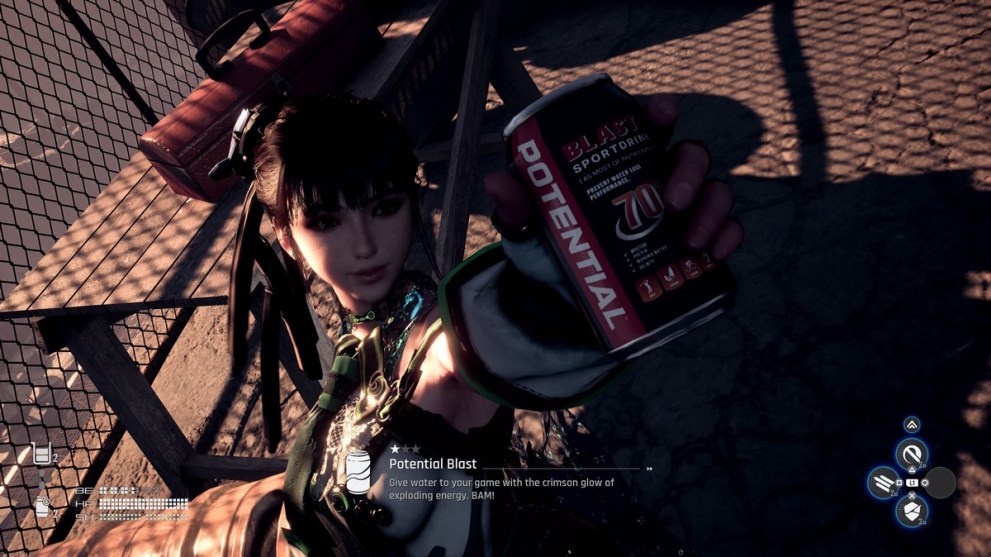
At the Construction Zone area, climb up to the third floor of the building to find the can on a table overseeing the area. It will likely be found when you get the first Crane ID.
Can #34 – Potential Tempest – Wasteland


Around the Solar Tower will be a bunch of terminals and enemies. Clear the foes and activate the terminals accordingly. Now, move the nearby yellow crate into position to reach the top of the blue containers. Use the terminal there again to open up the box.
Can #35 – Potential Frost – Great Desert


Use the nearby school bus to reach the ladder and climb up. Move across the rooftops, and you will see a seesaw. Jump on the nearest side to tilt it upwards, then shift the yellow box next to the fulcrum. Now jump across to the swing bar and drop down. Turn around and jump past the lasers to get the can.
Can #36 – Dionysus C – Xion


After going up the stairs on your way to the Bulletin Board, look to the left to find the can among the trash.
Can #37 – Moonwell – Spire 4


During the section in the Space Center, Eve will have to venture across a beam outside of the area and fight the Machine Hive. From here, look for a wall to the right that can be jumped around. Proceed to the end to find a vending machine with the can.
Can #38 – Starwell – Great Desert


West of the Crumbling Rooftop camp will be a small area where a Lurker is roaming. Look closely for a shining light in the ground. Place a Smart Mine here and wait for the Lurker to hit it. This will cause the box to appear.
Can #39 – Mountain Sparkle Mont Blanc – Xion


Head to the area above Sisters’ Junk and find the vending machine here.
Can #40 – Mountain Sparkle Everest – Great Desert


From the Middle Path between Ruins camp, continue down the path and you will find an area with a yellow box and an alcove with lasers. Start pushing the box towards the lasers, stopping to fight all the enemies that spawn. Use the box to block the lasers and get the can.
Can #41 – Mountain Sparkle Halla – Wasteland


Go north from the Western Great Canyon Camp to find some yellow ledges that Eve can climb using the Double Jump ability. Keep proceeding and eventually you will reach an area where some enemies are guarding the box.
Can #42 – Cryo the Clear – Wasteland


Go deep into the Forbidden Area, and halfway down, there will be a gated area. Enter and find the can on the ground.
Can #43 – Cryo the Malt – Great Desert


Look for the drone with the target in this area. Shoot it down and climb the rope to reach the rooftop. Here, interact with the electrical box, which starts a timer. Make your way across the bars and ledges, and interact with the subsequent two boxes. Now, climb down the ladder and open up the gate to reach the can.
Can #44 – Bayern Hefe Weissbier – Wasteland


Inside a vending machine that can be found just next to some collapsed ruins.
Can #45 – Bayern Weissbier Dunkel – Xion


Near the middle fast travel point, there is an alleyway. Go to the end to find the can.
Can #46 – Corsair Lager – Wasteland


In the northern tip of the area, there will be an area that has a lever that can be activated to bring down a platform south of it. Upon activation, two Guard Towers will become active. Use the first attempt to destroy them first, then try the lever again. Make your way to the platform and wait for it to rise, giving you access to the box with the can.
Can #47 – Corsair Ale – Matrix 11


In the flooded area of Matrix 11, there will be an area to the right where there is a fence. Swim underneath it and climb up onto the platform to find the can.
Can #48 – Johnson’s Highball Lemon – Great Desert


Enter this opening in the rock formation and fight the two Lurkers within. Move the yellow box beneath the ledges and climb to the top to find the box.
Can #49 – Johnson’s Highball Ginger – Great Desert


From the Buried Ruins camp, the can is found in the vending machine just below the safe area.
Rewards for Finding All Cans in Stellar Blade
After Lily builds the vending machine, players can hand in their finds back at Xion for some important rewards. This includes:
- Collect 1 – Max no. of Shock Grenades +1
- Collect 7 – Max No. of Lingering Potions +1
- Collect 14 – Man No. of Smart Mines +1
- Collect 21 – Max No. of Highly Concentrated Potions +1
- Collect 28 – Max. No. of Pulse Grenades +1
- Collect 35 – Max No. of WB Pumps +1
- Collect 42 – Max No. of Sonic Grenades +1
- Collect 49 – Black Pearl Nano Suit

The added healing consumables will be very helpful, and having a Nano Suit to add to the collection is also something to look forward to for fans of Eve and her unique sense of fashion.
And there you have it, everything there is to know about all 49 collectible cans and their locations in Stellar Blade. For more help with the game, be sure to check out our other guides, or search Twinfinite for more.


Updated: May 1, 2024 04:39 am