In New Pokemon Snap, players can take photos like never before, as this sequel allows gamers to not only snap photos of their favorite Pokemon but also edit them. In order to do so, you’ll have to follow a few specific steps first. Here is everything you need to know about how to edit a photo in New Pokemon Snap.
How to Edit a Photo in New Pokemon Snap
The first thing you need to know about editing photos in New Pokemon Snap is that there are two different ways to do so: Re-Snap and post photo editing. Below, we will detail the differences between these two editing tools.
Re-Snap
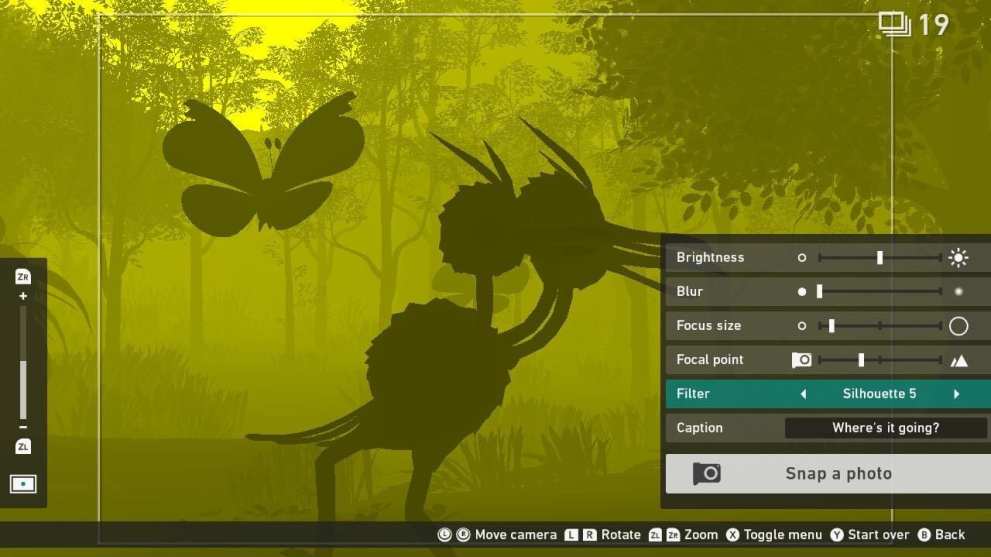
After taking photos in any of the courses throughout New Pokemon Snap, there will be an option to save and edit the pictures you’ve taken immediately after you’re done called Re-Snap. When you click on this, it’ll allow you to fine-tune the photo, changing the brightness, focus, and blur. You can even add in filters.
Filter options are a bit more limited in this customization mode, simply allowing you to apply small effects like silhouettes. If you want more options for filters, you’ll want to use the game’s other editing mode.
Post Photo Editing
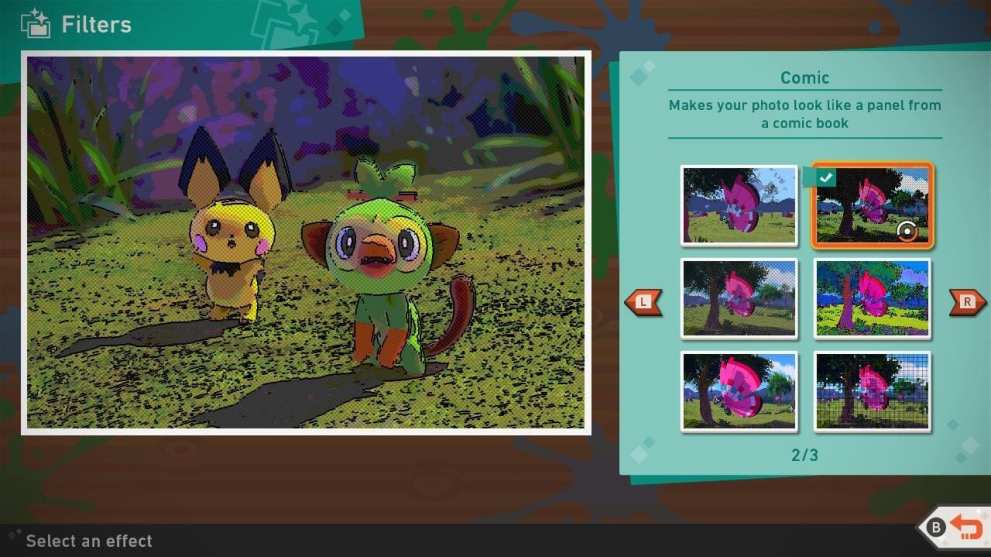
Whenever you finish a course, be sure to save the pictures you know you want to do a little more editing on later. When you do, they’ll appear in your album. Click on the picture and you’ll see that there are numerous different options for you to explore filter-wise, ranging from styles like comic to grid.
That is everything you need to know about how to edit a photo in New Pokemon Snap. If you’re still looking for more tips, tricks, and FAQs, be sure to check out our guide wiki.
There should also be some related content down below you may find helpful. For any questions you can’t find the answer to, always feel free to reach out to us in the comment section and we’ll do our best to help.






Updated: Apr 30, 2021 02:59 am