There are a lot of options to choose from when building your player in NBA 2K24. When it comes to MyCareer specifically, that couldn’t be more true. Creating a perfect shot may not be possible but getting as close as you can could make all the difference at the end of the day. That is why we’re here to tell you how to use the NBA 2K24 Jump Shot Creator.
NBA 2K24 Jump Shot Creator Guide
The jump shot creator is back for another go round this year, and despite some menu tweaking, the options remain plentiful. But first, you’ll need to be able to find said creator. Fortunately, it’s where it always is.
Accessing the NBA 2K24 Jump Shot Creator
- Hit Start in MyCareer to bring up the Menu.
- Go to MyPlayer, then select ‘Animations.’
- ‘Jump Shot Creator’ is third from the left.
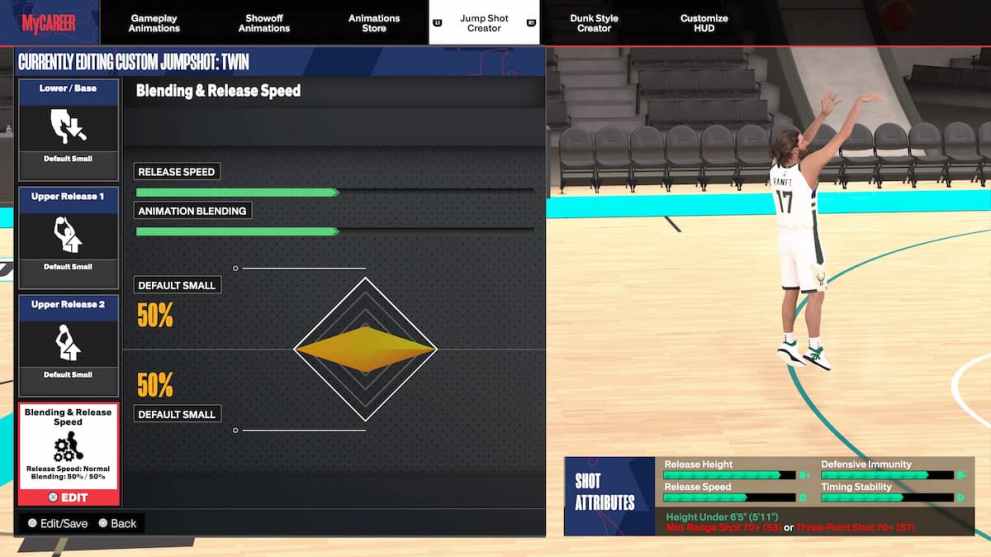
As for actually creating your jump shot, that comes down to a small handful of factors.
Creating Your Jump Shot in NBA 2K24
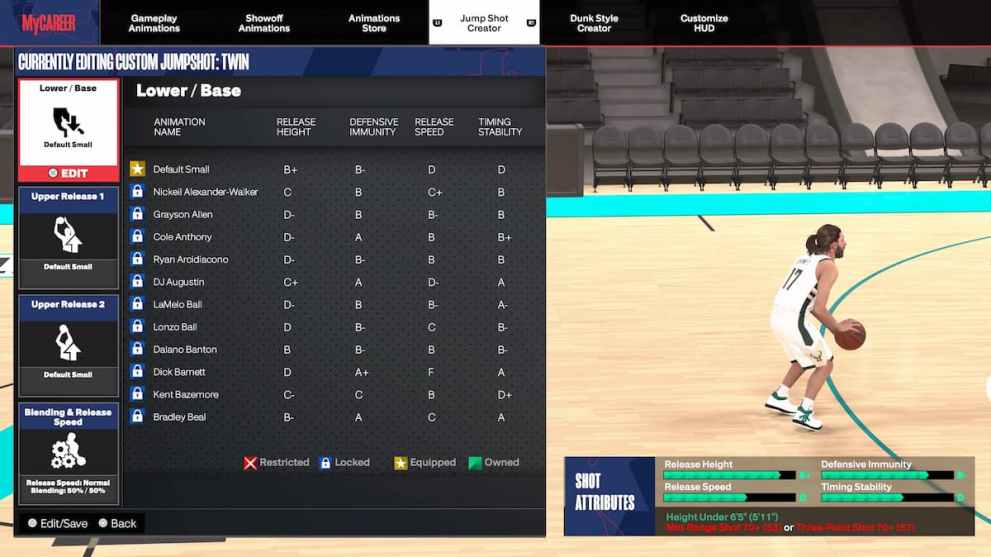
There are four sections to focus on when creating your very own jump shot, and they are as follows:
- Lower/Base
- Upper Release 1
- Upper Release 2
- Blending & Release Speed
So, how do you know which options to choose? Well that will come down to your player’s stature. If you’re a tiny guard, it’s probably to your benefit to find shots with a quicker release. Additionally, a shot release with a higher height could prove crucial.
You’ll have to unlock more Lower/Base options as you increase your attributes through various game modes early on, but there are plenty of player choices to be made between both Upper Release options. After that, it’s all about blending a comfortable release point with the right speed. Players are able to tune those sliders to their liking as well.
That’s all you need to know about how to use the NBA 2K24 Jump Shot Creator for now. The fun doesn’t have to end there, however, as we’ve got plenty more 2K coverage to peruse from guides to news updates and beyond.






Updated: Sep 10, 2023 09:13 pm