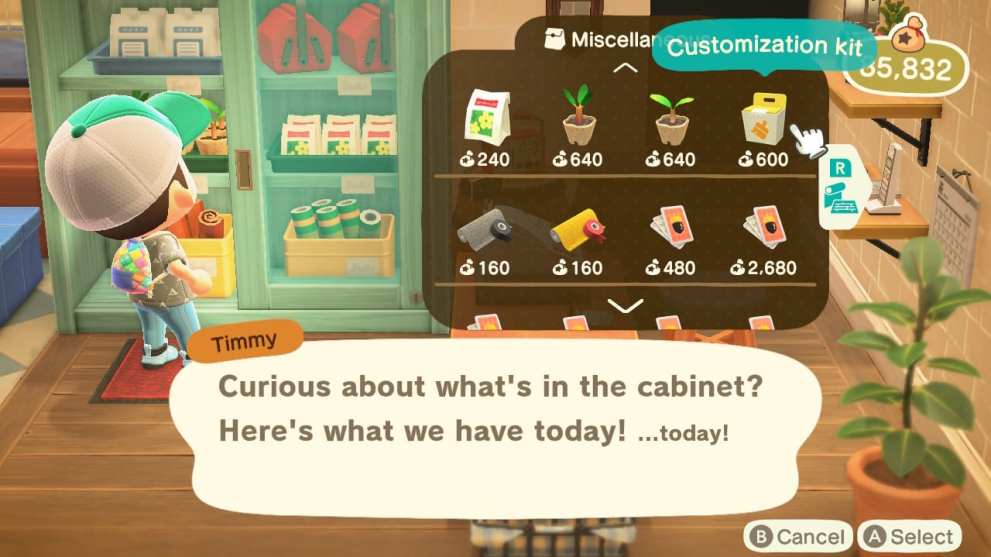
Animal Crossing: New Horizons‘ Customization Kits are key to making your furniture fit in with your perfect home. You’ll be able to tweak and change the color or design of pieces of furniture so that it all fits together. If you’ve rinsed through your initial supply, you may be wondering how to get more Customization Kits in Animal Crossing: New Horizons.
Getting More Customization Kits
When you’re first introduced to the customization feature, Tom Nook will provide you with a tutorial workshop to show you how it’s done. After completing the tutorial, he’ll give you 50 Customization Kits to use at your own leisure.
To get more Customization Kits, you’ll need to buy them from Nook’s Cranny for 600 Bells. Specifically, you’ll need to walk over to the cabinet. This can be found in the top left-hand corner in the basic store, or over to the right hand-side in the upgraded store.

You can buy as many of the kits as you need to perfect the interior design of your house this way, so go nuts.
Using Animal Crossing New Horizons’ Customization Kits
As Tom Nook showed you in the tutorial demonstration, all you need to do is walk over to any DIY Workbench and press A. After this, select the “Customize Something” option and select the piece of furniture in your inventory that you want to change the color or style of.
It’s worth noting here that not all furniture can be customized, so if it’s greyed out, you won’t be able to use it.
Make the desired changes and press + to confirm you’re happy. A short cutscene will play out as your characters gets to work making the required adjustments and voila, you’ll have some newly-customized furniture.
Looking for more tips, tricks, and guides on New Horizons? Be sure to head over to our guide wiki, or check out more of our coverage below.


Updated: May 4, 2020 10:00 am