Assassin’s Creed Valhalla’s world is simply stunning. From the snow-tipped mountains of Norway through to the rolling green pastures of the English countryside, there’s always something to gawk at and appreciate. Sometimes, these views are too good to simply appreciate for a moment and you’ll want to snap a quick photo to share with your friends. In this guide, we’ll be talking you through how to use photo mode in Assassin’s Creed Valhalla.
Using Photo Mode in Assassin’s Creed Valhalla
To open photo mode in Assassin’s Creed Valhalla, simply press L3 and R3 at the same time when in-game.
This will cause the action to freeze, and you’ll now be able to move the camera freely around Eivor and your surroundings to get the perfect angle.

This first screen provides options for zooming in and out, tilting the camera, rotating and offsetting the camera, orbiting, and the grid that appears over the image by default.
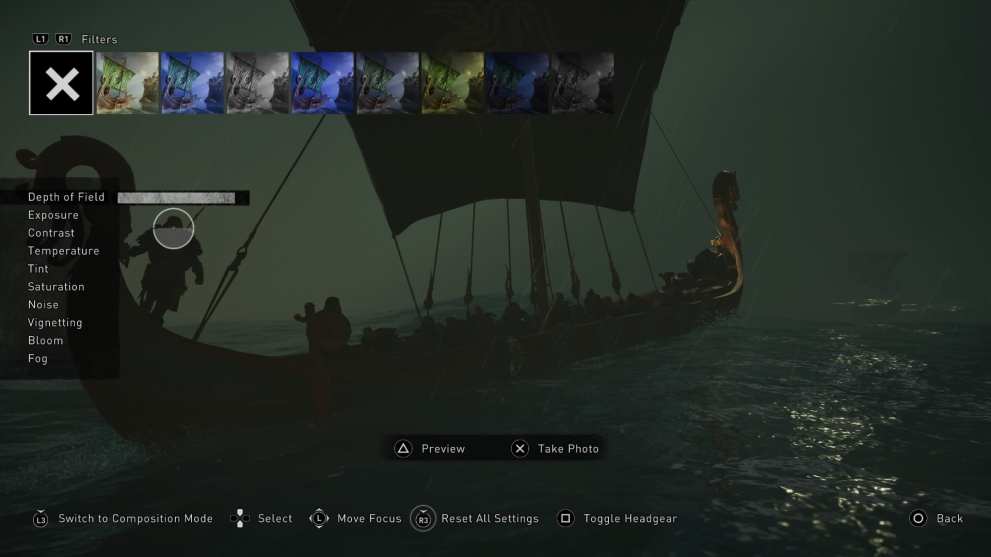
If you’re looking for more options, simply press L3 to open up the edit mode. This is where you’ll be able to amend saturation, brightness, contrast, and apply filters and other ways to further enhance the photo you’re trying to capture.
When you’re happy with the shot, simply press X on PS4 or A on Xbox One to snap the photo. Your photo is then saved to your console’s hard drive and can be accessed from the Capture Gallery on PS4, or your recent captures on Xbox One.
There you have all you need to know on Assassin’s Creed Valhalla’s photo mode. For more tips, tricks, and guides, head over to our wiki or have a browse through more of our coverage below.
And as always, if you have any questions about this guide, feel free to drop a comment down below and we’ll get back to you ASAP.


Updated: Nov 9, 2020 06:26 am