
Visions of Mana has a fair few collectibles in the game, and some of the trickier ones to track down are the locations tied to the Behind the Scenery quest line. That’s why we’re here to help you track down all Behind the Scenery locations in Visions of Mana, and guide you toward the side quest’s emotional conclusion.
Visions of Mana Behind the Scenery Locations: Where to Find Every Behind the Scenery Viewpoint
There are a total of eight Behind the Scenery views to find in Visions of Mana, and they all function the same way.
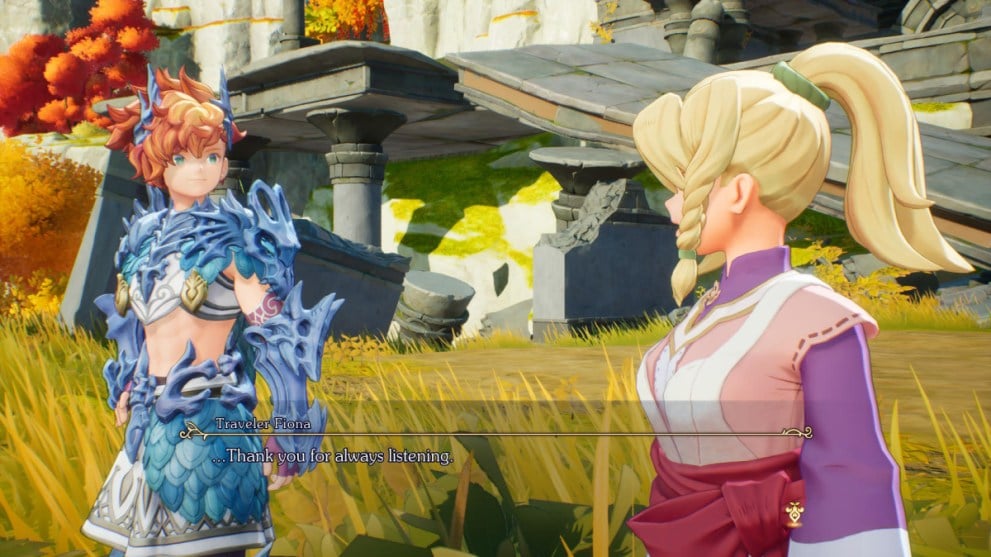
After you speak to a woman named Fiona, she tasks you with finding the place where her father made a famous painting. You’re given the general area to look around, but it’s up to you to determine where the exact point he used was. Once you find it, a prompt to Admire the View appears and you can inform Fiona of your discovery to complete that part of the quest.
We’ve detailed each part of the quest below, and have included screenshots so that you know exactly where to look.
Behind the Scenery 1 Location
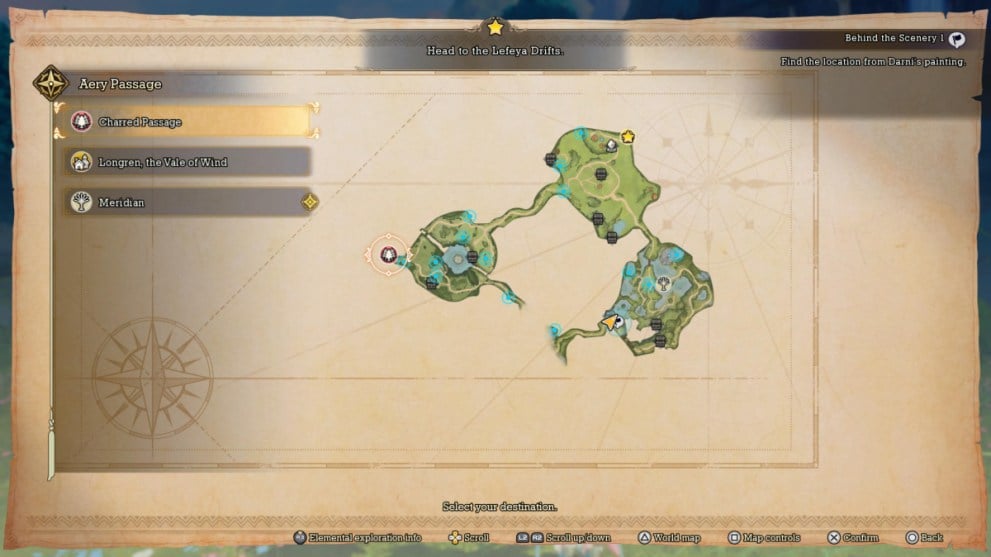
After you start the quest by talking to Fiona in Longren, the first Behind the Scenery point can be found in the Charred Passage.
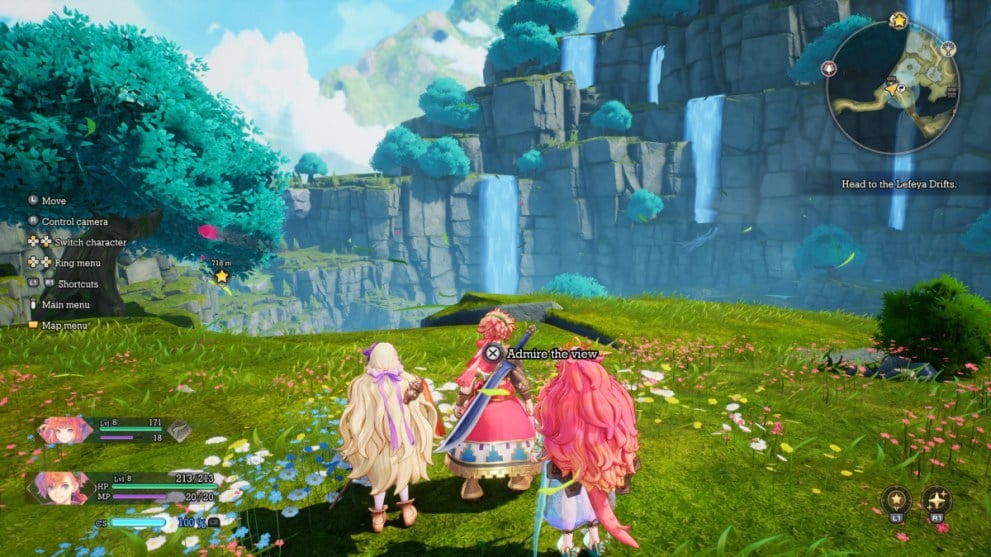
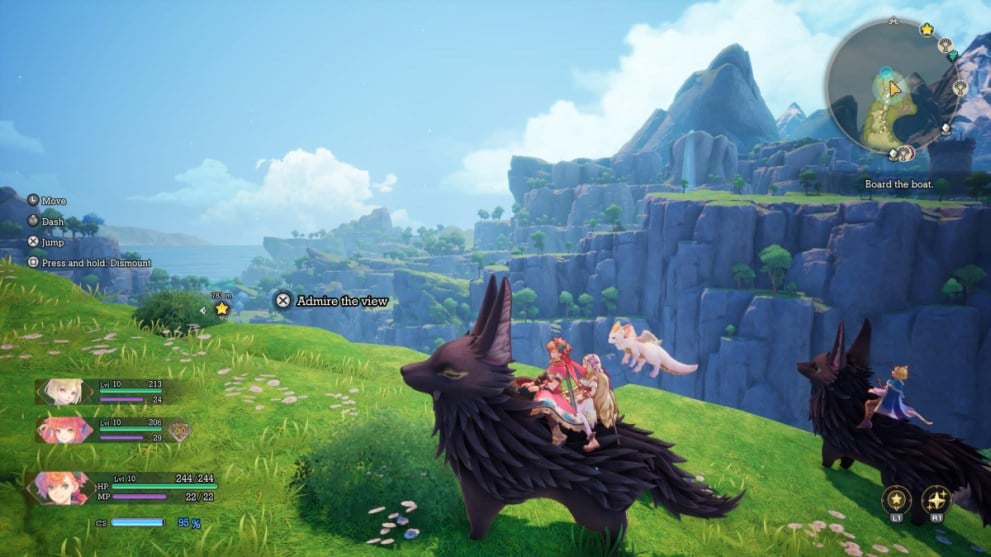
Head to the area, and then go to the lower right island where the general search area is marked. Once in the search area, look for a small bit of land near the cliff’s edge surrounded by flowers. Stand at its center, and the prompt to Admire the View will appear.
Press the button shown in the prompt, and Val will then call Fiona to report your findings. After a short conversation, she’ll thank you for your work and ask to be left alone, ending the first part of the quest.
Visions of Mana Behind the Scenery 2 Location
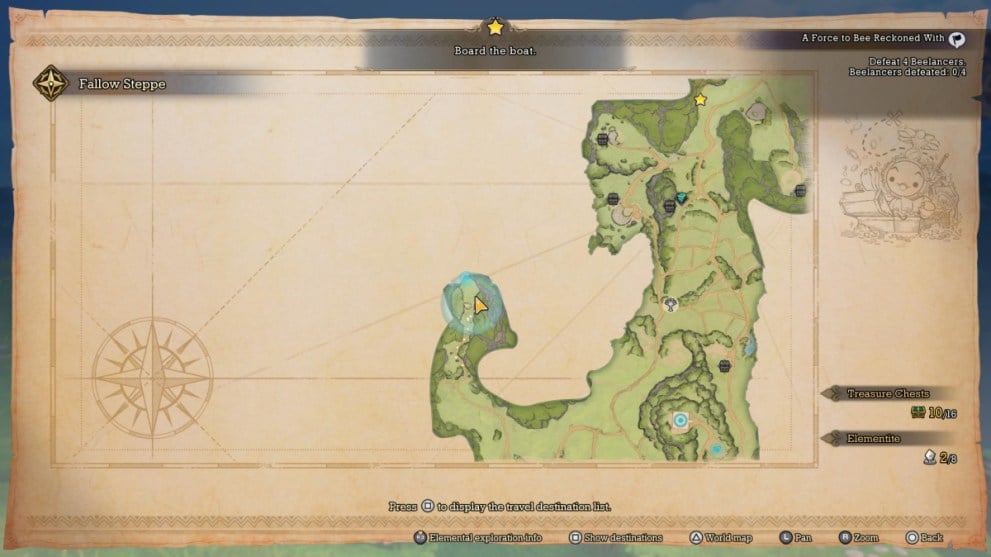
Fiona can then be found in Rhata Harbor so long as you have reached the area via story progression.
Speak to her there, and you’ll be told the next location is somewhere in the Fallow Steppe. The search area is located in the hook-shaped stretch of land to the left of the main map. Head there on foot or by Pikul, and then look for the bit of elevated land along the cliff’s edge to your right. Climb on top of it, and then look for a smattering of pink flowers to find the Admire the View point.
Press the button shown on the screen to successfully find the point. Fiona once again comes and talks to you about her father, after which the second part of the quest is completed.
Behind the Scenery 3 Location
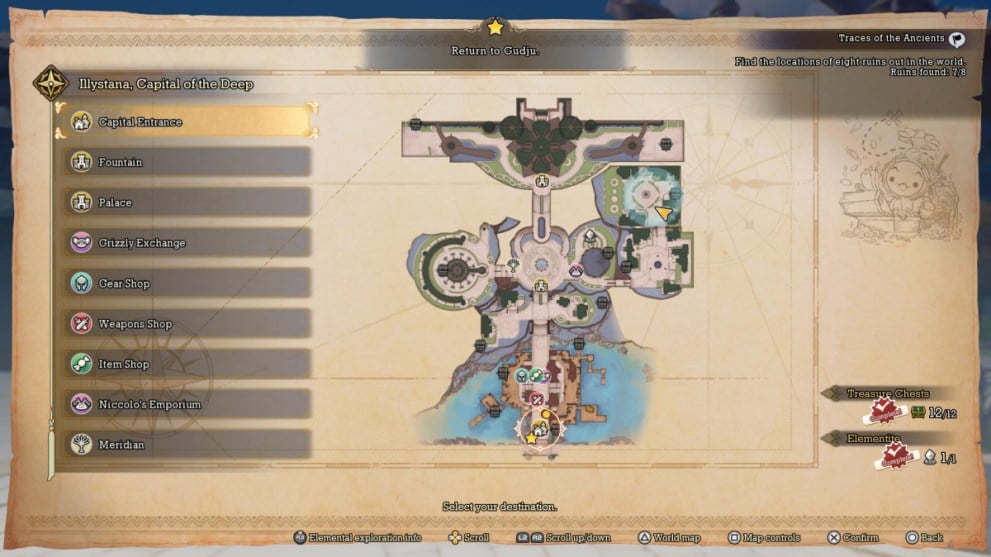
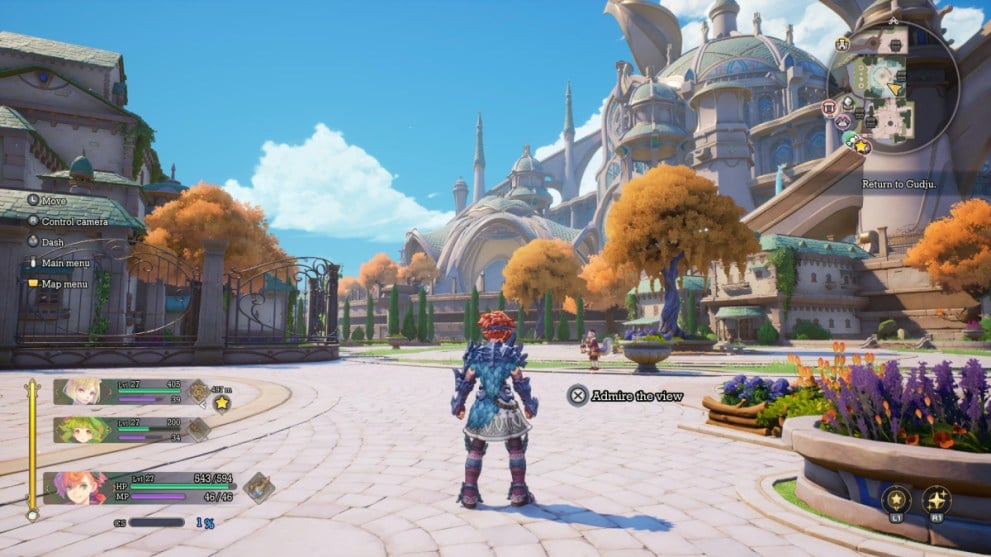
The next part of the Visions of Mana Behind the Scenery quest line doesn’t trigger until after you gain access to Vuscav. Once you’re able to travel across the world’s seas and oceans, head to Illystana and look for Fiona at the docks to the left.
After you speak to her, she informs you that the next point she needs to find is somewhere in the city. Head to the general search area in the courtyard to the northeast, and then look for an elevated flower garden with purple flowers in it. The Admire the View point is to the left of this garden.
Follow the button prompt to bring Fiona to the area, and she’ll then reward you for clearing this part of the questline.
Visions of Mana Behind the Scenery 4 Location
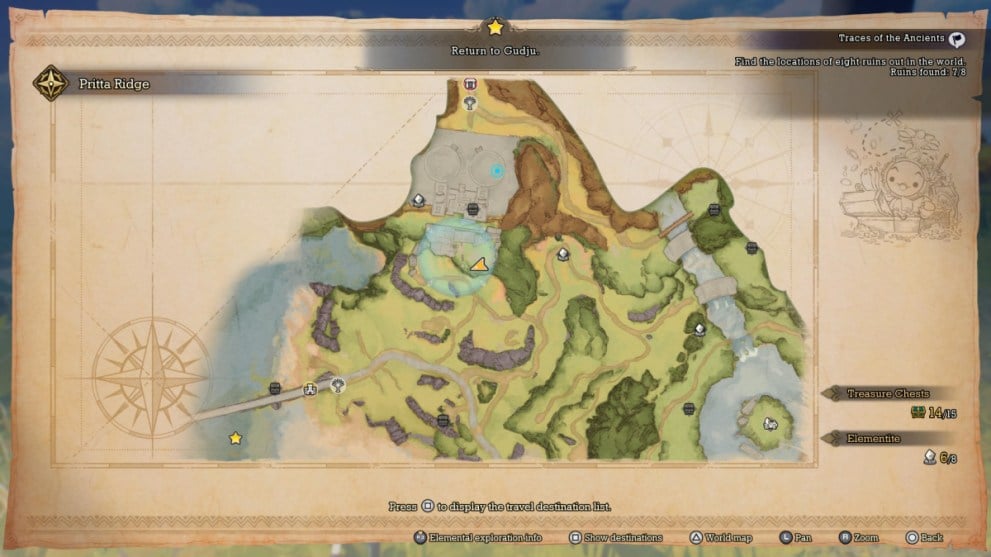
The next part of the Visions of Mana Behind the Scenery questline can be triggered by leaving and then returning to Illystana. Fiona can be found at the same place as before, and informs you the next location she needs you to find is in Pritta Ridge.
Head to the general search area, and then make your way down to the portion of the area’s ruins, which have collapsed down onto the cliff below. Once there, you’ll see two pillars embedded in the ground. Go between the pillars, and the Admire the View point will be waiting for you to interact with it.
Press the necessary button to bring Fiona to the area. The fourth part of the quest will be done and dusted!
Behind the Scenery 5 Location
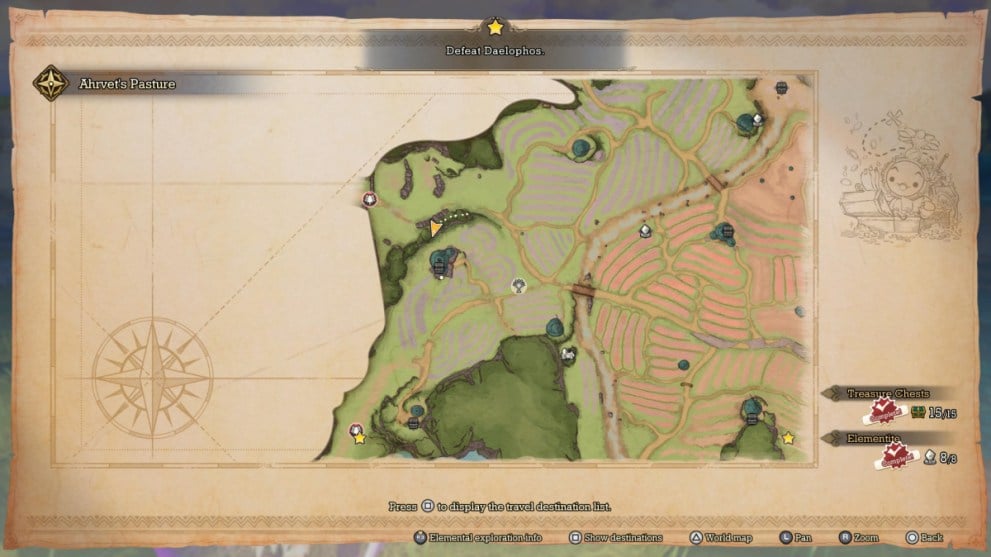
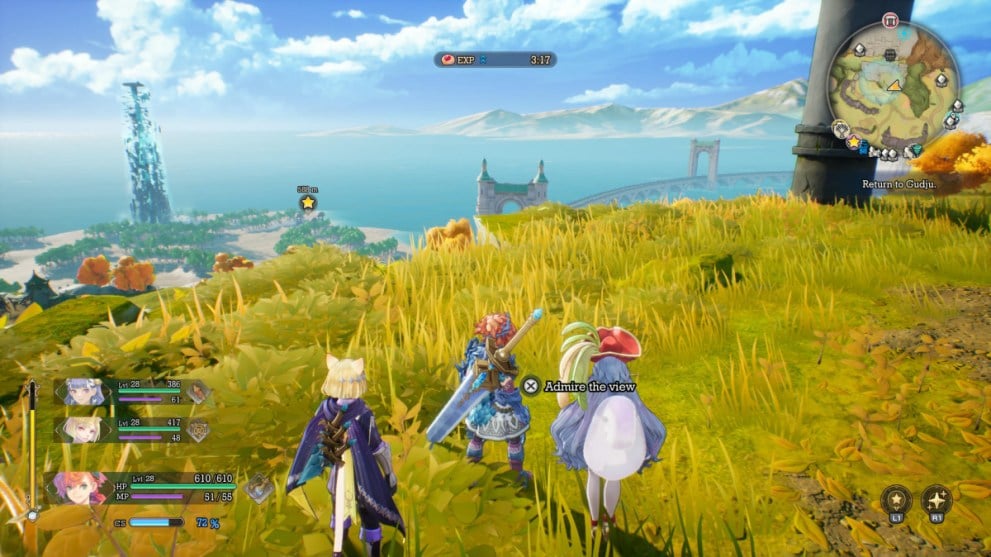
After you part ways with Fiona, make your way back to Illystana. She’ll be back at her usual spot, and will inform you that the next Behind the Scenery point is somewhere in Ahrvet’s Pasture.
Go to the general area marked on your map, and then head behind the farmhouse to find a cliffside. Climb up on top of the cliff, and then jump on top of some outcropped round rocks. The Admire the View point will appear once you do so.

Call Fiona out to the area by pressing the button prompt. After you do, she informs you that she plans to make her way to the free city of Tsaata.
Visions of Mana Behind the Scenery 6 Location
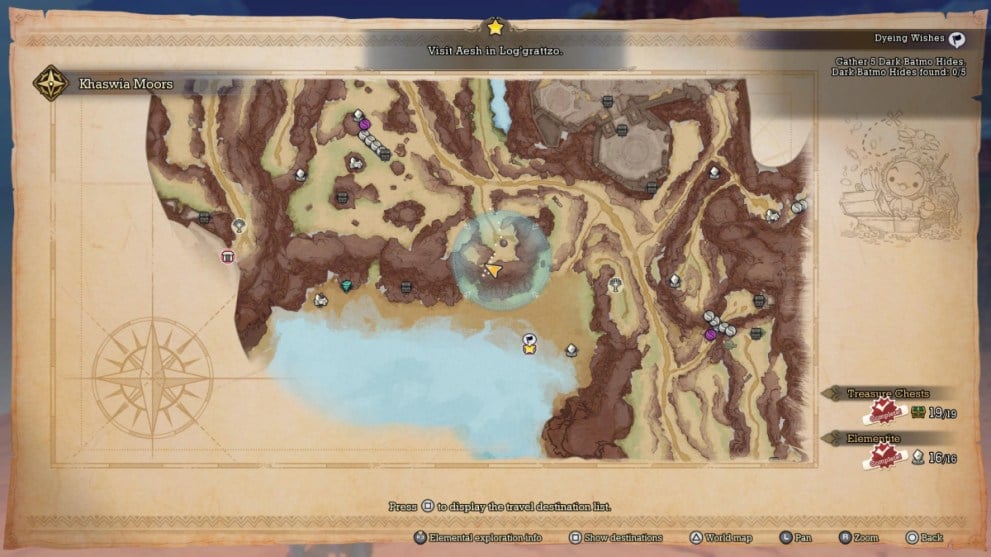
Fiona won’t appear in Tsaata until you gain the ability to fly around the world. Once you have this skill, head to Tsaata and talk to her to learn that the next Behind the Scenery point can be found in the Khaswia Moors.
Make your way to the general search area, and then head to the very end of the narrowing cliff. The Admire the View point appears as soon as you approach the edge.
Press the necessary button, and Fiona will appear to officially close out this part of the questline.
Behind the Scenery 7 Location
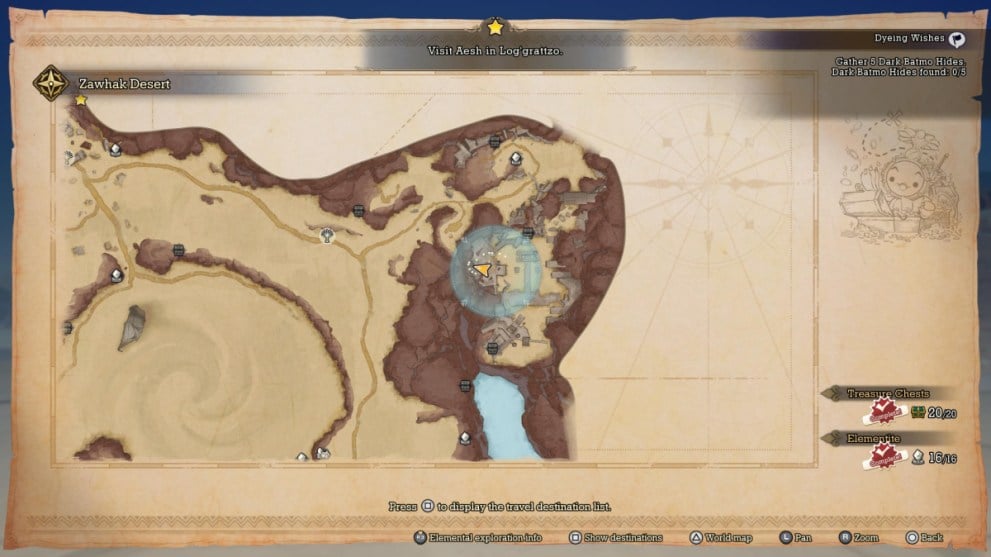
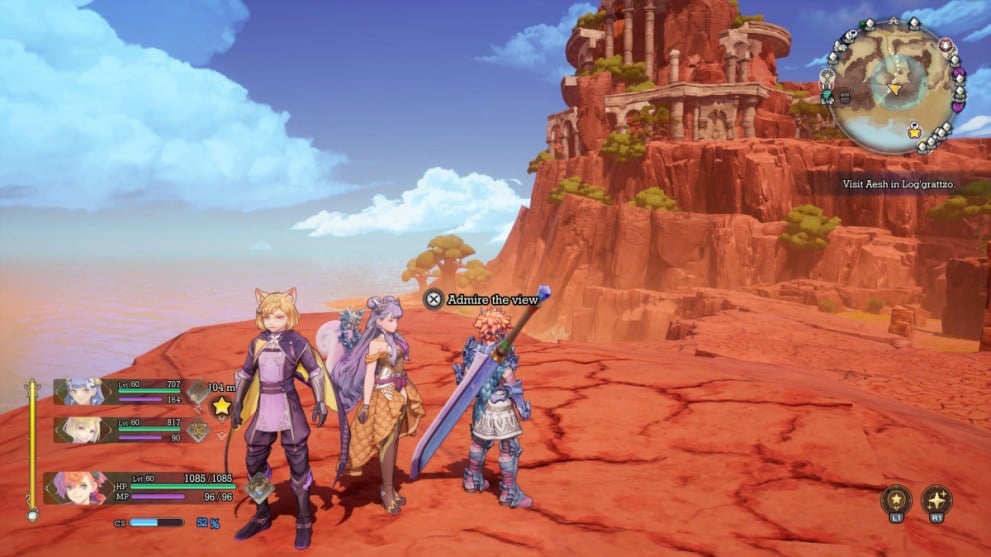
Fiona then heads to Gudju, the Earth Village. Go there and talk to her to learn that the next Behind the Scenery point in Visions of Mana is found in the Zawhak Desert.
Head on over to the general search area, and then enter the area’s ruins. Make your way to the west side of them, and then look for a collapsed stone floor. Walk to the center of the floor, and the Admire the View point will appear.
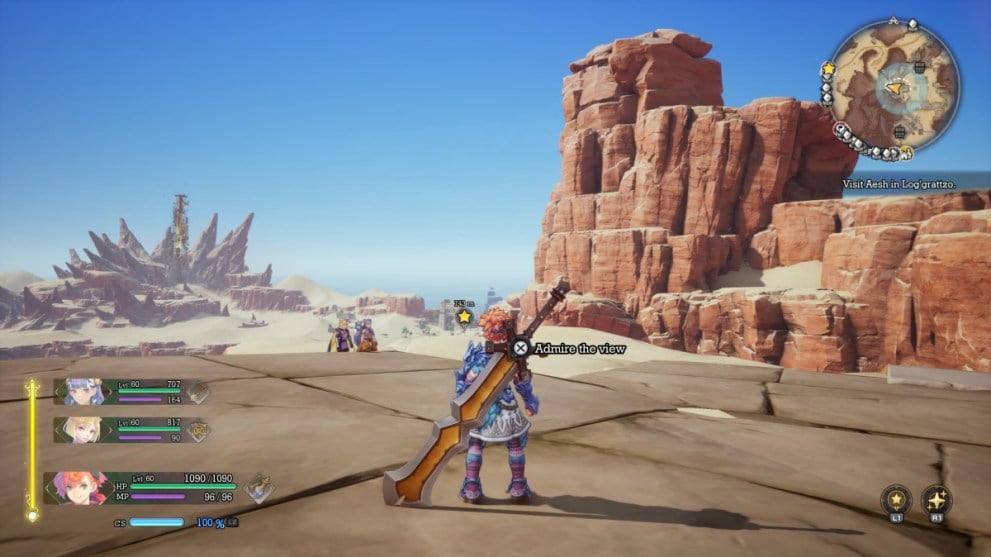
Press the button prompt to call Fiona out to you. She’ll once again ask for some privacy after mentioning that she’s headed back to Longren.
Visions of Mana Behind the Scenery 8 Location
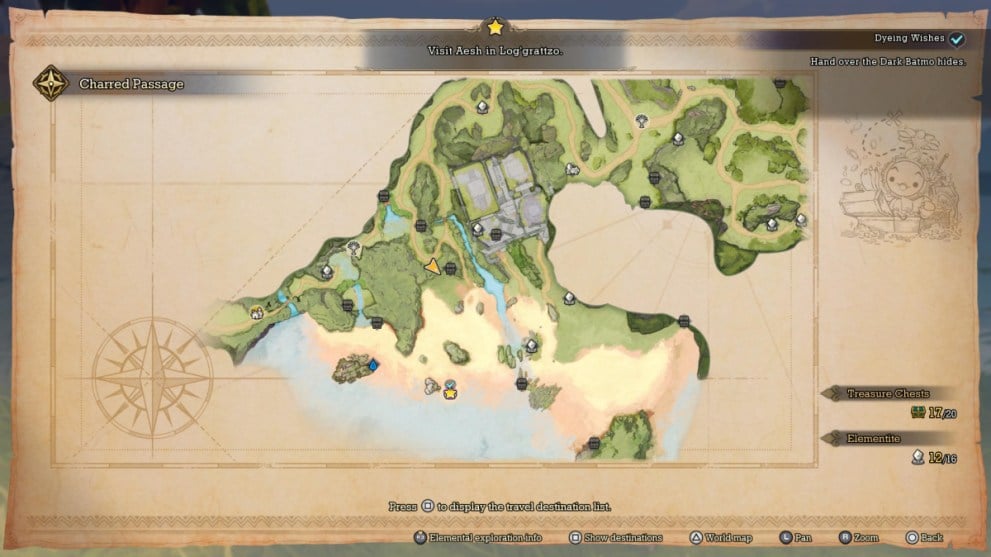
Head back to Longren, and then talk to Fiona there. She tells you that the eighth and final Behind the Scenery point is in the Charred Passage.
Travel to the general search area in the Charred Passage. Then, head to the southern edge of the rounded path overlooking the beach. Once you reach the portion with some palm trees to your left, the Admire the View prompt will appear.
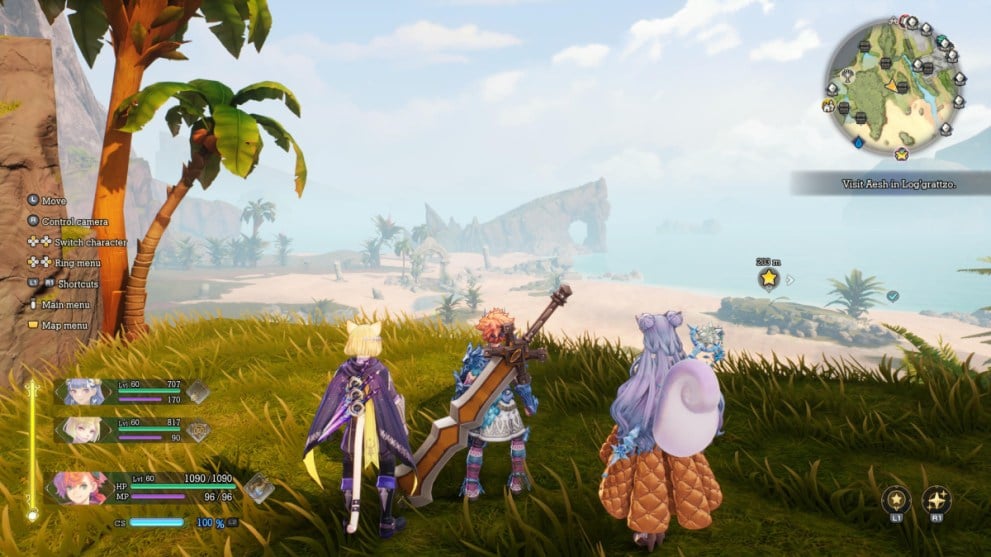
Press the necessary button one last time, and Fiona will come out to enjoy the scenery. She then decides to return home, satisfied after tracking down all of the inspirations for her father’s paintings.
What Do You Get for Finding Every Behind the Scenery Location? Explained
With all of that out of the way, you might now be curious about what finding every Behind the Scenery point gets you.
In addition to a metric ton of Gold Clovers you can use to level up your party members’ class abilities, finishing this questline also nets you the Love’s Light Ability Seed. With it, you can ensure your party recovers 5% of their health after every successful battle. This significantly cuts down the amount of time and resources you spend healing via items and spells.
Hopefully, this expedited your time spent finding every Behind the Scenery location in Visions of Mana. For more on the game, check out our other guides. We cover every side quest in the game and how to get the best weapons.


Updated: Aug 28, 2024 08:30 am