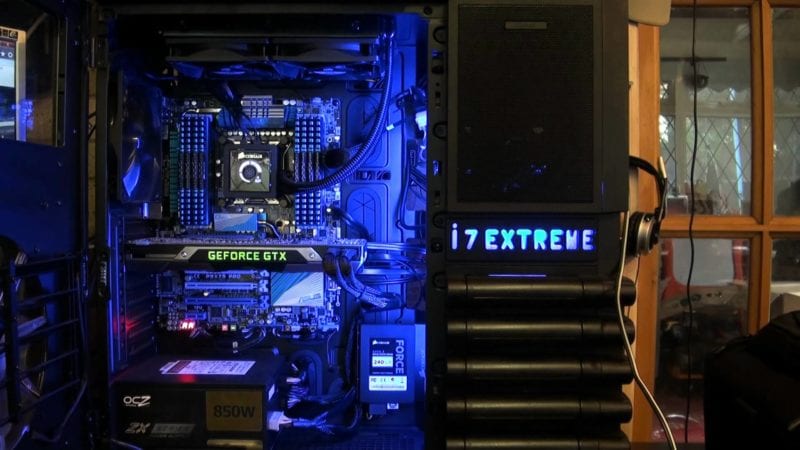
Step 0: Pick the right parts
For guidance on what to choose and what each component does, check out our gaming PC parts guide.
Step 1: Fixing Your Motherboard into Place

The first thing you’re gonna do when building your PC is put the motherboard into place, as this is the component everything else is going to plug into. Open up your case and place the I/O shield in the rectangular space on the back of your case. Push this I/O shield into place until you hear and feel each side snap into position. This I/O shield will protect the ports on the back of your motherboard from getting damaged.
Once this is in place, grab your motherboard and line up the ports on the back with the I/O shield. If you’ve done this correctly, the holes on your motherboard will line up perfectly with the screw holes on the bottom of your case, and you can screw in your motherboard standoffs into these. Place your motherboard on top of these standoffs and then screw your motherboard into them until the motherboard is secure.
Alternatively, you can install your RAM, processor and PSU onto your motherboard before placing it in the case. If you want to go this route just follow our steps for installing them and do these before fixing your motherboard into place. But be careful, just placing your motherboard onto a surface and having it sliding around on it could lead to damage.
Step 2: The Processor

Putting the processor into place is a simple step as long as you’re careful. Hold your processor and look for the gold arrow in one of the corners. Your motherboard should have a similar arrow on the processor socket. Lift up the lever on the processor socket and put your processor in, lining up the gold arrows on both your processor and the socket. Push the lever back down to hold it into place. There should be no resistance when you’re doing this and if there is, stop and double check everything is in place and lined up perfectly.
To ensure your processor doesn’t start a fire inside your PC, you’ll need to install your cooler on the top. First off, put a small line of thermal paste on top of your processor. You don’t need tons of this stuff, so don’t be over-zealous with it. Next, place your cooler on top of your processor. Fix it into place with either the four pins on an Intel processor, or by hooking the two latches onto the motherboard’s square pegs for an AMD processor. Finally, pull the lever down to keep it firmly in place.
Step 3: RAM

Your RAM is one of the easiest parts to install. Look for the sockets on your motherboard and push the clips at the end of each socket down. Now look at your RAM. You should see a little notch among the gold contacts that’s slightly off center. Line this up with the little bump in your RAM socket and firmly press it into place. Give the RAM a good push as it can require a bit of pressure. Once it’s securely seated, make sure the clips are moved back into the locked position.
Step 4: GPU

Your GPU or video card will be plugging into one of the PCI slots on your motherboard. Look for the plates on the back of the case that should be in line with these slots. Remove the plate and move your GPU into this position. You should now find that the graphics card is lined up with the PCI slot. Push it into the slot and then fix the bracket that came with your GPU onto the back of your case. Hopefully, if you now let go of your video card everything should look firmly in place and your GPU shouldn’t look like it’s bending or applying pressure to your PCI slot.
Step 5: Hard Drive

Let’s keep this simple. Remove the hard drive out of any packaging and either slide it into the hard drive tray that some cases may have, screw it into place and put the tray back in, OR just slide the drive into the drive bay of your case. Always fix your components into place with screws to make sure they’re not going to come loose or apply pressure to anything they shouldn’t be.
Step 6: Optical Drive

Just like with the hard drive, this one’s super easy. Remove the plastic cover from one of the 5.25” drive bays on your case and slide your optical drive in. Remember, screw it in into place to avoid any accidental casualties.
Step 7: PSU

Look for the hole on the back of your case near the top or the bottom of the case. Set the PSU into place, ensuring that the fan is facing away from the edge of the case to ensure it runs coolly. The holes on the back of the case around this should then line up with the holes in the power supply. Guess what you’re gonna do? Yup, screw it firmly into place.
Once the PSU is in place all you need to do is start plugging things in. A lot of these cables and sockets will be clearly labelled and you should be able to find the correct place for everything. Your motherboard should have a couple wires running from your PSU to it and your GPU should have one to plugging into it from the PSU.
Any hard drives you have should have two cables, one red and one black. The black is the one coming from your PSU which will give it power, and the red is your SATA cable which plugs into your motherboard. If you’ve got any fans installed, ensure that these are plugged into your PSU by connecting the male molex connector to the female. In some instances, some fans may plug into the motherboard at a clearly labelled location. Plug the fans into the corresponding ports and you’re all done.
Not Turning On?

Once you’ve got everything wired up, make sure you don’t have any loose cables going from any of your components. If you do, just make sure it doesn’t need to be plugged in or it hasn’t fallen out of where it should be.
Connect your PSU to your wall socket and give your power button a push. If everything turns on and you get a BIOS screen, congratulations, you’re in business and just need to install your operating system.
If your new baby doesn’t turn on or something doesn’t display properly, turn it off, unplug the cable from the wall and the back of the system and make sure everything is firmly in place and everything is connected together. With enough trial and error you’ll be able to diagnose and fix any loose connections or slight issues that may be preventing your rig from living.
Got any questions or tips for your fellow PC assemblers? Share them in the comments below.


Updated: Jan 21, 2016 04:53 am