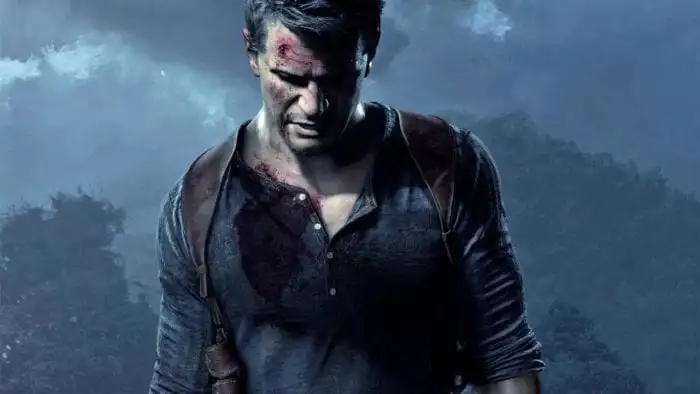
Uncharted 4: A Thief’s End marks the return of Nathan Drake and friends for one final adventure. Naturally, the game brings back the collectible treasures from previous entries in the series. This time around, there are Treasures, Journal Entries, and Optional Conversations.
Let’s focus on Treasures right now. There are a whopping 109 strewn about the game in areas you normally wouldn’t look. To get these, you must go off the beaten path and really keep your eyes peeled. You’ll know you’re in the presence of some treasure when you see a shining light. It will always be shining, albeit dully, and for a brief moment it will burst bright to make sure you notice it. Be aware of your surroundings and keep an eye out for when the treasure burns brightest.
Each one is a special artifact that you can collect. Getting every single one will lead to a trophy. That enough incentive to find them? Good. Let’s get started, because it’s not easy.
As a heads-up, you should be aware that there are no treasures in either the Prologue, Chapters 1, 4, 5, and 7, or the Epilogue.
Chapter 2: Infernal Place (2 Treasures)
Panamanian Cat Pendant – Once outside of the prison, locate the structure that looks like a well and drop in to find the treasure in a section to the side.
Navaja Folding Knife – When you climb the building to enter the old prison, head down the broken stairs to find the knife on the floor near one of the columns.
Chapter 3: The Malaysia Job (4 Treasures)
Antique Padlock – As soon as the mission starts swim straight and to the right of the large rock ahead of you. There will be a tree over two rocks, luck under.
Chiriqui Shark Trinket – Continue on from the padlock and you’ll come across two arches under the water. when you’re through, turn around and the treasure will be sitting on the ground between the twin arches.
Antique Pocketwatch – When you finally reach the large container you’re looking for follow the top of it and it will lead you to a treasure on the top of some rocks it’s pointing at.
Antique Arcade Token – When you’re on the boat back on the surface, head to the platform where you can talk to the worker in the middle of the boat and look on the shelves near the green hose.
Chapter 6: Once a Thief (9 Treasures)
Maghal Water Container – From the first grassy area you start at, head to the left edge of the cliff, you’ll find it near some shrubbery.
Nephrite Brass Cup – Once you up the wall to enter the grove, follow the wall to your right and check the window sills under the large lemon tree.
Viking Cloak Clasp – After finally getting into the event, a small cutscene will play where a plan is made. Turn around once it’s finished and go back into the room you came from to find it on a desk.
Mother of Pearl Horn – Now go back to where you were heading but instead of continuing towards your objective head to the balcony where you can talk to Sam. After talking to him go to your right and walk down to the end, you’ll see the treasure sitting on a ledge on the wall.
Persian Bronze Bowl – After you get through security and find yourself in the catering area, locate the round tables stacked to the side (should be to the left). The treasrue is behind some nearby crates covered in blue tarp.
Brass Barber’s Bowl – After heading down the stairs to discover a locked gate, turn around and look under the stairs.
Syrian Vase – This one is tricky. After escaping the vents, drop down to the area where you see a fountain and locate a ladder. Climb it, then folow the drain pipes you can climb and balconies, until you reach this treasure.
Persian Candlestick – Another tricky one. When you boost Sam and he lowers the ladder for you , climb up, then ignore him. Turn around and you’ll see a balcony. Use the roof of the nearby porch to get some height, then run and jump to reach the balcony. The treasure is sitting on a pillar.
Mughal Dagger – After the auction begins and the cutscene with Sully ends, you’ll have to climb some stones and use metal poles to swing through to where you need to be. Instead of starting to climb, immediately drop of the ledge and move to your right.
Chapter 8: The Grave of Henry Avery (11 Treasures)
Redware and Silver Jug Flask – As soon as the capter starts, head to the left and go around the large rock to find this treasure after a short climb up a hill.
Bronze Boar – Now head to your right and follow the cliffs on the bottom. There will be a cave you can enter.
Carved Wood Kashkul – This can be found after your first encounter with enemy guards. Defeat them then move on to the next Shoreline controlled area. Follow the righthand side and you’ll find the treasure in the grass nearby some crates covered in blue tarp.
Carved Nut Bottle – After you’ve obtained Dynamite for the first time and open the large door. Wheel the crate in and climb up to enter the next area. There will be a cave in front of you with some crates. Use Dynamite to break them and crawl in to climb this treasure.
Traveling Inkwell With Seal – There will be a lot of slopes up ahead. At one point you will swing across a wooden pole. Do so, then drop down the ledge to the you right and find a small area on the side.
Carved Ivory Vanitas – When you reach the entrance to the graveyard, don’t go in. Instead, climb up the ledges to the left of the door and search the base of the statue at the top.
Scottish Ha’penny – As you work your way through the tomb, shortly before coming across the three large crucifixes, you’ll enter an area with mist covering the floor. Head into the alcove to your left and and check the foot of the statue.
Slipjoint Clasp Knife – Exit the graveyard and you’ll encounter three enemies. After clearing them out, check the lower level for a cave.
Pewter Singing Bird Box – Continue on and you’ll boost Sam on to a ladder that breaks. He’ll lower a log for you to connect your rope to. Ignore that for now and jump to the ledge across and enter the small cave like structure.
Tortoise Shell Snuff Box – Continue and Sam will break a bridge, leaving you to find another way up. When you do reach Sam, turn around and follow the path he took to find your treasure on the other side of the broken bridge.
Persian Tailoring Scissors – Make your way over the wrecked pirate ship using the beams. You’re supposed to follow the path and head up the stairs. Instead, go under them and you’ll find a small section hidden beneath.
Chapter 9: Those Who Prove Worthy (6 Treasures)
Lantern Mounted Flintlock – After examining the cage at the beginning, follow the right-hand path while moving towards the bridge and drop down to a a platform on your left. Follow it and it will take you to a cave.
Strange Pendant – This is actually one of the three Strange Relics and we tell you how to get it here.
Amatory Box – You’ll reach a section where you have to swing a few times to make it through. After the first swing, climb down the ledge on your left, and work your way down to the treasure.
Pewter Box – After the whole scene with Rafe and Nadine, you’ll make it through a room with a bunch of water. There will eventually be an altar with a bunch of candles. Pass it and locate a room in one of the corners that has a bunch of statues laying down.
Memento Mori Skull Watch – After knocking down the crate to climb up and continue your journey, turn to your right and you’ll see a broken bridge. Climb down its ledge and you’ll find the treasure below.
Scottish Tipstaff – After the section where you rappel by connecting to a crate, search the corner nearby and climb behind the boxes there, you’ll find a treasure.
Chapter 10: The Twelve Towers (15 Treasures)
Sawasa Ware Tobacco Box – As soon as you start, hang left and one of your passengers will comment on the building nearby. Exit your care and check the pully by the building.
Eroded Flintlock Pistol – Stay on this left side and you’ll come across a waterfall. Behind it is a cave that you can access by pulling a crate with your rope. You’ll find the treasure at the far end of the platform inside.
Mughal Ivory Powder Flask – Once you reach the first tower, the one with the dragon sigil, climb up to the platform above. It’s sitting on a crate.
Parchment Scroll – After the first time you use the winch, follow the mud track to some ruins on your left. You’ll find the treasure on top of a crate.
Ancient Fertility Idol – Follow the same mud track as before but keep an eye out for an opening in the rocks to your right.
Pocket Celestial Map – Fix the bridge to reach the next area (using the winch). Follow the track on your left, and climb the ruins you come across.
English Ale Bottle – Continue through the level until you first spot enemy trucks far in the distance (the game will stop to show you this). Keep to your left and drive until you reach an abandoned building. On the roof is an opening covered by wood with explosive barrels nearby. Blow it up and climb in.
Pewter Letter Cylinder – Continue on until you find a well. Grab the winch cable and climb into it, attach it to a far column and sully will pull it over. Use it to reach the higher ledges and get your treasure.
Mughal Box -After spotting smoke from Shoreline, head left and follow the path up the large hill. Inside the ruins at the top is your treasure.
English Musket Bandolier – Now advance towards your next encounter with Shoreline’s guards. Kill them all then shot the explosives in the middle of the area to open the room below. Climb down and find what you’re looking for on a bench.
Antique Tea Tin – Continue on and you’ll come across a bunch of enemies setting up explosives. Kill them and then use the detonator nearby to open the door to the tower. Search at the end of the hallway.
Scottish Two Pence Coin – When you reach the really large beacon tower, climb up to find a treasure on the grate that normally holds a flame.
Scottish Snuff Mull – Head towards big white tower (the story will guide you here). Before entering, go to the right hand side of it.
Brass and Ivory Tankard – When inside, before going down the large spiral stares check behind the crates on the left side of the room.
Muff Pistol – Don’t head down the stairs yet. Instead, locate the breakable crates in the corner and shoot them.
Chapter 11: Hidden in Plain Sight (5 Treasures)
Earthenware Mug – When the chapter begins, follow the steps, but then turn around and head left to go into a dark alley.
“Antique” Compass – Head to the right of the market. There’s a seller behind a yellow table. Keep talking to him until you eventually get this one.
Nephrite and Jade Bowl – Make your way into the tower and Nate will inspect the scales on the floor. Afterwards search the corer rooms and look for your treasure at the base of a statue.
Ivory Handle Dagger – Eventually you have to make your way to the large bell all the way at the top of the tower. Don’t ring it yet, though. Climb up the side of the door to the bell and make your way up to the beams holding the bell up. Search the balconies to find your treasure in one of the corners.
Brass Globe Hand Warmer – After everything comes crashing down, check the debris for this treasure. It will be nearby the hand of a statue.
Chapter 12: At Sea (13 Treasures)
Combination Lock Tobacco Box – Use your boat to circle the island at the beginning of the chapter. You’ll find a small canyon you can get through with a beach on the other side. On the right-hand wall of the beach you’ll find the treasure on an old crate.
Brass Pocket Sundial – On the opposite side of that closed off beach is a small island with a shipwreck nearby. Swim into the wreck and you’ll find the treasure near the central mast after you pass through the hole in the hull.
Silver and Wood Tankard – After finding the hanging skeleton for your Journal as you continue through the chapter normally, turn right to see the treasure on a rock on the beach you’re currently on.
Persian Silver Pen Box – Make your way down the beach to find the next treasure sitting right inside of a cave. To make sure you’re going the right way, keep the rock wall to your right.
Panamanian Pendant – Take your boat and find the small beach on the other side of this same island (you should still be on the island with the Black Tower). When you get there, you’ll find only one path and it will lead you to the Panamanian Pendant.
Persian Leather Notebook Case – Head back to the much bigger island. You can find some arches made out of the rock and between them is a ledge. Move your boat close to the wall, then climb up it so you can jump to the ledge. Follow the climbing path to find this one.
Deccani Bronze Spouted Bowl – Follow the story normally until Sam starts to rush you while in the jungle. You’ll find a cave to your right at this point.
Mughal Elephant Carving – After the snapping rope bridge, climb what’s left of it and make your way to the platform to the left. Enter the cave nearby.
Ottoman Helmet – Nate and Sam will eventually reach the tower they’ve been trying to get to. Enter the base of the tower and your treasure will be sitting right there.
Decanni Bronze Vase – This one is tricky as you can miss it easily. When you have to jump from a wooden beam and use a rope jump, there will be a mud slope for you to land on. To the side is some solid ground that you can land on if you really focus. Get there then use the ledges on your left to reach a small, hidden area.
Strange Relic – At the bottom of the mud-slide you just avoided, go left and you’ll find a side path that you can climb. Climb it and use your rope to swing to a sort of basin.
Hamsa Mythical Goose – Return to where you came from and head to the right of the mudslide now. There is an item that you can sketch if you get close enough. Start to swing down these statues, but stop at the second one. The treasure is at its base.
Pique Tortoise Shell Box – When you’re in the provisions room, jump down and swim around the huge tree you spot. It’s roots are growing onto a platform. Get onto that platform.
Chapter 13: Marooned (5 Treasures)
Persian Ring – As soon as Marroned begins, jump off of the rock you’re on to the cliff wall. Don’t go all the way up, though, instead look for a section to the right when you’re almost at the top. It will be narrow and easy to miss, but if you keep moving right, you’ll find a way up.
Wood Tankard – When you reach the waterfall, use your rope to hand down. Face the waterfall and jump to one of the grips to the sides of it. Use those to make your way to the cave beneath.
Spy Glass – Continue to the back of the cave where you just found the Wood Tankard and you’ll come across a pirate. Slide down the rocks nearby and jump to the grips on the right. Follow this along and you’ll reach a room filled with water, and one of its corners has barrels and boxes with your treasure.
Dress Dirk – Make your way through the jungle and you’ll eventually come across some enemies, one has an actual grenade launcher to keep things interesting. After they’re dead, swing to the area with a large tree trunk, then explore the path to the left of the skeleton you find there. At the end is the Dress Dirk.
Frechen Bearded Bottle – You’ll come across Sam again, but Nate will need to crawl under a ruined building. After pushing a huge crate, continue through the building and follow the wall to your right. Drop down into the room below and crawl under its floor (lot of crawling). There’s another room that’s hidden.
Chapter 14: Join Me in Paradise (9 Treasures)
Carved Horn Spirit Sculpture – Once this chapter starts, go to your right and climb through a window high overhead. Locate the wheelbarrow in the following room.
Mughal Vase – After you locate the pirate code down the road from the stables, you’ll find a store to the right of it. Check the first floor and find the back room.
Ancient Stone Pot – There’s a prison next to the stocks, explore it and find the open cell. Inside is a way to get into another cell that has the treasure.
Painted Copper Bottle – When you reach the cave that is more like a mine than anything climb the ladder after you locate the tunnel plans and keep to the right path until you reach the dead end.
Mughal Jade Bottle – Survive the enemy ambush then regroup with Sam in a room full of barrels. Once you exit this room, turn immediately left and climb up to the platform over the door you just came from.
Slipjoing Claspknife – After survive a number of ambushes you’ll climb up yet another tower where you’ll have to swing to a new area. Climb up the stairs then head to your right and you’ll find a tree outside. Jump past, hook on with your rope, and swing into the lower part of the tower.
Large Bronze Boar – When you finally reach the state house, grapple to the other side of the huge gap in the floor, then move to the left and make your way to the room at the end of the narrow wood and find the item on a desk.
Stout Vase – Slide down to the main hall, then use the staircase to the upper right. Jump across to check the desk for an item.
Mughal Serving Vase – Outside of the house there are a bunch of barricades in the courtyard. Make your way around them and you’ll find a fallen chair near the pillars. There’s your item.
Chapter 15: The Thieves of Libertalia (1 Treasure)
Emerald Flask – Once the chapter starts, head to your left immediately. Move around the shelves, and crawl under the fallen bookshelf.
Chapter 16: The Brother’s Drake (3 Treasures)
Toy Soldier – When the chapter starts head to the right side of the area. Search the bench after teh stone fountain.
Toy Seaplane – When you enter the room with the large sarcophagus, turn right and follow the stairs to a locked door and this toy.
Pirate Snowglobe – When you reach the point where Sam helps Nate climb up into a vent with a shelf, don’t enter the vent. Climb up and jump to the floor behind you. Look on the couch.
Chapter 17: For Better or Worse (6 Treasures)
Mughal Flared Vase – When you see Elena stop for a view of a waterfall, examine the ledge she goes to.
Mughal Hinged Box – After you reach the old lift, kill the enemies, but don’t jump down the mudslide. To the left of the waterfall is a broken platform where you’ll find a treasure.
Jade Serving Bowl – After you clear out the rubble with the winch, jump down into the clearing and climb up into the building. Find the balcony on the left and check the box.
Ancient Stone Bowl – After Elena and the Jeep ride the elevator up, check the cliffs to the right of the elevator. There’s a path hidden by a lot of plants that you can follow to get your treasure.
Pewter Incense Burner – After the huge jump with the jeep drive up the mud slope and then head right until you find the low ledge with a cave. Go the end of the cave to find the treasure. It will be next to the broken window.
18th Century Combination Lock – Continue up the stream to locate another huge waterwheel. Climb up to the second floor of the building with the waterwheel.
Chapter 18: New Devon (8 Treasures)
Mughal Stout Vase: After Elena examines the small sign at the beginning of the level, look into the jungle while facing the sign. You should see the sparkle of the collectible in the trees.
Small Mughal Dagger – Continue on until you reach some ruins at the end of a swamp. Climb up the stone pillar in the center and then start jumping to the skeletons. Face the ruins from when you first entered the area and then work your way over to the skeleton furthest to your right.
Mughal Candle Holder – After the part where you fall into the water, head left and climb onto land. Head to the large tree with a archway nearby. Your item is in the arch.
Mughal Circular Box – There is a strong river past the point where you talk to Elena. Swim across and walk towards the waterfall to find the treasure.
Mughal Headress – Follow the story normally and when you reach the point where you have to swim through two windows, don’t. Dive deeper and check the wall near the windows.
Spanish Brass Chalice – Swim through the windows now and climb up to the second floor. When you come across the bedroom, take the door to your right to exit and follow the hallway to your left. Look behind the old couch.
Mughal Painted Elephant – Move to the dining room, climb the wall and reach the old cannons. Look to the right of you to see where there are three cannons and your treasure.
Mughal Dinner Ware – When Nate receives the note from Elena near the end of the chapter continue on and follow the spiral staircase to the right. On the second floor balcony you’ll find the treasure on a small table.
Chapter 19: Avery’s Descent (2 Treasures)
Ancient Stone Vessel – There is a part where you have to slide down a long slope while avoiding traps. Take the path to the right, follow a second slope and enter the new passage (there’s a skeleton nearby). Drop down and search the dark corner behind you.
Mughal Decorative Cudgel – After the ambush, you and Elena will fall into a cave. Move through and when you reach the mermaids, take a left.
Chapter 20: No Escape (5 Treasures)
Jade Flower Pendant – Above the pirate ship’s wreckage you can follow a path until you reach a rope grapple. Don’t swing across to continue though, instead turn around and jump to the other rock wal and climb up.
Stoneware Bearded Jug – Head to the old town where you’ll meet back up with the gang. As you all head to the town square, look beneath the town entrance to find your treasure. The stairs to the location are on top of the building.
Stout Jade Vase – Continue on until you reach a cracked bridge. To the right is a building over a stream. Jump into the stream, swim under the building, and climb up through the broken floor.
Painted Spouted Vase – There’s apart where you must help everyone across a gap. When that’s done head into the building to the right of the path that Sully chooses. Head to the back room and look for the stairs to the second floor where you’ll find this treasure.
Mughal Perfume Bottle – Now continue through the story and head to the next major village area. To your left will be a ruined building that you can explore for a treasure.
Chapter 21: Brother’s Keeper (4 Treasures)
Mughal Enamel Bird – In the beginning of this chapter, use your rope to swing back to where you came from to reach an area with a treasure.
Stone Vase – Follow the chapter until you reach the dark cave. You’ll eventually hit a room where you need to climb up the left wall, but you should drop down instead and head towards the plants. You know you’re in the right area because a wild animal will run away from you and hide.
Strange Fruit – There’s a point where you come to a cliff and need to rappel down. Nate will comment on seeing Avery’s ship, letting you know you’re in the right place. Don’t continue down, though. Instead, you can find a small nook in the rock arch ahead of you. Swing up and to the right to enter this hidden area.
Rajasthan Box – After a segment where you swing from an anchor that completely breaks away, look towards where water is cascading down and then look to your right. Climb the rocks you see and search the corner.
Chapter 22: A Thief’s End (1 Treasure)
Mughal Egg Pendant – The final treasure in Uncharted 4: A Thief’s End is found right at the beginning of chapter 22. Dive into the water and turn right to locate an underwater cave. Swim inside and there you have it, all 109 treasures collected.
For more guides, tips, tricks, and information on Uncharted 4: A Thief’s End, be sure to check out our wiki.
We’ll be updating this guide on Monday, the 9th of May. Check back then for the locations to all of the treasures in Uncharted 4: A Thief’s End.


Updated: May 13, 2016 02:49 pm