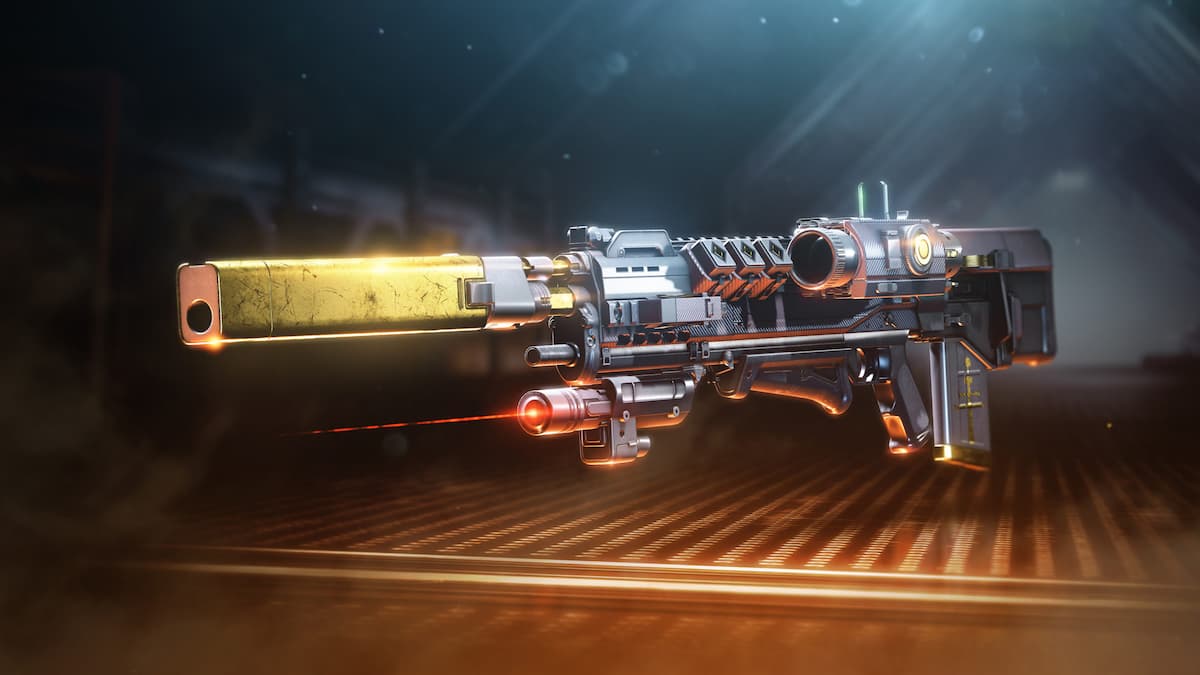
With your newly acquired Revision Zero Exotic Pulse Rifle, it’s finally time to hunt down and destroy those pesky Security Drones throughout the system. There are 50 of them in total, spread out through multiple areas and activities. So today, let’s go over all of the Security Drone locations in Destiny 2.
PSA: While the drones are numbered 1-50 in the triumph section, there is no particular order that you are required to destroy them.
All Security Drones Locations
The Security Drones are all hidden through the Moon, Europa, all of the Heist Battlegrounds, and Operation: Seraph’s Shield. We’ll go through each location one by one.
All Security Drones Locations
- (Moon) Sorrow’s Harbor
Head to the far right of Sorrow’s Harbor and you’ll find a Security Drone hanging off to the side of a pillar.

- (Moon) Sorrow’s Harbor
Next up, head towards the Scarlet Keep like you’re entering the Pit of Heresy Dungeon entrance. You should see a Drone off in the distance dead ahead.

- (Moon) K1 Revelation Lost Sector
Now make your way into the K1 Revelation Lost Sector located in Sorrow’s Harbor. After defeating the Shrieker you’ll see the Drone off to the left next to some netting.

- (Moon) The Hellmouth
You can now leave Sorrow’s Harbor and head over to The Hellmouth, where one of the Drones will be floating along the outer ring section.

- (Moon) The Hellmouth
After that, start heading over to the K1Crew Quarters Lost Sector, but before entering, look up at the tower above it.

- (Moon) K1 Crew Quarters Lost Sector
Now you can head inside the Lost Sector, where the next Drone will be waiting for you before you meet the final boss. It’s right before you encounter it.

- (Moon) Archer’s Line
Over in Archer’s Line, at the top of the destroyed ship lies the next Drone. You can oversee the entire area from this spot.

- (Moon) K1 Logistics Lost Sector
Hop down from the destroyed ship and make your way into the K1 Logistics Lost Sector. The Drone will be waiting for you off to the right in the final boss arena.

- (Moon) Anchor of Light
Make your way to the Anchor of Light, where the ninth Drone will be at the top of the broken tower. You can see the K1 Communion Lost Sector from this spot.

- (Moon) Anchor of Light
Finally, head over to the giant Ketch, where the last Moon Drone will be waiting for you near the entrance to the inside of the Ketch.

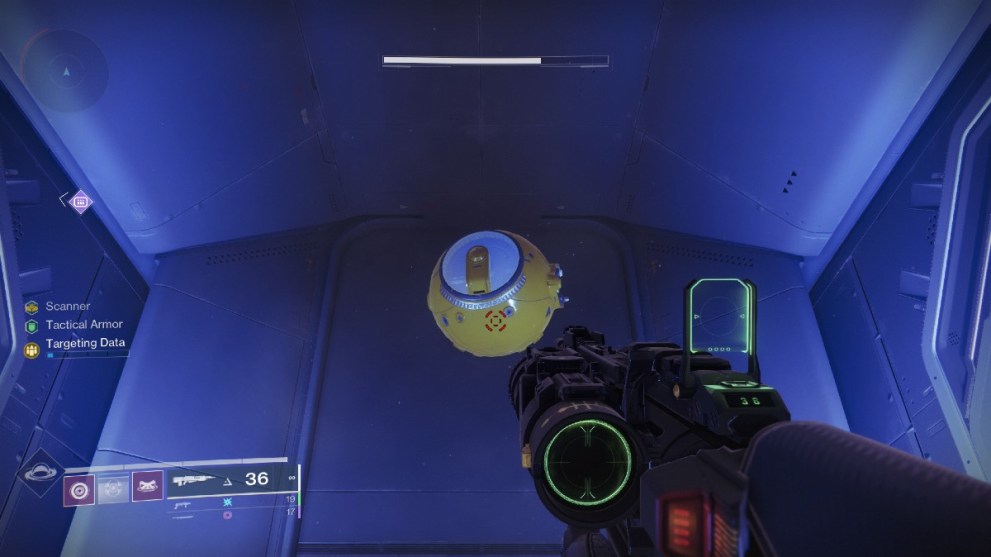
- Heist Battleground: Moon
In the Moon Battleground, the first Drone can be found above the enemies that initially spawn when you load in. It’s nearby the dome buildings as shown in the image below.

- Heist Battleground: Moon
After clearing out the waves of enemies at the start, make your way down into the bunker. Before sliding down the giant hole, look down, and you’ll see the second Drone hiding. You can shoot it from the top.

- Heist Battleground: Moon
Immediately after sliding down the hole and entering the bunker, look to you right and you’ll see the third drone hiding behind some terminals.

- Heist Battleground: Moon
Before entering the big room where you defend your ghost from waves of enemies, look to your right once more and you’ll find another Drone hiding behind a terminal.

- Heist Battleground: Moon
When you enter the giant room where you defend your ghost from waves of enemies, look up. You’ll see the fifth Drone floating in the light in the ceiling.

- Heist Battleground: Moon
Finally, after clearing the big room, make your way down to the giant hive door with locks on it. You’ll find the last Drone off to the right of the door.

- (Europa) Beyond
Onto to Europa. Head down to Beyond, where the Exo Stranger is, and a Drone will be hovering at the top of the mini Pyramid ship near her.

- (Europa) Asterion Abyss
Now make you’re way to the Asterion Abyss, where one of the Drones will be hidden in the top left section of the area. It will be hiding in a little cove as shown below.

- (Europa) Asterion Abyss
From there, retrace your steps to the middle section of the Asterion Abyss. At the top of the mountain lies the next Drone. For additional help, two yellow-bar Goblins spawn in this area as well.

- (Europa) Concealed Void Lost Sector
Hop down from the mountain and enter the Concealed Void Lost Sector below. A drone will be hidden underneath a platform in the opening area of the Lost Sector.

- (Europa) Cadmus Ridge
Head over to Cadmus Ridge next. A Drone will be chilling on top of an Ice hill as soon as you enter the area.

- (Europa) Cadmus Ridge
After that, head to the southwest section towards the Bray Science facility. Before you enter, look left, and a Drone will be hiding near the entrance.

- (Europa) Perdition Lost Sector
To finish off Cadmus Ridge, enter the Perdition Lost Sector. You’ll find the Drone next to the loot chest at the end after you defeat the final boss.

- (Europa) Eventide Ruins
Travel north to the Eventide Ruins, and the next Drone will be hiding to the left of the Deep Stone Crypt Raid entrance.

- (Europa) Eventide Ruins
Now make your way towards the Bunker E15 Lost Sector, however, before you enter, jump up to the platform to the left of the entrance. A Drone will be hiding in the back.

- (Europa) Bunker E15 Lost Sector
Finally, enter the Bunker E15 Lost Sector. In the middle section, where all of the Bray Robots are trapped by Vex shields, there will be a hidden door off to the right, where the last Drone will be waiting.

- Heist Battleground: Europa
Onto Europa’s Heist Battleground. When you first load in, before entering the Bray Science facility, turn around, and you’ll see a Drone floating next to an Icy hill.

- Heist Battleground: Europa
Make your way inside the facility to the first room, where you fend off Xivu Arath’s forces. When you first enter the room, look up to the top left area, and you should barely see the Drone poking out from its hiding spot.

- Heist Battleground: Europa
After fending off Xivu Arath’s forces, progress further into the facility. However, instead of turning left after leaving the first room like you normally would to progress through the battleground, look to the right behind some boxes, and a Drone will be waiting for you.

- Heist Battleground: Europa
When you enter the second room full of enemies, clear them out, and you’ll find the next drone off to the left side of the room near the Exo cloning tubes.

- Heist Battleground: Europa
In the giant, open section before the third room of enemies, you will find the next Drone at the bottom left section before the third room entrance.

- Heist Battleground: Europa
Finally, enter the third room of enemies, and clear them out. The last Drone for Europa will be to the right of the giant Clovis head in the room, next to some boxes.

- Heist Battleground: Mars
Now it’s time to enter the Mars Heist Battleground. When you first load in, make your way to the A Tower. The first Drone can be found next to the Hive totem on the right.

- Heist Battleground: Mars
Similarly, another Drone can be found nearby the B Tower, behind a small wall.

- Heist Battleground: Mars
After clearing out the Hive from the Towers, enter the Bray facility and look up. The Drone will be hovering up towards the ceiling from where you first walk in.

- Heist Battleground: Mars
When you reach the jumping puzzle section, the next Drone can be found to the right of the giant Hive moss where you would normally jump to progress to the next section.

- Heist Battleground: Mars
Immediately after that, instead of looking to the bottom right, look to the top left of the Hive moss area, and you’ll see the next Drone hovering above.

- Heist Battleground: Mars
Finally, before entering the room with the giant Hive door, turn around and look up, and you’ll find the last Drone at the top left section of the area.

- Operation: Seraph’s Shield
Last but not least, Operation: Seraph’s Shield contains the remaining 12 Drones. However, to unlock roughly half of them, you will need the Security Clearance and Tactical Armor buffs from the seasonal story line in order to unlock the remain Drones. When you have them both, load up the mission, and right before you enter the facility, look to the bottom right of where the Ogre normally is. A hidden room down below will contain the first Drone.

- Operation: Seraph’s Shield
Make your way inside the facility and up to the space station. When you enter the first room that uses the Scanner buff, the next Drone can be found in a hidden room with laser doors.
- Operation: Seraph’s Shield
In the second Scanner room, you’ll need the Security Clearance buff to open the locked door. Shoot the terminal, and three symbols will appear in the room you are in. Shoot them all in the correct order as the terminal shows, and the door will open, revealing the Drone.

- Operation: Seraph’s Shield
Once again, in the next room, you will be met with another Security Clearance door as you progress through the mission. Shoot the symbols in the correct order to open the door and destroy the Drone.

- Operation: Seraph’s Shield
In the final Scanner room, commonly referred to as the “Oven”, you’ll be able to see the next Drone underneath some stairs before entering the oven to progress to the next section.

- Operation: Seraph’s Shield
In the “Operator” section, you will see a door with lasers blocking the way. Using the Tactical Armor buff will allow you to pass through with minimal damage and discover the next Drone.

- Operation: Seraph’s Shield
Immediately after, in the next room over, you will be met with another Security Clearance door. Same as the others, shoot the symbols, unlock the door, and destroy the Drone hidden inside.

- Operation: Seraph’s Shield
Progress through the mission until you reach the first boss, the Maw of Xivu Arath. Repel the boss and all of its forces until everything eventually despawns. Afterward, you can now open the Security Clearance door to the left from where you entered the boss room and destroy the Drone inside.

- Operation: Seraph’s Shield
Thankfully, there aren’t any Drones hidden throughout the jumping puzzle in the space section of the mission. However, when you reach entrance to the second boss fight, there will be a laser door off to the left. Use the Tactical Armor buff, pass through the lasers, and destroy the Drone.

- Operation: Seraph’s Shield
Before entering the final boss room, in the room with the Raid Banner, there will be another Security Clearance door to your left. Rinse and repeat the same steps as the others to destroy the Drone.

- Operation: Seraph’s Shield
Finally, when you defeat the final boss of the mission and make your way into the loot room, there will be two doors, one to your left, and one to the right. Within these doors lies the final two Drones. For the right side is the last Security Clearance door. Shoot the symbols, open the door, and claim your Drone.

- Operation: Seraph’s Shield
Last but not least, pass through the lasers on the left to destroy the final Security Drone in Destiny 2.

That’s everything you need to know about all of the Security Drone locations in Destiny 2. Be sure to check out our latest Destiny 2 guides, like how to get the Taken King Iron Banner Armor or how to get the Liminal Vigil Sidearm.


Updated: Jan 10, 2023 09:44 am