NieR Automata: Story & All Endings Explained
Introduction

If you’re new to NieR: Automata and Yoko Taro’s previous games in general, you might want to consider reading up a little bit on the series’ backstory here. While you don’t need to play the older games to enjoy Automata, having a basic understanding of the series’ history and lore will definitely help you make connections and spot references in Taro’s latest title.
Also, as a word of warning, this article will contain massive spoilers for NieR: Automata. I mean, we’re literally going to break down every major plot event, plot twist, and main story endings in the game. So if you haven’t beaten Automata and you don’t want to be spoiled, don’t read on.
NieR Automata: Story & All Endings Explained
Part One: 2B and 9S

NieR: Automata is set centuries after the events of the original NieR. At the end of NieR, it was unclear whether Project Gestalt was a success or not, especially when you take that game’s multiple endings into consideration. However, Automata tells us that aliens have invaded Earth, and because of this, the humans have been forced to take refuge on the moon. From this, we can infer that Project Gestalt must have been a success.
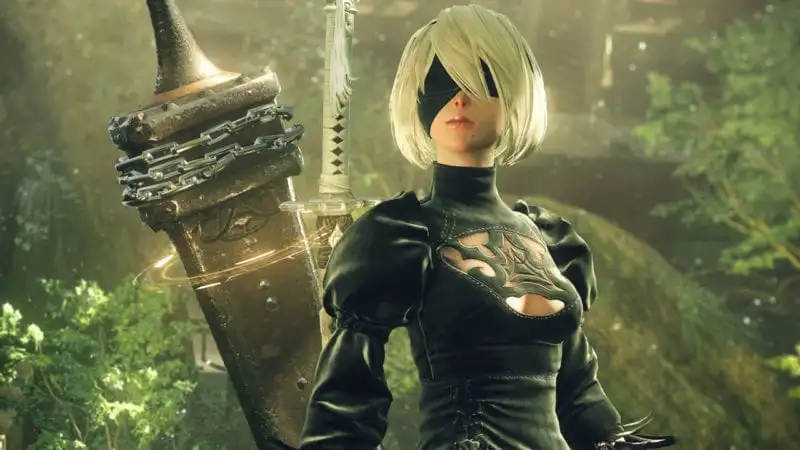
To take back Earth from the machine lifeforms created by the aliens, the YoRHa androids were created. These elite androids are tasked with helping the android resistance force on Earth to battle against the machines. Our story starts with YoRHa units 2B and 9S. The game begins with 2B infiltrating an abandoned factory to take down a Goliath machine on Earth with fellow Type-B models. However, her entire squad is shot out of the air by the machines, and only 2B survives. 9S is a scanner model who meets 2B at the factory, and he tells her that he’ll be providing recon support during her mission.
2B eventually tracks down the Goliath. However, the Goliath is a pretty tough machine, and 9S ends up taking a serious injury while trying to protect 2B from getting hit. With the help of 9S and his flight unit, 2B eventually manages to defeat the Goliath, though she ends up getting injured too. During the fight, 9S tells his Pod to upload 2B’s data bank to the bunker so that she can retain her memories and transfer them to a new body if she happens to get destroyed. However, 9S doesn’t have enough time to upload his own data as well.
When 2B is reunited with 9S, the both are injured, and the pair is quickly surrounded by even more Goliath machines. They decide to initiate a self-destruct sequence via a black box reaction. This kills the both of them, including all Goliaths in the area.
2B wakes up in the space bunker, with a new body and her old memories intact. She meets 9S in the bunker hallway, but quickly realizes that he doesn’t remember anything that happened in the factory. As 9S walks away, we see that 2B is visibly affected by that knowledge. The two of them are paired up for yet another mission, and this time, they’re tasked with providing aid to the resistance force on Earth.
During their endeavors on Earth, 2B and 9S soon encounter two human-like machine lifeforms named Adam and Eve. These two men quickly take control of the other machine lifeforms and become their leaders. We also meet Pascal, a peaceful machine who takes care of a small colony full of non-hostile machines. Soon after meeting Pascal, the city is attacked by Goliath class machines. The androids win the battle, but much of the city is destroyed even further to reveal an underground cavern.
2B and 9S go to explore the cavern, and this is where they discover the base from which the alien masterminds were operating. However, the aliens are dead, and we find out that they were killed by Adam and Eve. Adam and Eve’s intentions are unclear to the androids, but they quickly state that their next step is to wipe out the humans as well. Adam and Eve are soon defeated by 2B and 9S, though they end up escaping.

Speaking with Pascal, we also find out that there is another machine kingdom hidden in the Forest Zone. The forest machines have a king, and the androids speculate about how they could possibly harbor feelings of loyalty, especially since they’re just robots. When 2B and 9S reach the castle, they find out that the king that the machines were protecting was simply a small, baby machine. Before they can do anything, YoRHa unit A2 shows up and kills the baby. The Operator tells 2B and 9S that A2 is a wanted fugitive, and they’re ordered to kill her. A2 escapes after a heated battle, and 9S asks the YoRHa commander about A2’s crimes. The commander tells 9S that that’s classified information. After asking Pascal about A2, he reveals that he doesn’t know much either, just that she’s a very dangerous android.
Either way, a large machine lifeform soon makes an appearance at the coast of the city, and all YoRHa androids and resistance forces are tasked with taking it down. As 2B and 9S try to destroy the machine, 9S leaves the battlefield, saying that he’ll activate old missiles on the coast to help destroy it. The two are separated again, and while 9S’ plan works, 2B soon wakes up to find that he’s missing. With help from Operator 60 and the Pod, 2B heads down to the city caverns in search of 9S.
She soon finds an elevator that takes her up to a large white copied city. Here, we find the bodies of countless dead androids. In the meantime, 9S has been taken captive by Adam. While trying to restore his systems via the hacker space, 9S learns more about Adam’s motives and his desire to learn more about the purpose of the machines’ existence and the lifestyle of the humans. Unsure of his own purpose, Adam cut himself off from the machine network created by the aliens (just like Pascal and his colony), and is able to act independently. Through the hacker space, Adam also taunts 9S by stating that he’s driven by emotion as well, just like him, and calls him out for harboring feelings for 2B.
2B eventually finds Adam and defeats him. 9S is seriously wounded, however, so he’s sent back to the Bunker for repairs. In the meantime, 2B continues to hunt for Eve, and also attempts to broker a peace between the rogue machines who followed Adam and Eve, and the ones from Pascal’s colony.
NieR Automata: Story & All Endings Explained
Part Two: The Outcome of Project Gestalt and Eve’s Demise
The rogue machines tell 2B and Pascal to meet them at the Abandoned Factory, where they can discuss terms of peace. However, this turns out to be a trap of sorts. For an unknown reason (which will be revealed much later), the machines start to kill themselves and each other, along with anyone in their surrounding area. The machines start chanting about becoming gods through death. Realizing that there’s no way to discuss peace terms with these berserk machines whose eyes have started to glow an eerie red, 2B and Pascal attempt to escape the Abandoned Factory.
9S recovers from his injuries and immediately goes to 2B’s assistance by remotely controlling a machine unit from the safety of the Bunker. While securing an escape route for 2B, he hacks into the machine network and discovers a few files related to Project Gestalt. As it turns out, Project Gestalt ended up being a massive failure, and all of humanity was wiped out. The Replicant data from the project was gathered and fired off to the moon as a beacon. The moon beacon was then used as a relay point to consistently ping messages to Earth and the Bunker to make the androids think that the humans were still alive and well.
In order to perpetuate the lie and to keep the surviving androids’ morale from sinking to an all-time low, Project YoRHa was launched. This project sought to train elite androids to help take back the planet from the machines. By lying to the YoRHa units that humanity was still alive, the androids would feel that they still had a purpose and something to fight for. It’s important to understand that according to the game’s lore, an android’s basic instinct is to serve and protect the human beings. Knowing that all humans were dead would inevitably cause the androids to sink into depression, thus leading to their eventual extinction. Only a trusted few were privy to this information, like the YoRHa commander.
9S helps 2B escape the factory, but it isn’t long before they’re confronted by Eve. At this point, all of the machines, save for Pascal’s colony, have been overtaken by some sort of virus being spread by Eve himself. Eve’s tattoo has also started to expand, revealing the symbol of the Cult of the Watchers on his chest. Interestingly enough, all of the infected machines have glowing red eyes – a call back to the White Chlorination Syndrome in NieR and the mind controlled Empire in Drakengard. 9S takes his flight unit and returns to Earth to assist 2B.
During the battle with Eve, 9S is forced to hack into Eve’s system to stop him from regenerating his health through the machine network. However, 9S’ own systems are corrupted during this process. After defeating Eve, 9S is severely injured once again due to his systems going haywire from the hacking attempt. As a final wish, he asks 2B to end his life. As 9S’ consciousness fades, 2B begins to sob as she chokes him to death, uttering the words, “It always ends like this.” The significance of this line will be explained later on in the game.
However, 9S miraculously comes back to life as it’s soon revealed that he actually managed to upload his memory data into a machine’s body that was lying in the area. Filled with relief, 2B tells 9S that she’s glad he’s fine. All around them, the machines, now free from Eve’s control, start to regain some of their own consciousness and free will.
Back at the Bunker, 9S struggles with the question of whether or not he should tell 2B the truth about humanity and Project Gestalt. Before he can make a decision, the commander approaches him, and she already knows that he’s found out the truth. The commander gives him another report on Project Gestalt, and doesn’t say anything when 9S questions why she’s just giving him this information. Soon after, the YoRHa units receive reports that the machines seem to be launching an assault on the resistance forces, and they’re tasked with taking them down. The commander gives the androids a stirring speech, telling them that this is the true battle for Earth, and this is where they take back their homeland from the machines.
NieR Automata: Story & All Endings Explained
Part Three: The Last Surviving Members of YoRHa
2B and 9S are sent back to Earth once more to help in the war against the machines. The pair is tasked with acting like a guerilla unit, providing assistance to any YoRHa androids who need it. However, the YoRHa androids are quickly ambushed by a group of machines, and they’re knocked unconscious by an EMP attack. 9S, who has been providing support from higher ground, quickly hops down to protect them from the incoming machines. As the machines gather round for a final push, 9S quickly hacks into 2B’s systems to help her regain control over her own mind and body. However, it’s too late for the rest of the YoRHa units. The remaining members are infected with some sort of logic virus, causing them to turn against 2B and 9S.
The pair quickly escapes from the area, but find themselves surrounded again. With no other choice left to them, 9S tells 2B that he’ll upload their memory data to the Bunker, and they can wipe out the YoRHa androids here via a black box reaction that would destroy their bodies too. The initiate the self-destruct sequence, and 2B wakes up in the Bunker moments later.
2B finds 9S in the hallway, and they quickly go to tell the commander what has happened. However, the commander doesn’t believe them, stating that she received no report about a logic virus and that she didn’t order a retreat either. Just as the commander orders for the arrest of 2B and 9S, the YoRHa androids around her are revealed to be infected with the virus too. 2B and 9S then protect the commander while fighting off the infected units. As the three of them try to make their way to the hangar to escape, we can hear the infected units laughing and making mention of a flower – another reference to the Cult of the Watchers and the parasitic Flower that started it all in Drakengard 3. When the commander asks how come 2B and 9S weren’t affected by the virus, 9S mentions that he’d actually deferred their memory data to the Bunker through another route to be safe, and that was probably why they were okay.
Once they reach the hangar, the commander stops in her tracks and says that she can’t go with them. As she opens her eyes, we see that they’re red too, revealing that she’s been infected by the virus as well. 2B and 9S are then forced to take their flight units and escape as they watch the Bunker explode right in front of their eyes, along with all their fellow androids from the YoRHa unit. As they make their descent to Earth, they’re pursued by infected YoRHa units. 2B takes over 9S’ flight controls and puts him on an auto-pilot route to get him to safety.
2B crash lands at the Flooded City, where she’s attacked by machines. As she tries to move to regroup with 9S, we find out that the virus has been spread to her systems as well, likely due to her prolonged battle with the YoRHa units in the air. She tells Pod that she needs to find a secluded area to go to, so that the virus wouldn’t be spread to other androids when her body eventually fails. 2B drags herself to the commercial district, where she’s ambushed by more infected units. Before they can completely wipe her out, A2 shows up and fights off the infected androids.
On the brink of death, 2B hands over her sword to A2, telling her that it contains her memories. 2B then pleads with A2 to take care of the androids, and tells her that the safeguarding of the future is now left to her. At the same time, 9S locates 2B and starts moving to her position. He reaches the commercial district just in time to see A2 stab 2B with her own sword. Just before she dies, 2B sees 9S in the distance and calls him by his nickname “Nines.” Before 9S can do anything else, there are ground tremors and an earthquake occurs, causing 9S to lose his balance and fall into the Forest Zone. A large white tower appears right in the middle of the City Ruins.
NieR Automata: Story & All Endings Explained
Part Four: A2 and 9S

Pod 042, which was originally assigned to 2B, starts to assist A2, as that was 2B’s dying wish. A2 is initially reluctant to talk to the Pod, but with its help, she locates a large machine in the Desert Zone. We quickly find out that ever since A2’s desertion from YoRHa, she’s just been wandering around Earth, hunting machine lifeforms and destroying them. After defeating the large machine in the desert, she passes out.
When she wakes up, A2 finds out that her fuel filter needs to be replaced, and she’s forced to consort with Pascal in order to get one. Due to her hate for the machines, she’s initially distrustful of Pascal, but she soon starts to change her mind, thinking that maybe the machines in Pascal’s colony aren’t so bad after all. The good times don’t last, however, and Pascal’s village is soon attacked by hostile machines. Pascal and his colony takes refuge in the Abandoned Factory, but A2 finds out that even more machines are converging on their location. She and Pascal then defend the children machines as they fight off their enemies.
After finally defeating the machines, A2 and Pascal return to the factory to check on the children, only to see that the children have all committed suicide by destroying their own cores. Pascal had taught them various philosophies and emotions, including fear, in the hopes that it would help them exercise caution and not rush into battle heedlessly. However, the emotion of fear was what ultimately caused the children machines to kill themselves as they were afraid of being hunted by the hostile machines. Unable to cope with the loss, Pascal begs A2 to wipe his memories. A2 consents, and Pascal is reset.
9S also wakes up with Pod 153 (his own assigned Pod), and states his intentions to destroy all the machines and A2. He finds himself in the Resistance Camp, where he’s nursed back to health with the help of Devola and Popola, twin red-haired androids who are often forced to take on the most difficult and demanding tasks in the resistance force. After recovering, 9S goes to investigate the large white tower in the ruins. However, it turns out that he needs to infiltrate three tower sub-units in order to gain access to the main tower. As he makes his way to each of these towers, he uncovers even more shocking truths about Project YoRHa.
The first truth is that the black box installed in each YoRHa android is actually made from the same materials and source as the core of a machine lifeform. The machine core is where a lifeform’s consciousness is stored, and the black box functions in the same way for these androids. With this information, we find out that the YoRHa androids and machine lifeforms aren’t that different from each other after all. This is also probably why the logic virus from the machines was able to infect the androids so easily.
The second truth is that the war between the androids and machines has been going on for centuries because there is a system in place to make sure that the androids never get to destroy them completely. Near the end of every war cycle, a backdoor to the existing Bunker at the time will be open, allowing for some sort of virus or infection to seep in and wipe out all the YoRHa androids. This would prevent the androids from ever winning the war, and the next generation of YoRHa androids can be created to restart the cycle all over again. This information wasn’t made known to the commander either.
Throughout all of this, Pod 153 notes that 9S is undergoing a steady decline in his psychological state, and is slowly losing himself to the grief over 2B’s death and his rage against A2 for killing her. After destroying the final tower sub-unit, he makes his way to the white tower. At this point, A2 also begins heading over.

9S is the first to make it into the tower – something that was only possible with the help of Devola and Popola, who end up sacrificing themselves to fight off endless waves of machines as 9S hacks his way inside. Inside the tower, a mysterious voice taunts him as he makes his way upward. 9S is eventually forced to fight against 2B clone units, all of whom have been infected by the logic virus. 9S starts to lose his mind a little here as he cuts them down. He loses his arm in the fight, though he does manage to kill all of them. He then rips off the arm of one of the 2B units and attaches it to his own body. This causes the logic virus infection to start spreading to him as well.
A2 also makes her way to the tower in search of 9S. As she explores, she discovers yet another truth about the YoRHa project. Before anything else can happen, she is attacked by a black-haired girl in a red dress. This girl appears to be a computer program of some sort, and we’ll refer to her as N2 from here on out. We find out that N2 is actually the mastermind behind this whole cycle of war. N2 states that they are a concept that cannot be killed, and while they had actually intended to completely wipe out the androids, they changed their minds after seeing the curious behaviors of both the machines and androids. They noted that both lifeforms started trying so hard to be human, to live like them, and N2 had gotten curious as to how this development would pan out. We also find out that N2 was responsible for destroying A2’s entire squad back when she was still with YoRHa. It is revealed that A2 and her comrades were actually the first generation of YoRHa androids, and they were sent into the field as guinea pigs, and that the commander had no regard for their safety. A2 saw this as a betrayal on command’s part, and so she deserted.
In a fight between N2 and A2, A2 deliberately refrains from attacking the enemy in hopes of causing a data and consciousness fracture by going against what N2 expects her to do. N2’s own consciousness and logic process begins to evolve and splits into two sides. One side of the consciousness argues that the androids should be left alive, as this will continue the cycle and potentially provide more hardship for them. If they can overcome more hardship and obstacles, N2 will become an even more powerful being through that conflict. The other side argues that the androids have become way too dangerous, citing the initiative and self-awareness illustrated by A2, 2B, and 9S, and insists that they should be destroyed. The two opposing sides eventually start to fight against each other to see which would come out on top. A2 is then able to destroy N2’s consciousness, or at least this particular projection of N2’s consciousness, in the middle of the conflict.
I know. My head hurts too.
Anyway, after destroying the machine lifeforms that guard the tower, A2 and 9S finally come face to face with each other. It’s here that A2 reveals to 9S that 2B’s own name was just a cover-up for her real designation: 2E. 2E was a special type of YoRHa unit created specifically to destroy fellow YoRHa androids in case they ever got too close to finding out the truth about humanity. 2E didn’t know the truth, of course, but she was paired up with 9S, who was a high-end scanner-type model, so that she could kill him if he ever discovered the truth. After killing him, his memories could then be wiped, and his consciousness would be transferred to a new body, effectively resetting him. It’s implied that 2E has actually killed him multiple times before, which explains her words after the fight with Eve earlier on.
Regardless, 9S still insists on fighting A2. At this point, we see that his eyes are now red, due to the virus from 2B’s (or 2E) arm spreading to his system. This is also where the game splits into multiple endings.
NieR Automata: Story & All Endings Explained
Conclusion: The End of YoRHa
In Ending D, both 9S and A2 are killed in their battle with each other. Well, A2 is killed, but we still get a few moments with 9S as he’s severely injured. The true purpose of the white tower is revealed in this particular ending, and we find out that the tower was actually meant to fire off an ark full of machine lifeforms and data on the world into space. In his last moments, 9S sees that Adam and Eve are on the ark, and Adam invites him to join them. Whether you choose to go with them or stay, the ark gets fired off into space, where it will wander aimlessly until it eventually lands and settles itself on another planet. If 9S stays, he bleeds out, but is glad that he’ll finally be reunited with 2B. Or 2E, I guess.
In Ending C, A2 is able to subjugate 9S for a brief period of time, and she hacks into his system with the help of Pod 042. In this ending, she manages to remove the logic virus from 9S’ body and destroy the white tower, but at the cost of her own life. As A2 dies, she looks up to the sky, and she’s glad to be able to rejoin her fallen squad mates. It is also implied that 9S survives and continues to live on Earth. It’s not entirely clear how A2 pulls this off in the game, but this ending also sees her destroying the white tower (somehow) and preventing the ark from being fired into outer space
Ending E branches out from Ending C, where both 9S and A2 die. The Pods are about to conclude this cycle of Project YoRHa and conduct a complete data wipe. However, over the course of the game and witnessing the ordeals of the three main androids, the Pods themselves have also started to form some semblance of a consciousness and free will. They achieve sentience, and Pods 042 and 153 decide that they will try to preserve the memory data of A2, 2B, and 9S. In order to do this, the Pods (and by extension, the players) are forced to engage in a bullet-hell mini game against the game’s end credits. It’s not clear if we’re fighting against N2 and what remains of their consciousness, or if this is a fourth wall-breaking meta message in which we literally fight against the game’s creators to help the Pods achieve a better ending. Either interpretation suits the game just fine.
After beating the mini game, we are treated to a cutscene where we find out that the Pods were able to reconstruct the bodies of A2, 2B, and 9S by using spare parts found around Earth and in the white tower. Their memory banks from before the virus outbreak are also restored. However, while our three main characters will come back to life, the Pods also acknowledge that there is a good chance that the androids and machines could very well fall back into conflict all over again. Pod 042 states that the possibility of a continuing cycle is there, but there is also hope that they could potentially carve out a new future for themselves on Earth.
And that’s about it for the overall story of NieR: Automata. While this article serves as a summary for the events that occurred in the game, I still highly recommend playing through the game yourself to learn more about the little details surrounding YoRHa, N1, and the machines in general so you can form your own opinions on the story. That said, hopefully this helped you gain a better understanding of what’s going on in the story, and feel free to sound off in the comments if you have any questions about the game.
It’s worth noting that Emil, Devola, and Popola are returning characters in NieR: Automata as well, and we’ll have story summaries and explanations dedicated to these specific characters soon.
Be sure to check back with Twinfinite and our ever-expanding wiki for more information on NieR: Automata.


Updated: Sep 20, 2018 02:02 pm