
Frostpunk 2 can feel insurmountable to beginners, as there are a flood of mechanics you need to keep track of in addition to resources, Factions Trust, and so much more. That’s why we’ve compiled some useful info in this Beginners Guide to help you get started.
How to Use Frostbreaking in Frostpunk 2

To start, you need to know how to use Frostbreaking in Frostpunk 2. It allows you to cut through the thick ice surrounding your city so that you can expand and build new Districts.
To use it, press the X key or click on the three-pointed icon in the bottom right corner of the screen. This begins the process and highlights any frost you can break bright white. Click on these tiles and create a connecting path until you reach the maximum amount, and then click the check mark to begin breaking those ice blocks.
You can have multiple Frostbreaking teams active at once so long as you have the Workforce and Heatstamps to supply them. This can help you expand rapidly and create ample space for your Districts. If you need more Heatstamps, simply wait for a few days or weeks, as they are generated automatically through taxes on your population.
How to Build and Highlight Districts in Frostpunk 2
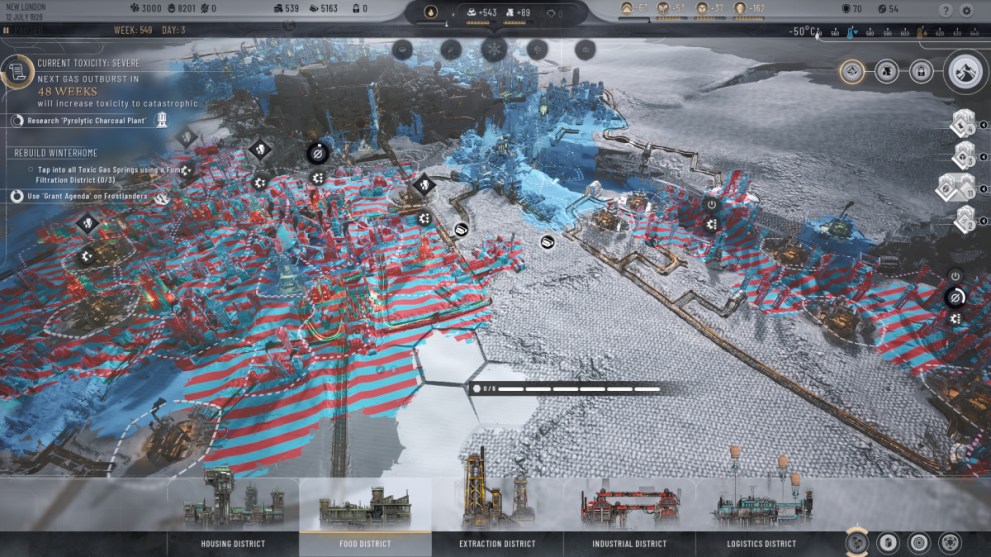
You can build Districts by pressing the B key or clicking on the clustered buildings icon in the bottom left corner of the screen.
This brings up the five different districts you can construct for a mixed cost of Heatstamps, Workforce, and Prefabs. It also highlights all of your currently constructed districts in different colors, which can make it much easier to see what you’ve constructed so far and plan your next structures accordingly.
Each District serves a different purpose, and we’ve explained each of them in a bit more detail down below.
Housing Districts
Housing Districts provide general shelter and warmth to your population, and serve as their basic means of shelter. You typically want enough to have a surplus of shelter and warmth, as any shortage of housing can cause you multiple issues ranging from a lack of Trust to high Tension.
Food Districts
After that are Food Districts. These allow you to harvest from Food sources, denoted by the little leaf icon. They can be diminished during strong storms and White Outs, but otherwise create resources consistently and can be built next to Housing Districts for a Heat bonus.
These districts also use Materials to facilitate the creation of food in addition to Workforce. Make sure you have enough to keep up production, or else you’ll have to deal with Hunger among your populace.
Extraction Districts
Next up are the Extraction Districts in Frostpunk 2. They’re how you shore up a natural supply of Materials, Prefabs, and Fuel. They can be used to harvest from points denoted by Cubes for Materials; Stacks of bars for Prefabs; Piles of Coal for Coal; Oil Drums for Oil; and Puffs of wind for Steam.
You typically want to position these away from Food and Housing Districts, or else the proximity to their pollution can cause Disease and Squalor. Luckily, they can be built near Industrial Districts for a Heat bonus with zero debuffs.
Industrial Districts
Fourth on the list is Industrial Districts. They can produce Goods to keep your citizens stocked with necessities as well as Prefabs that can be used to create new Districts.
Like Extraction Districts, they need to be built away from Food and Housing Districts to avoid a Disease and Squalor penalty. Proximity to Extraction Districts, meanwhile, results in additional Heat production and less strain on your Generator.
Logistics Districts
Finally, there are the Logistics Districts. They allow you to produce Frostland Teams that head out to explore the Frostland around your city and bring back different resources.
These can only be built on the far ends of the map, so it’s best not to worry about building anything near them unless absolutely necessary.
How to Make Buildings in Frostpunk 2
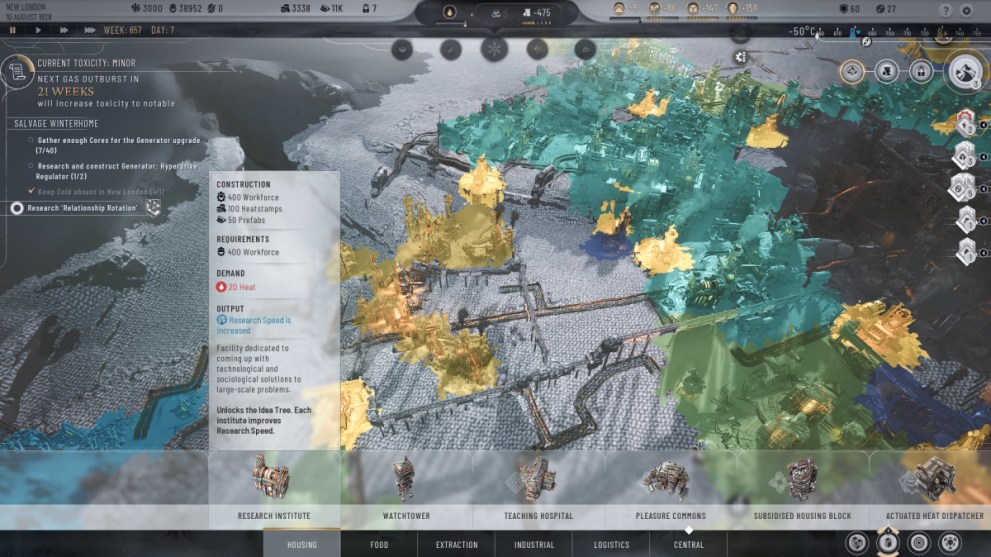
Once you have your Districts set up, you can prep them for Buildings by clicking on them and then choosing to Expand them. This requires a small investment of Heatstamps and additional Workforce, but it increases their efficiency and unlocks a Building slot.
Start by choosing to expand a Housing District. After this is done, press the N key or click on the icon of a Building in the bottom right corner of the screen.
This brings up a list of your available Buildings, and the Research Institute and Council Building are your first available options. The Research Institute allows you to study new Laws and Building ideas, while the Council allows you to vote on which Laws are applied to your city via Council Voting.
How to Use the Generator in Frostpunk 2
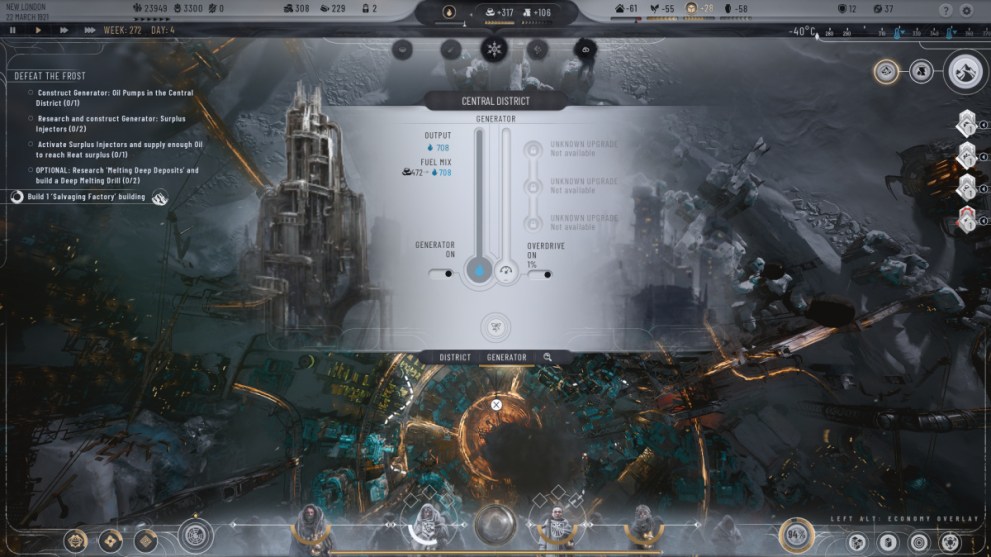
Finally, there’s the Generator at the city’s center in Frostpunk 2. This is your main producer of heat, and it runs on whatever fuels you manage to track down and make viable via Research.
While it runs on its own so long as you click the on switch from its menu, you can also send it into Overdrive to increase its heat output with a lower Fuel cost. Be careful though: This increases the strain on the Generator, and it can suffer an accident if it hits 100 percent Overdrive. This results in the need to shut it down for repairs, during which your population has to weather the cold.
It’s a bad time all around, but Overdrive can still prove useful so long as you’re mindful. Use it when you need to stock up on resources, or when your stores of fuel are on their last leg.
And that’s all that our Beginners Guide for Frostpunk 2 has to offer. There’s plenty more to learn about the game though, and our guide on Frostland exploration is a great next step on your journey.


Updated: Sep 20, 2024 05:07 am