
You can only harvest so many resources from your city’s surroundings in Frostpunk 2, which means trips to the Frostland are unavoidable. These excursions out into the white wilds don’t have to be ordeals though, and we’re here to show you how to make the most of them. Read on for our Frostpunk 2 Frostland exploration guide.
How to Explore the Frostland in Frostpunk 2
Near the edges of a given map in Frostpunk 2, you can find spots dedicated to the establishment of Logistics Districts. These run you the same amount as most any other District dedicated to resource gathering, and take up a modest amount of Workforce.
Once they’re built, they allow you to venture out into the Frostland, where you can investigate points of interest and establish new colonies to harvest resources from, relocate parts of your population, and otherwise help to resettle the world with your city at its center. You can open up the Frostland map by clicking on the icon with a mountain on it in the upper right corner of the screen.
How to Get More Frostland Teams
Like with every other part of the game though, the Frostland is rife with different resources you need to manage.
To start, you need Frostland Teams to man your expeditions. You can get more via your Logistics Districts, as well as having a higher number of Frostlanders, Evolvers, and Pilgrims in your population. The latter can be kicked into a higher output if you consistently Promote these groups, but that can also give them more sway in Council Voting.
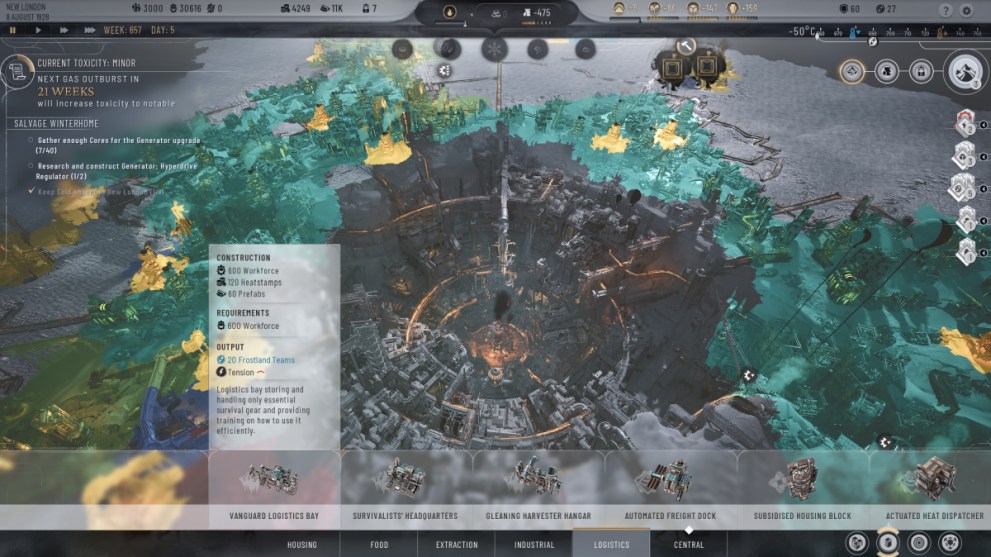
Logistics Bays also a must-have for any Logistics District. It adds 20 Frostland Teams, and you can have up to three at a time. You can Research it through the Frostland Ideas tree via the upper branches.
How to Launch Expeditions in Frostpunk 2
Once you have a good amount of Frostland Teams, you can then make the most of this wide expanse of snow with Expeditions.
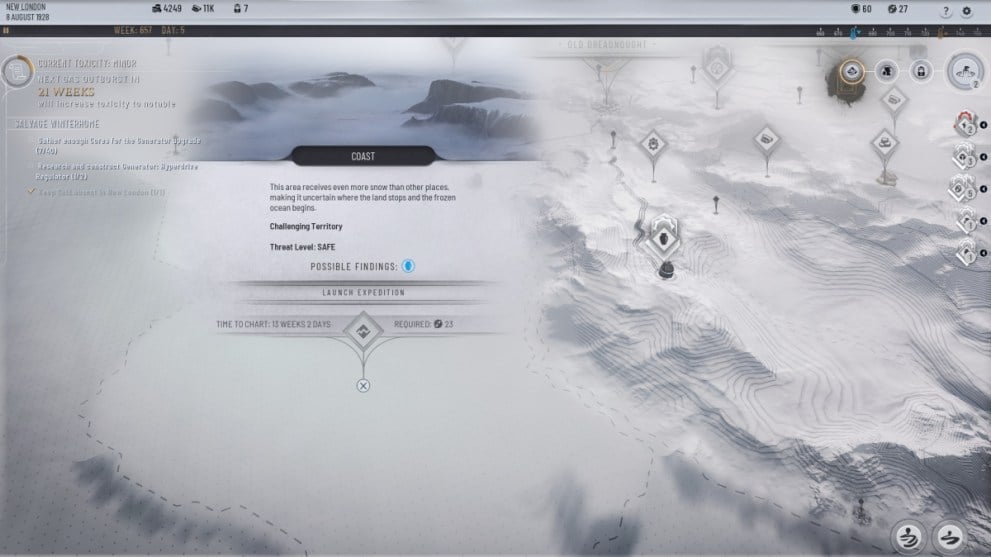
These are your general trips in and out of the Frostland, and they carry both risks and benefits. In terms of risks, each Expedition can be more or less dangerous based on how much of the surrounding area you’ve explored, how well-trained your Frostland Teams are, and so forth. A higher danger rating carries the risk of injury and death, while a lower one means all of your Frostland Teams can handle the trip with no issue.
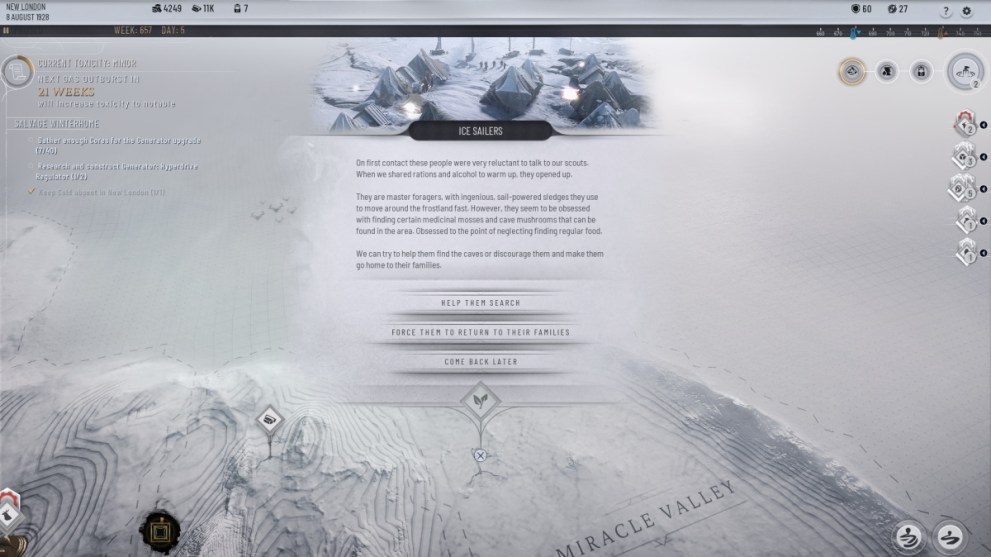
In exchange for these journeys, you can uncover points of interest which contain everything from resources you can harvest and areas you can set up settlements at to stashes of Cores you can use to upgrade your Generator. There are also several scenarios you encounter where your current city build and past choices determine what resources you can gather, whether you encounter allies or enemies, and if you get the chance to unlock permanent bonuses to the items available.
How to Harvest Resources in the Frostland
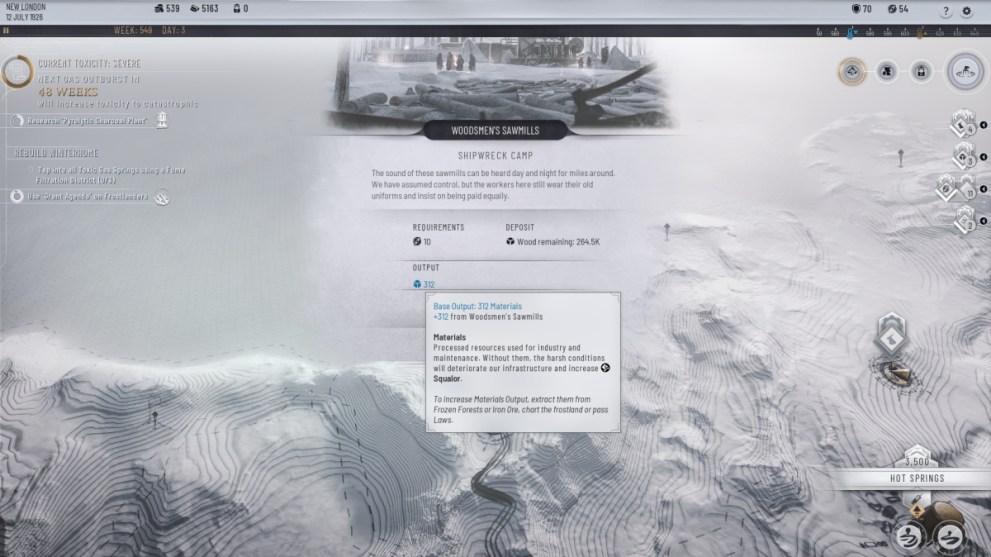
Most all of these areas require an investment of Frostland Teams to gather the resources there and bring them back to your city, and how long they’re committed to these tasks varies.
For one-off caches of items, your Frostland Teams only have to make one trip. This typically ties them up for a few weeks, after which they can be used for more expeditions.
The same can’t be said for Harvesting points. In exchange for a steady supply of Food, Fuel, and other resources, some of your Frostland Teams are kept at the site in order to oversee these operations. They can’t be assigned to Expeditions unless you deactivate the Harvesting site, so keep this in mind before you leave yourself choosing between exploration and the continued functioning of your city.
How to Set up Outposts in the Frostpunk 2
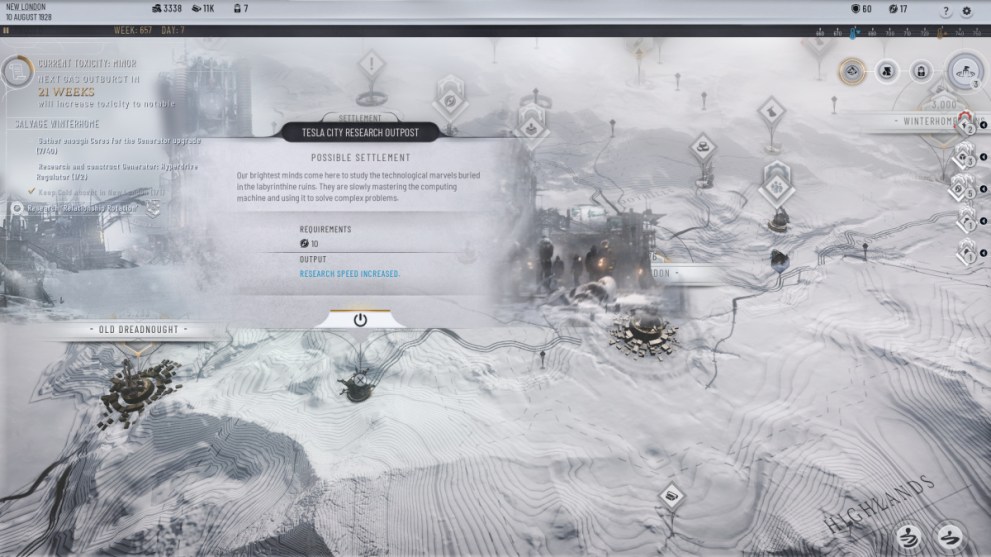
And then, there are Outposts. These are permanent bases your Frostland Teams can occupy to grant themselves and your city various effects, from increased Research speed to operational bases which lower the overall risk of Expeditions. What’s more is that they don’t require any sort of Resource investment for these bonuses, so you can save a lot of Heatstamps that’d otherwise go to Building construction.
In exchange, the Frostland Teams assigned to these Outposts are permanently taken out of your pool of available explorers unless you deactivate the Outpost. These bases also need to be connected to your City to function via Trails or Skyways, so make sure you’ve done this before you go committing valuable explorers to an unreachable point of the map.
How to Build Trails and Skyways
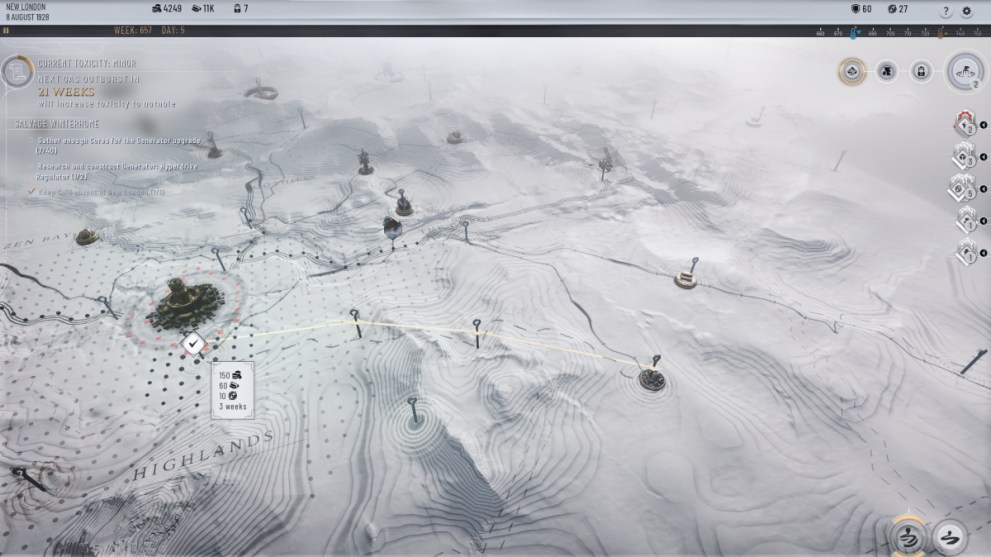
Speaking of which: In order to efficiently transport resources between your city and the various harvesting points, settlements, you need to regularly build Trails and Skyways between them. The former is available to you right away, while the latter needs to be researched via the Frostland Research tree.
Once you have one you want to use, simple click either of the icons at the bottom right of the Frostland Map screen. This brings up stakes in the ground, and you need to plant them within the area denoted by black spots in the ground. Continue to plant them and drag the cursor toward either the city or trail you want to connect your new path with, and then press the Check Mark icon once you’re ready to construct your path.
These pathways require Heatstamps, Prefabs, and Frostland Teams to build, so make sure you have a healthy before you try to build a byway you can’t afford.
And with that, you know everything we have to share about Frostland exploration and how to do it well in Frostpunk 2. It’s definitely a lot to juggle at first, but in time you’ll be wandering the frozen wastes like the best of the post-apocalypse’s survivors. For more on the game, check out our other guides on the best Laws and buildings you can Research, as well as all the Laws in the game and how to unlock them.


Updated: Sep 20, 2024 05:00 am