Welcome to Meltdown

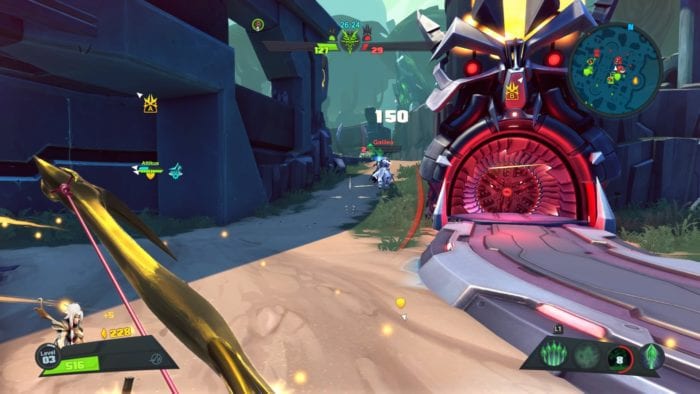
Meltdown is a versus mode in Battleborn that tasks each team with escorting their minions to the opposing forces Grinders. These large, metallic totems eat your minions and grant your team points. The larger the minion, the more points you get, and first to 500 points wins.
Sounds simple, right? Well, this mode leads to constant contests at chokepoints throughout the map. Teams must strategize and communicate in order to emerge triumphant. Here are some tips that will help you and your team taste victory every time you’re in the Meltdown arena.
Coordinate Your Character Selection

Each character in Battleborn is great. Gearbox did a great job at building unique individuals and keeping them balanced. What helps them maintain that balance is their particular roles on the field. When picking a team for Meltdown you want to consider these roles from not only an FPS point of view, but a MOBA one as well.
If you see two members of your team have already chosen snipers, don’t choose a third. Maybe go for someone who gets closer, or a defensive support hero to help keep the sniper in your lane alive. Always consider how you want the lanes to play out and choose your hero accordingly. Many matches are lost simply because there is no skill chemistry between the members of a team.
The Objectives Are on the Left and Right Lanes

Maps are set up like your typical MOBA maps, with three lanes. There’s the large center lane, then one going to the left and right of your spawn point. During Meltdown, the objectives are located on the sides. Use this knowledge to your advantage.
Enemy players, especially those who aren’t fully familiar with the game mode just yet, will keep an eye on their minions while focusing on yours. Use the central lane as a sort of express line to quickly get behind enemy forces and punish them for overreaching. This is risky, as powerful players on the opposing team will undoubtedly have the same idea, but play it smart, and use your team’s varied skills to dominate this area.
Control the Shards

You may have noticed the large glowing Shards that are situated on the map as you play. They even show up on your mini-map. Destroying these nets you a sizable amount of Shard points so that you can activate items in your loadout or build turrets. These respawn two minutes after being destroyed.
If you can manage to lockdown their spawn points you can have an endless amount of currency used to put up defenses and improve your Battleborn. While you’re rolling in the dough, the enemy team will be scraping coins together, unable to thwart your advances.
Only Build Around Choke Points

If you’re going to spend your Shards on construction, spend it wisely. While it’s easy to build on every node you see, stop and think for a second first. Is this a spot where enemies will be spending time? Can you lock this area down? Will placing a structure here help you if a retreat is needed?
If the answer to those questions was no, then don’t waste your time. If one of the objectives you’re trying to defend is nestled in a corner, then build around it, force your opponents to deal with it. If you find a narrow lane where you’re facing off against more than one adversary, drop a turret and let it help you in the bottleneck. Just because you can build, doesn’t mean you should. Play smart.
Remember: Bigger Minions are Worth More

After every minute or so, a new wave of minions will spawn from your camp. These waves usually consist of around 4 small minions and one medium one per lane. You may find yourself trying to defend every single one, as you should, but don’t become too disheartened if the odd smaller minion dies. The medium minions are worth much more and they can stand a small beating. Keep them alive at all costs.
Late in a Meltdown round, larger minions will spawn. You’ll know when it happens because this is the only wave that the game actually announces. They are worth a massive amount of points so grab two other players and go to work to keep them alive.
Don’t Give Up, Objectives Move to Buy You a Chance

When a team reaches the halfway mark (250 points) the objectives they must reach are pushed further back into enemy territory. That makes it harder to seal the deal, meaning they’ll have no choice but to play a bit more aggressively. If you’re on the side that’s losing, that means the odds are stacked a bit in your favor now.
You still only have to go to the halfway mark. If you can down a majority of the team in your territory, you and your allies can use their downtime to make a push towards the close objectives. It isn’t uncommon to find yourself behind only to catch up and then even take the lead after the objectives shift. Never give up in Meltdown.
If you need any other help with Battleborn, check out our wiki!


Updated: May 3, 2016 05:56 pm