The life of a spy is fraught with danger and intrigue! Playing as Edwin and Marie, undercover as newlyweds, you must attempt to smuggle two scientists out of Europe. To help you figure out who the traitor is we have the solution to every puzzle in our Adventure Escape Mysteries Allied Spies walkthrough!
Allied Spies Tutorial
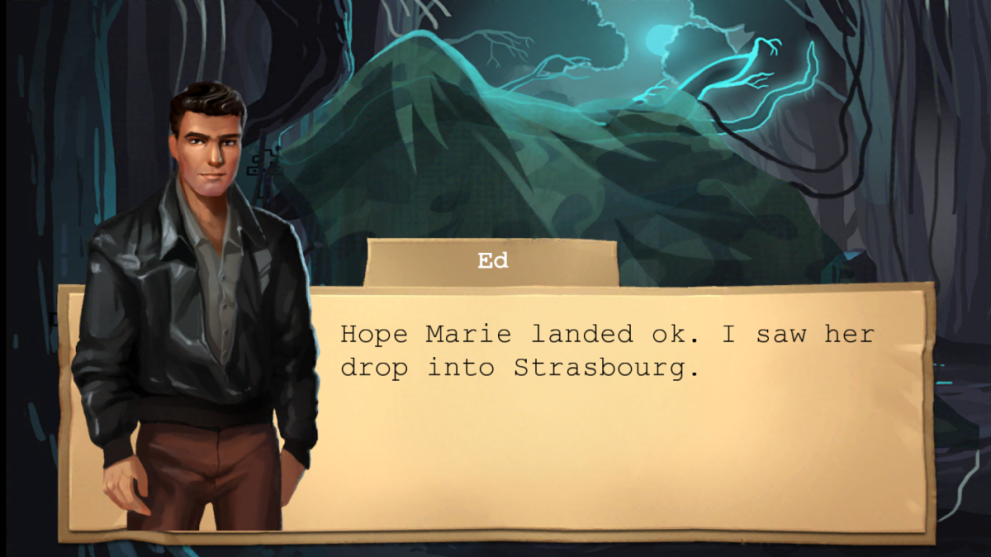
The walkthrough for Adventure Escape: Allied Spies begins with a quick tutorial to help you navigate the game. It is important to note that, like other AE Mysteries titles, you are given Stars which can be spent on revealing hints or skipping puzzles. This will come in handy for moments when you encounter bugs which stop you from progressing or completing a chapter. First, let’s complete the tutorial and collect some free stars!
- Pick up the knife;
- Take the knife from your inventory to hold it;
- Use the knife to cut the parachute cord;
- Tap the farmhouse to move to a new screen;
- Look closer at the lock;
- Go back and find the star on the ground;
- Collect your free stars.
That concludes the tutorial! Remember: save your stars and check back to this walkthrough for help and tips to get through the trickier puzzles.
Chapter 1
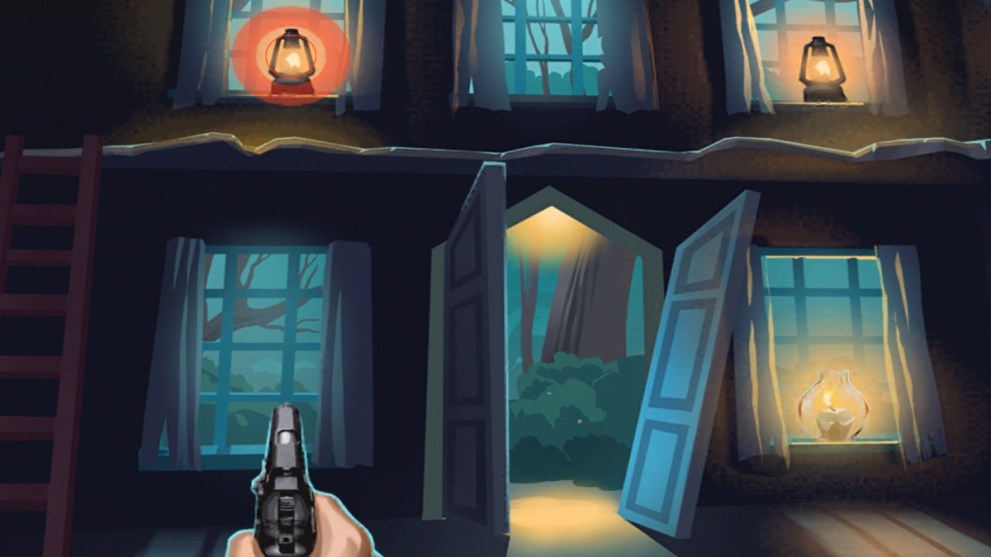
The AE Mysteries Allied Spies tutorial is now complete so you are on your own! You will need to find clues to solve any tricky puzzles so revisit this walkthrough for the solutions.
- Go back a screen by tap the trees on the left;
- Pick up the parachute cord;
- Check out the markings on the trees because these show you the solution to the lock puzzle;
- Go back to the Farmhouse;
- Take the lantern from on top of the door;
- Solve the puzzle on the lock by tapping each button in this order:
- Lower right, upper left, upper right, lower left.
- Go through the door of the farmhouse;
- Open the curtains;
- Pick up the two lanterns and broken bottle from the floor;
- Open the toolbox to the right and remove the carpenter’s pencil and the crowbar;
- Look at the paintings stack against the wall;
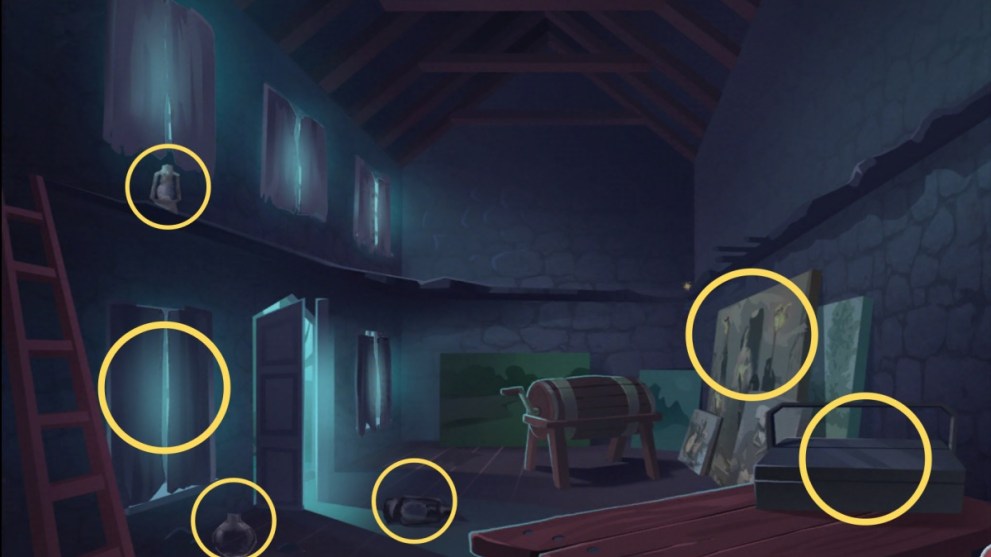
- Pick up the crowbar from your inventory and use it on the butter churner;
- Take the butter from inside;
- Inspect the table so you can place down the jar, butter and parachute cord;
- Tap and drag the butter and cord to the jar and then pick up your new lantern;
- Go to the door to leave the farmhouse;
- Use the crowbar on the car to open the hood and tap to look inside and remove the battery;
- Tap both buttons and then place the carpenter’s pencil on top;
- Light all four lanterns by picking them from your inventory and placing them on the flame;
- Place two regular lanterns and your makeshift lantern in the windows inside the farmhouse.
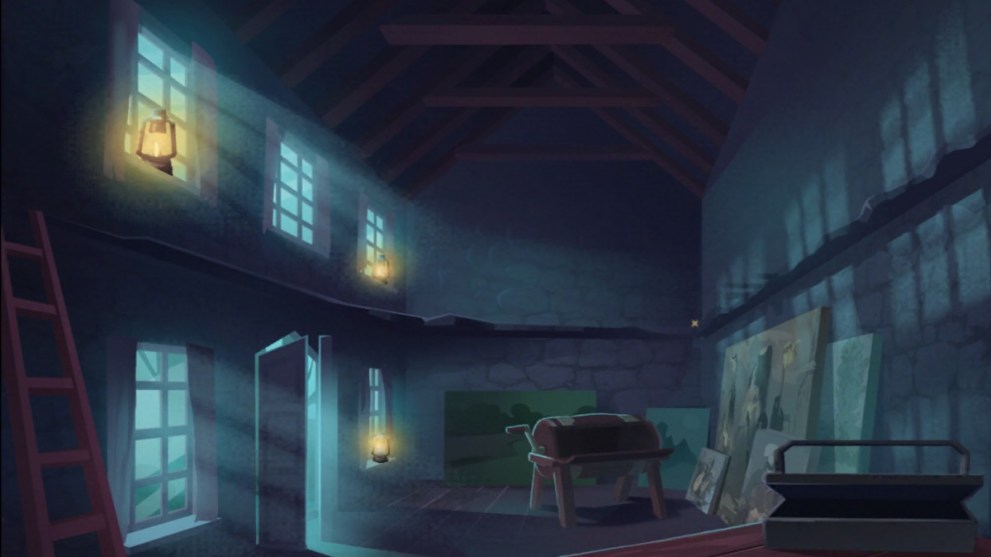
- Place the final lantern outside above the door;
- The lanterns alert the French Resistance who arrive instantly and talk with you;
- Inspect the gun on the table and then go back to the room;
- Pick up the lock parts from the floor;
- Head outside and take the burnt carpenter’s pencil from the car;
- Go back inside and tap the table to inspect the gun;
- Use the burnt pencil to draw out the gun schematic;
- Place the lock parts down on the table;
- Assemble the gun using the schematics by tapping each piece to turn them so you can then place them in the right spot;
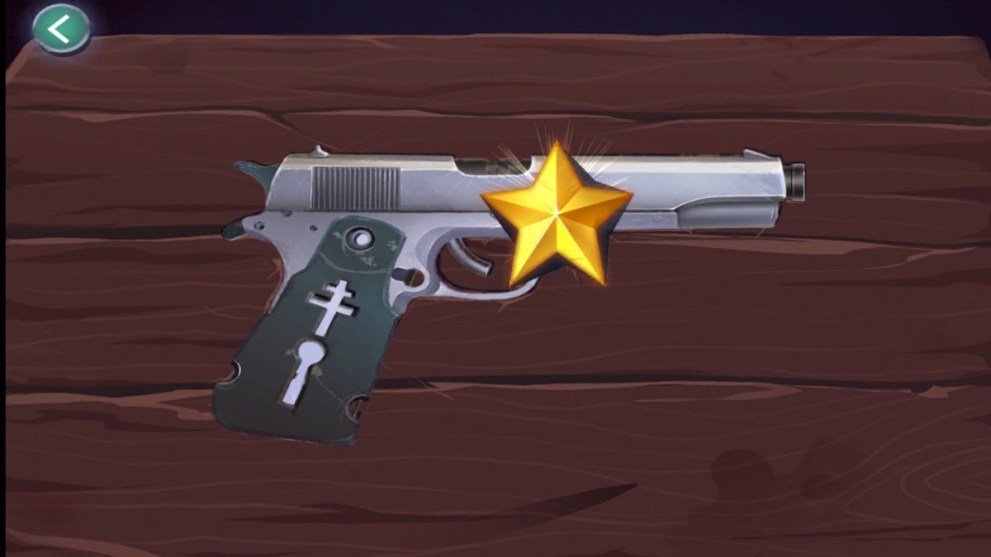
- Use the gun to shoot each lantern when the outer circle hits the inner circle;
- Finally try to shoot the Nazi soldier but do not worry if you miss.
That draws Chapter 1 to a close and we move on to Chapter 2 of Allied Spies in our walkthrough.
Chapter 2
Allied Spies continues in Strasbourg where Marie is concerned about Ed. Help her hide her parachute and change clothes so she can move safely around the town.
- Pick up your parachute so no one knows where you landed;
- Take the street sign;
- You must use the sign to reach the bag because it is so high up;
- Shove the parachute into the grate on the side of the building to hide it;
- Remove the dress and the passport;
- Move all the papers around so you can see what it all says because in a moment you will have to answer some questions;
- Tap the patrolman who will demand some answers. Make sure you answer carefully so you don’t reveal you are one of the allied spies;
- I was born in Chicago
- My husband is inspecting auto factories
- Hotel Le Chat Noir
- We’ve been married two weeks
- We live in Detroit
- Good night
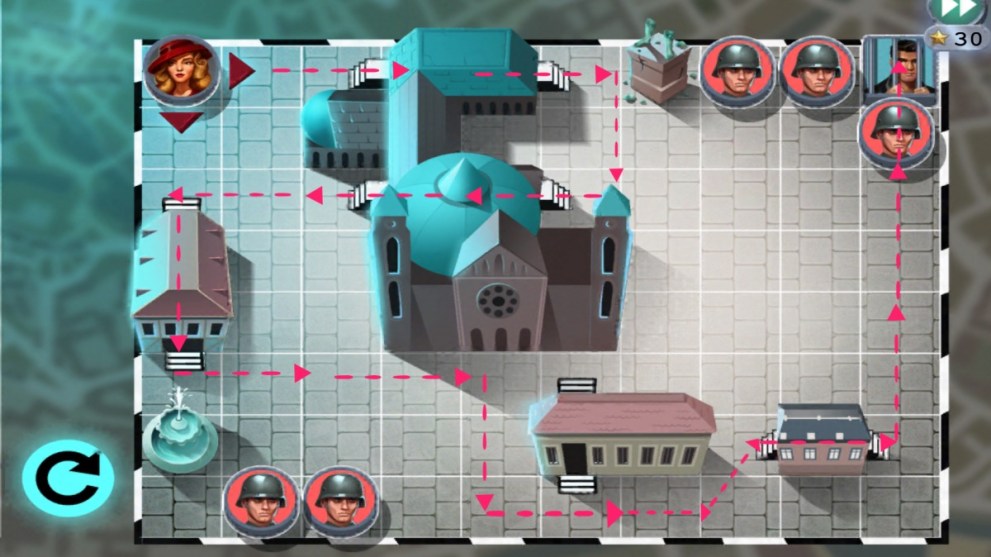
Next, you need to make your way to the American Consulate which is shown on the map as the building with the eagle icon. Tap Marie to move and if a soldier follows you, hide in a building! Try to stay out of the line of sight of the soldiers because if they catch Marie she will go back to the start. Check out the map below to see the directions and stop points we took to get Marie safely to the consulate. As you can see, you will need to exit and enter the church quickly to get the guard on the right to move left. This frees up the path around the right so you can head around safely. If a guard catches you then you must start again.

The next puzzle is set on the table in the consulate reception. Tap the images to rotate them and place each one so the riders look like they’re riding. The horse images must go side by side vertically as the image below shows. You can then place the riders on top and line then up so they fit.
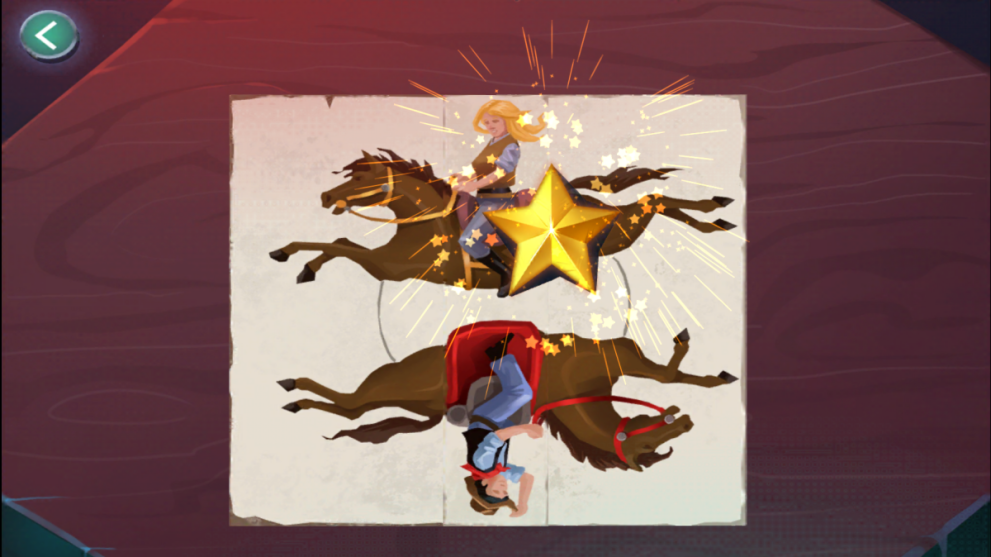
- Take the arrows stuck in the completed puzzle;
- Tap soldiers to rotate and place them, and the flag, in the right spots;
- Pick up the shield from the drawer below and the olive branch from the right side.
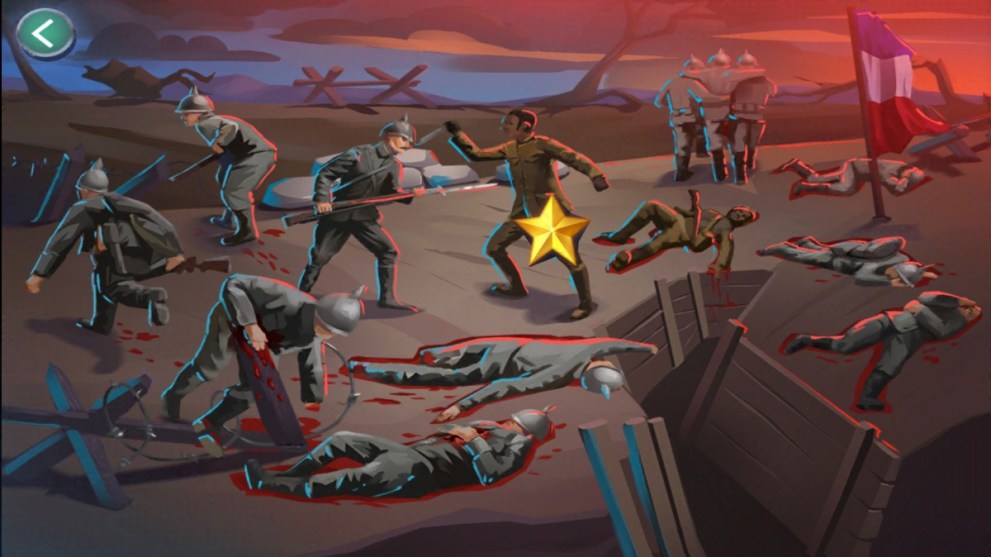
To get through the door you need to place the items you found (sheild, olive branch, arrows) on the eagle above. Just tap on the door to go upstairs where you will find some very suspicious people. Your job is to uncover Leo and Liselotte, a pair of German scientists by figuring out everyone’s stories.
- Start with the man with the plate of spaghetti and ask him every question available but do not confront him with evidence yet;
- When he mentions the slit in the floor go back and check it out;
- Solve the puzzle by piecing the torn up identity card.
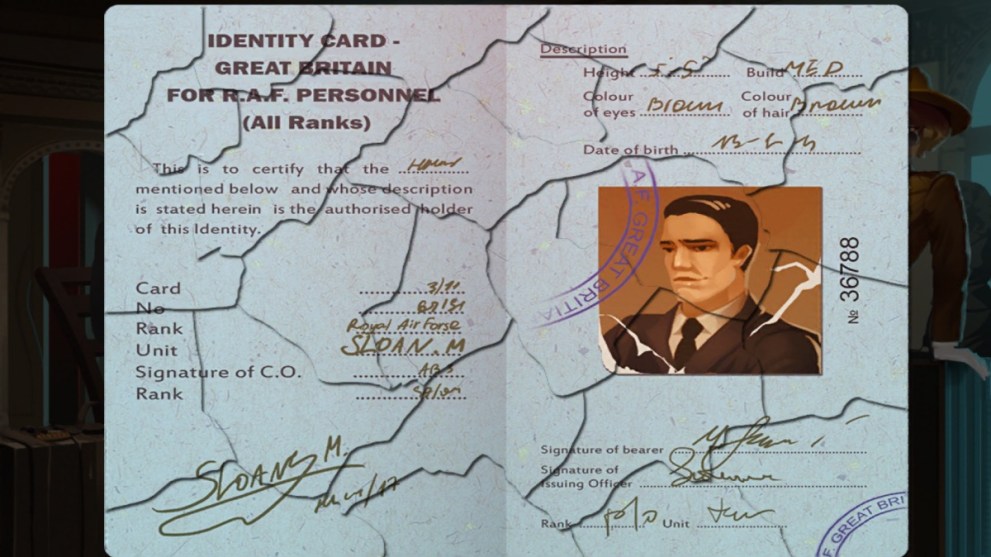
- Speak to the man in the cowboy because he is the one in the ID card;
- Ask him some questions and then confront him with the evidence. Tell him you know he is not American so he leaves.
- Have a look at the lady in the brown dress and how many colored circles there are in her outfit:
- 4 Brown
- 2 Red
- 2 Gray
- 1 White
- Tap the bag and look at the colored circles on the strap. Enter the code based on the order of colors according to the no. of circles on the lady’s outfit: 4, 2, 1, 2
- Speak to the woman and then confront her with the evidence saying ‘Only an Allied Spy would have this”. She will hand you a note;
- Talk to the man with the spaghetti again and confront him with the evidence saying “This proves you’re the saboteur!” He will then leave;
- The poster in the lobby shows the Harlem Hellfighters fighting the German 243rd Infantry so enter the number 243 on the bag left behind by the man;
- Take the ring and the cryptic document.
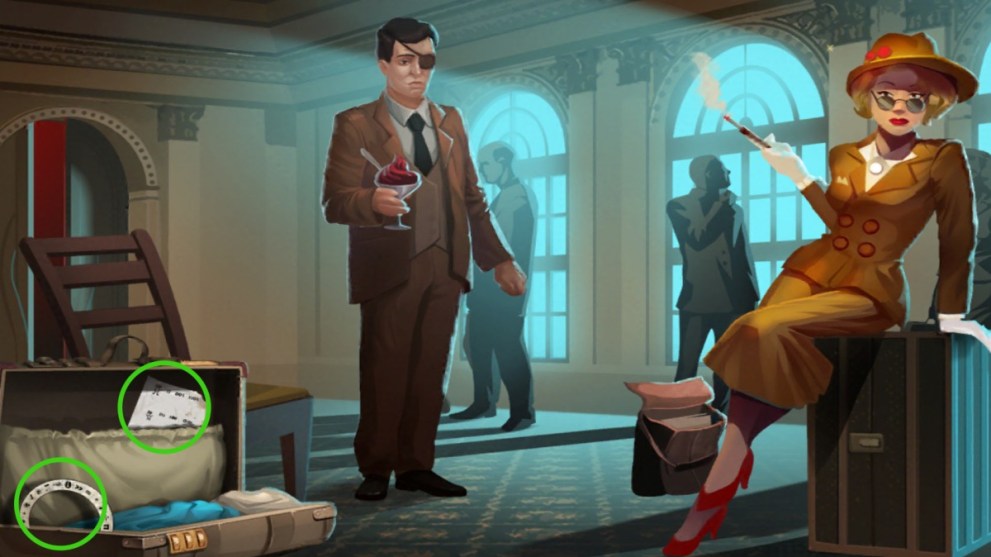
- Back at the lobby you can put the ring and note on the desk;
- Move the rings so they create the stickman. Do this with each stickman to find out what each secret message hides;
- 101, U, and two L shapes
- 10, W, two arrows right
- 0, M, omega symbol
- 01, D, sideways almost-S (see image below!)
- When all rings are connected you can move them to decipher the hidden message in each stickman: LEO, HAT, EIN, AUGE(T) (there is a bug here: it is meant to be an E but infact the wheel shows T!)

Now you can go back to where the last guy is and tell him you know he is Leo, the man you have come to meet with. Unfortunately a Nazi shows up to arrest you both! This marks the end of Chapter 2 so read on for Chapter 3 of the Allied Spies walkthrough.
Chapter 3
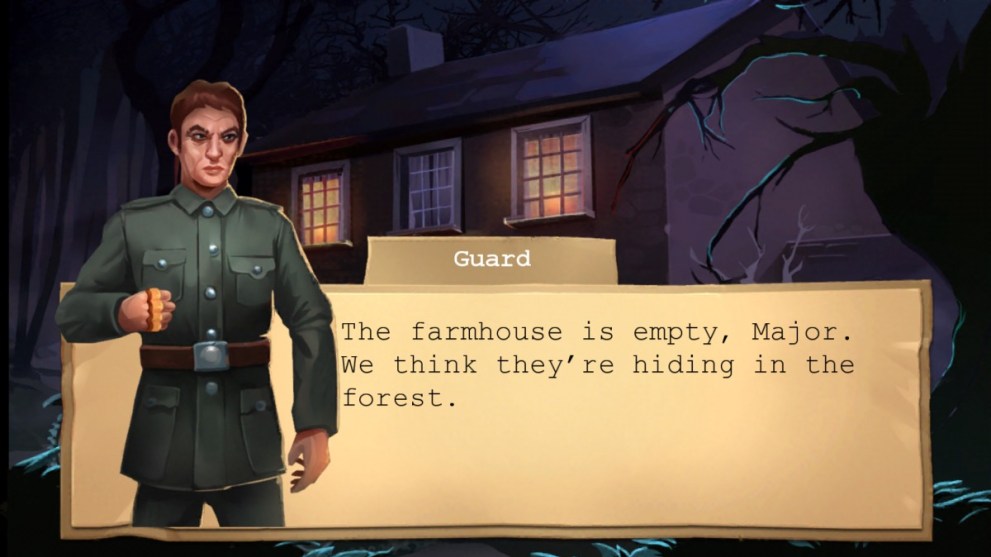
Our walkthrough continues with chapter 3 of Allied Spies and Ed is desperate to find his wife but first he must get past the enemy!
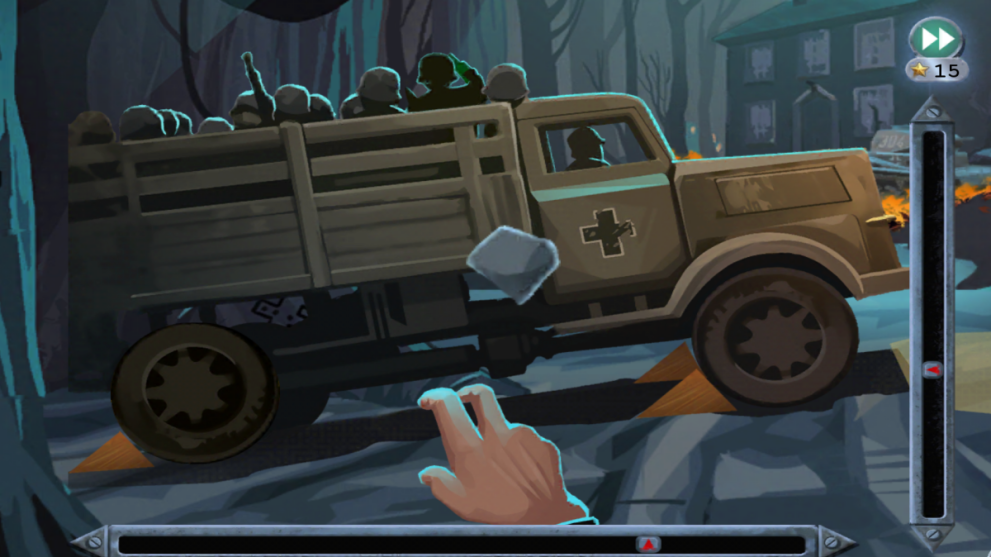
- Pick up the pile of stones on the right hand side;
- Use the bottom guage to judge direction and the right guage to judge power and use the stones to knock the orange mounds away from the wheels. This may take a few attempts!
- Pick up the green bottle;
- Take the hose from the truck;
- Use a rock from your pile of stones on the red gas tank;
- Put the green bottle under the tank and add the hose;
- Now you have a bottle full of gas;
- Go to the farmhouse;
- Light the gas-filled bottle and throw it at the back of the tank;
- Tap the car and keep tapping it until the bar fills and the car is out of the way;
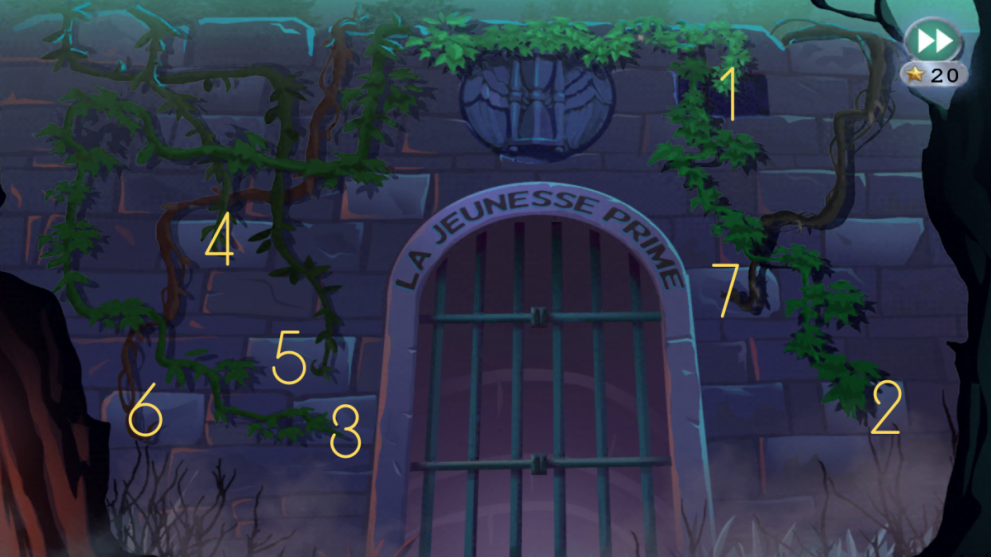
- Go to the gate and look for the writing that reads: LA JEUNESSE PRIME. Tap it to see the translation: Youth Goes First;
- Choose the vines in order of youngest to oldest (green to brown).
- Head through the gate;
- Repeatedly tap the debris to move it out of the way.
- Carefully move the grenades out of the barbed wire. This has to be done super slowly and make sure the grenades don’t touch the silver parts of the wire at all or you have to start all over again. Begin with the large one on the right as that is the trickiest of them all. Go slow, watch where they are swaying and go in the other direction — VERY SLOWLY — and get each one up and out of the way.
- Pick up the bar from the dead body and take his keys;
- Two keys fit into the lock together: tap the shiny gold key with a large circle design and the tarnished silver key with three circle design;
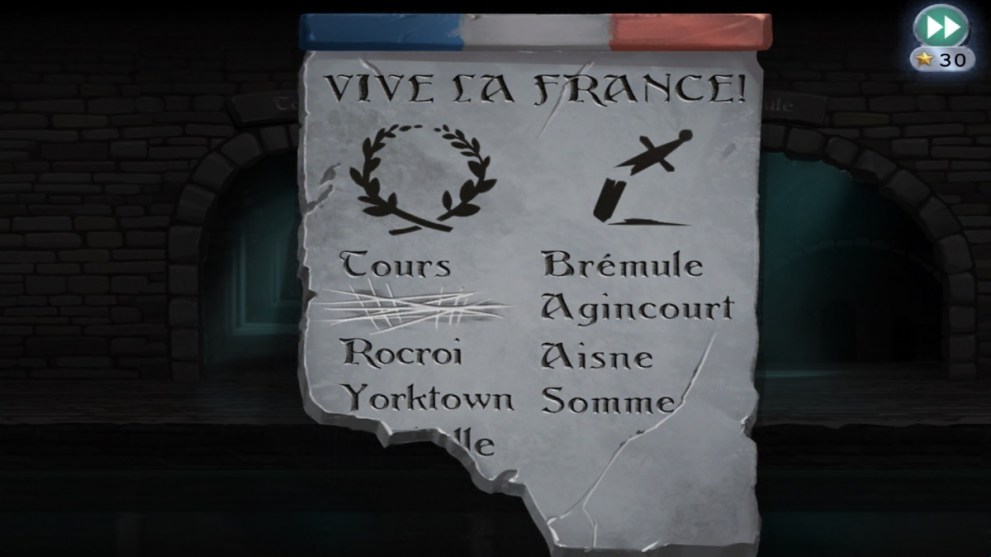
- Look at the sign. It shows the French victories on the left and French defeats on the right. You must go through tunnels named after French victories: Tours, Rochelle, Yorktown.
- The next tunnel shows Waterloo (which Napoleon famously lost), and Austerlitz (the correct choice);
- Finally head through Marne and you will end up in a pipe room.
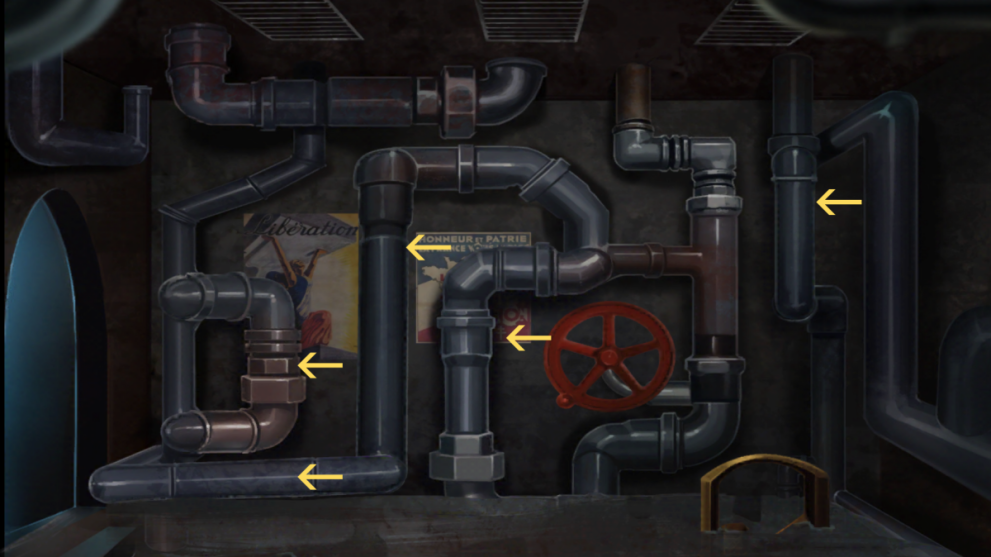
- Pick up all the three spare pipe pieces from around the room;
- Don’t turn the red wheel yet because the room will flood;
- Place them so they end up in the right spots (see the image below) and turn the red wheel;
- Go back to the room with the dead body;
- Pick up the brass pipe;
- Return to the pipe room;
- Place the pipe in the brass object on the right;
- The pipes will ight up to show a number: 6211;
- Go back to the other room and tap the manhole cover on the floor;
- Enter the number 6211.
- Go through the manhole and be faced with a blockade;
- Ask Pascal for help and convince him using these answers:
- We will be done by dawn.
- A Nazi megaweapon is a problem for your family.
- The plan is: get to the consulate and find the scientists.
- Can’t we both be free?
- Yorktown.
- He will agree to stay and you will have to convince the woman too;
- I am not commanding! This is a strategic alliance.
- Explain the situation.
- Yes. I break things, I blow things up.
- I skipped my honeymoon to be here.
- Please. Aidez-moi!
- Duplix also agrees to stay and you can tap the blockage until it is pulled away.
- Use the grenades to blow up the bars and escape the area!
This concludes the end of this chapter and this part of the walthrough! Continue for Chapter 4 of Allied Spies.
Chapter 4
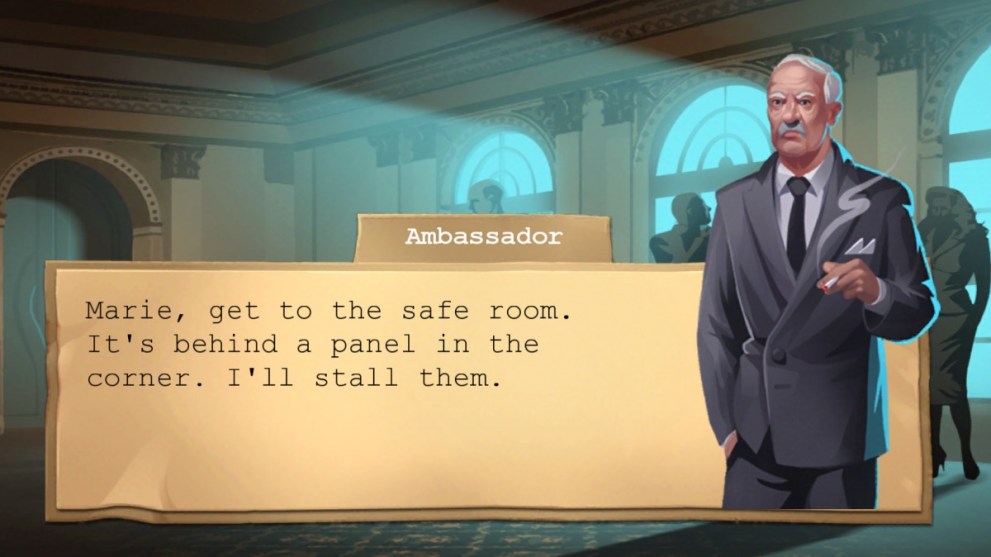
Our walkthrough for chapter 4 of Allied Spies begins with the Ambassador telling Marie to get to the safe room. You are confronted with a series paintings but they look like they are out of order. Set them right snf head through the doorway.
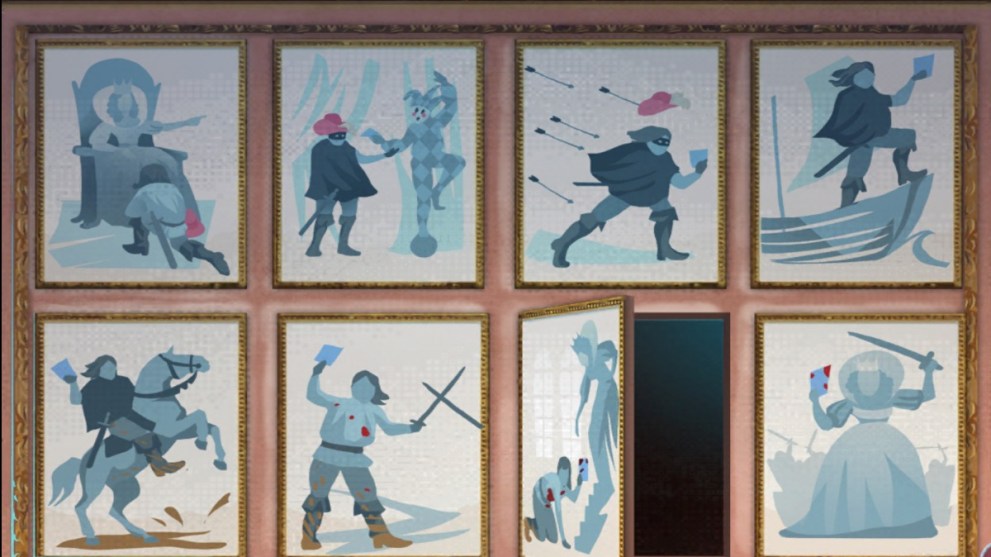
- Switch on the light;
- Pick up the letter;
- Get the cable;
- Move the pillows and pick up the document;
- Take the sheet and mattress;
- Get the rug out of the way and pick up the other document;
- Tie the cord to the light switch;
- Count the colored wooden panels on the window;
- check out the wooden panels on the chest;
- Tap the chest and enter the code: 2223;
- Place the lock on the door to the secret entrance;
- Open the chest;
- Use the letter opener on the book pages;
- Take the third document;
- Look at the sum on the case;
- Tap the radio on the table and move the dial to 120 > 90 > 200 and take the document;
- All of your documents are now lying on the case. Tap the buttons to choose a document and move them around until they line up correctly like the image below. We found it easier to line up the equation at the bottom:
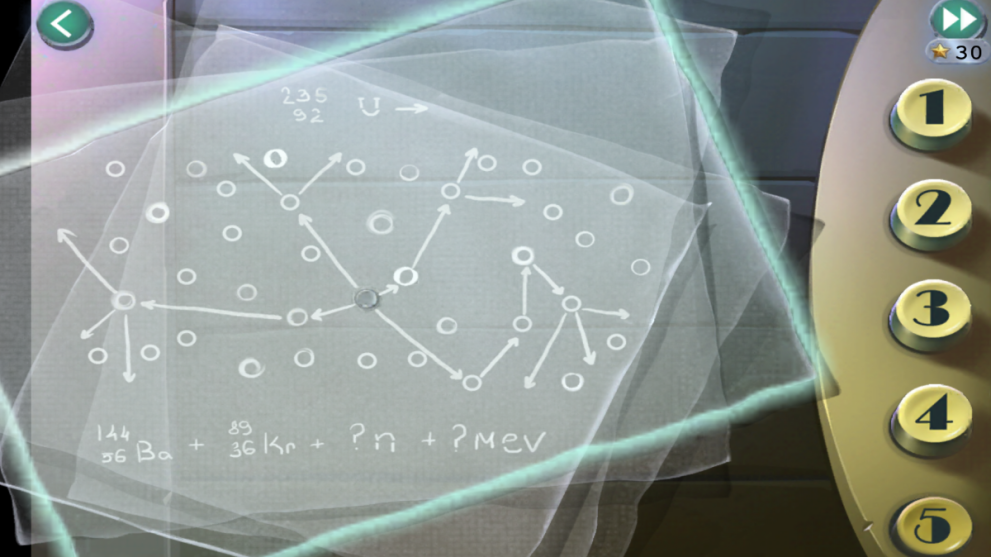
A soldier knocks at the door. At this point you can choose any answer as either way he will try to enter by force. The soldier bangs on the doors and a trophy falls to the ground. Pick it up and use it to remove planks from the window. You can now use the boards to block the door.
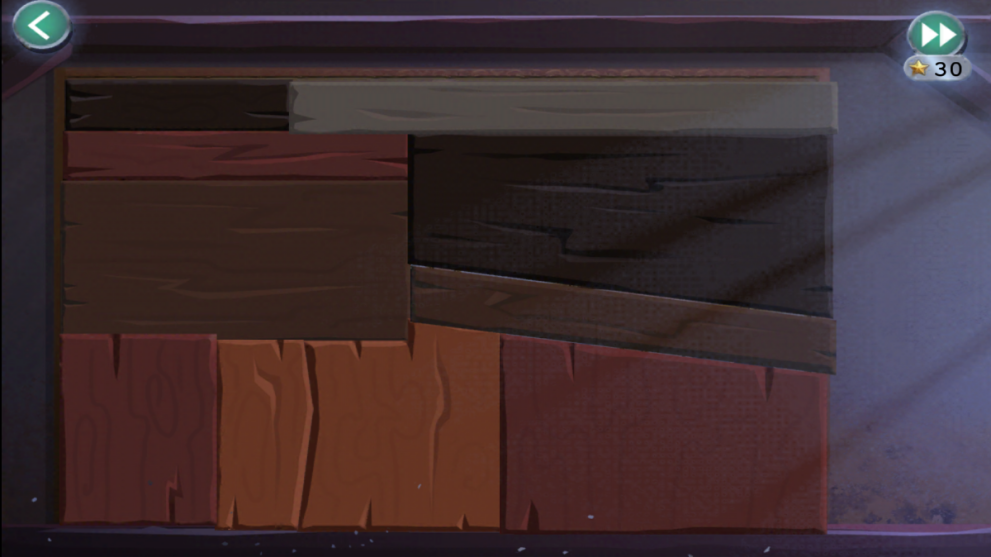
- Tap the cable attached to the light and it will swing and electrocute the soldier;
- He will drop the axe which you should use on the other wall;
- Ed will be waiting for you on the other side.
That brings the walkthrough for Chapter 4 to a close in this Allied Spies mystery!
Chapter 5
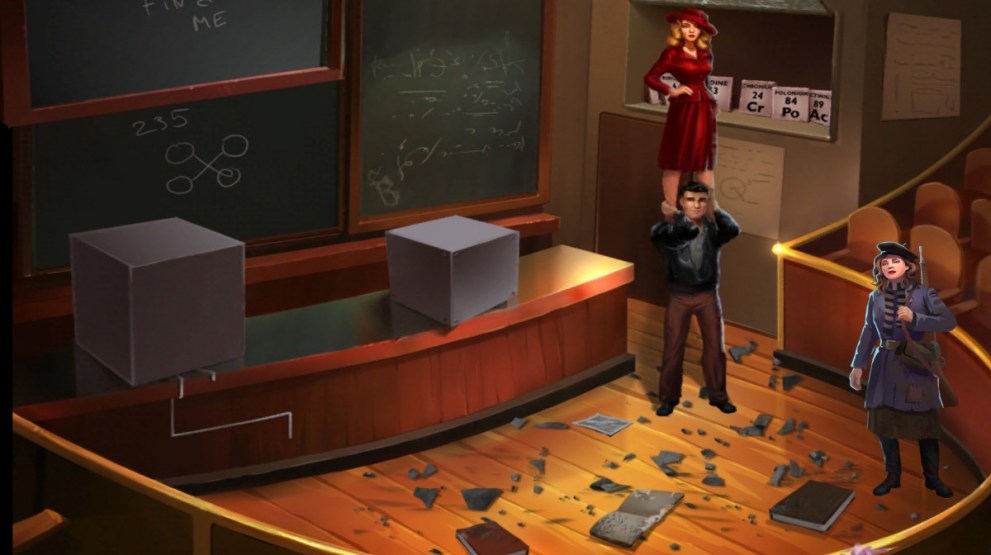
Our walkthrough continues with Chapter 5 of Adventure Escape: Allied Spies. Marie and Ed have found each other at last and are exploring this mystery further.
- Pick up three portraits from the area;
- Read the signs and the books on the floor;
- Tap the fountain in the bottom right corner to enter the room;
- Pick up three more portraits near the desk;
- Read the books and papers on the floor, including a photograph;
- Tap the broken glass above the door to see it has a lock;
- Go back outside by tapping the door;
- Place the portraits in the correct spaces and take the key.
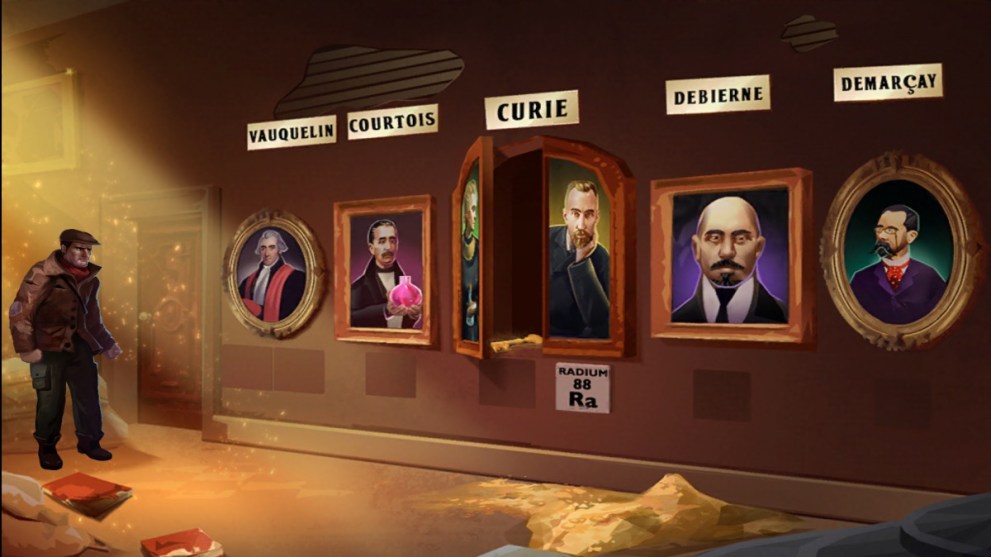
- Use the key on the lock above to door in the other room;
- You will get a bunch of element signs;
- Use the info you read in the books to place the elements under the correct portraits in this order:
- CR > Be > I > Po > Ra > Ac > Eu
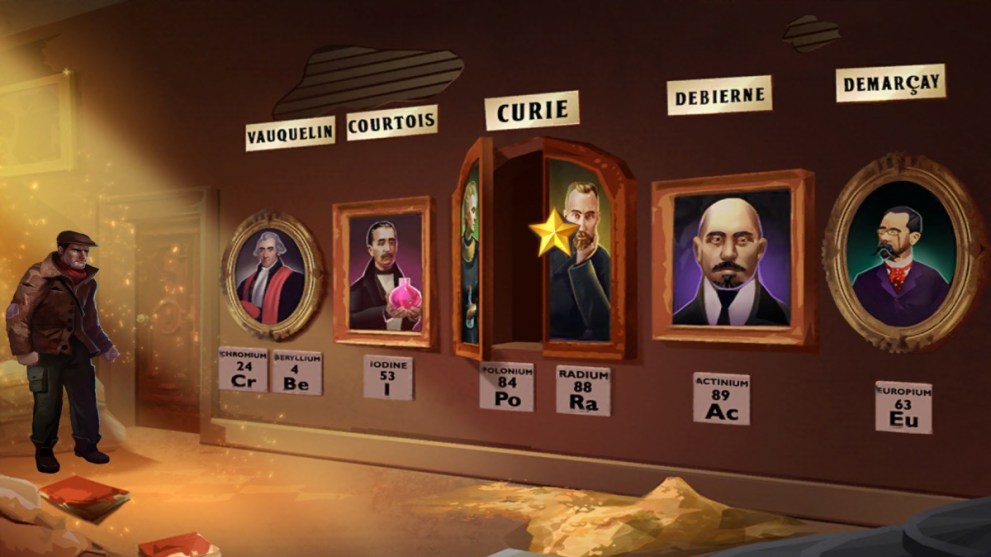
This action unlocks the door and you can go through. The room is burning inside and the first thing you need to do is untie the knotted rope. This requires you to trace your finger along the rope from one spot to the other. If you get it wrong it will make you start again.
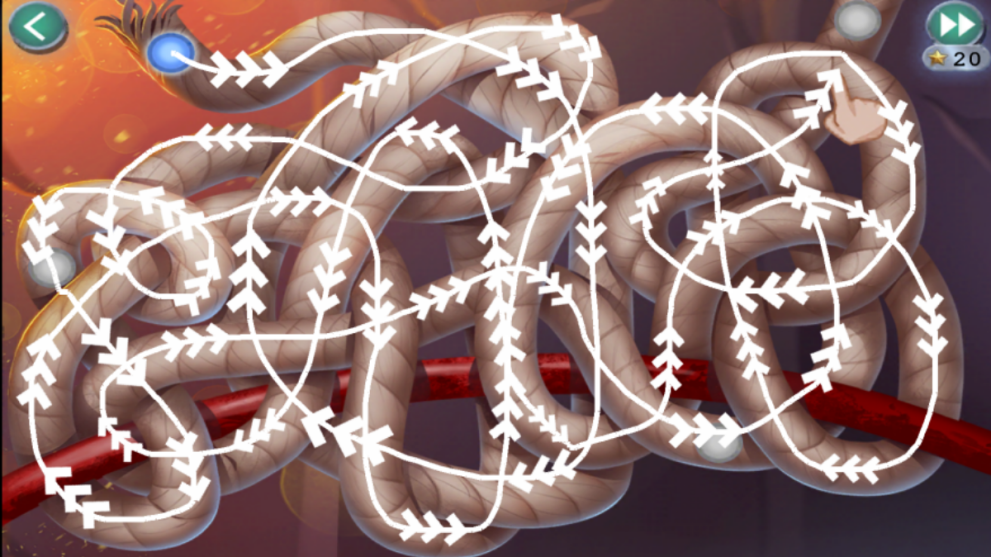
- Pick up the rope and use it to grab the handle from the window;
- Leave the room;
- Fill the bucket with sand;
- Pick up the wrench;
- Go back and throw the sand on the fire;
- Pick up the paper and the scraper;
- Go back to the room with the chalkboard;
- Use the wrench on the boxes;
- Add the handle to the machine on the left (tap the lower part so you don’t open the puzzle);
- Put the bucket underneath;
- Use the scraper on the pnk gum stuck to the panel at the front.
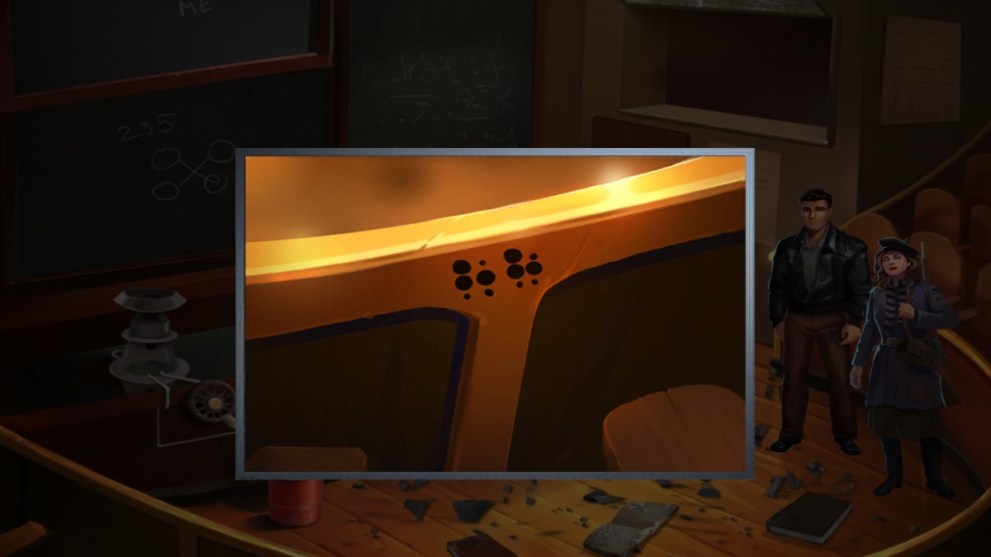
- Check the clue against your paper and see it says 88 which stands for Ra (Radium);
- Use the drawers in the now-extinguished room to spell out RADIUM. Each drawer must be opened to represent a dot as shown below:
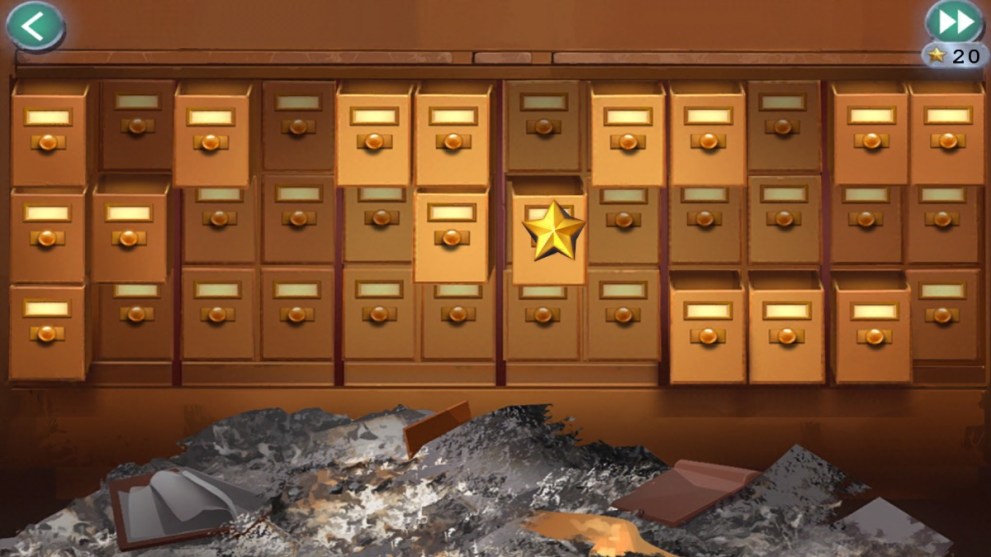
- Take the Uranium;
- Go to the other room;
- Now all numbers in the machine on the left must be balance to make 235 as it shows on the board.
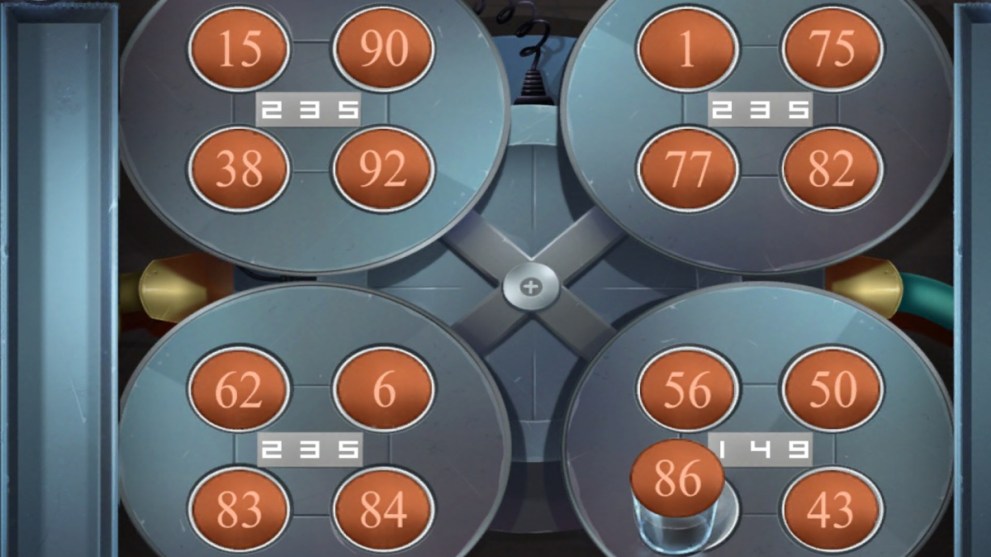
- Keep tapping the wheel to fill the bucket;
- Add the Uranium to the machine on the right and a panel opens to reveal the other scientist.
Chapter 5 is finished and our walkthrough continues into Chapter 6 next!
Chapter 6

Chapter 6 of Allied Spies begins by a well and broken sundial. Marie, Ed, amd the female scientist must find their way through this next part of the mystery.
- Take the stone piece from the wall of the well;
- Look at the building to see the wood decor spells out Roman numerals V II X VI.
- Go up the steps;
- Take the stone pieces from the floor and wall;
- Tap the planter and tap the buttons V, II, X, VI.

- Take the winch;
- Head back to the well and place the winch on it;
- Take the bag, key, and antenna;
- Back upstairs you can use the key on the door;
- Take the Morse key from the door mechanism;
- Go inside;
- Pick up four more stone pieces from the floor and under the table;
- Tap the windsill on the right and grab the headphones;
- See the writing on the wall says 1687 and use that code on the suitcase;
- Tap the barrel until the purple bar fills and get the map;
- Go to the suitcase and add the Morse key, antenna, and headphones;
- Head back to the sundial and add all of the stone pieces;
- Place the stone pieces in the right place to make a sundial;
- Add the bag and see it is pointing southeast, meaning the wind is coming in from the northwest;
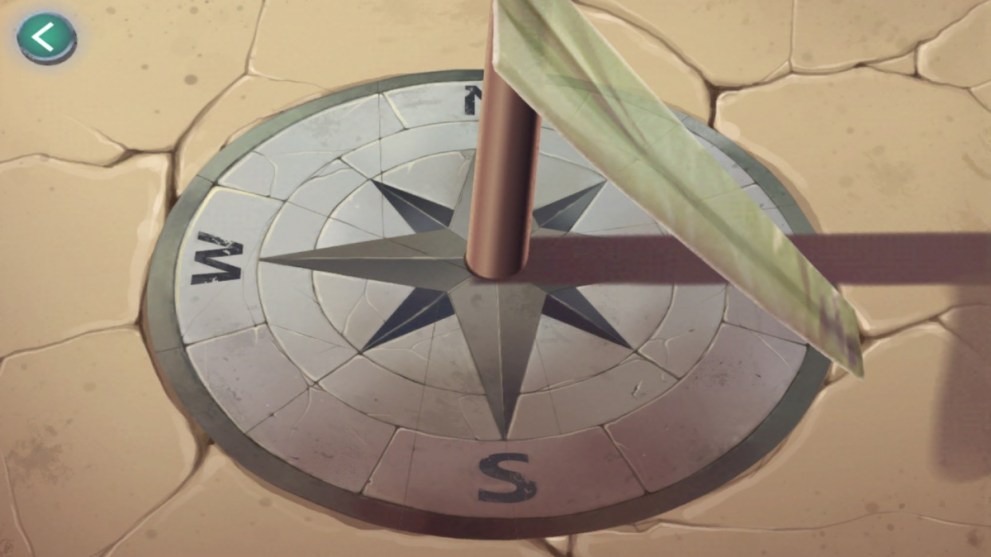
- Open the map over the sundial by tapping the magnifing glass;
- Looking at the map you can work out where the landing zone is. Pascal seems to be looking at it It is by two lakes to the west and a railroad to the north; the sun is setting over the lakes. This means you are located by landing Zone 3 (LZ3);
- Head up to the building and open the suitcase;
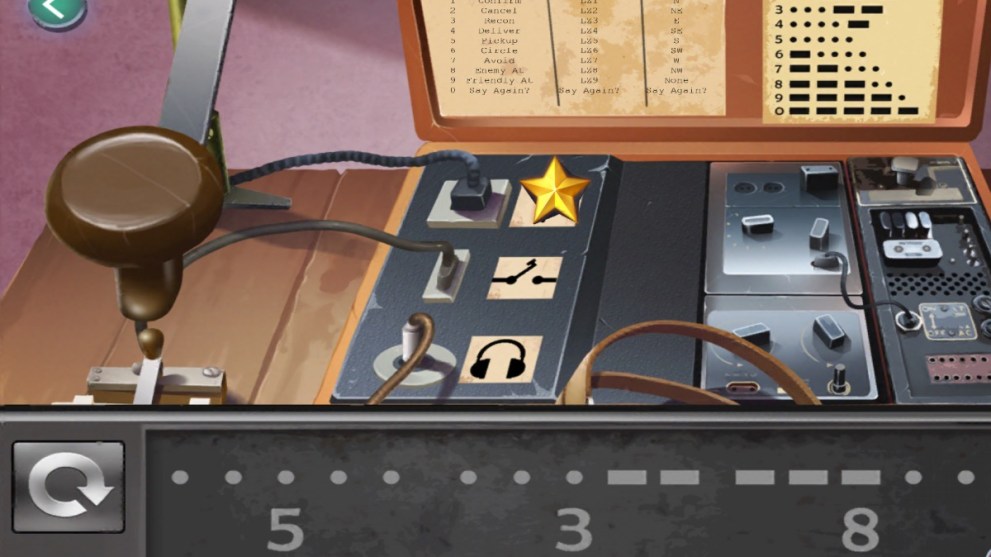
- Send a message using Morse Code:
- Action: Pick Up 5
- Landing Zone: LZ3 3
- Wind: NW 8
- So the code you send should be 538 in Morse code (dot dot dot dot dot / dot dot dot dash dash / dash dash dash dot dot.) Tap to make a dot and hold to make a dash.
Betrayal! Now a shotout begins and you must defeat the Nazis. Shoot at them by tapping when the rings align. Try to defeat them in one round or you will have to start again. There are casualties so use the key on the case and get supplies.
- Take the bandages, disinfectant, morphine, and absorbant;
- Use the morphine, then disinfectant, then absorbant, and finally the bandage on Ed;
- Tap the wine press until the bar fills and it is moved out of the way;
- Solve the puzzle so the red shape is revealed by moving pieces around. It looks like A lower case t stacked on top of an upper case T!
The end of this chapter ends with Marie’s escape and the burning building collapsing around Ed and the scientists.
Chapter 7
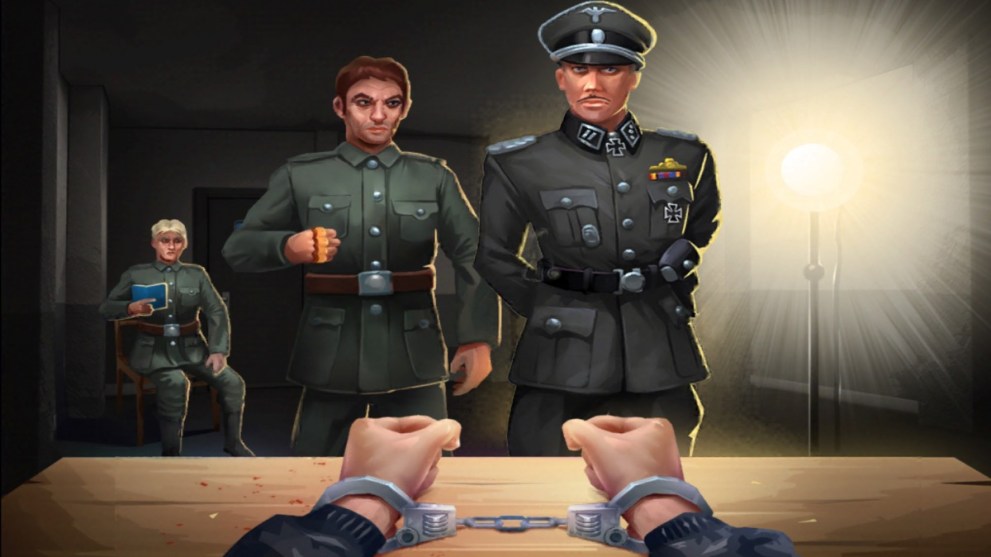
The Chapter 7 walkthrough begins with Ed in handcuffs. He has to convince the Nazi to let him see the ambassador. Use these answers:
- I’m an American citizen.
- Ed Hamilton.
- The Yorktown Protocol.
- I’m on loan to British Intelligence.
- I demand to see my Ambassador.
Now pick up the pen and the confession. When you hold the paper up to the light you will see the numbers 6382. Use that code to unlock your handcuffs.
- Grab the stethoscope;
- Read the book of fighting techniques:
- Punch beats kick;
- Kick beats elbow;
- Elbow beats punch;
- Stab beats anything except dodge;
- Block beats anything except stab;
- Dodge beats anything.
- Leave and use the techniques on the men outside in this order:
- Block, Nothing, Punch;
- Nothing, Dodge, Elbow;
- Stab, Kick, Nothing.
- Go through the door and answer the question:
- I’m not talking till I see my wife;
- Play blockade with the soldier;
- There is more than one solution to this puzzle so you may have to spend some time placing each ship etc until everything surrounds the island. Planes and rockets go on land, boats go on the water. The spy can be placed anywhere on the UK island. Just make sure all circles overlap slightly.
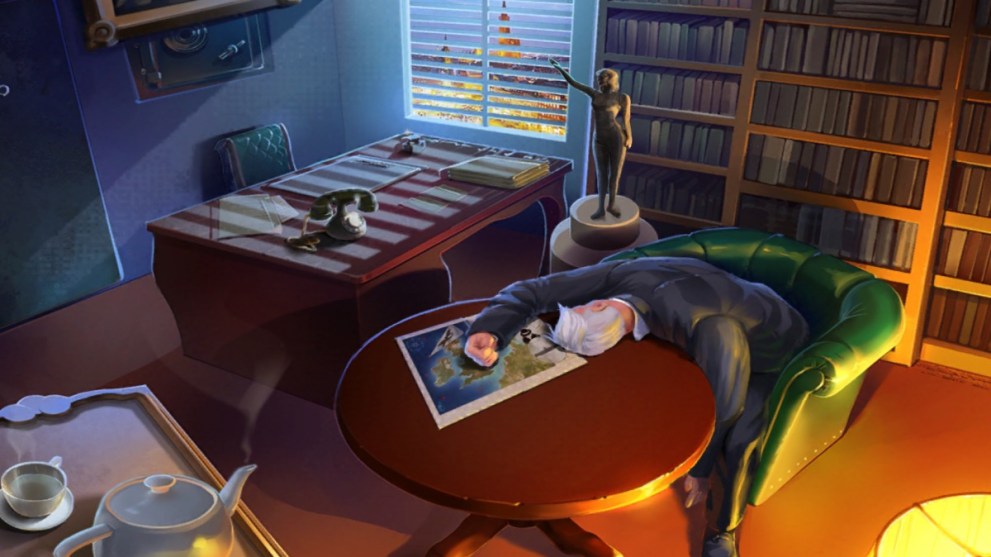
- Answer the questions any way you like and then the Ambassador falls face down on the desk!
- Take the photo;
- Move the statue so it looks like the pose in the photo.
- Use the stethoscope on the safe;
- Move the dial clockwise to 30, counter-clockwise to 15 and then clockwise again to 80.
- Take the map and notes;
- You are found again and end up in a cell;
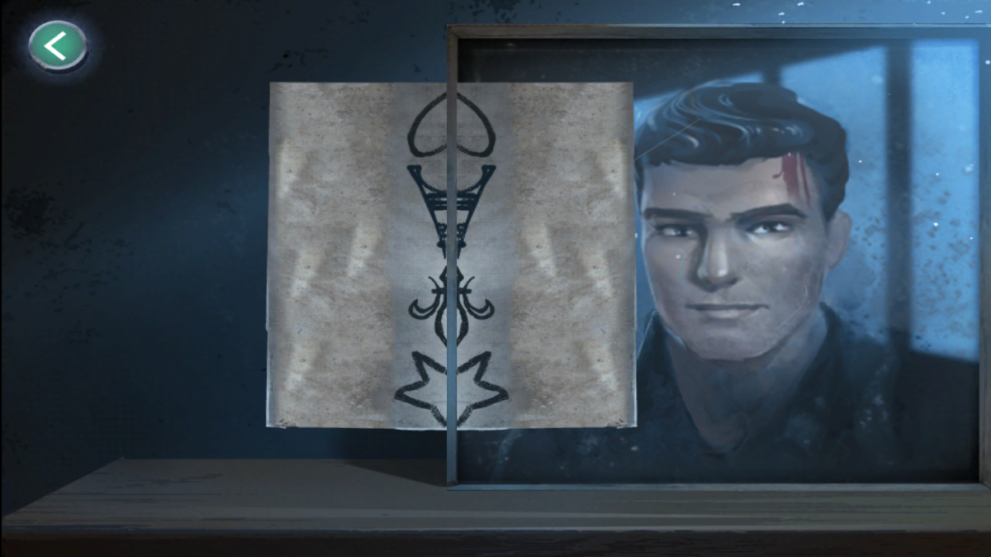
- Tap the mirror and pick up the cup;
- Put the notes on the mirror and rotate it moving it inwards until you see four symbols: a heart, the Eiffel Tower, a Fleur-de-Lis, and a star;
- Find these symbols on the wall and connect them then tap at the bricks until they disappear.
- Go back and use the cup on the red stain on the wall;
- Give Leo the cup of ‘ink’, pen, and paper;
- Take the note;
- Answer the Nazi’s questions. Leo will die either way so answer what you think is best.
And that brings chapter 8 to a close! Read more of the walkthrough below for more hints and clues as chapter 8 starts…
Chapter 8
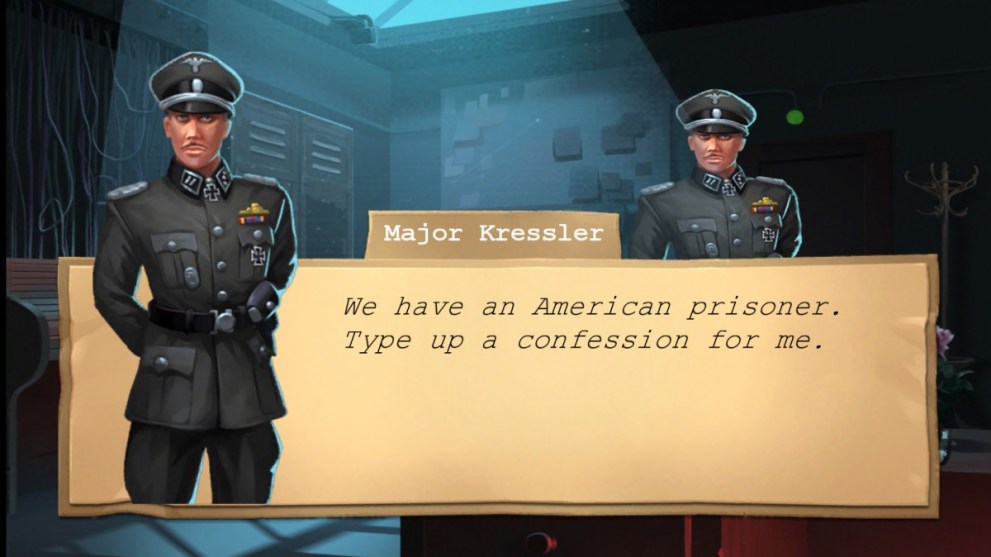
The next chapter starts with another puzzle game where you must try to escape the guards by entering and exiting buildings. Marie also changes in to a disguise as she runs through the church!
- Open the drawer and take the tweezers;
- Look at the note by the flowers and see the clue: (42 50 81) + (12 18 01) which comes to 54 68 82.
- Tap the locker and enter the numbers;
- Take the drugs and ink;
- Use the tweezers to get the instructions;
- Use the invisible ink on the typewriter;
- Go through to see the ambassador;
- Add the drug to his tea;
- Get the key from the Nazi;
- Go back to the other room;
- Use the key on the switchboard desk;
The next puzzle is a long one and you will need to keep up! A lot of the time you will have to reuse plugs and be as quick as possible.
- When the yellow light blinks you should insert a plug;
- Insert another for the person’s requested call;
- Unplug when the call is over and the light is red;
- Use the tweezers to get the key from Kessler’s pocket and use it to get out of the skylight.
Make your way past the guards and searchlights:
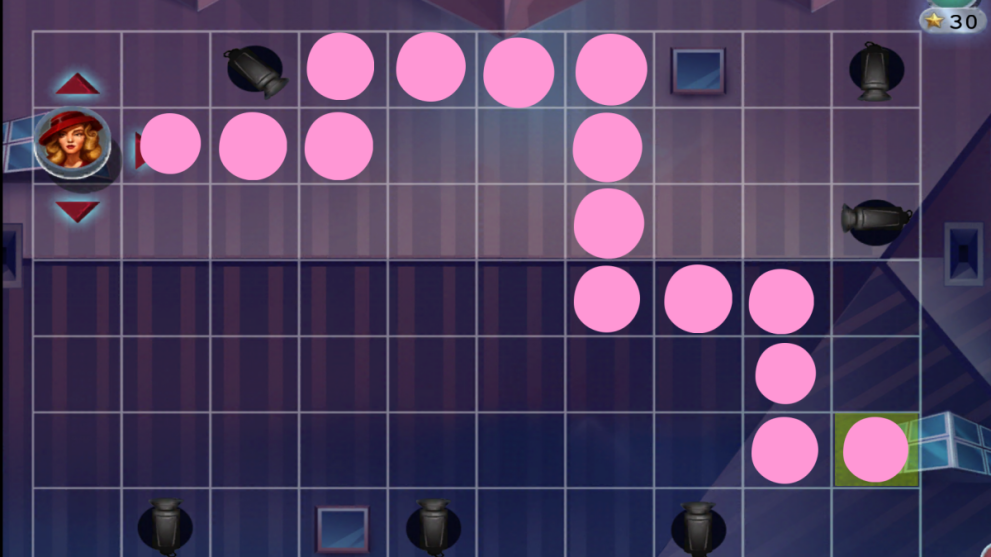
Take the keys from the door and escape to find Ed which brings chapter 8 and this part of the walkthrough to a close.
Chapter 9
The final chapter and last section of our walkthrough begins! Chapter 9 sees our heroes attempt to infiltrate Kessler’s factory. Gather up the documents from the table and let’s start!
- Look at the map;
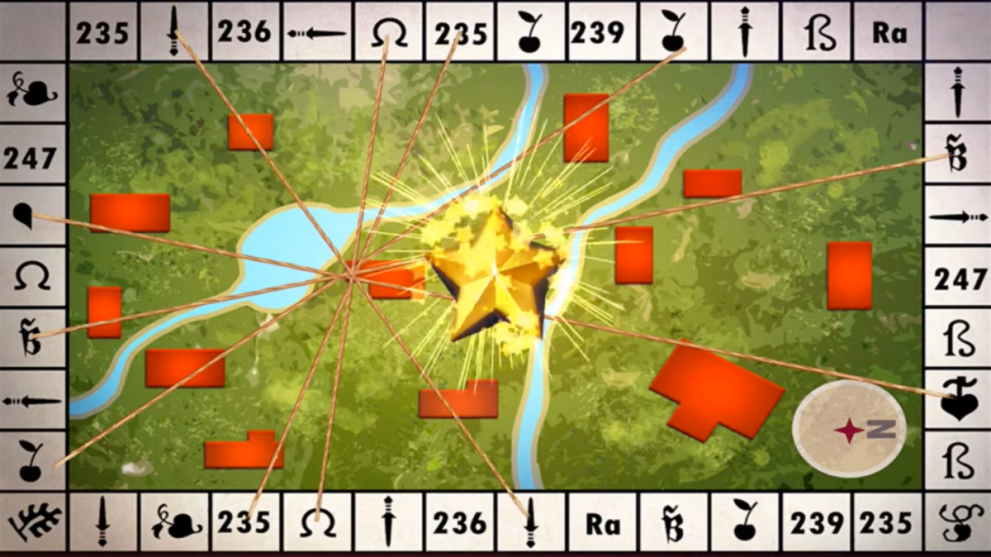
- Use the string by tapping each symbol and draw six lines to show where the factory is. All your clues are in the documents and all strings will need to cross. Use the solution below if you get stuck.
The next game needs you to move each character to the top of the factory. You can only move if you jump over a Nazi. You will have to move each person until they come to a point where they cannot move and then switch to another.
The next puzzle shows red flashing lights. Take note of which numbers the lights are highlighting and how many times they light up:
- 1 = 2
- 6 = 1
- 8 = 3
- 9 = 4
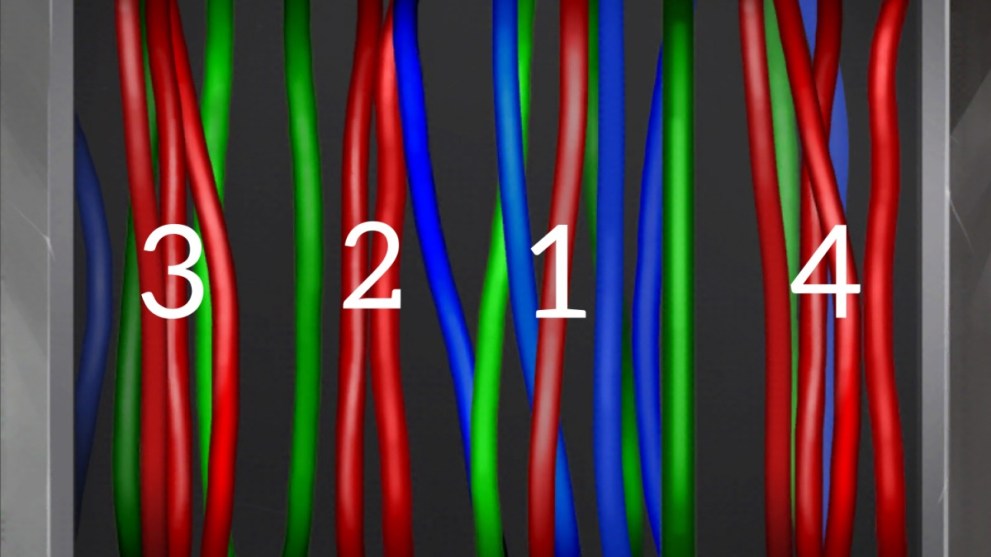
Put them in order to get 6189. That’s your code for the bunker door! The next section has a large red light. Tap it to get the metal strap and use that to take the screws from the panel. Count how many red wires there are in each section: 3214. That is your code for the door.
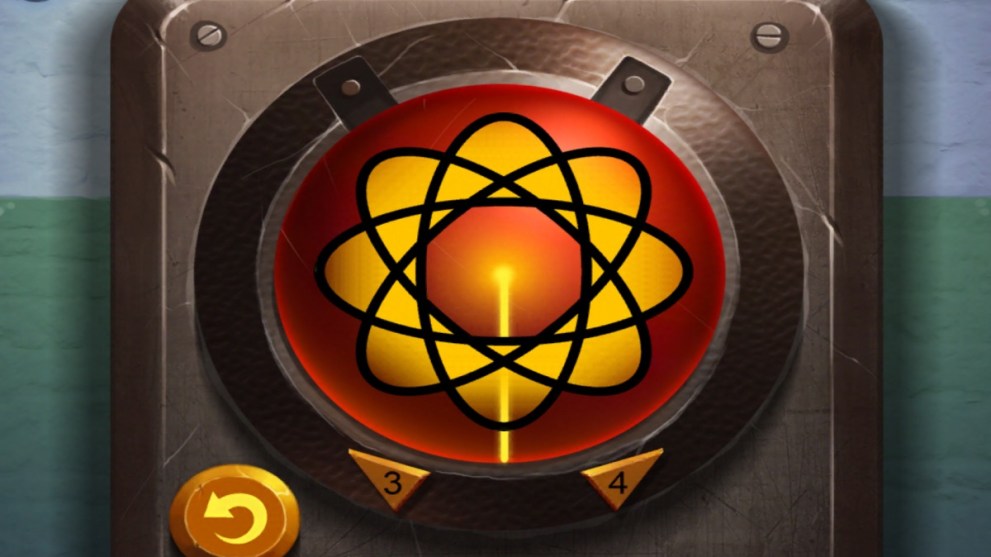
The next puzzle requires you to light the entire shape up and you can do this by tapping the buttons in this order: 3 4 3 3 4 3 4 4. Go through the door!
Major Kressler is in the next room and he shoots the Ambassador! Marie steps over the body and sits to answer some questions:
- It was fun to play Hilda.
- You’re building it in this factory?
- I won’t play this game.
- You’re stalling, Major.
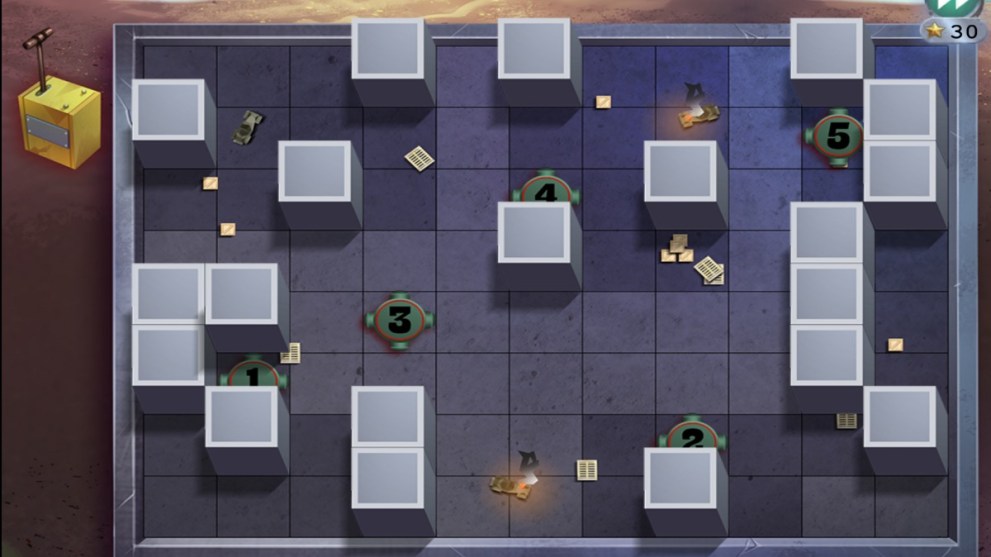
The Ambassador speaks for a bit before dying and you can answer basically anything. Pick up the charges and set them so they each explode and destroy enough pillars. The explosives will be detonated in numerical order so place each one so every pillar will eventually get hit:
With the factory blown to pieces you and the team have been successful! And that concludes Adventure Escapes: Allied Spies.
For more help with walkthroughs such as AE Mysteries: Haunted Hunt check out more in the list below!


Published: Jan 28, 2024 08:37 pm