
There are strange goings-on in Hidden Town including rumors of weird experiments and creature sightings! Unwanted Experiment is the second instalment of the Hidden Town series, each full of escape room puzzles and secrets to uncover. If you are struggling with this Hidden Town game we have answers in our complete Unwanted Experiment walkthrough guide below.
This interactive detective story is a thrilling ride from start to finish and has a variety of puzzles to complete. Although some answers change on different playthroughs, the solution to getting those answers will be the same. Our Unwanted Experiment walkthrough will show you how to get the right answer but not necessarily what that answer will be.
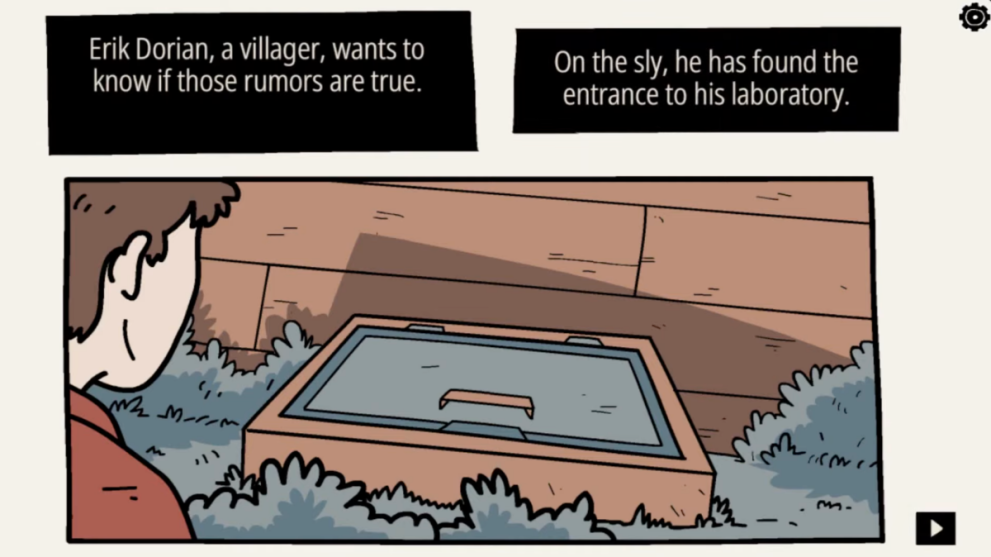
The Unwanted Experiment walkthrough begins as a strange scientist arrives in Hidden Town. The villagers soon start to see weird creatures moving in the dark near his home. They then discover he has a mysterious laboratory in the basement. One Hidden Town resident, Erik Dorian, wants to discover what this scientist is doing. As he sneaks around the entrance he is knocked unconscious.
Unwanted Experiment: Exploring the Basement
Our walkthrough for Unwanted Experiment begins as Erik awakens in the basement of the scientist’s house. The first thing you need to do is explore every room and item inside. Pick up what you can and then start to work out how to solve each puzzle.
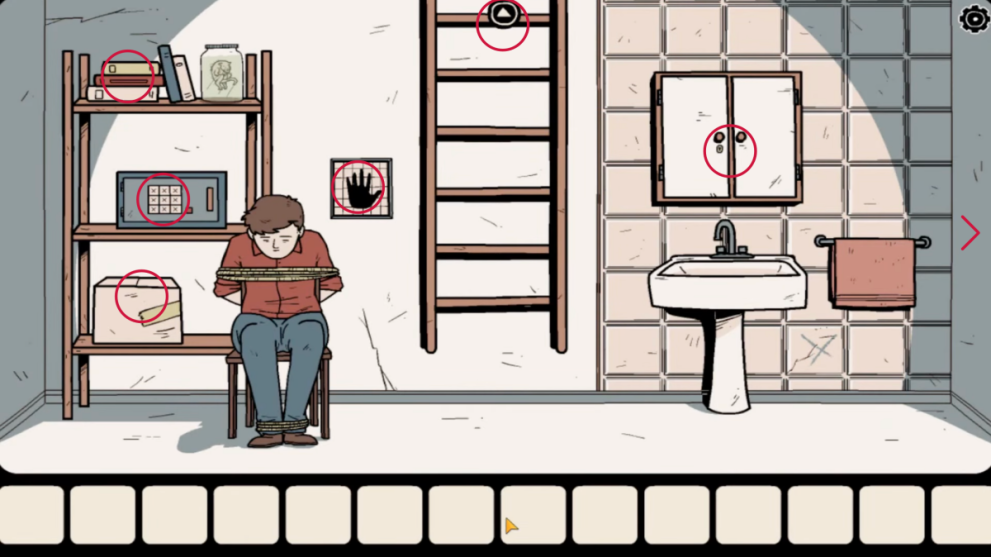
- Tap on Erik to wake him;
- Tap the rope so Erik rubs it on the edge until it frays and breaks;
- Try the biometric keypad to discover Erik’s handprint won’t work;
- Look closer at the top of the bookshelf;
- Open the yellow book and turn the pages to see the picture of a flower;
- Check out the box on the lower shelf;
- Take the CD from inside;
- Tap the arrow on the right to go to the next room;
- Take the dart from the dart board;
- Pick up the paintbrush from the shelf on the right;
- Take note of the red book, the locked box and drawers;
- Tap the arrow on the right to go to the next room;
- There is nothing in this room to pick up so move to the next room;
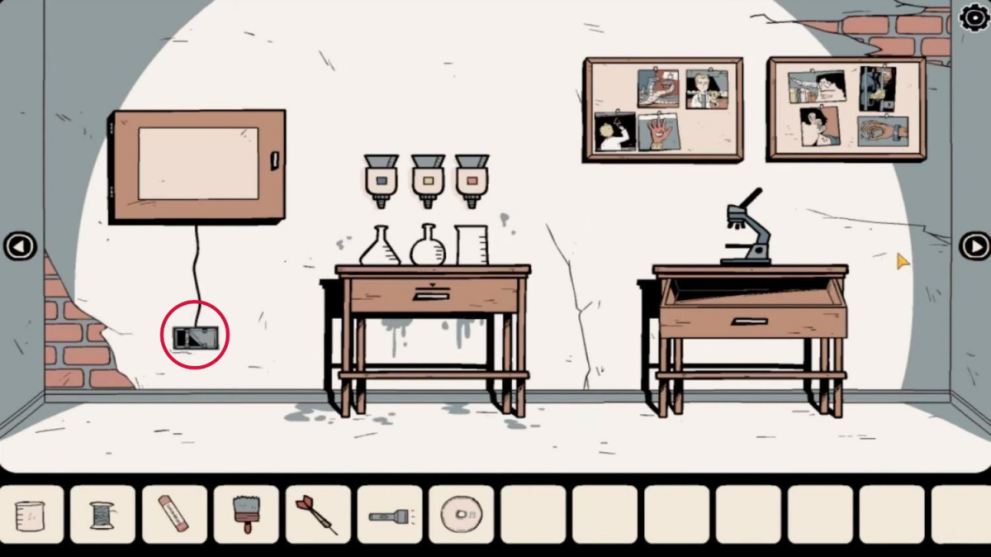
- In this room there are two tables;
- Open the drawer on the right;
- Take the flashlight and the transparent sheet;
- Look closer at the images on the two notice boards;
- Tap the arrow to go back to the first room.
Locked Box Puzzle
- Find the red notebook again;
- Open it and tap the arrow to turn the page;
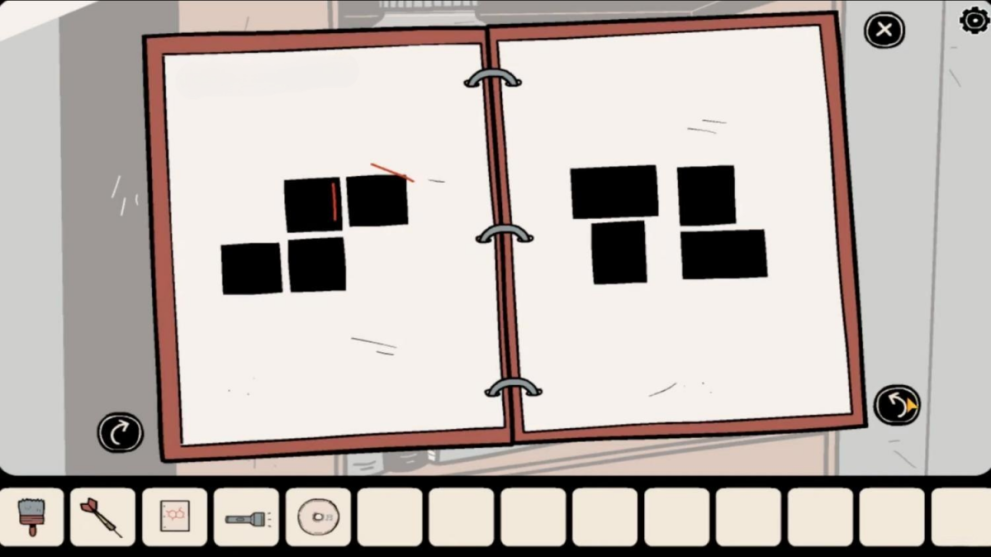
- Notice how the squares are arranged just like the pictures on the two boards;
- Select the transparent sheet in your inventory and choose the ‘grab’ option;
- Tap the page to place the sheet;
- Take note of the red lines on each page when the translucent sheet is on top:
- Right side on top left square – one red line
- Right side on top right square – three red lines
- Left side on top right square – two red lines
- Left side on top left square – four red lines
- The number of red lines corresponds with the chronological order of the squares and the symbols on each image;
- Go back to the room with the two noticeboards. Look at each of the images in this order:
- Right board – top left picture
- Left board – top right picture
- Right board – top right picture
- Left board – top left picture
- Each image has a symbol hidden on it, so note them down. These symbols will unlock the locked box in the room with the jail cell:
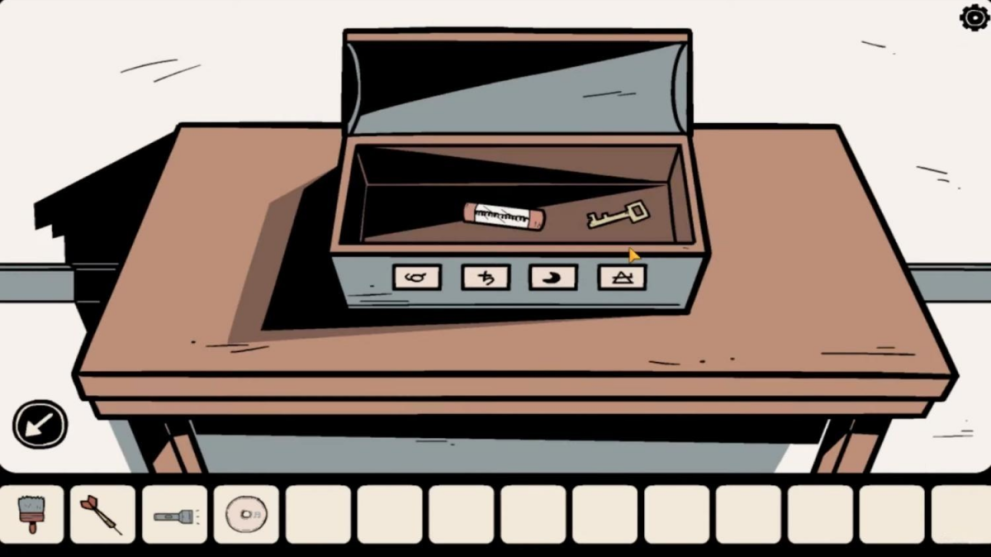
- Go to the room with the jail cell and find the locked box;
- Enter the symbols you found to unlock it;
- Take the fuse and the yellow key.
Fuse Box Puzzle
- Tap on the fuse box and insert the fuse;
- Head back to the room with the red notebook for the next clue;
- Flip through the pages until you find notes on an experiment to turn a man into a monster;
- Tap the image of the man to see the back of the image;
- Here you will find the clue to the order in which to press the buttons:
- This order may change depending on your version. Just note which position the black buttons are in.
- Go back to the room with the fuse box;
- Press the buttons in order according to the last clue and take note of how many times each light blinks:
- Again this may be different in your version so just note down the blinks for each button pressed. For example: 1st button – 3 blinks, 2nd button – 3 blinks, 3rd button – 4 blinks, 4th button – 5 blinks.
- This clue is then used to open the Roman numerals combination lock in the room with the jail cell. So with our example above we would set the combination as follows: III, III, IV, V
- Tap to see inside the cell and tap him to speak.
Antidote Puzzle
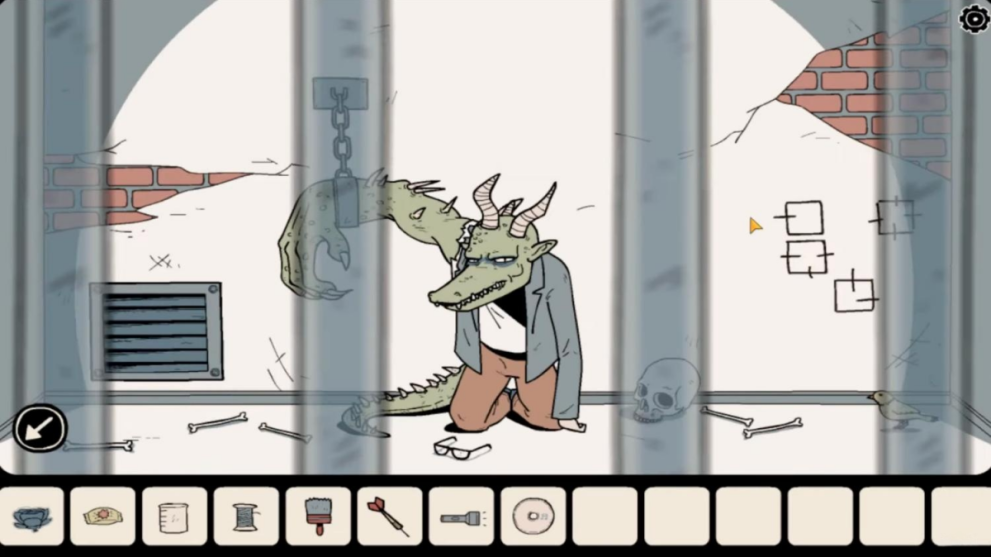
- Now we know the man’s name (Alex) and that his handprint will open the door to the lab. Before he can tell you the password to get the antidote, Alex turns into a creature. Unable to speak, he can only point to symbols:
- He will always point to the same four symbols: Serpent, Square, Triangle, Circle. The order may differ in your playthrough.
- Use the symbols given to you by Alex to unlock the red box in the previous room;
- Take the scissors, bubblegum, and blue key. Now you should have two keys: yellow and blue;
- Go back to the room where you were first held. Use the yellow key on the washroom cabinet;
- Take the spool of thread and the empty beaker;
- Tap on the top shelf of the bookcase and open the yellow book;
- Use the scissors to cut the flower from the page;
- Go back to the room with the jail cell;
- Select the blue key from your inventory and use it to unlock the keyhole to the left of the cell door;
- Pull the lever to turn on the light in the cell;
- Look inside the cell by tapping the bars;
- Now the wall is lit up and you can see four squares to the right:
- The arrangement of the squares may be different in your playthrough but the clue is the same. The line drawn on each square represents the order of the squares. The position and order of the squares correspond with which buttons to press to unlock the safe in the room where we started.
- Go to the room with the washroom where we first began and tap on the safe. Tap each button as suggested by your own clue. For example, our clue (seen in the image above) shows the buttons should be pressed in this order: Top left, lower center, middle left, top right.
- Take the apple, bread, and chemical recipe;
- Go to the room with the jail cell;
- Tap on the cell door and see there is a bird to the right;
- Select the bread from your inventory and feed the bird;
- The bird drops a feather but it is too far to reach;
- Select the bubblegum in your inventory and choose ‘Chew’;
- Select the thread and combine it with the chewed gum;
- Use the combo to fish for the feather by selecting the piece of chewed gum on the string and then tapping the feather;
- Head back to the room with the red notebook;
- Look through the book until you find the recipe and instructions for making the antidote with the apple, feather, and flower;
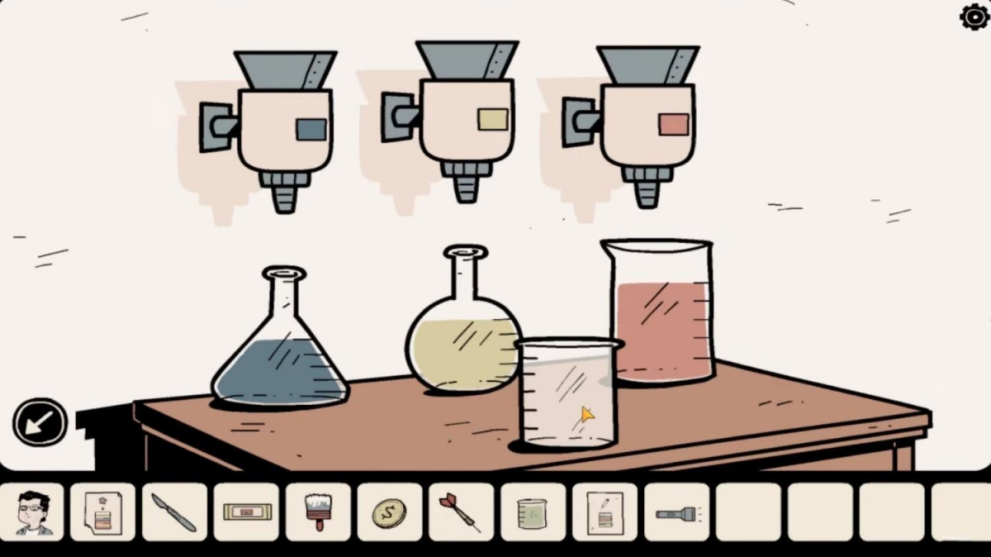
- Go to the laboratory room and tap on the table with the beakers;
- Each blender above the beakers is marked with a colored square:
- Place each item in each blender according to their color: flower = blue, apple = red, feather – yellow.
- Place the empty beaker on the table;
- Select the chemical recipe from your inventory. This note shows the order in which to enter each color.
- Pour the chemicals in order as shown in the note from the bottom to the top;
- Head back to Alex in the jail cell;
- Take your dart and combine it with the antidote;
- Look inside the jail cell and select your antidote dart;
- Throw it at Alex to cure him;
- Now we can switch between Alex and Erik via their images in the inventory.
CD Player Puzzle
- As Alex inside the cell pick up the dart from the floor;
- Tap the arrow on the right to go to the next room;
- Here is a cabinet and a music player;
- Open the cabinet and pick up the toy robot;
- Tap it to turn it over, open it up and remove the small battery from the back;
- Look at the music player and check the back of it;
- Put the small battery inside;
- Open the CD slot at the top and enter the CD from your inventory;
- We will come back to this later but for now, move to the next room to the right;
- There are tally marks on the wall;
- Switch back to Erik and go to the red notebook;
- Flip pages until you find images of tally marks and a flashlight;
- This shows you will find a clue by turning off the lights and using the flashlight;
- Go to the room with the cell again and use the lever again to switch off the lights;
- Switch to Alex once more;
- Select the flashlight from the inventory and then tap the wall with the tally marks:
- You will see a musical note and some tally marks circled in blue. Note down the number of tally marks circled from top to bottom. The answer may differ in your walkthrough but the clue is the same- the tally marks represent track numbers on the CD player.
- Switch back to Erik and use the lever to turn the lights on again;
- Switch back to Alex and go to the music player;
- Tap on the player and listen to the tracks in order according to the tally marks you found. You will hear four different sounds: Laughter, Frog Croak, Bell Ringing, Guitar Sound. These will always be the same but you may find yours are in a different order;
- Switch back to Erik and find the red notebook again;
- Tap the bottom drawer on the bookshelf to the right;
- The buttons are images and can be changed by tapping them. Tap each one until they show the images of the sounds you heard. For example, the sounds we heard would prompt us to select the images in this order: the smile, the frog, the bell and the guitar;
- Tap the drawer to open it and take the paint thinner;
- Switch back to Alex;
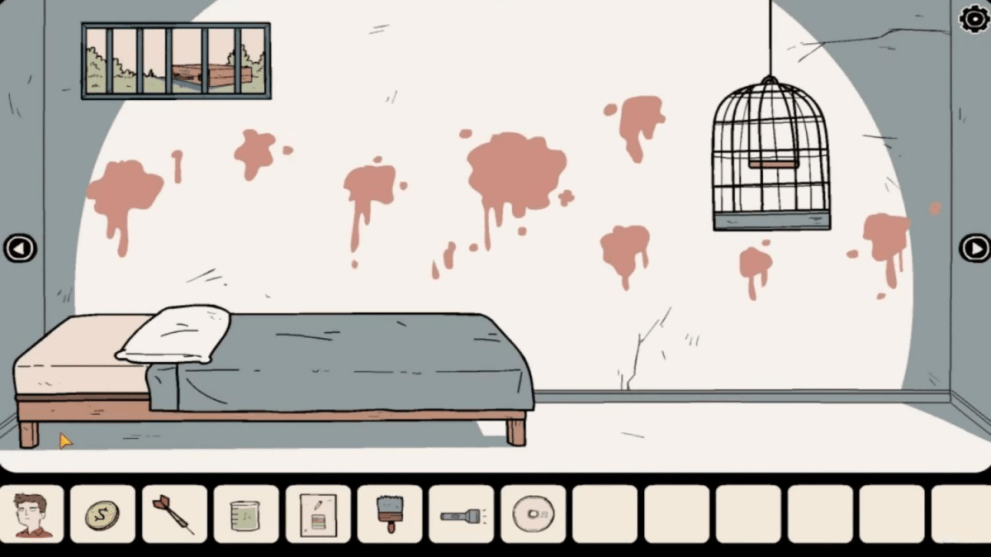
- Go to the room with the bed and the bird cage;
- Tap the bed and move the pillow to get the coin;
- There is a briefcase by the barred window but it is guarded by a creature;
- Use the paint thinner on the paint splatters on the wall to reveal arrows;
- Switch to Erik;
- Go to the room with the dartboard;
- Look at the lock by the shutter;
- Use the directional arrows you exposed under the paint splatters to unlock the shutter. Yours may differ but we had: up, down, down, left, right, down.
- Press OK.
Origami Bird Puzzle
- There is another puzzle under the shutter:
- Rotate each circle until the puzzle is completed and you see a paper bird.
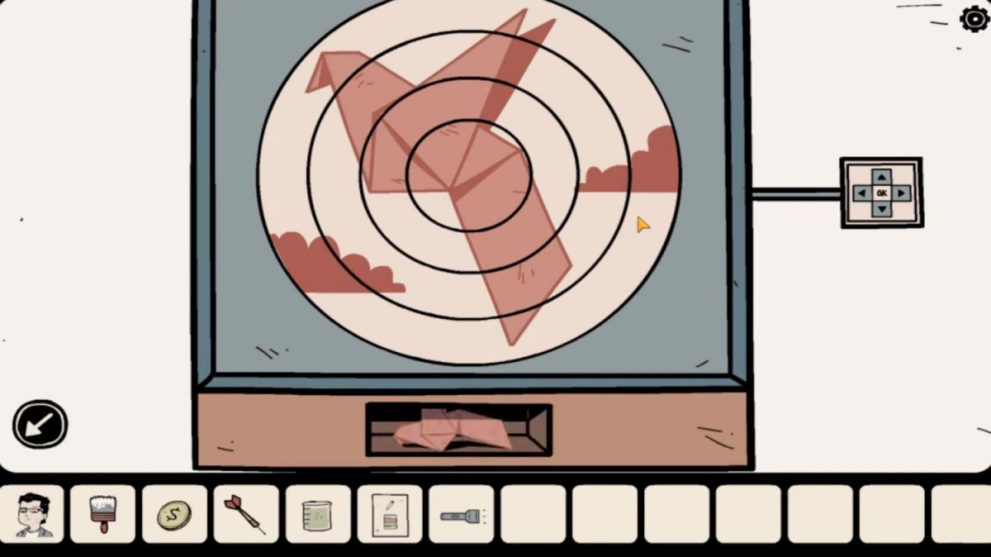
- Take the origami bird;
- Switch to Alex and go to the room with the bed and birdcage;
- Place the bird in the birdcage;
- Pick up the yellow microscopic slide dropped by the origami bird;
- Switch to Erik;
- Go to the room with the lab equipment and use the microscope;
- Select the slide and tap the microscope to examine it;
- Use the vertical slider to the right to adjust the view. You will see a chest and six arrows. The arrows show the combo for the next puzzle so note them down;
- Switch to Alex and go to the room with the music player;
- Look closer at the keypad to the left and use the directional arrows you found earlier to unlock it.
Origami Fish Puzzle
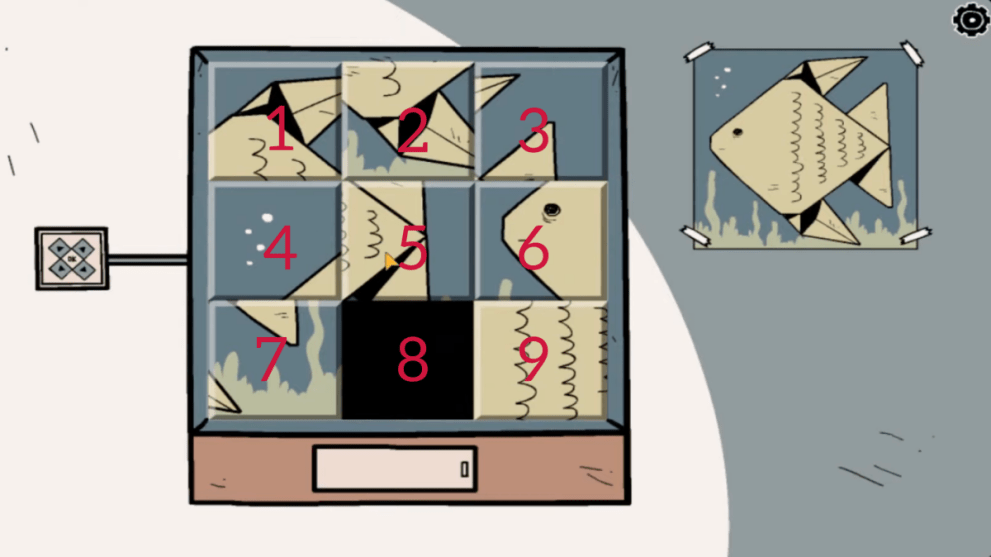
- Solve the fish puzzle by moving each piece in turn as numbered above: 5, 2, 1, 4, 5, 6, 9, 8, 7, 4, 5, 6, 9, 8, 7.
- Take the origami fish;
- Go to the room with the tally marks;
- Place the fish in the bowl;
- Take the pipe valve from the fish bowl;
- Switch to Erik and go to the room with the washroom;
- There is a cracked tile under the sink. Tap on it;
- Select your pipe valve and place it on the water pipe;
- Tap it to release water;
- The water washes away the garbage and reveals a numerical code;
- Switch to Alex and go to the room with the CD player;
- Look at the water grate to the left on the floor and take note of the code (yours may differ in your playthrough);
- Go to the room with the origami bird and tap on the briefcase behind the barred window;
- Enter the code you found (ours was 8249);
- Take the pink key and the scalpel.
Slime Solution Puzzle
- Switch to Erik and go to the room with the red notebook;
- Select your pink key and use it to unlock the drawer in the bookcase;
- Take the empty beaker and the chemical formula;
- Go to the lab room to prepare the solution;
- Place the empty beaker and, just like when you prepared the antidote, make up the chemical solution from bottom to top as shown in the note;
- Take your new solution and go to the room with the slime on the closet;
- Use the solution on the slime and then open the closet doors;
- Take the magnetic card and the empty jar;
- Go back to the lab room and use the magnetic card on the slot in the desk;
- Open the drawer and take the tweezers;
- Go to the room with the washroom;
- Tap the top of the ladder to go up;
- You are now looking at the ceiling and should see a fly;
- Use the jar to catch the fly;
- Switch to Alex and go to the room with the CD player;
- Go to the cupboard with the robot and pot of sugar cubes;
- Use the tweezers to take a sugar cube.
Tiny Chest Puzzle
- Head to the room to the left where Alex was first chained up;
- Look at the vent;
- Use the coin to unscrew the hatch;
- Place the jar and fly on the floor and tap to remove the lid;
- Place the sugar cube on the web and the fly will go toward it;
- The spider will catch the fly and you can take the red microscope slide;
- Switch to Erik and go to the lab room;
- Put the slide in the microscope and use the vertical slider to sharpen the view;
- Select your scalpel and tap on the bug to cut it open;
- Use the tweezers to take the tiny key inside the bug;
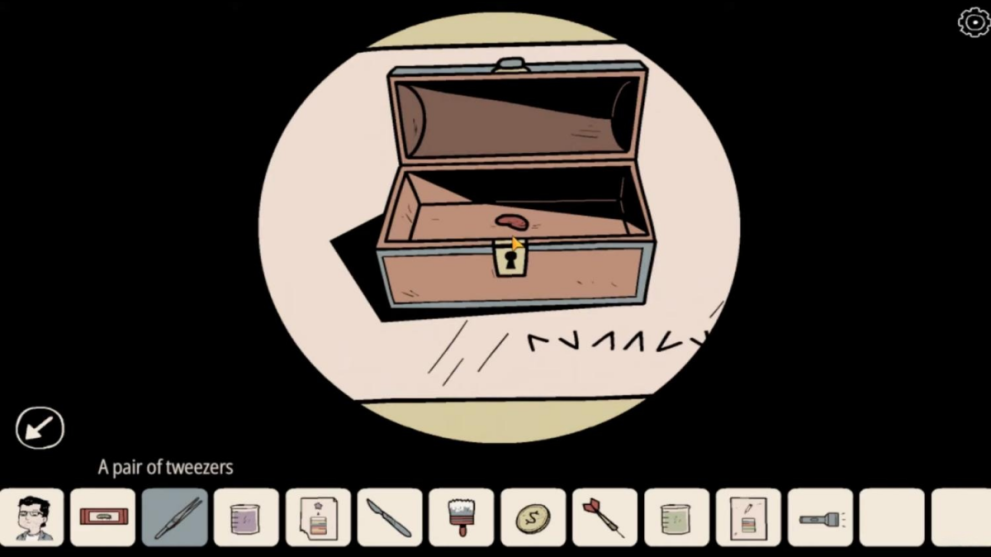
- Place the yellow slide under the microscope and use the tiny key on the tiny chest;
- Use the tweezers to take the tiny seed;
- Go to the washroom;
- Tap the sink to look at it;
- In the plughole is a red key;
- Select the tiny seed in your inventory and place it in the plughole;
- Turn on the water and watch the seed grow;
- Take the red key.
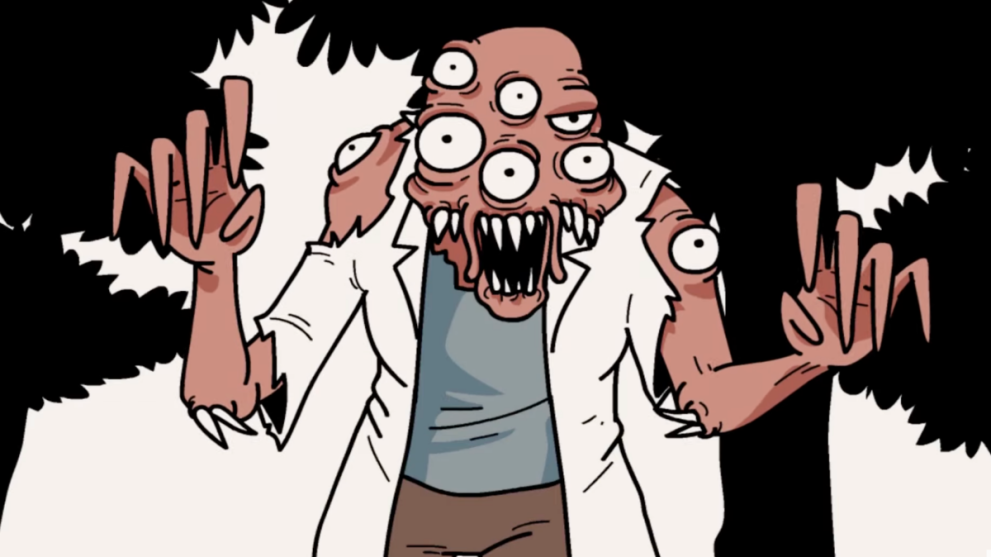
Good or Bad Ending?
- Use the red key to unlock the cell door;
- Alex is now free so switch to him to use his hand on the biometric scanner;
- You can now escape!
- There are now two possible endings: good or bad.
- Bad ending – This occurs if you did not pick up the dart earlier, or are not quick enough to react in this moment.
- Good ending – This is only possible if you picked up the dart earlier and prepared the antidote-dart combo before escaping. Before you head up the ladder, select the dart you picked up earlier and combine it with the antidote. Use it on the scientist and the game is over!


Updated: May 16, 2024 04:07 am