With the latest update for Animal Crossing New Horizons, players can now collect candy, grow pumpkins, and craft all sorts of new Halloween-themed furniture in preparation for Oct. 31. However, if you want to change the color of the new furniture and customize them to your liking, you’ll need to put in a bit more work for that. Here’s how to customize the Spooky furniture sets in Animal Crossing New Horizons.
Customizing the Spooky Furniture in Animal Crossing New Horizons
Every day in the month of October, you’ll be able to purchase one random piece of Spooky furniture from Nook’s Cranny. You’ll also be able to collect DIY Recipes for them by talking to villagers crafting at home, from bottled messages, or balloon gifts.
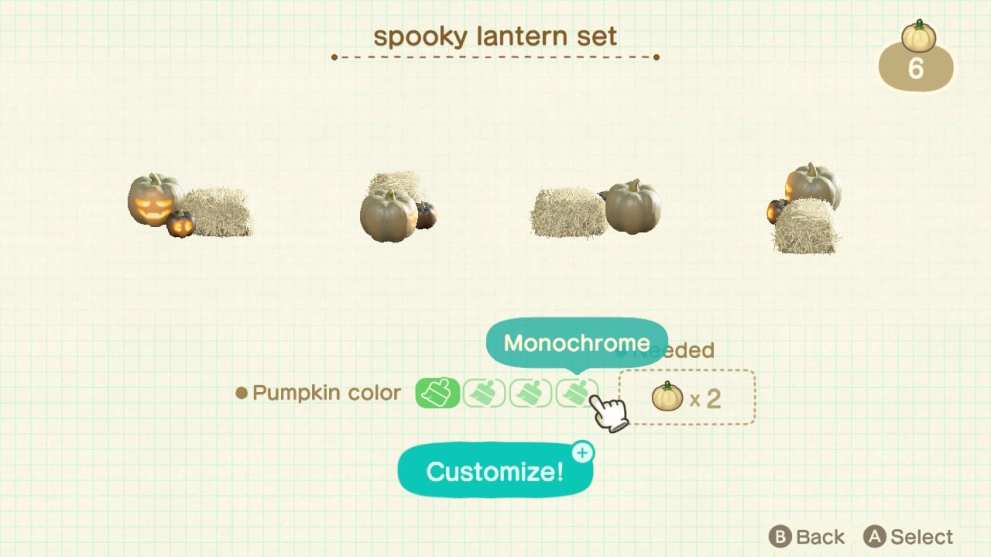
Unlike regular furniture items, though, you can’t customize these with the Customization Kits you get from Nook’s Cranny. Instead, you’ll need to use colored pumpkins.
For instance, if you want to customize the Spooky Lantern Set and change the pumpkin colors to green, you’ll need to use green pumpkins to do that. This is where things get slightly trickier, as there’s some RNG involved in getting colored pumpkins.
You’ll be able to get pumpkin starters from Nook’s Cranny or Leif when he’s on your island, then plant them. They’ll sprout after three days, and the pumpkin colors you get will be completely random. You have a chance of getting any of these four colors: orange, yellow, white, and green. Your best bet is to water them daily to increase your harvest at the end of the three days, and hope that you get the colors you want.
After harvesting your pumpkins, just water them again and wait for them to sprout.

With your colored pumpkins, head over to any DIY workbench, choose the customization option, then use your pumpkins to customize your Spooky furniture sets.
That’s all you need to know about how to customize Spooky furniture in Animal Crossing New Horizons. Be sure to check our guide wiki for more tips and information on the game.
