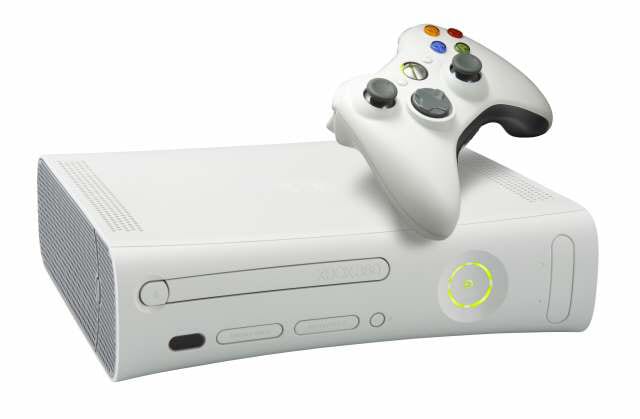
As our Xbox 360s continue to age the parts in them feel the wear of time and sometimes start to malfunction. While sliding disc trays didn’t make the leap to the next generation of consoles, and weren’t even to be found on the Wii or PlayStation 3, the Xbox 360 steadfastly held onto the aging technology.
Now gamers are finding out why the technology evolved as their console’s disc trays become sticky and start to jam. Rest assured there are likely ways you can reach your stuck copy of Halo 3 and there’s a chance you can fix the issue entirely.
Original Xbox 360

The OG that kicked off the seventh generation of video game consoles hasn’t yet kicked the bucket, so if you’re still rocking one of these bad boys and the disc tray is giving you trouble, give one of these options a try.
Forcing the tray open
Sometimes the tray just needs a little motivation to open, which you can give it with a simple credit card. No, you don’t need to spend money for this solution, but if you hear your console click when it fails to eject the disc tray, this trick may work for you.
Inserting a credit card horizontally into the top of the closed disc tray, press the eject button and when the clicking noise occurs bend the credit card back toward the console, applying leverage to force the tray open.
If you’re struggling with the credit card method, you can also use your thumbs to snap the faceplate off the front of the console, then use your fingers to tug at the protruding portion of the disc tray as the console clicks after a press of the eject button.
If this isn’t working for you, give the next section a try.
Manually eject the tray
Start off by shutting down the console and removing all the cables plugged into it. Then, securely holding the console, use your thumbs to pull the faceplate off the front of it.
With the faceplate off, insert a paper clip into the hole underneath the disc drive’s right side (if there is no hole there, skip to the next paragraph) and push until some resistance is felt. This should cause the tray to pop out a bit, and you can open it the rest of the way with your hands. If this worked for you, skip the next paragraph, otherwise there’s one more thing you can try.
There are two more holes underneath the left side of of the disc tray. Insert a paper clip into the leftmost hole and push until you feel it hit something. If you pushed the internal gear correctly the disc tray should open slightly, and you can pull it out fully with your hands.
With the tray now open, make sure the disc inside isn’t sticky and causing the problem. Then plug the console back in and see if the tray is back in working condition. If not, reopen the disc tray the same way and move on to the next section.
Cleaning the internal mechanisms
Don’t worry, you won’t have to open up your console any more than you already have to try this potential solution. A video of this method is available here.
One of the main mechanisms for opening your 360’s disc tray is a simple rubber band. Holding firmly onto the open disc tray,use a small pair of tweezers or something similar to reach into the tray and grab the rubber band stretched around two rotating cylinders, making note of exactly where the band is. Be very careful to ensure the disc tray does not close, as it would be difficult to reopen without the rubber band in place.
Using rubbing alcohol and a cotton swab, gently rub the alcohol over the surface of the band, getting the grime and dirt off. Using the same products, gently rub the cylinders the rubber band was on, slowly opening and closing (not all the way!) the disc tray while doing so to rotate the cylinders. Then use another cotton swab to ensure the cylinders and rubber band are dry.
While holding the tray open, carefully rewrap the rubber band back around the cylinders they were on.
With any luck the newly cleaned opening mechanism will solve your disc tray issue.
One last chance
Of course, if none of these work you can always get your console serviced by Microsoft. Alternatively, upgrading to a newer version of the console like the Xbox 360 E is probably worth it at this point in time.
Xbox 360 S

Turning off the system and disconnecting all cables from it, move the console to a horizontal position. Looking carefully into the vents on the system’s left side, you’ll find the eject button about 2.25 inches from the front of the system. Insert a large paper clip into the eject button hole and push it in about an inch and a half. This should cause the tray to open a bit, and your can open the tray fully with your hands.
Ensure the disc in the system isn’t sticky or gooey, causing the tray to jam. Unfortunately if this doesn’t fully resolve the issue there’s not much you can do yourself without taking the console apart, but you can at least save any disc that was trapped in the console.
Microsoft can service the console however, or a used Xbox 360 S can be found for less than $100.
Xbox 360 E

Turn off the console and disconnect any cables running to it. Move the console to a horizontal position and search the vents on the left side of the console for a yellow sticker. Straighten out a long paper clip and insert it into the hole, about an inch and a half.
This should cause the tray to open a small amount. Using your hands, grab the front of the tray and open it fully. Ensure the disc in the system isn’t causing any issues by being sticky or gooey. Unfortunately if this doesn’t fix the tray there’s not much you can do without taking the console apart. You can at least recover the disc that was in the console before sending it to Microsoft for servicing or purchasing another one.


Updated: May 8, 2018 04:23 pm