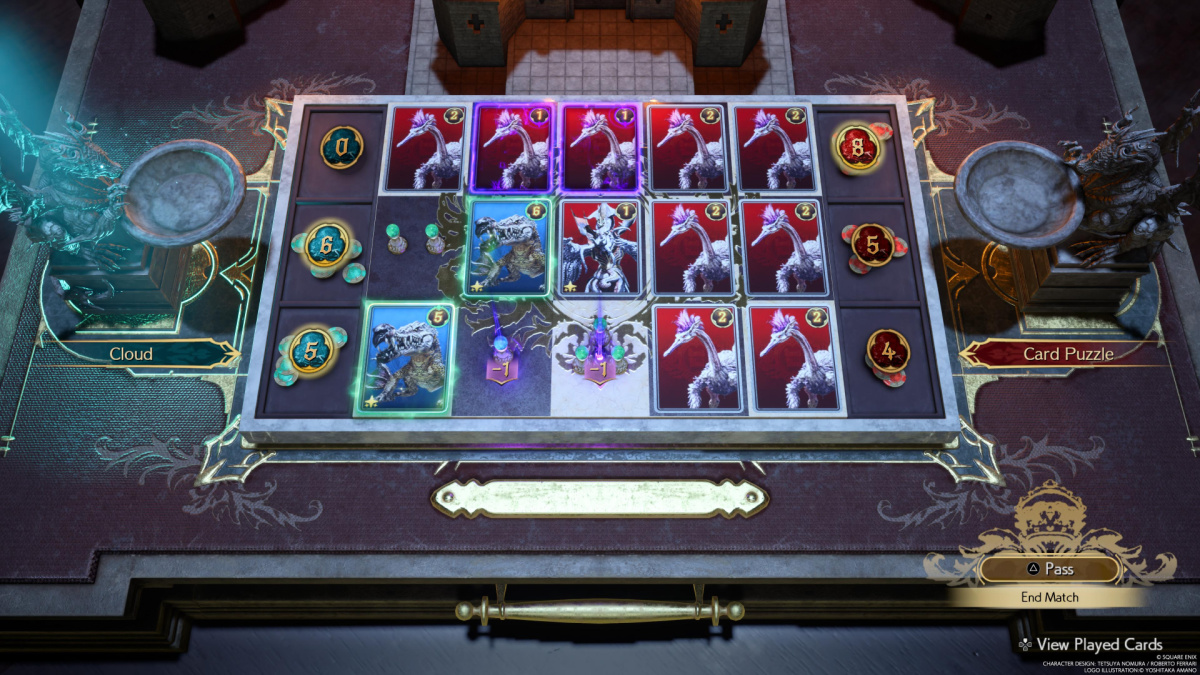
Final Fantasy 7 Rebirth has no shortage of minigames to get lost in, but some are harder than others to complete. The Card Carnival puzzles in Costa Del Sol in particular are some of the trickiest, but we’re here to help with a detailed guide on how to solve them.
All FF7 Rebirth Costa Del Sol Card Carnival Puzzle Solutions
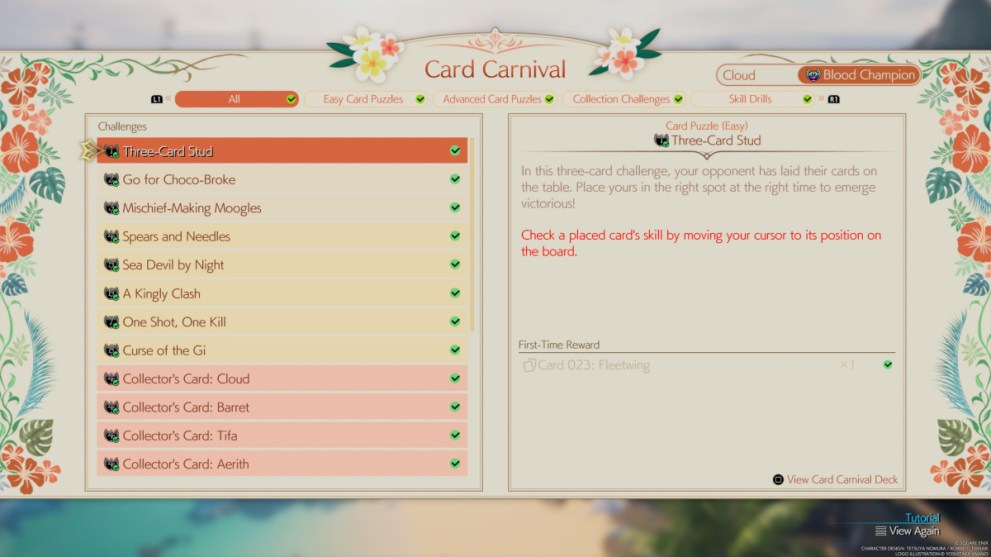
There are a total of 22 Card Carnival puzzles for you to take on in Final Fantasy VII Rebirth. Some are made available by advancing the main story, while others are unlocked as you complete the easier puzzles.
We’ve listed them all down below along with their solutions and the reward you get for completing them. Bear in mind that you can take them on regardless of your deck layout thanks to the fact that they provide all of the cards needed to win, so it’s well worth taking them on as soon as you can.
| Card Carnival Challenge Name | How to Beat Card Carnival Challenge | Challenge Completion Reward |
|---|---|---|
| Three Card Stud | Place the Fleetwing in the bottom right space to fill the upper left corner space with two tokens. Then, place the Zu in the upper left corner to give the center space two tokens. Finally, place the Quetzalcoatl in the center space to win 5-4. | Card 023: Fleetwing |
| Go For Choco-Broke | Place the Fat Chocobo on the bottom left space with three tokens. Then, set the Posh Chocobo in the bottom right corner space to give it a +2 Buff and create a new space to it’s left. Fill that new space with the Chocobo and Moogle to win 17-16. | Card 109: Posh Chocobo |
| Mischief-Making Moogles | Set the Moogle Trio card in the center left space to get the Moogle Mage and Moogle Bard cards and create two new righthand corner spaces. Then, put the Moogle Mage in the bottom right corner space to destroy the Cactaur. Next, place the Fleetwing in the center right slot to create two lefthand corner slots and put the Moogle bard in the upper left corner slot to buff the Fleetwing and Moogle Mage. Finally, place the Grasslands Wolf in the bottom left corner slot to win 11-6. | Card 110: Moogle Trio |
| Spears and Needles | Place the Cactaur in the upper right corner space to create a space below it and buff a lower right corner space. Put one Spearhawk in the space below the Cactaur to create a space to the right, and then put the second Spearhawk in that newly made space and buff the same soace the Cactaur powered up earlier. Finally, place the Quetzlcoatl in the buffed bottom right corner space to win 8-6. | Card 031: Spearhawk |
| Sea Devil by Night | Set the Security Officer in the debuffed bottom center right to create two Three token spaces and a single space token to the right. Then, set the Sea Devil cards in the Three token spaces. After that, keep placing the Mandragora and the Mandragora Minion cards in the debuffed bottom center right space to trigger the Sea Devils’ buffs repeatedly. When you’re out of cards, you can end the match and win 11-8. | Card 032: Sea Devil |
| A Kingly Clash | Set a Zu in the bottom center space to create a one token space on the center right. Then, place the other Zu in the upper center slot to make the center right space worth two tokens. Next, place the Tonberry King in the center right space. After that, place the Mindflayer in the center left space worth two tokens to create several debuff spaces around it. Set the Deathwheels in the upper left corner space and bottom left corner spaces to rebuff and destroy the pre-placed Flametrooper cards as well as the Death Wheels themselves. Doing so triggers the Tonberry King to be buffed up to 15, winning you the match 16-14. | Card 035: Tonberry King |
| Power Down Practice | Set the Archdragon in the bottom right space to destroy the Crystaline Crab and create a new one token space to the right. Then, place the second Archdragon in the newly made space to destroy the second Crystaling Crab and make the center space worth two tokens. Finally, place the Quetzalcoatl in the center slot to win the match 9-4. | N/A |
| Chain Reactions | Place Amphidex in bottom right corner, Cactuar in upper left corner, and Gagighandi in upper right corner in that order to win 27 to 0. | N/A |
| Major Power Outage | First, place the Reapertail in the bottom right corner to add one token to the center right space. Then, place the Desert Sahagin in the upper right corner to make the center right space worth two tokens. After that, place the Rictus in the upper left corner and then put the Jabberwock in the center right space to complete the challenge by winning 20-13. | N/A |
| Back to Replace-ics | Start by replacing the Levrikon with the Grandhorn to make the center right space worth 2 tokens and buff the Midgardsormr. Then, place the Quetzalcoatl card in the center right space. Finally, replace the Sandhog Pie with the Gigantoad to buff the Midgardsormr, Quetzalcoatl, and Security Officer, winning the game 21-10. | N/A |
| Replacement Test | First, place the Cactuar in the upper left corner. Then, Replace the Bloatfloat with the Griffin to buff the Griffen and the Mandragora. Finally, set the Spearhawk in the center right space to buff the Griffen further and win 12-6. | N/A |
| One Shot, One Kill | To start, set the Bombs in the upper middle three token space and the center right three token space. Then, place the Bloatfloat on the bottom left 1 token space and the Scrutineye on the bottom center 3 token space. Finally, set Dyne on the far left center 3 token space to clear the field with his ability and win 4-0. | Card 119: Dyne |
| Curse of the Gi | Start by placing the Desert Sahagin in the upper right corner and the Sandhog Pie in the lower right corner. Then, put the Jabberwock in the center right slot to debuff and destroy the Sahagin and Sandhog Pie respectively, buffing the Jabberwock. Next, place the Crystaline Crab in the bottom right slot to further buff the Jabberwock and set the Riot Trooper in the bottom left corner. Replace the Riot Trooper with the Griffin to buff the Jabberwock even more, and then replace the Jabberwock with Gi Natak to buff the Crystaline Crab and the Sahagin to win 40-19. | Card 123: Gi Nattak |
| Collector’s Card: Cloud | Place the Security Officer in the bottom center slot to make the central slot worth 2 tokens. Then, place Cloud in the central slot. Finally, place Sephiroth in the middle of the enemy’s side of the board to destroy two enemies along with your Sahagin, buffing Cloud so that his power reaches 7 and he buffs all the cards around him. With this, you win 13-12. | Card 086: Cloud |
| Collector’s Card: Barret | Set the Toxirat in the upper right space worth 2 Tokens to destroy the Flame Trooper along with several other enemy cards per the Flame Trooper’s skill. Then, set the Sandhog Pie in the bottom right 1 token slot and the Bomb in the central slot. Replace the Bomb with the Insectoid Chimera to make a far right center 3 token slot and buff the Chimera. Set Barret in the 3 token slot to win the game 9-6. | Card 087: Barret |
| Collector’s Card: Tifa | Put the Cactuar card in the upper left corner. Then, set the Spear Hawk in the central slot and the Deathwheel in the lower center slot with the +5 buff to weaken the top row of enemy cards down to 10. After that, set Tifa in the upper right slot and replace the Deathwheel with the Griffin to buff her, winning 19-10. | Card 088: Tifa |
| Collector’s Card: Aerith | Set Aerith in the upper left slot to make a 3 token slot to her right. Place the Leviathan in the 3 token slot to destroy two enemy cards, and then place the Mandragora in the bottom center slot and the Mandragora Minion in the upper left corner slot. Finally, place the Adjucator in the bottom right corner slot to win 21-20. | Card 089: Aerith |
| Collector’s Card: Red XIII | Set Red XIII in the bottom right corner slot. Then, set the Sandhog Pie in the center slot to create a new 1 token slot above it. Put the Stone Golems in the upper center slot and the center right slots, and then replace the Sandhog Pie with the Gi Spector. Doing so debuffs Red XIII and activates his ability, debuffing and destroying several enemy cards so that you can win 16-3. | Card 090: Red XIII |
| Collector’s Card: Yuffie | Set the Spearhawk in the upper right slot and the Crystaline Crab in the lower right corner to make a 2 token slot in the right center space. Set the Bomb on the right center space, and then put the Skeeskee cards in the upper left corner and lower left corner slots. Finally, replace the Bomb with Yuffie to destroy the surrounding enemy cards and buff both Skeeskees, winning 8-5. | Card 091: Yuffie |
| Collector’s Card: Cait Sith | Set the Space Ranger in the bottom left corner slot to create several 2 token slots. Then, put Cait Sith in the upper right corner slot to get the Moogle card and set the Moogle in the center left slot. Put Dio in the bottom right corner slot, and then set the Chocobo Jockey in the upper left corner slot. Finally, place the Loveless card in the center right slot to buff all your cards and win 40-31 thanks to the Jockey’s special ability. | Card 092: Cait Sith |
| Collector’s Card: Cid | Set Cid in the bottom left corner slot to get the Tiny Bronco card, and then put the Tiny Bronco in the upper left corner slot to make several 3 and 2 token slots. Next, set the Skywheel in the bottom right corner slot to make a two token slot between all the enemy cards. Then, place the Bomb in the slot between the enemies and replace it with the Insectoid Chimera to destroy said enemies, winning 6-4. | Card 093: Cid |
| Collector’s Card: Vincent | Set Vincent on the only available slot to create 1 token slots above and below him. Then, set the Black Bats in these slots to destroy Vincent and get the Galian Beast card. Place the Rictus in the upper left corner slot, and then set the Galian Beast where Vincent was to debuff several enemy cards and win 10-7. | Card 094: Vincent |
What Do You Get for Completing Every Card Carnival Puzzle in FF7 Rebirth?
In addition to the Queen’s Blood Cards listed above, there are some other rewards you get for completing every Card Carnival puzzle in Final Fantasy VII Rebirth.
Key among them are strategies that can help you beat the game’s tougher Queen’s Blood players. Almost all of the puzzles teach you not only how to use specific cards, but how to overcome specific scenarios and challenges presented by the Queen’s Blood mission line.
Once you overcome those, you’ll be privy to both fabulous prizes and some of the game’s rarer trophies, which takes you one step closer to earning the game’s coveted Platinum Trophy.
That’s everything we have on how to solve every Card Carnival Puzzle in Final Fantasy 7 Rebirth. For more on the game, check out our other guides on topics like the best Queen’s Blood cards, all the Queen’s Blood Ranks, and how to complete every side quest.


Updated: Feb 28, 2024 11:11 am