All 26 Dark Souls Bosses Ranked From Easiest to Most Difficult
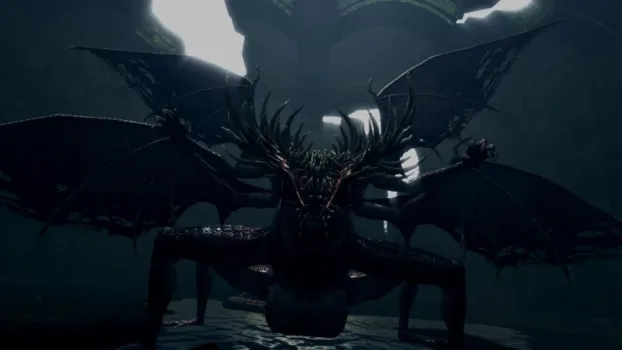
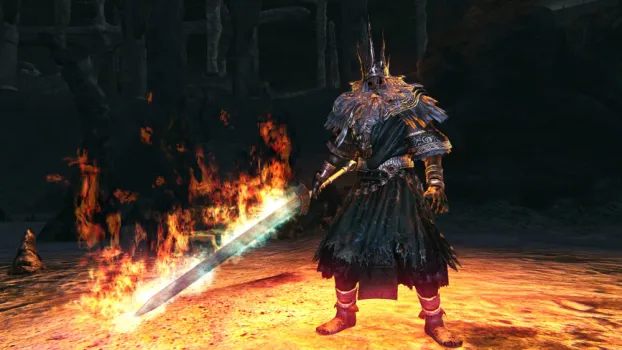
Manus, Father of the Abyss
And of course, we have Manus – the hardest boss in the game. He is fast and aggressive, not unlike Gwyn or Artorias, but since he’s massive, his blows are absolutely devastating. It’s tough to even find an opportunity to heal, which you’ll want to do often because of how hard he hits. Not to mention his powerful dark spells he casts when you get him to around half health. Manus also has a knack for almost teleporting to you across the arena, meaning you have to stay way far away from him to even recover. It’s recommended to use the Silver Pendant to block all of those spells so you at least stand a chance against this guy. I was unsure if I’d ever beat him, but thanks to ranged magic attacks and having a ton of health and stamina, I persevered.
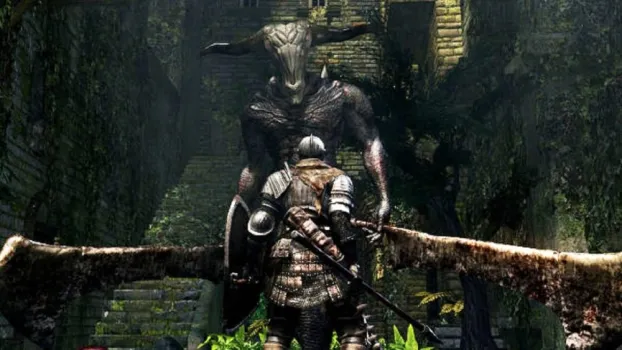
Knight Artorias
When fighting Artorias, I was questioning how the game could be any harder. If you want a fast, aggressive, unrelenting fight, this is the boss for you. It’s so tough to predict his moves because the animations are quick and don’t leave much time to react. Your best bet is to keep your distance and get in some attacks while he’s charging up, but even that can be tough. Artorias will drain your stamina and absolutely crush you if you aren’t prepared. As hard as he is, there is still one more boss to cover…
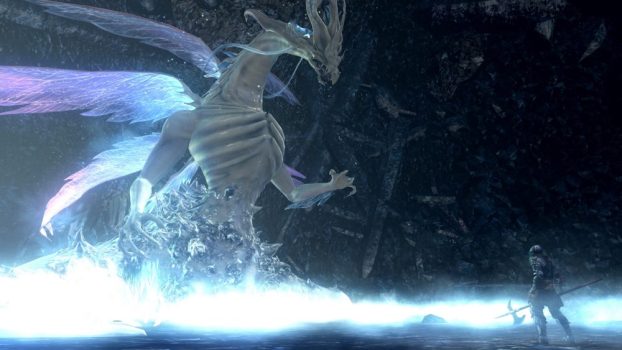
Black Dragon Kalameet
It’s always something with this boss – If the dragon isn’t hitting you with its weird headbutt attack, then he’s blasting his AOE flames, or swiping you with it’s tail. If it’s not firing on all cylinders with its ranged attacks then its grabbing you and dealing out a move that will cause you to take double damage. Like with many bosses, I recommend to use long ranged attacks, because getting close to the dragon can be difficult. Other than how aggressive Kalameet is, it’s a bit of a chore to get to him since the bonfire is far away. There is an interesting method of performing a plummet attack on it that will cause devastation damage, but many players don’t know about this trick.
Sanctuary Guardian
The wild thing about Sanctuary Guardian is that the DLC opens with this fight, almost immediately. So, it’s kind of jarring, but in hindsight, an expected move from the creators of Dark Souls. The fight itself is tough, though. The Guardian is fast and uses a deadly combination of lightning and poison attacks that will probably catch you off guard. He also likes to fly away and use ranged attacks, so I would often find myself running across the arena to get to him, which is a tad frustrating. If you’re someone who isn’t built for long ranged attacks, you’ll probably struggle with this one.
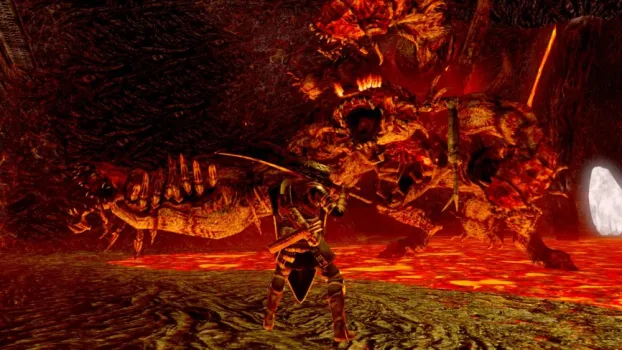
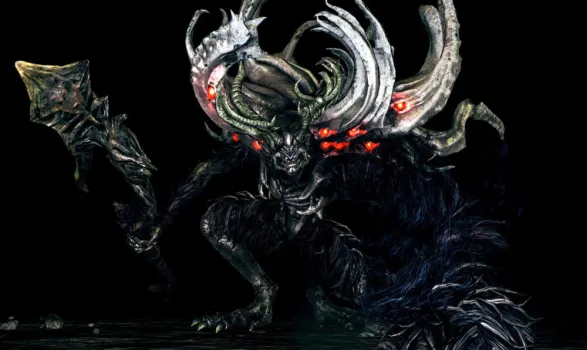
Four Kings
There is a lot that goes into why this boss is the hardest in the game. For one, the closest bonfire is forever away. And the journey to get to the boss from that bonfire is no joke. You must battle through ghosts that can only be damaged if you use a Transient Curse, or if you, yourself, are cursed (which I don’t recommend). Then you must battle some of the tougher enemies in the game, the Darkwraiths. When you finally get to the boss, you are required to wear a ring that allows you to traverse the Abyss, meaning you only have one ring slot available. As for the boss itself, it’s comprised of an enemy that’s keeps spawning until you deplete the total health bar. So, the name is kind of deceitful because you could encounter way more than four kings, since it’s based on timing and not just health. They take a ton of damage and if you’re slow at killing one, you can quickly get overrun by the Kings that keep spawning. This boss is not to be taken lightly.
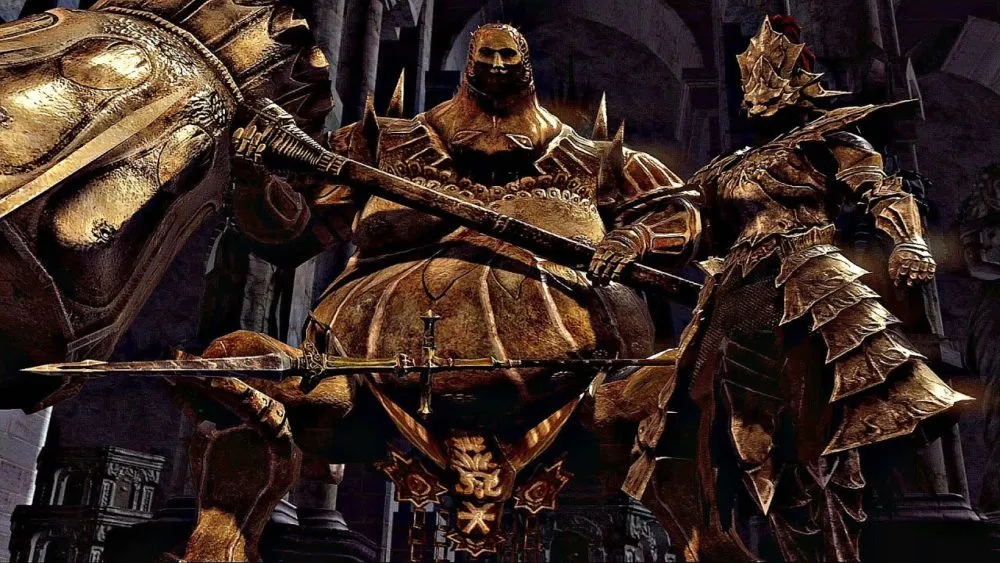
Ornstein and Smough
O&S is an interesting fight because it’s the only boss battle in the game that forces you to fight two bosses simultaneously right from the start. I know Bell Gargoyles and Four Kings involve multiple bosses, but you at least have a moment to prepare before the next boss comes in. With O&S, you’re thrown immediately into a fight where you’re outnumbered. Not only that, but they both compliment each other very well, making it hard to get in any attacks. Ornstein is fast and will be up in your face, while Smough is slow and deals heavy damage. There isn’t anything complicated or hard to understand with this fight – It just tests your multitasking and endurance skills because of the constant barrage of different attacks you’ll encounter. Oh and when you kill one, the other will absorb the dead one’s power and receive a buff and full health. Good luck.
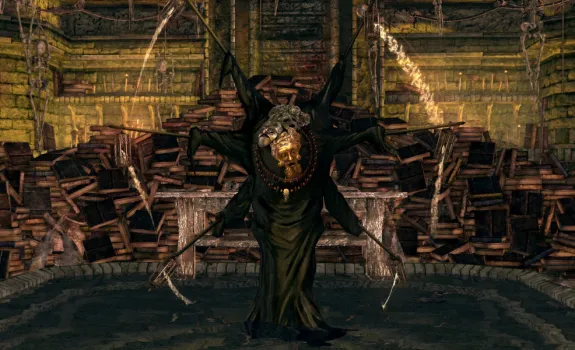
3. Gravelord Nito
This may come as a surprise, but Nito is a lot harder than people give him credit for. He has an attack that can seemingly hit you from anywhere, giving you toxic damage, and causing your health to constantly deplete. To make matters worse, the arena has a ton of skeletons, which can only truly be killed with a Divine weapon, rendering all of your other weapons to be practically useless against them. On top of that, the closest bonfire is a frustrating distance away, meaning you have to traverse the lovely Tomb of the Giants to get there. Nito himself is no pushover – he can grab you and throw you, dealing massive damage. Plus, he is terrifying to look at. I still cower in fear at the sight of Nito.
Gwyn, Lord of Cinder
Gwyn is interesting because while he is complex, he can be defeated fairly easily if you know what you’re doing. Still, most people get stuck on this fight because of how fast and aggressive he is, which is understandable. He deals a ton of damage and hardly gives you a chance to attack. If you aren’t careful, he can dash right towards you in a second. Plus, like many of the hard per bosses, the journey from the bonfire seems like it’s miles away. The only thing keeping Gwyn from being more difficult is the fact that you can parry his attacks, making him a lot easier to defeat. However, many newer players don’t use the parry system because of its high risk/high reward nature. Gwyn packs a punch and is one of the most aggressive fights in the game.
Bed of Chaos
Alright, I know what you’re thinking: “You can kill Bed of Chaos in one hit! She’s not hard.” True, but my goodness is this boss a victim of bad design. Right off the bat, it’s worth mentioning that there is a platforming section during the fight, which might make you want to pull your hair out, because it’s easy to mess up. Then, you must navigate a giant room while avoiding falling through the floor. THEN, you have to dodge its attacks that deal devastating damage.
Oh and if you mess any of this up, you have to restart, which means going back to the bonfire, which is a frustratingly long distance away. Bed of Chaos is a dreadful boss, not because of its difficulty, but because of its abysmal design.
Great Grey Wolf Sif
If you set aside that you’re murdering a giant doggo, this fight is pretty fun and enjoyable, albeit a bit challenging. The hard part is that Sif is so fast and he depletes your stamina almost instantly. If you’re caught with no stamina and low health, you’re done for, meaning you have to be on your toes for this fight. Staying under him to attack is about the only thing you can do since facing him head on is a recipe for disaster. Sif is like a slightly easier version of Gwyn, which is is still not an easy task to overcome.
Seath the Scaleless
Seath is probably the easiest out of the four Lord bosses, but he’s still challenging. Part of the difficulty comes from his sheer size – it’s common for Seath to use his massive tail to swipe you from almost anywhere. He can also spawn crystals from the ground that cause curse, which will bring your total health to half of its normal value. Although he’s massive, he’s still fast and sometimes hard to hit. And again, the journey to him is way too far away from the bonfire, so dying is a bit more frustrating than it should be.
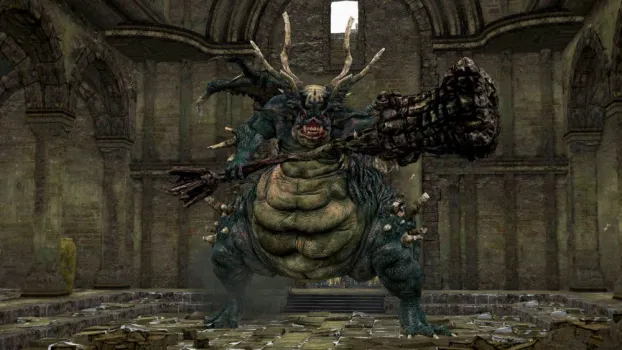
Centipede Demon
The Centipede Demon would rank higher on this list, but one feature makes this way harder than it seems: the floor is lava. So, you can’t just freely run around and attack as you please. You must stay on the designated platforms to deal any damage, which is tough because there isn’t much room to maneuver. You *can* get a ring that significantly reduces lava damage, but you must cut off the Centipede’s arm to acquire it. The Centipede is definitely beatable, but that lava makes this a challenge.
Firesage Demon
Ah, Firesage – One of the clones of the Asylum Demon from the beginning of the game. He is quite difficult, but if you stick behind him and know when to back away from his AOE attacks, he is quite manageable. The things that makes this boss tough are his attacks that can take you out in one hit if your health isn’t upgraded a ridiculous amount. The nice thing is that you have a wide open area to use to your advantage.
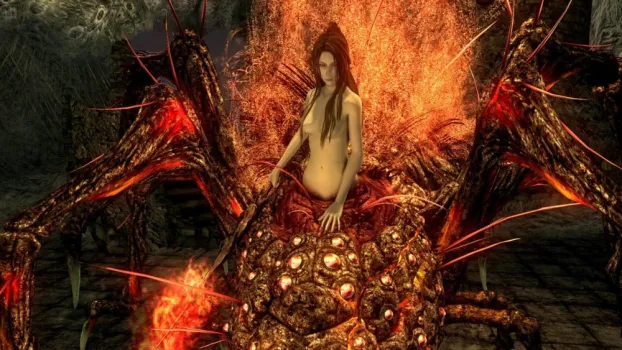
Chaos Witch Quelaag
Quelaag is interesting because she is made more difficult by how early she appears in the game. If you compare her against some of the other bosses in the game, she doesn’t quite stack up in terms of difficulty – But when you encounter her, your character will still probably be low-leveled, making this battle more difficult. You may notice that attacks don’t seem to do much damage and she has a couple moves that can take away almost all your health. Plus she can spray lava on the ground, just to add to the difficulty. Level up as much as you can before facing her because you might have trouble with her at an early level.
Stray Demon
Stray Demon is the other rip off of the Asylum Demon. The only issue is that you don’t have much room to move because of the tiny arena. Like the Firesage, the Stray Demon has some one hit kill moves that will be frustrating to be on the receiving end of. You also may accidentally initiate this fight if you go back to the Asylum and run into the boss room if you aren’t careful – the floor will break through and you’ll be trapped in the small room with him. Stay being him and fight him just like you fight the Firesage.
Capra Demon
This boss has no business being in such an early level area. The room you have to fight him in is way too small, and you have to deal with two dogs, and the Capra Demon’s heavy hitting attacks. And of course, the closest bonfire is comically far away. The nice thing is that defeating this boss isn’t required to finish the game, but skipping this boss negates your entry to the Depths. If it weren’t for those dogs, this boss would be easier, but the Capra Demon is still no walk in the park. His moves hit hard, but if you use the steps to your advantage, you may emerge victorious.
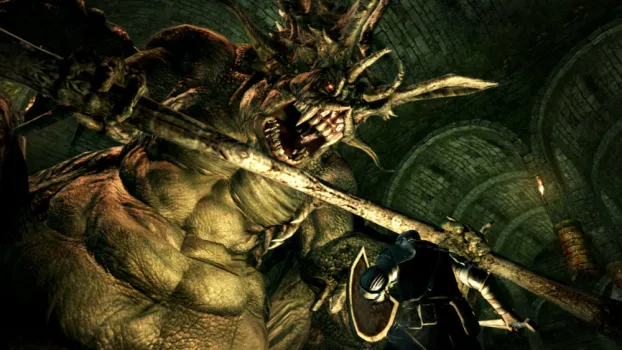
Bell Gargoyles
Like the Capra Demon, this boss is way to hard for how early it appears in the game. The bonfire is far away and once you get the first gargoyle to half health, another gargoyle appears, quickly outnumbering you. What’s worse is that the fight takes place on a roof, making it easy to fall to your death. If you’re overpowered, you can kill the first boss before the second one comes in, but most early level players won’t know to do this. Try to level up as much as you cons before facing these guys.
Dark Sun Gwyndolin
Yet another optional boss – Gwyndolin is one of the more unique fights in the game. You fight Gwyndolin in a long hall, where he will continuously back up once you get close. The idea is to get a few attacks in before he teleports. However, his attacks hit hard as you don’t have much room to dodge, especially if you get caught in the middle of the hall in between attacks. I recommend to equip high magic defense and shield to make your life easier.
Iron Golem
Some might think this boss is ranked too high, but Iron Golem never gave me much of a hassle. Sure, the bonfire isn’t close, but the boss itself can be defeated easily if you stay behind it’s legs. You can even knock it off the arena and cause it to die from fall damage. The only hard part is that he can stomp his feet and catch you if you’re too close. He can sometimes grab you and throw you, too, but after getting through Sen’s Fortress, Iron Golem shouldn’t be much of a challenge.
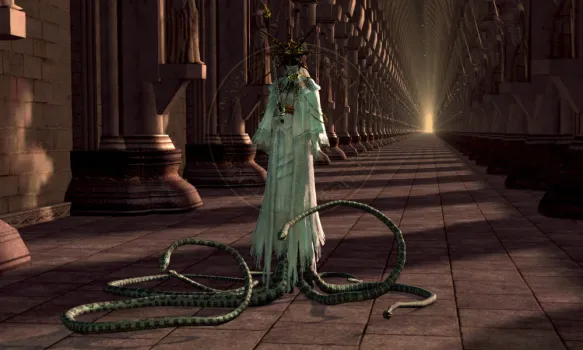
Crossbreed Priscilla
Priscilla is one of the most uniquely designed bosses in the game. Initially, you can actually attack her before she’s hostile. Meaning that you can start the fight, add as many buffs as you can and dish out a powerful attack right off the bat. Once the fight begins, she turns invisible and the only indication as to where she is is based off her footprints in the snow. It’s a beautiful fight, but her health is low and you shouldn’t have much trouble with this one. Just remember to get a massive blow at the beginning and you’ll be golden.
Taurus Demon
This boss is one that can be super difficult if you aren’t prepared. I even think it’s a tad to difficult for the area it’s in. The Taurus has heavy attacks that will knock off all your health quickly if you make a mistake, especially for new players. If you use the ladder to climb to the area above for a plummet attack and use Gold Pine Resin on your weapon, you’ll be well off, but watch your stamina and be cautious when battling him.
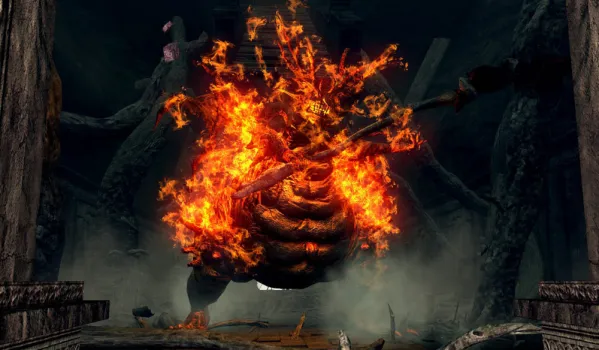
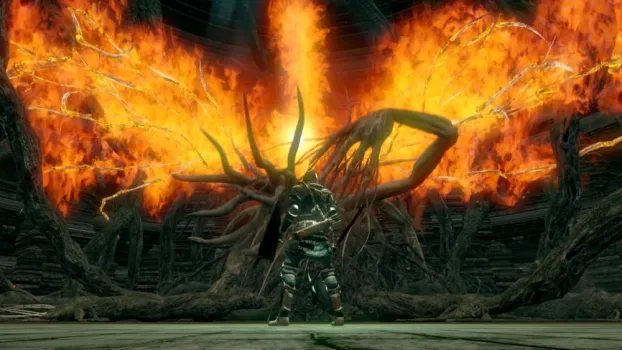
Ceaseless Discharge
One of the more controversial bosses – Ceaseless Discharge has an awful name and even more awful design. It would rank lower on the list, but you can cheese him and kill him in a couple hits, which is what most players do. You have to aggro him and run all the way back to the start, where the fog gate is. From here, he’ll slam his arm down and all you have to do is attack it a couple times and he’ll fall to his death. Ceaseless Discharge? More like Cheese-less Discharge.
Gaping Dragon
This boss is a lot easier than he looks. I know he’s a giant gross-looking dragon, but his health is low and it’s easy to dodge his attacks. The hardest part is getting to him from the bonfire, because in typical fashion, the bonfire is ages away. You shouldn’t have many complications with this boss – just stay at his side and whack him or use magic from afar. If you’ve made it this far, you’ll be golden for this fight. Make sure you take out the Channeler above to avoid having to dodge his attacks during the boss fight.
Asylum Demon
Depending on your starting class, the first boss of the game can go from easy to a cakewalk. If you start with Firebombs, chuck a couple at him and he’ll be done for. If not, you can still get through this fight with little trouble. Now, he *is* the first boss of the game and that in and of itself might be a challenge, but he’s quite simple to defeat. Stay behind him, back away when he starts to attack and use magic against him. Also, dot get used to how easy this boss is.
Moonlight Butterfly
I almost feel bad for killing this thing. The Moonlight Butterfly is so beautiful and graceful, but still must be defeated. If you use the Crest Shield, your life will be made easier. What’s so easy about this fight is that it’s simple. You can really only effectively attack at one time, so simply dodge or block the butterfly’s long ranged attacks and strike when it lands on the bridge. Since this is optional, you can come back to it at a later time when you’re over-leveled to make things super easy.
Pinwheel
And of course, who can forget Pinwheel? I know this boss is important from a lore standpoint, but my goodness is it a letdown, especially for the area in which it’s located. It’s like the opposite of the Bell Gargoyles. If you play your cards right, you can kill Pinwheel in around three hits – less if you’re prepared. The only difficult part is distinguishing which Pinwheel is the real one, but if you kill the initial one quickly enough, you won’t need to worry about that. Also, the Catacombs is an abomination and a terrible area, so be prepared to die a lot trying to get to Pinwheel.
26. Pinwheel
If you play your cards right, you can kill Pinwheel in around three hits - less if you're prepared. The only difficult part is distinguishing which Pinwheel is the real one, but if you kill the initial one quickly enough, you won't need to worry about that. Also, the Catacombs is an abomination and a terrible area, so be prepared to die a lot trying to get to Pinwheel.
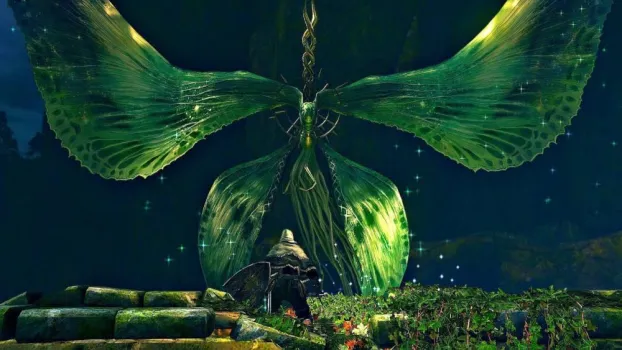
25. Moonlight Butterfly
You can really only effectively attack at one time, so simply dodge or block the butterfly's long ranged attacks and strike when it lands on the bridge. Since this is optional, you can come back to it at a later time when you're over-leveled to make things super easy.
24. Asylum Demon
If not, you can still get through this fight with little trouble. Now, he *is* the first boss of the game and that in and of itself might be a challenge, but he's quite simple to defeat. Stay behind him, back away when he starts to attack and use magic against him.
23. Gaping Dragon
You shouldn't have many complications with this boss - just stay at its side and whack it or use magic from afar. If you've made it this far, you'll be golden for this fight. Make sure you take out the Channeler above to avoid having to dodge his attacks during the boss fight.
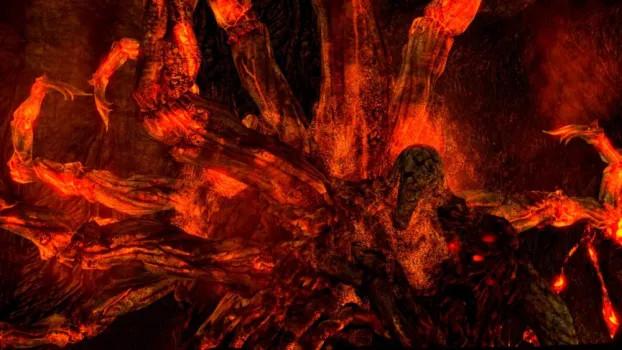
22. Ceaseless Discharge
You have to aggro him and run all the way back to the start, where the fog gate is. From here, he'll slam his arm down and all you have to do is attack it a couple times and he'll fall to his death. Ceaseless Discharge? More like Cheese-less Discharge.
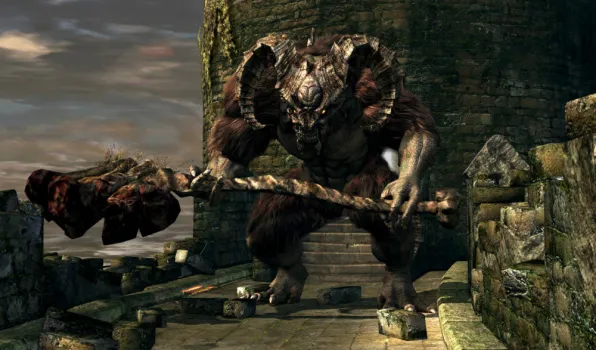
21. Taurus Demon
If you use the ladder to climb to the area above for a plunging attack and use Gold Pine Resin on your weapon, you'll be well off, but watch your stamina and be cautious when battling him.
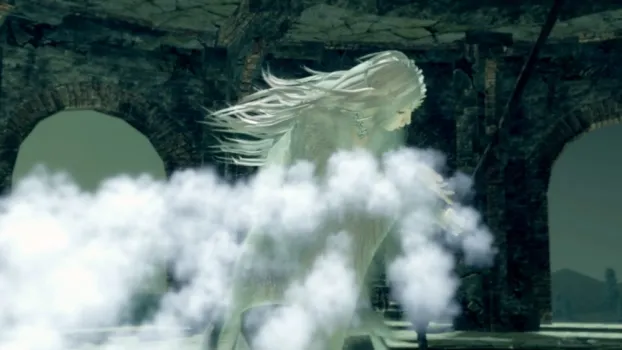
20. Crossbreed Priscilla
Once the fight begins, she turns invisible and the only indication as to where she is is based off her footprints in the snow. It's a beautiful fight, but her health is low and you shouldn't have much trouble with this one. Just remember to get a massive blow at the beginning and you'll be golden.
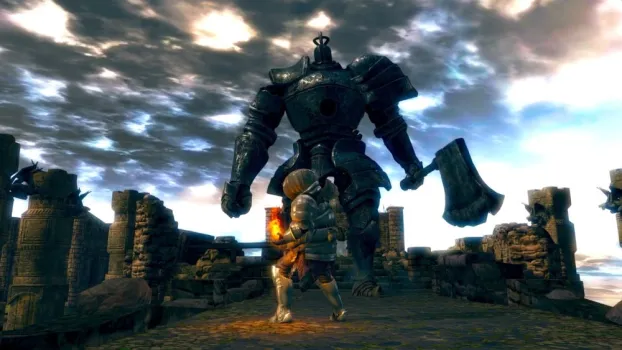
19. Iron Golem
The only hard part is that he can stomp his feet and catch you if you're too close. He can sometimes grab you and throw you, too, but after getting through Sen's Fortress, Iron Golem shouldn't be much of a challenge.
18. Dark Sun Gwyndolin
However, his attacks hit hard as you don't have much room to dodge, especially if you get caught in the middle of the hall in between attacks. I recommend equipping high magic defense and shield to make your life easier.
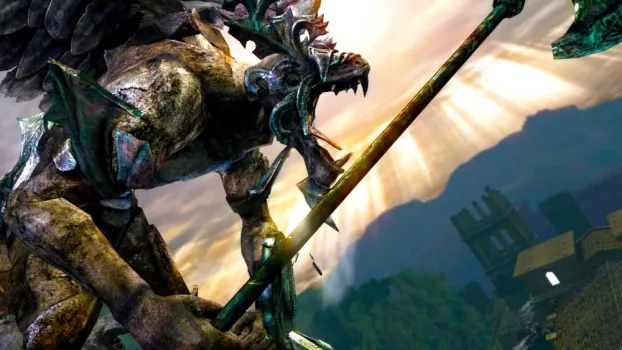
17. Bell Gargoyles
What's worse is that the fight takes place on a roof, making it easy to fall to your death. If you're overpowered, you can kill the first gargoyle before the second one comes in, but most early level players won't know to do this. Once the second one comes in, attack him while he's spraying his flames at you and you'll have him down in no time.
16. Stray Demon
You also may accidentally initiate this fight if you go back to the Asylum and run into the boss room if you aren't careful - the floor will break through and you'll be trapped in the small room with him. Stay behind him and fight him just like you fight the Firesage.
15. Capra Demon
If it weren't for those dogs, this boss would be easier, but the Capra Demon is still no walk in the park. His moves hit hard, but if you use the steps to your advantage, you may emerge victorious. Oh and take care of those pesky dogs as soon as you can so you can focus on the Capra Demon.
14. Chaos Witch Quelaag
You may notice that attacks don't seem to do much damage and she has a couple moves that can take away almost all your health in a matter of seconds. Plus she can spray lava on the ground, just to add to the difficulty. Level up as much as you can before facing her because you might have trouble with her at an early level. If you stay at her side and watch her animations, you should be able to defeat her.
13. Firesage Demon
The things that makes this boss tough are his attacks that can take away most of your health if it isn't upgraded a decent amount. Beware of his AOE blast - that thing is deadly. The nice thing is that you have a wide open area to use to your advantage.
12. Centipede Demon
You *can* get a ring that significantly reduces lava damage, but you must cut off the Centipede's arm to acquire it. The Centipede is definitely beatable, but that lava makes this a challenge.
11. Seath the Scaleless
Make sure you destroy the crystal at the far back of the room - otherwise, he'll be immortal. Once you do so, whack at one of his tails and circle around to the his back to stay clear of the crystals.
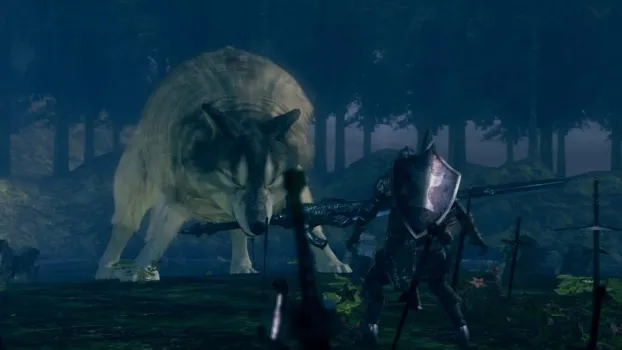
10. Great Grey Wolf Sif
Staying under him to attack is about the only thing you can do since facing him head on is a recipe for disaster.
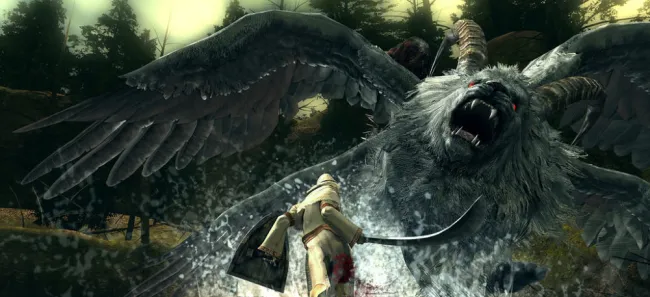
9. Sanctuary Guardian
The Guardian is fast and uses a deadly combination of lightning and poison attacks that will probably catch you off-guard. He also likes to fly away and use ranged attacks, so I would often find myself running across the arena to get to him, which is a tad frustrating. I found success attacking the Guardian from long range, but if you wait for him to finish his melee attacks, you can get a few quick shots in.
8. Bed of Chaos
Oh and if you mess any of this up, you have to restart, which means going back to the bonfire, which is a frustratingly long distance away. Bed of Chaos is a dreadful boss, not because of its difficulty, but because of its abysmal design.
7. Gwyn, Lord of Cinder
Plus, like many of the hard bosses, the journey from the bonfire seems like it's miles away. The only thing keeping Gwyn from being more difficult is the fact that you can parry his attacks, making him a lot easier to defeat. However, many newer players don't use the parry system because of its high risk/high reward nature. Gwyn packs a punch and is one of the most aggressive fights in the game.
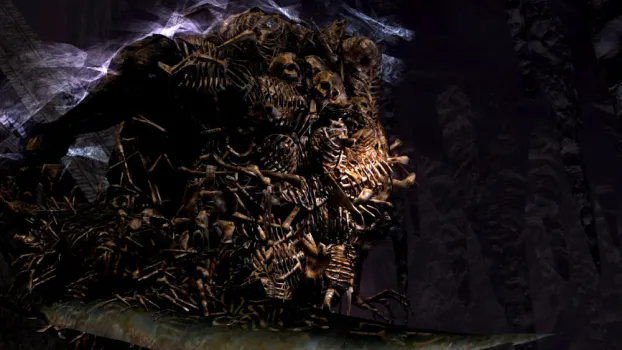
6. Gravelord Nito
On top of that, the closest bonfire is a frustrating distance away, meaning you have to traverse the lovely Tomb of the Giants to get there. Nito himself is no pushover - he can grab you and throw you, dealing massive damage. Plus, he is terrifying to look at.
5. The Four Kings
When you finally get to the boss, you are required to wear a ring that allows you to traverse the Abyss, meaning you only have one ring slot available. As for the boss itself, it's comprised of an enemy that's keeps spawning until you deplete the total health bar. So, the name is kind of deceitful because you could encounter way more than four kings, since it's based on timing and not just health. They take a ton of damage and if you're slow at killing one, you can quickly get overrun by the Kings that keep spawning. This boss is not to be taken lightly.
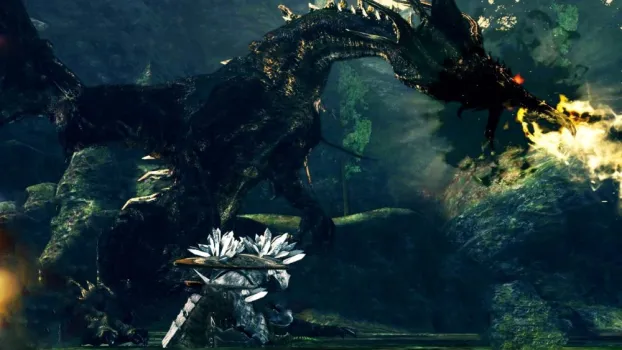
4. Black Dragon Kalameet
Like with many bosses, I recommend using long ranged attacks, because getting close to the dragon can be difficult. Other than how aggressive Kalameet is, it's a bit of a chore to get to it since the bonfire is far away. There is an interesting method of performing a plunging attack on it that will cause devastation damage, but many players don't know about this trick.
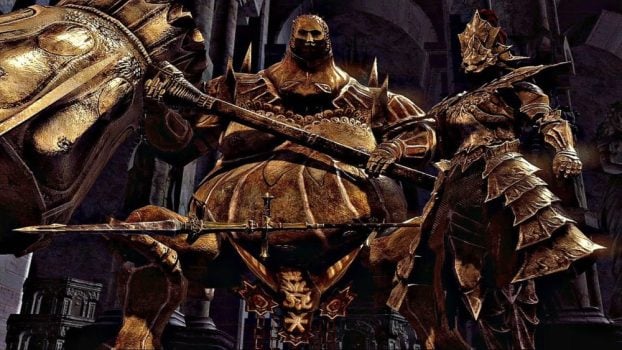
3. Ornstein and Smough
Ornstein is fast and will be up in your face, while Smough is slow and deals heavy damage. There isn't anything complicated or hard to understand with this fight; it just tests your multitasking and endurance skills because of the constant barrage of different attacks you'll encounter. Oh and when you kill one, the other will absorb the dead one's power and receive a buff and full health. Good luck.
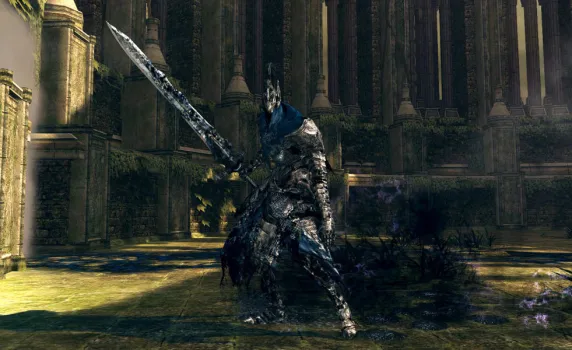
2. Knight Artorias
Your best bet is to keep your distance and get in some attacks while he's charging up, but even that can be tough. Artorias will drain your stamina and absolutely crush you if you aren't prepared. As hard as he is, there is still one more boss to cover...
1. Manus, Father of the Abyss
Not to mention his powerful dark spells he casts when you get him to around half health. Manus also has a knack for almost teleporting to you across the arena, meaning you have to stay way far away from him to even recover. It's recommended to use the Silver Pendant to block all of those spells so you at least stand a chance against this guy.


Published: Sep 21, 2018 07:07 am